Installing the BlackBox
This section will show you how to:
- Prepare your BlackBox and suggestions for sound treatment
- Miner pressure barrier
- Connecting power and Ethernet
Introduction
The intent of the BlackBox enclosure is to allow the user to run their mining ASIC hardware outdoors where the heat and noise can be more easily controlled or dissipated. Excessive heat and noise are common problems users experience when mining bitcoin in the home or working space. In this demonstration, the final BlackBox installation was outdoors. Give some forethought as to where you will be installing your BlackBox:
- How far is going to be from a suitable power source?
- How far is going to be from an Ethernet port?
- How will sun exposure be throughout the year?
- Is there adequate room for air flow?
- How close are any neighbors?
- Is it in a flood plane?
- Will it be secure?
- Is it out of plain view from the street?
Everyone will have a unique install situation. In this demonstration, the BlackBox was installed on the North side of a garage so that the majority of the year and for most hours of the day, the box will be in the shade to help reduce heat exposure. A dedicated 240v, 20 amp circuit was ran from a sub panel through the wall of the garage and tied into the BlackBox with water-tight conduit, consult a licensed electrician to help with your installation.
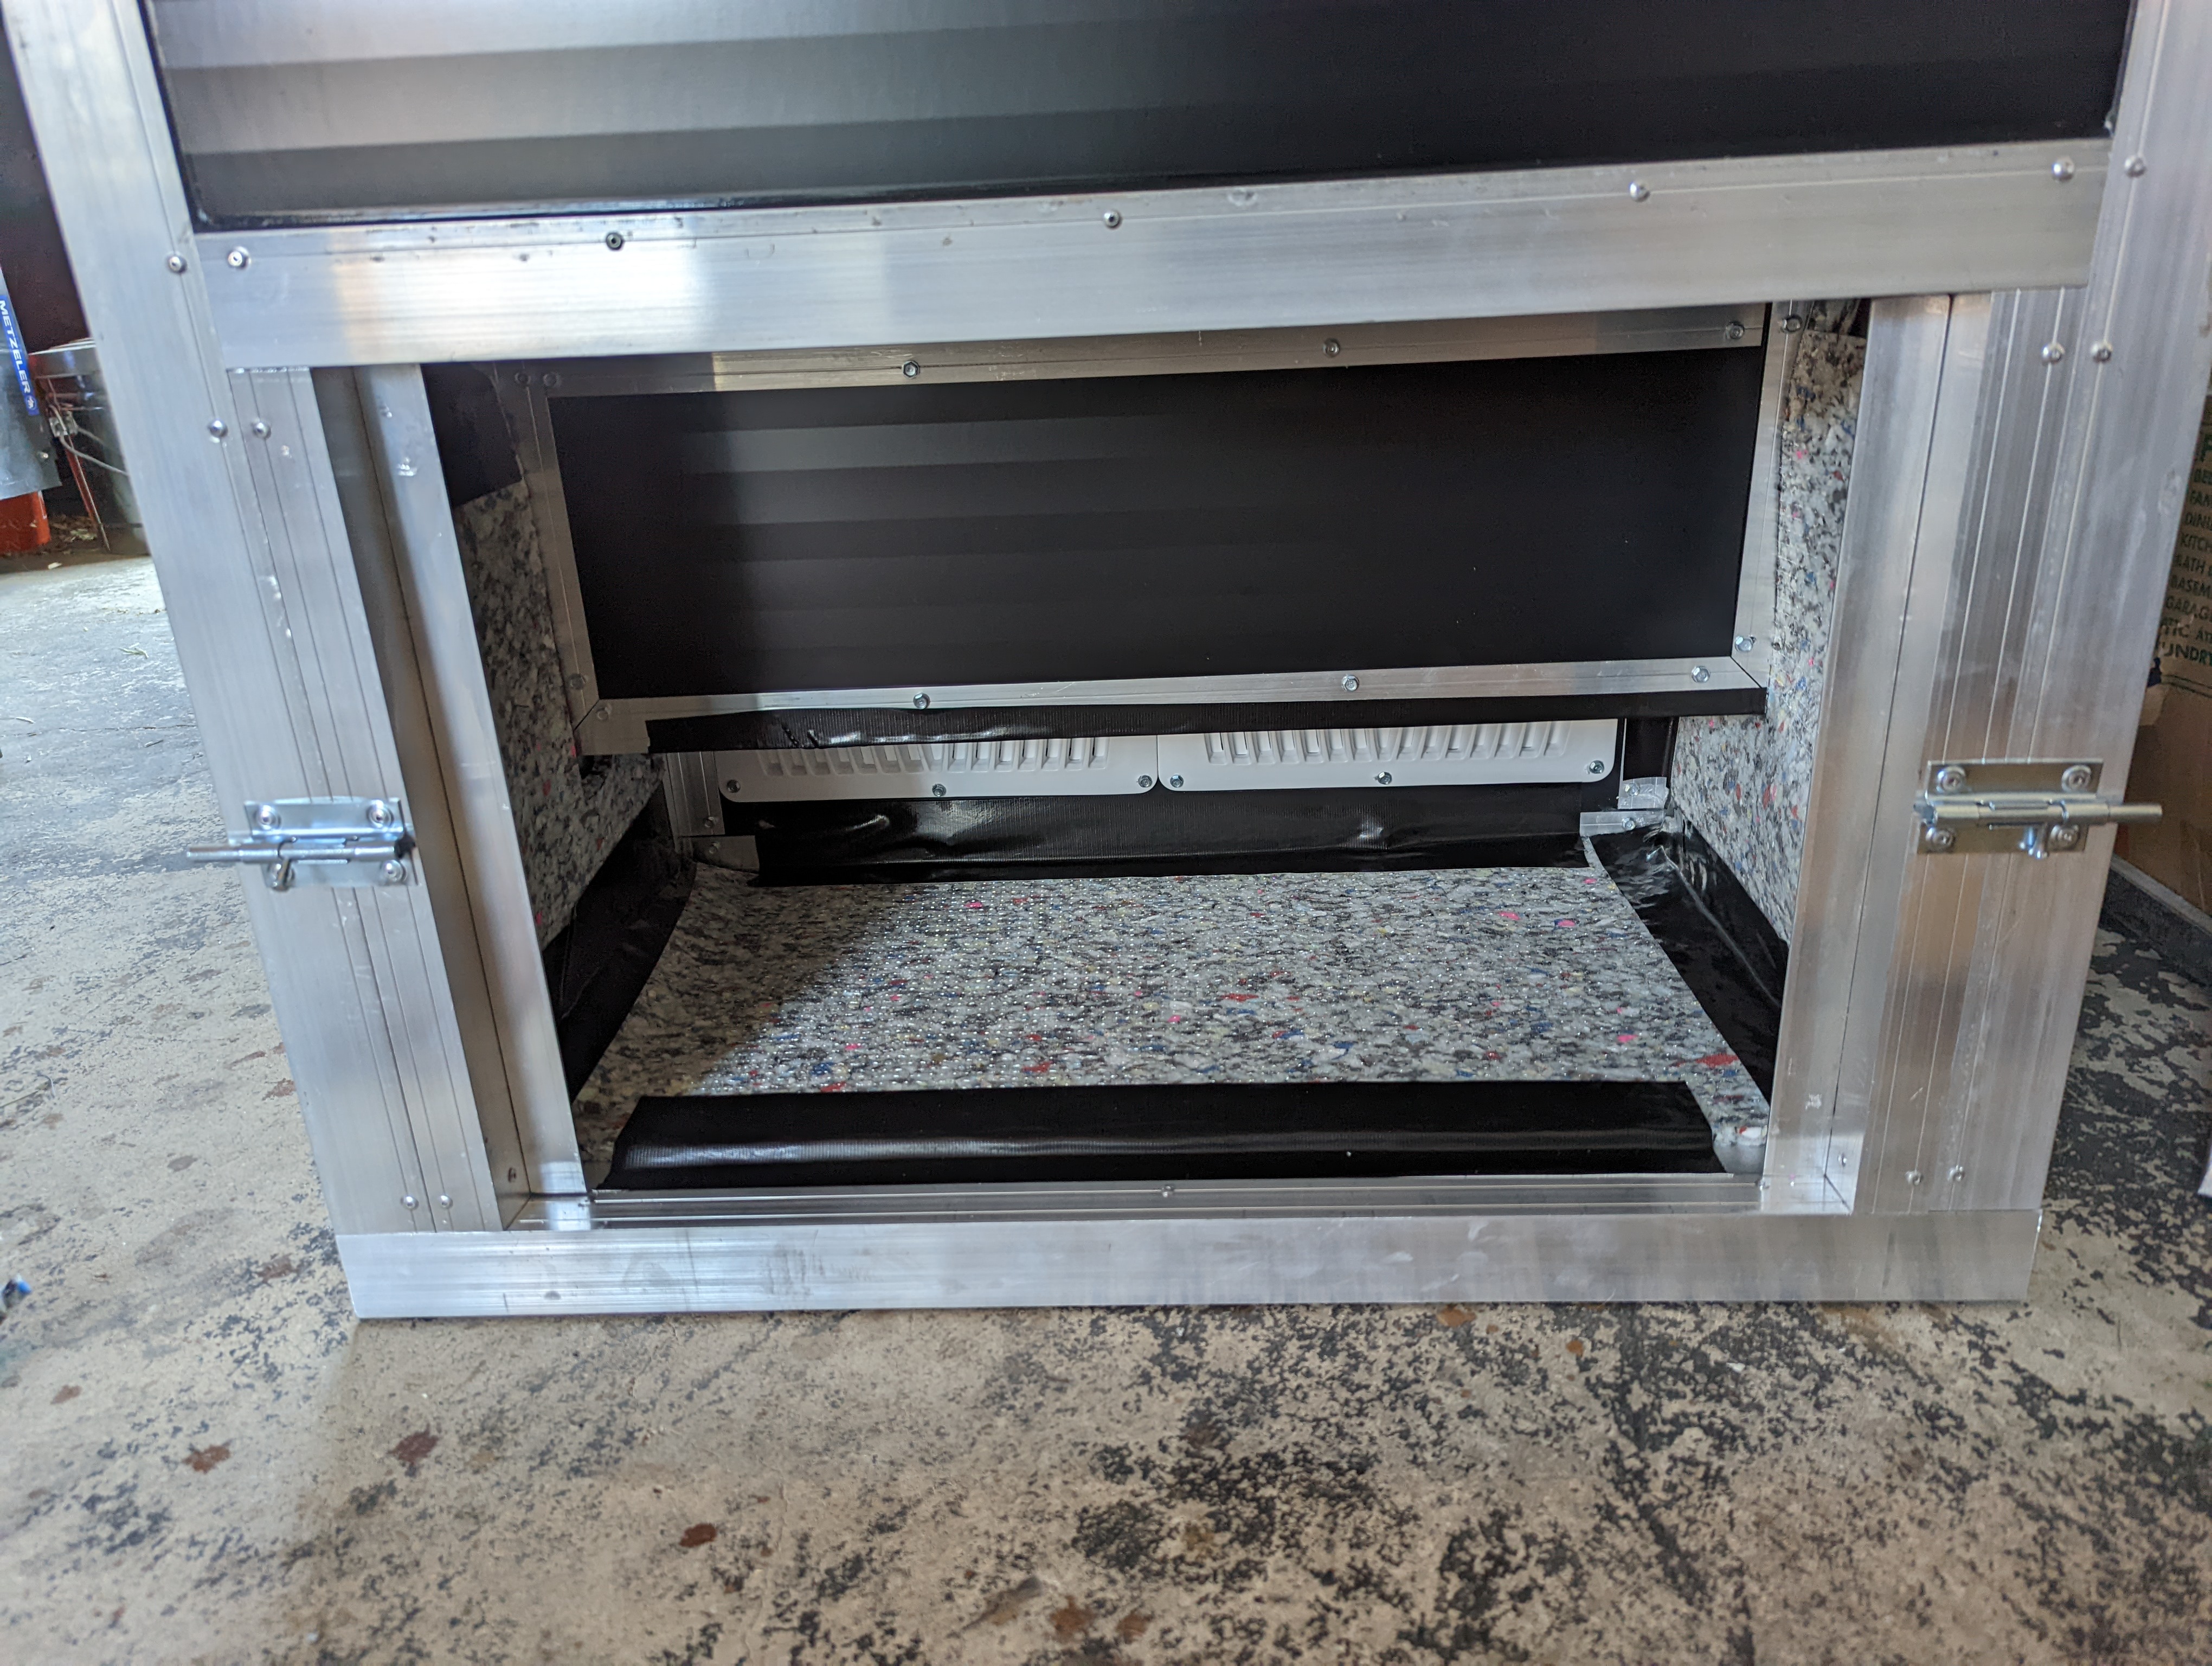
The enclosure is designed with the ASIC raised on a platform above the air intake/discharge with a symmetrical ‘S' shaped air flow path connecting each. This flow path allows snow, rain or dirt to fall out before it enters the ASIC, potentially causing damage. The ASIC itself is the prime mover of the heated air with an added barrier creating a pressure seal between the low pressure intake side and the high pressure discharge. The "tortuous" shape of the air flow path also helps deaden the sound waves as it reflects and is absorbed within the enclosure, reducing overall noise. The supporting column holding up the ASIC separates the ‘hot'/'cold' aisles and includes an air recirculating valve (air register) which gives the user the ability to recirculate heat when needed, for example in cold or humid climates. Finally, the design also allows for power scalability by elongating the dimension of the box perpendicular to the air flow path, enabling room for more mining ASICs up to 12 in a row in an 8' long enclosure.
The BlackBox weighs approximately 110 lbs, be sure to have another person help you move it. The exterior dimensions are 36"H x 32"W x 28"D.
Double check that everything looks good once you unpack your BlackBox, checking for dents or scratches, making sure the latches and hinges work, and the filters are in good shape and the bolt-action locks don't bind up.
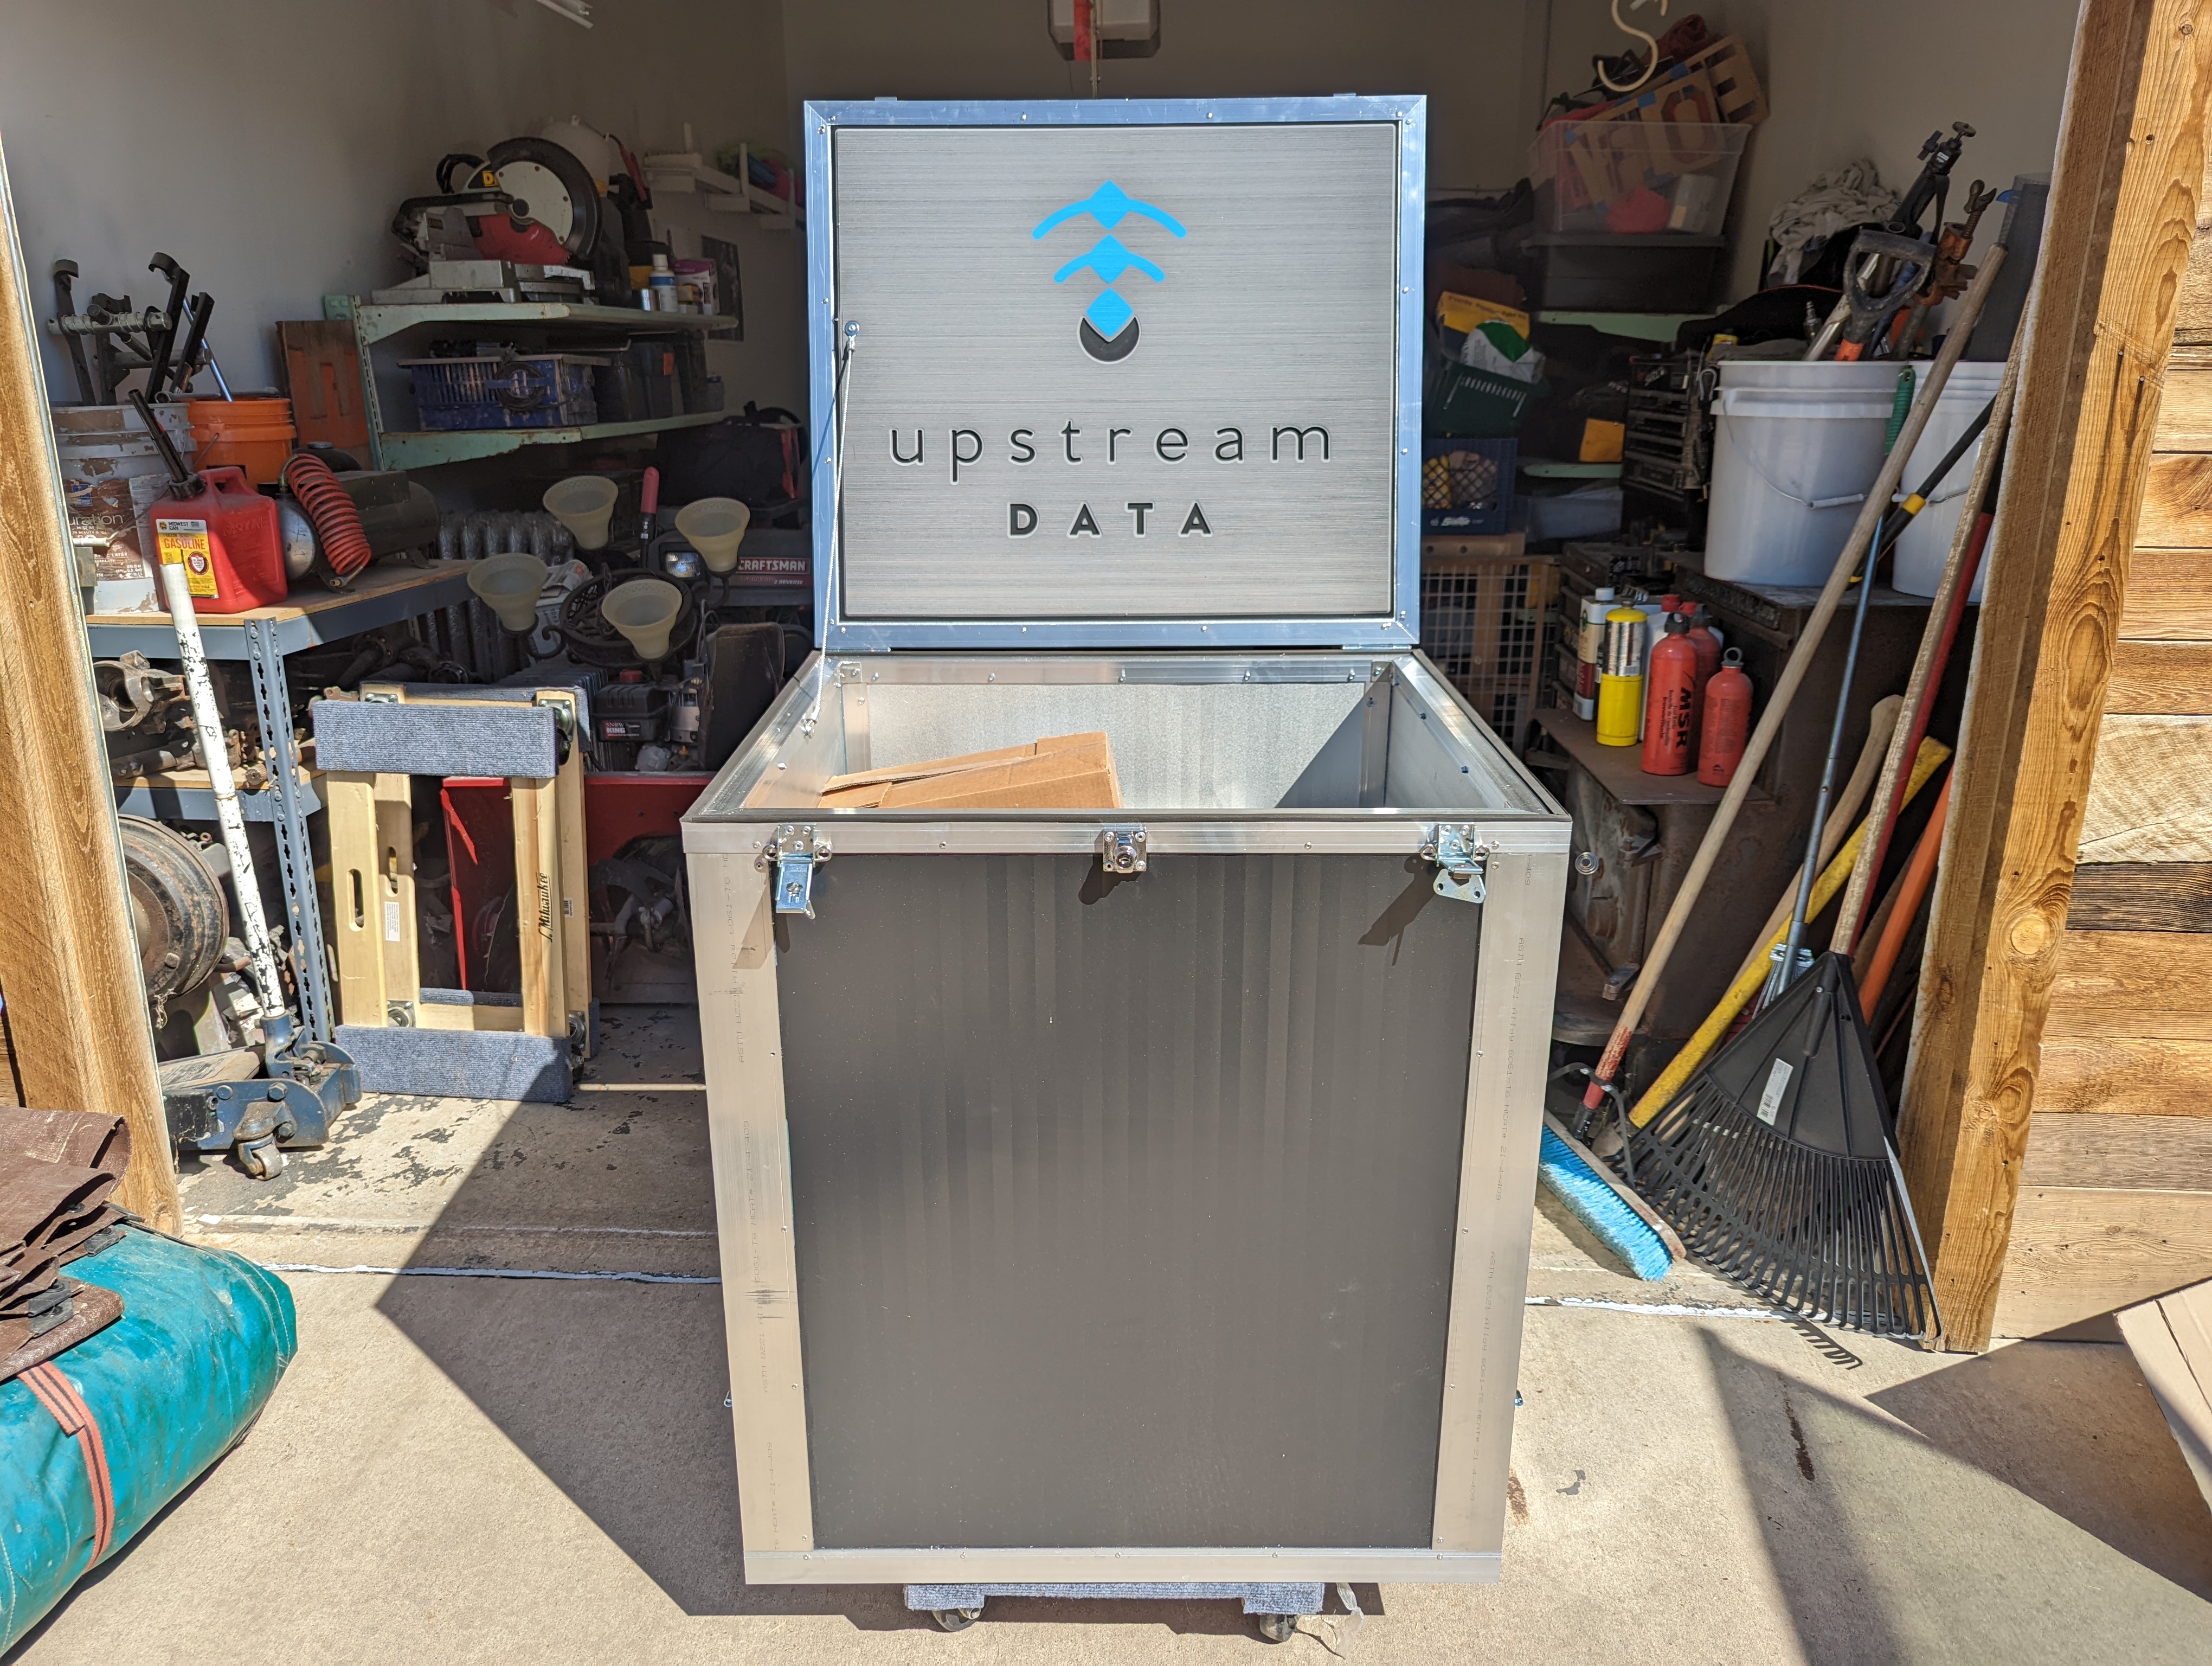
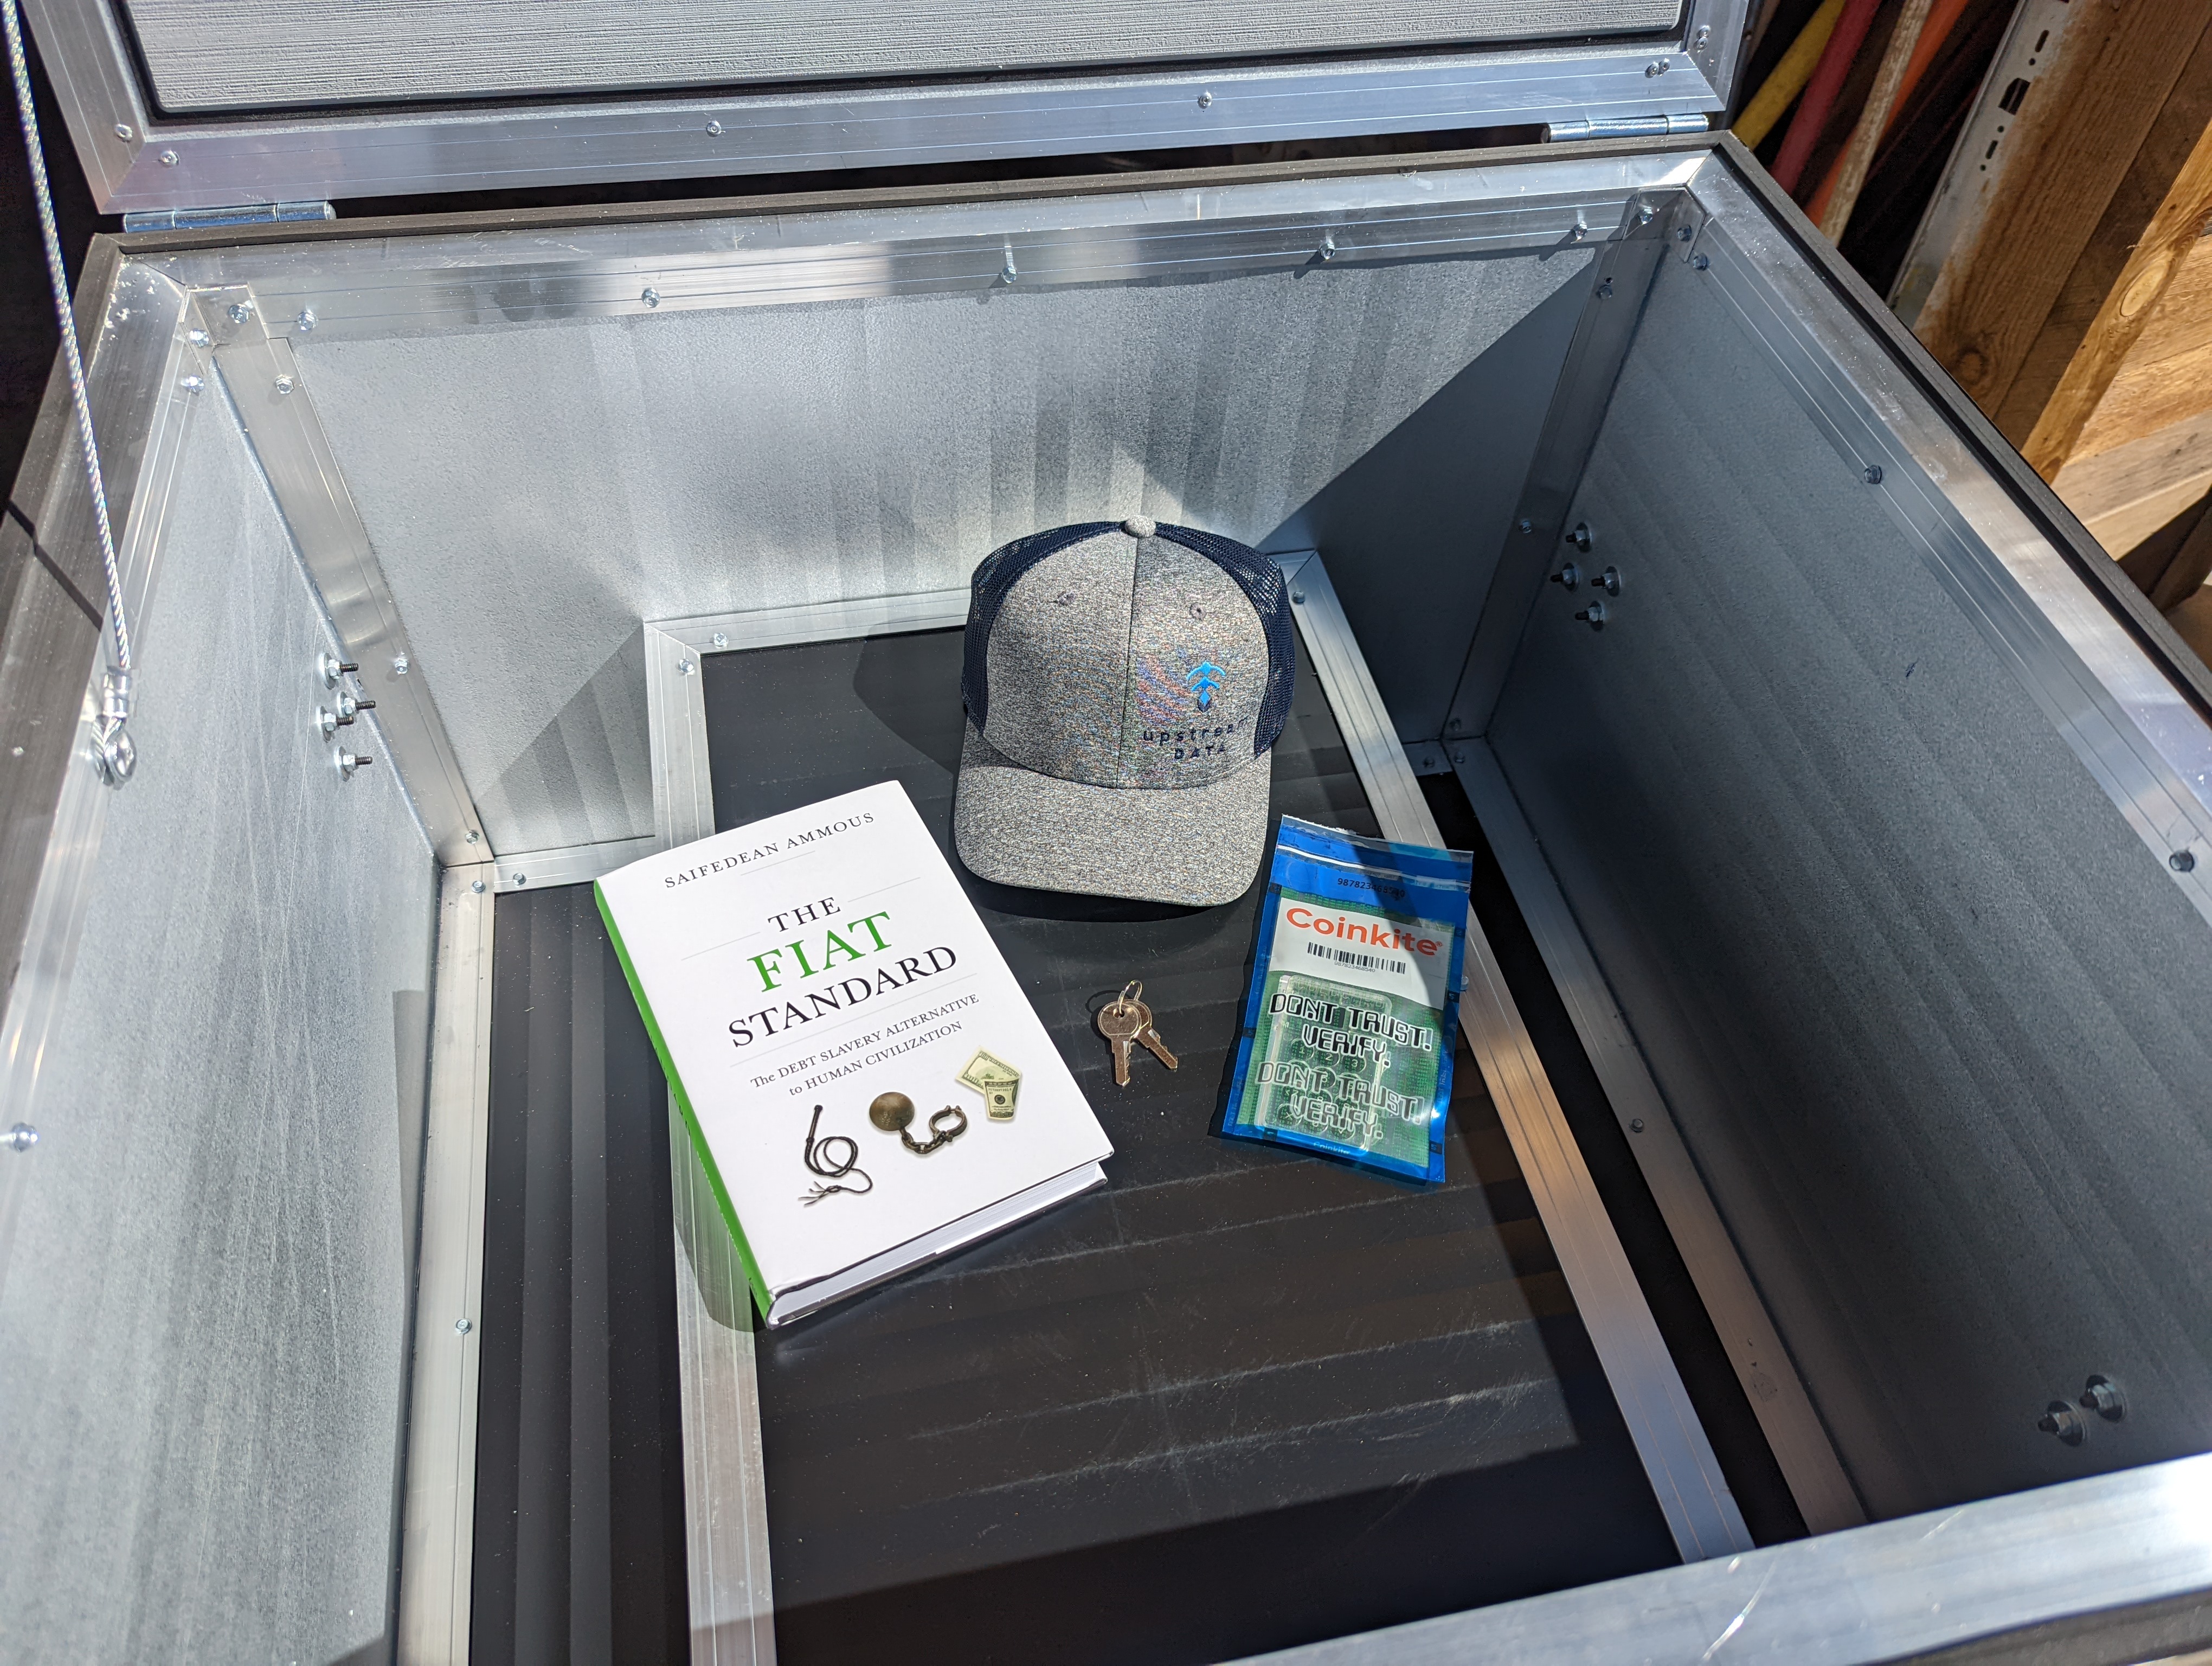
Inside the BlackBox, you'll find a few included "thank you" items from Upstream Data.
Sound Treatment
In this demonstration there was not any sound-treatment material included. The final production BlackBoxes will have a sound-treatment liner included. The process of adding sound-treatment material will be covered just in case you are interested in adding additional material above and beyond what is included from the manufacturer.
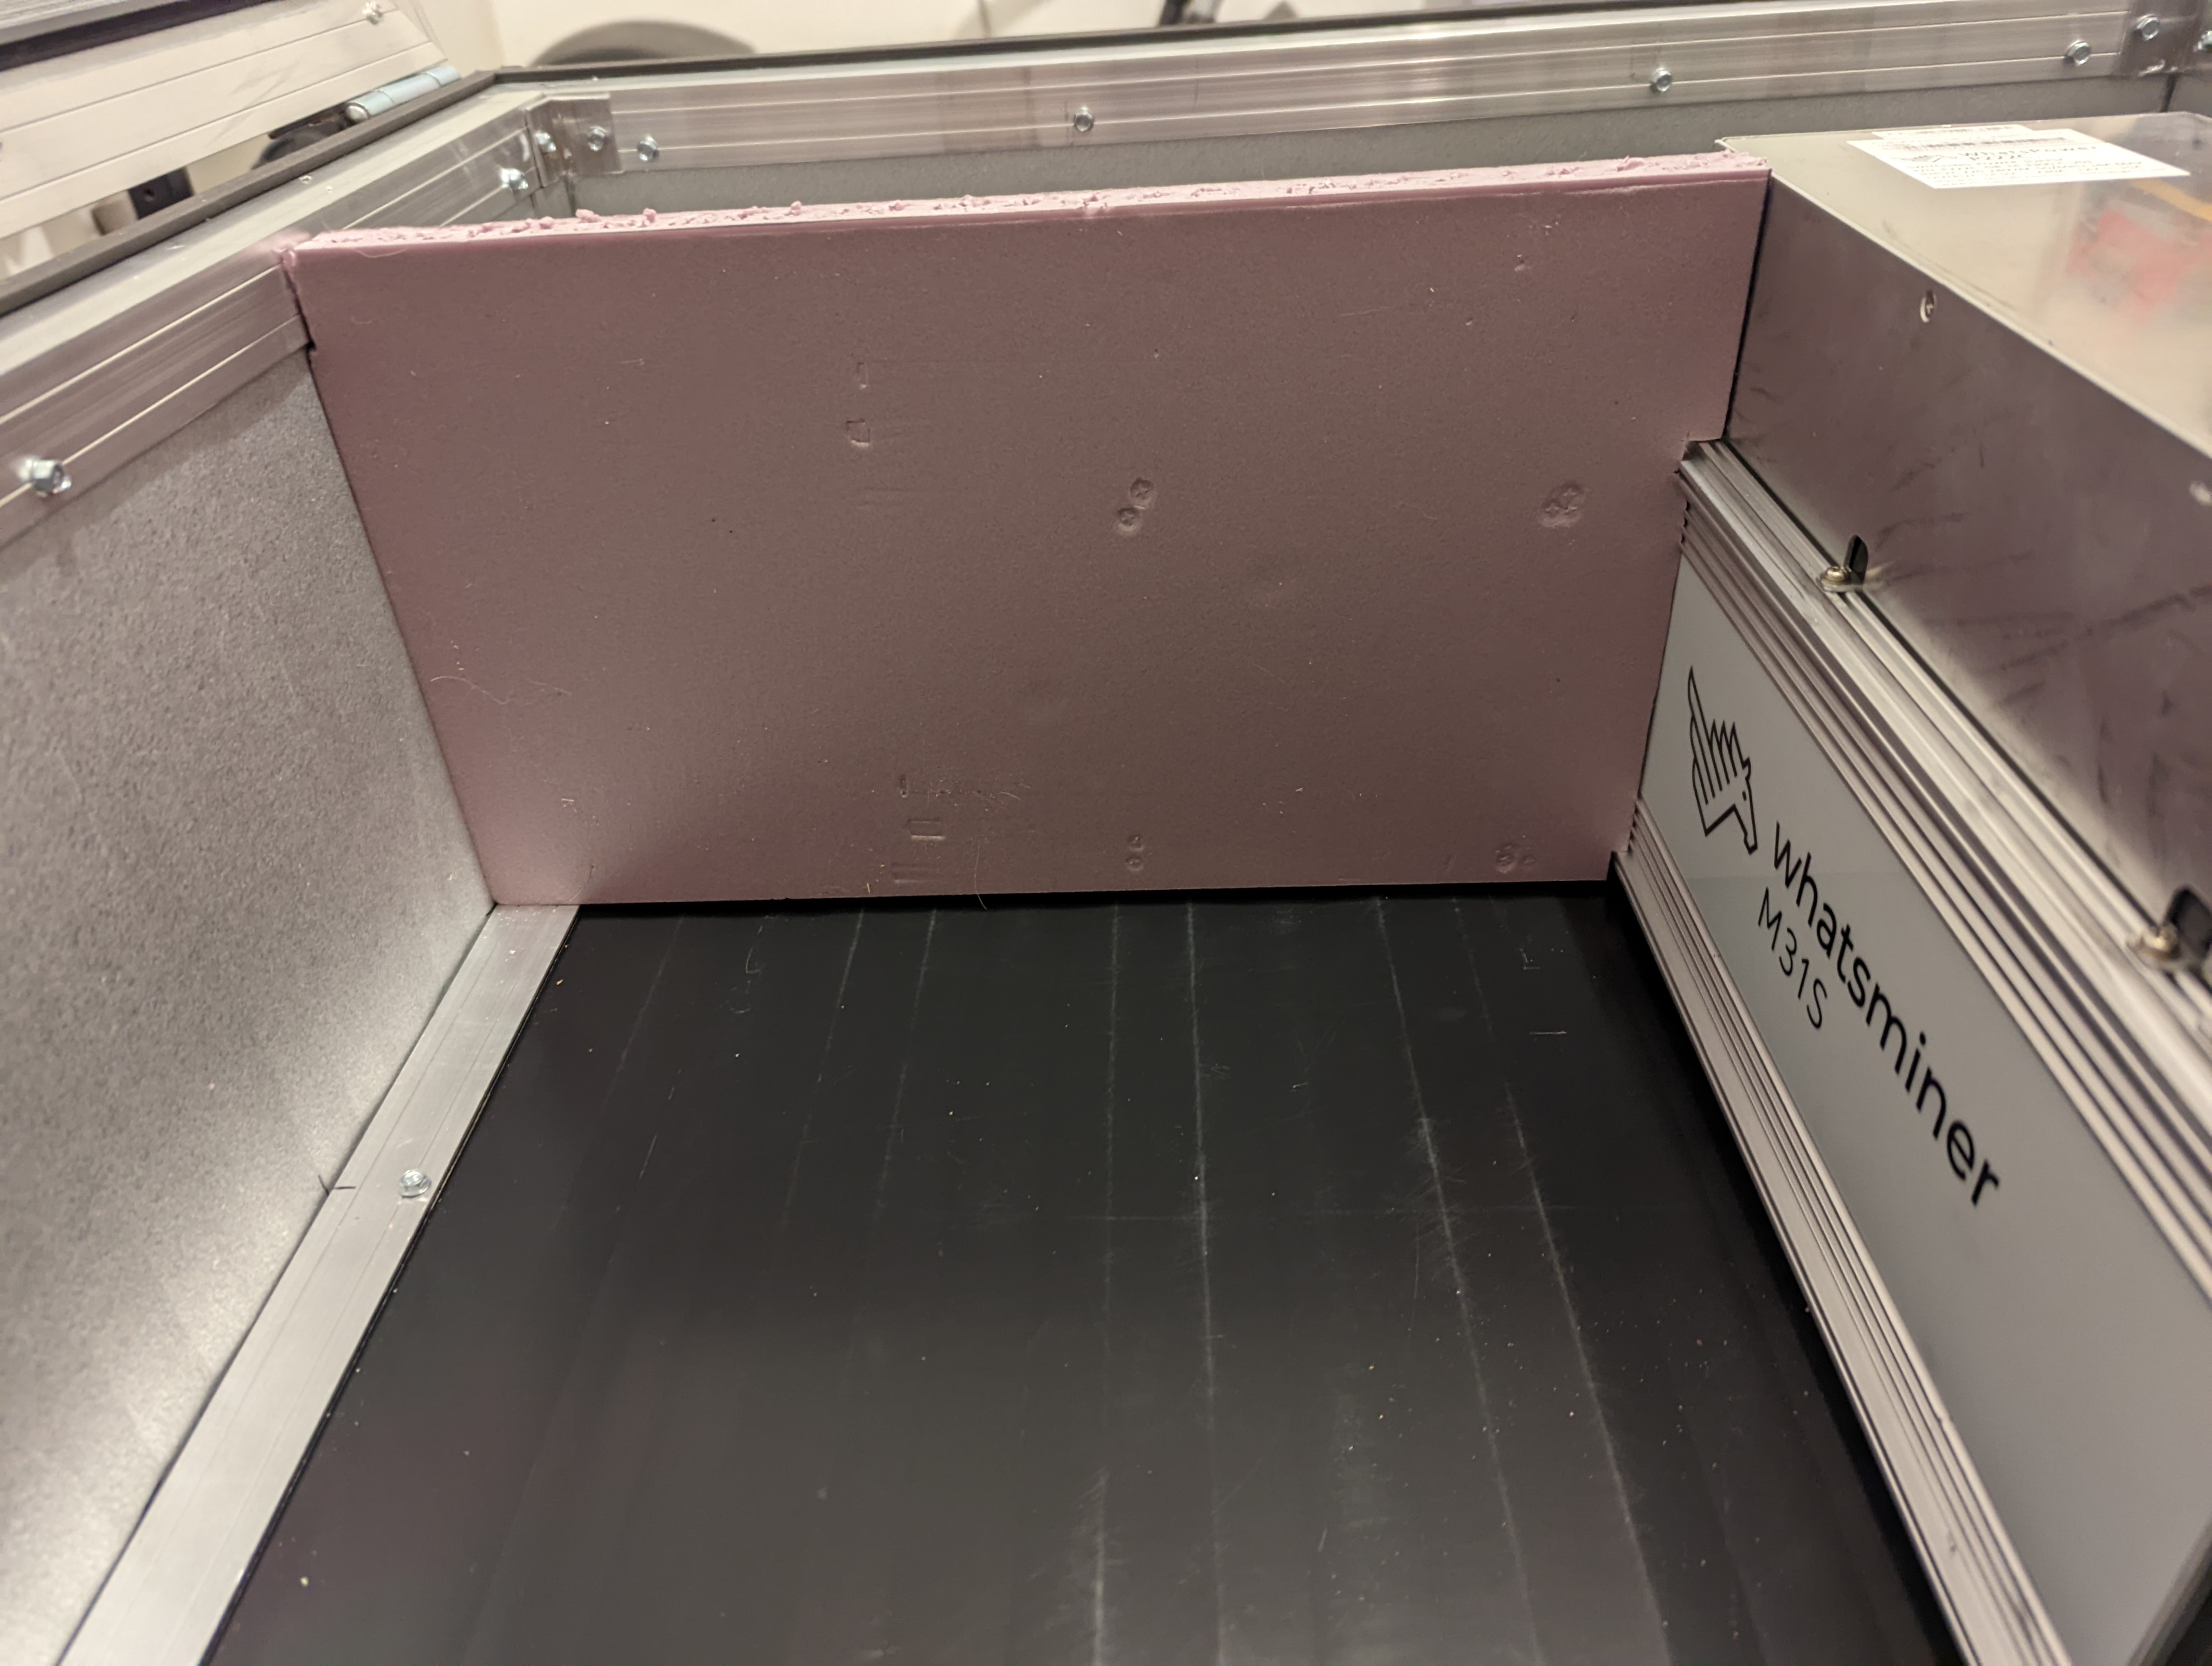
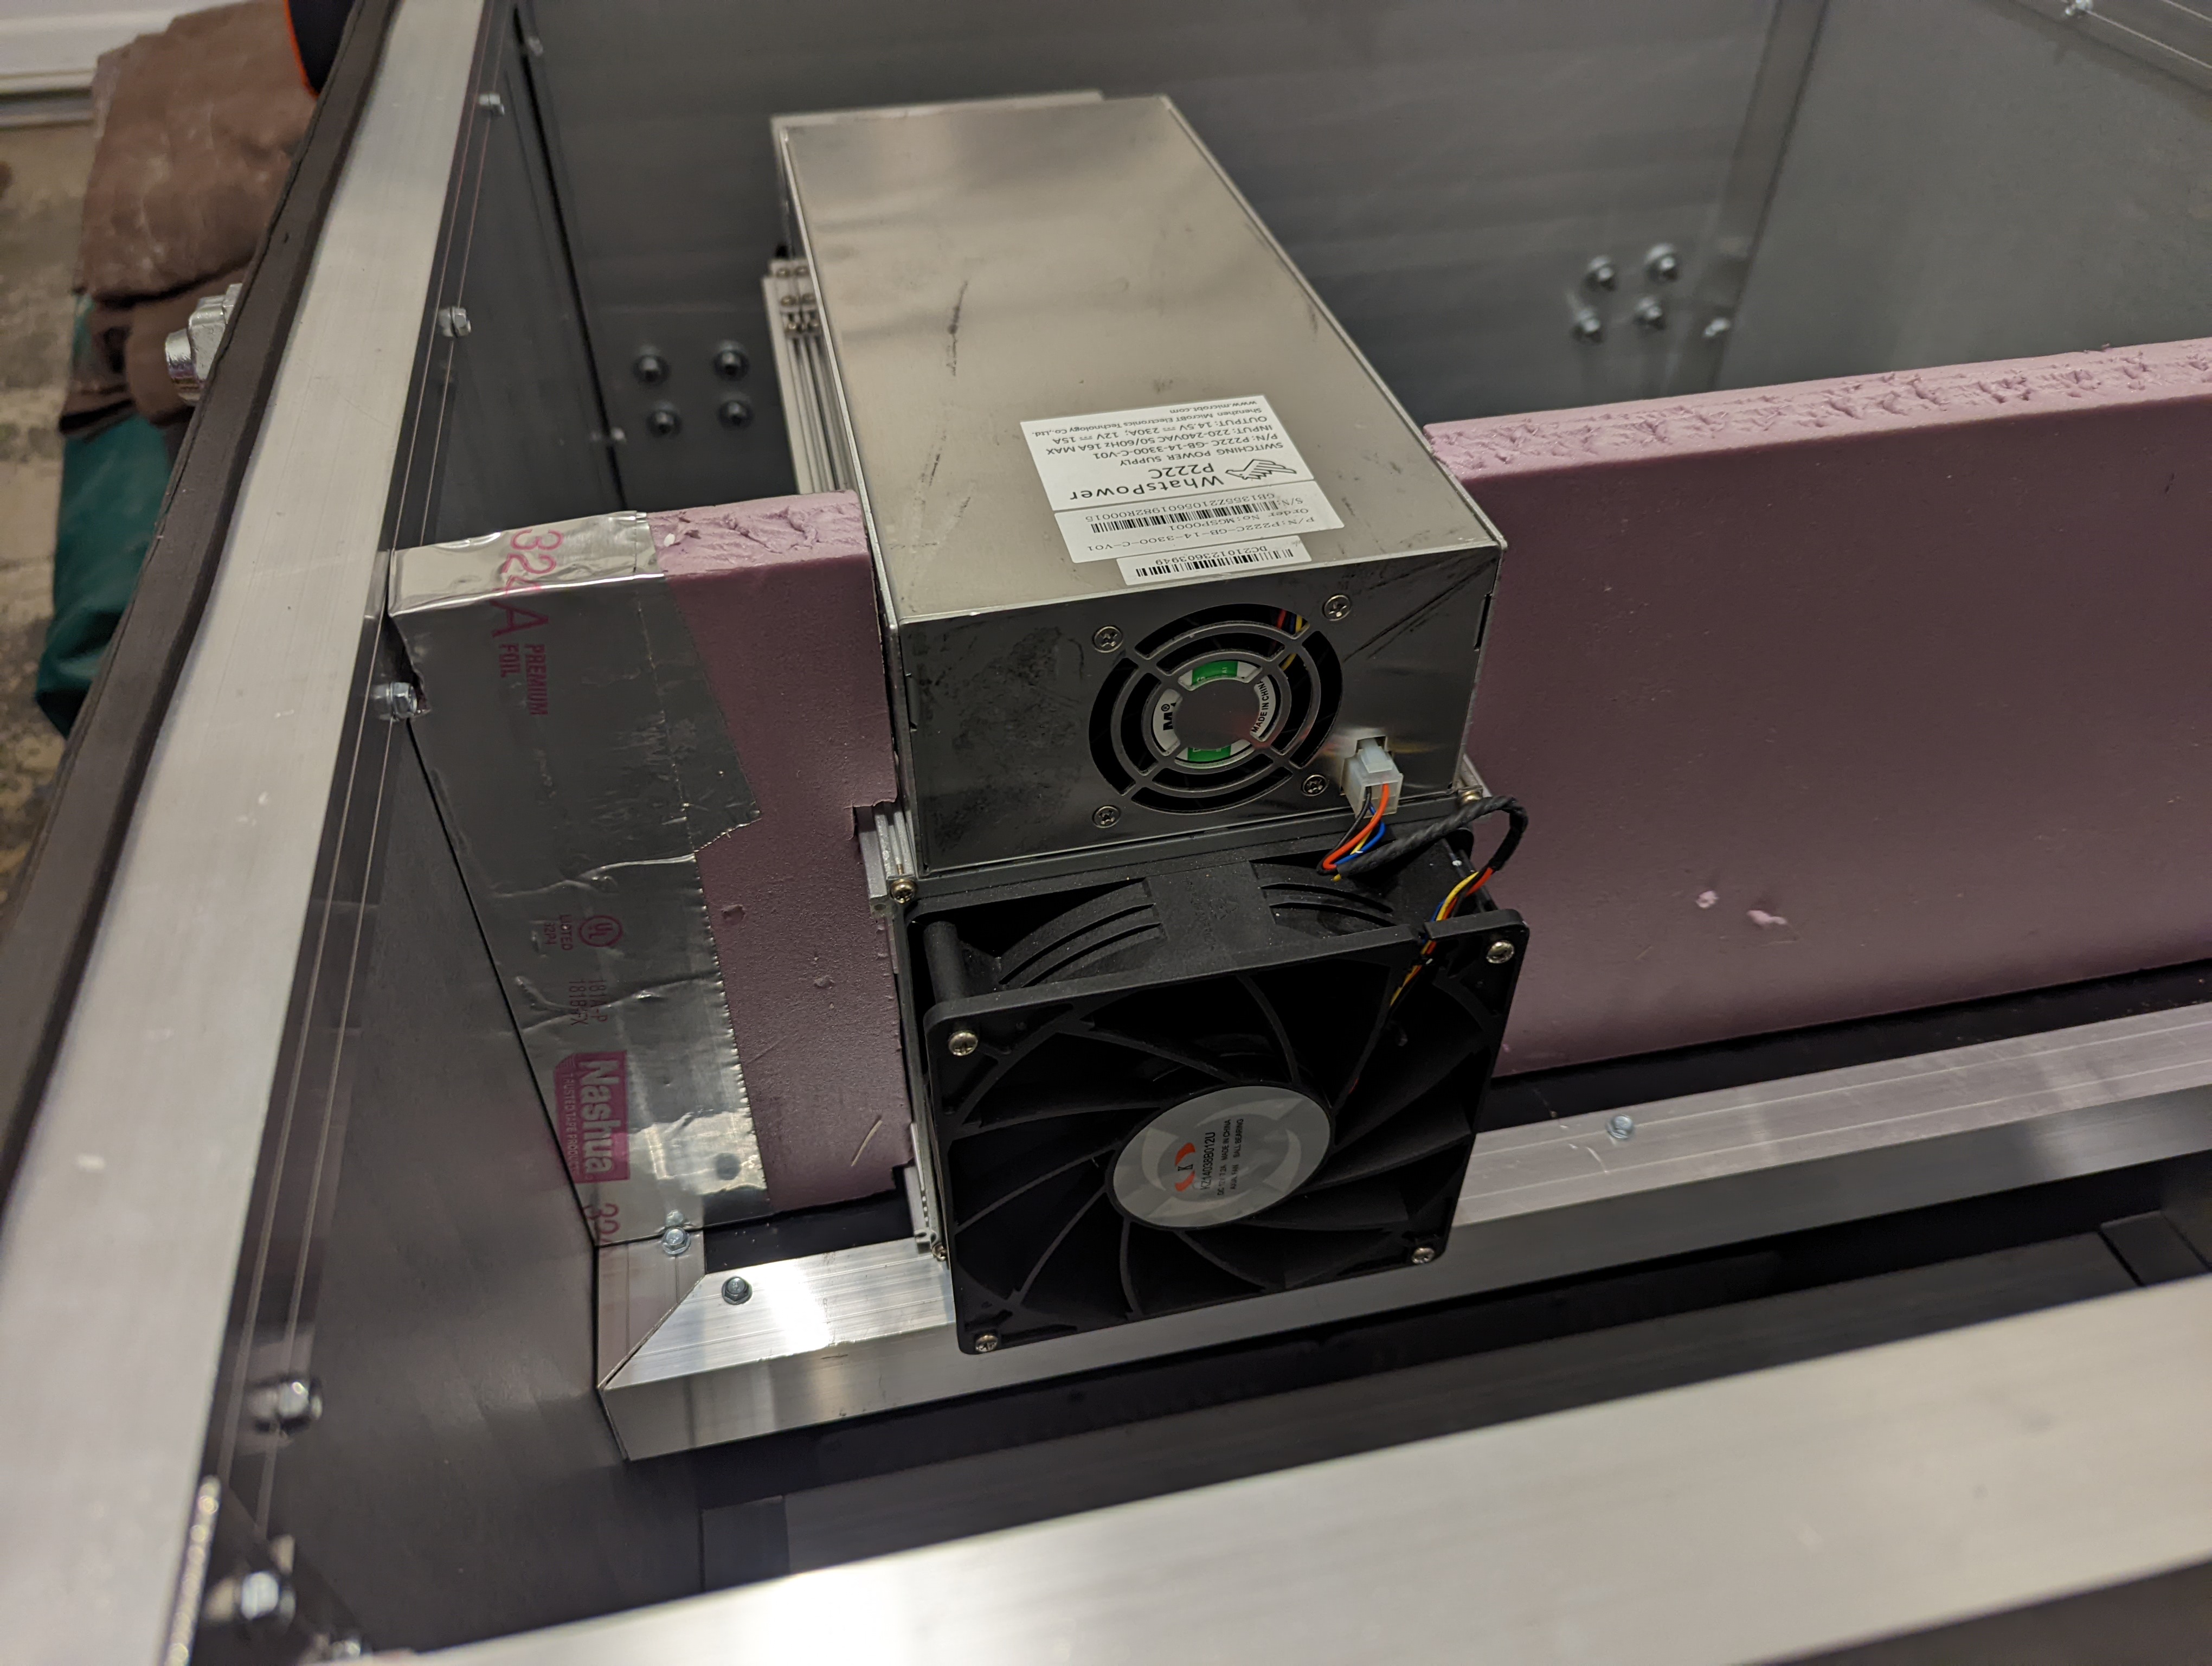
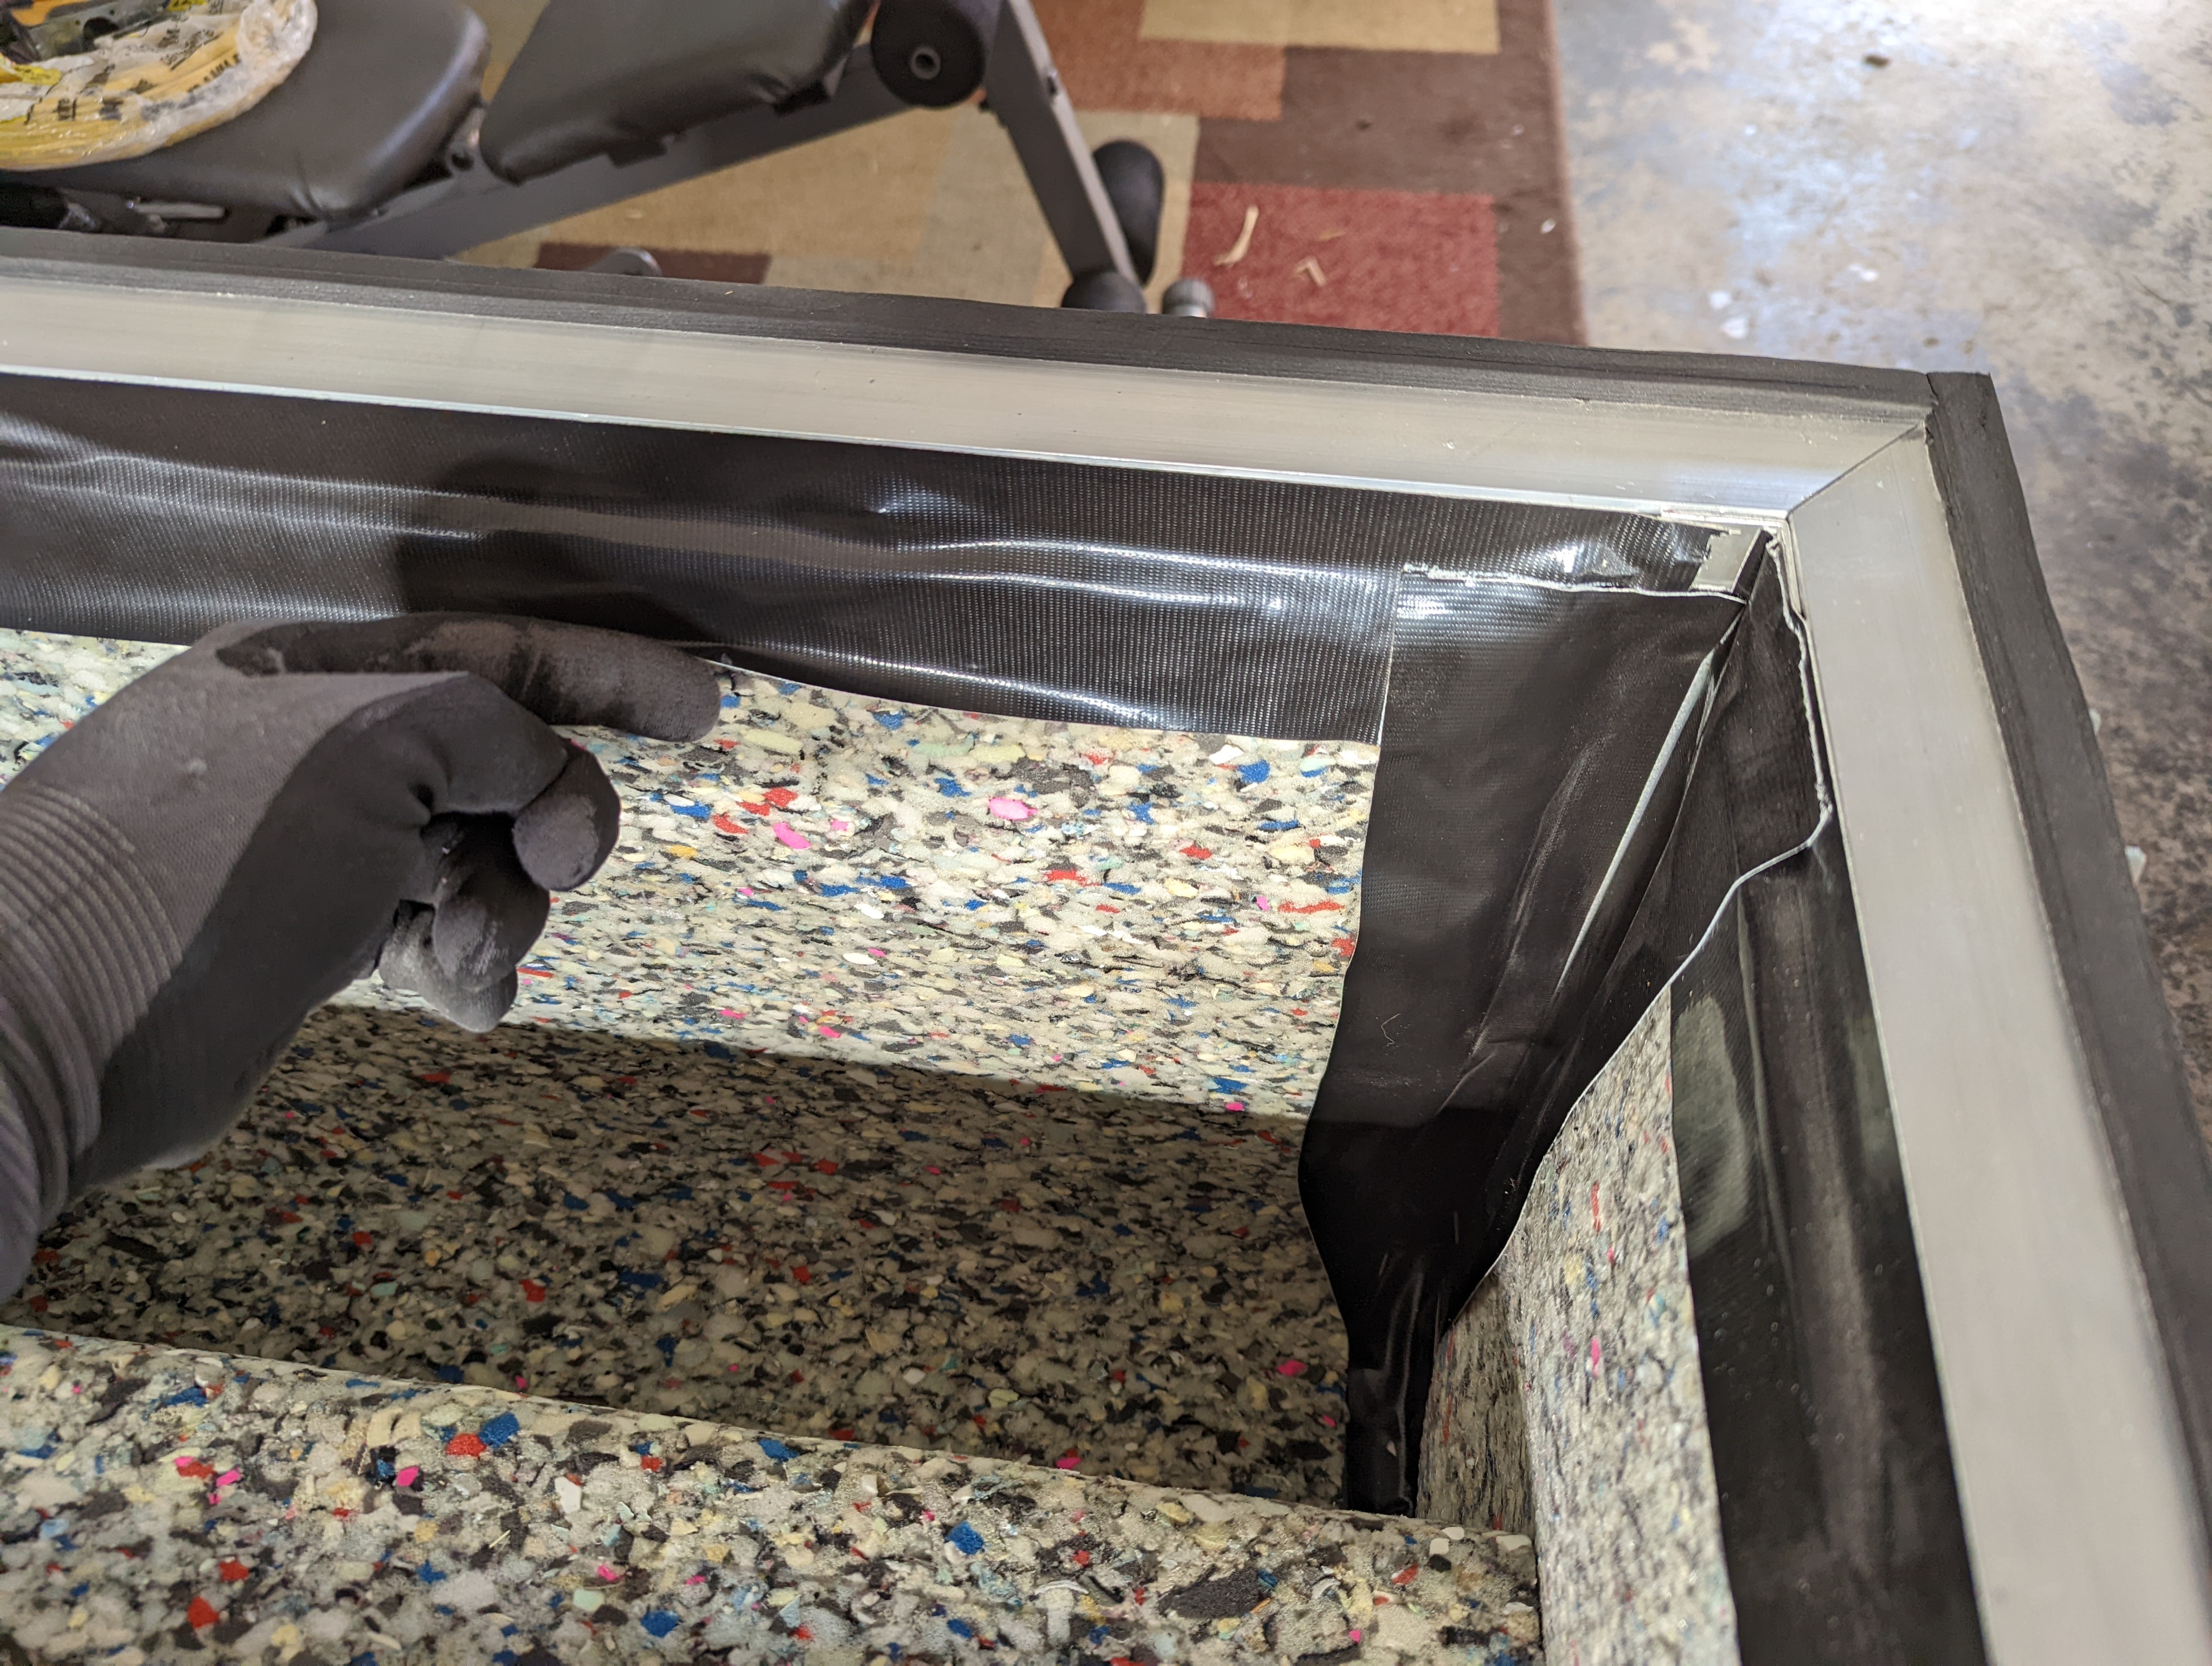
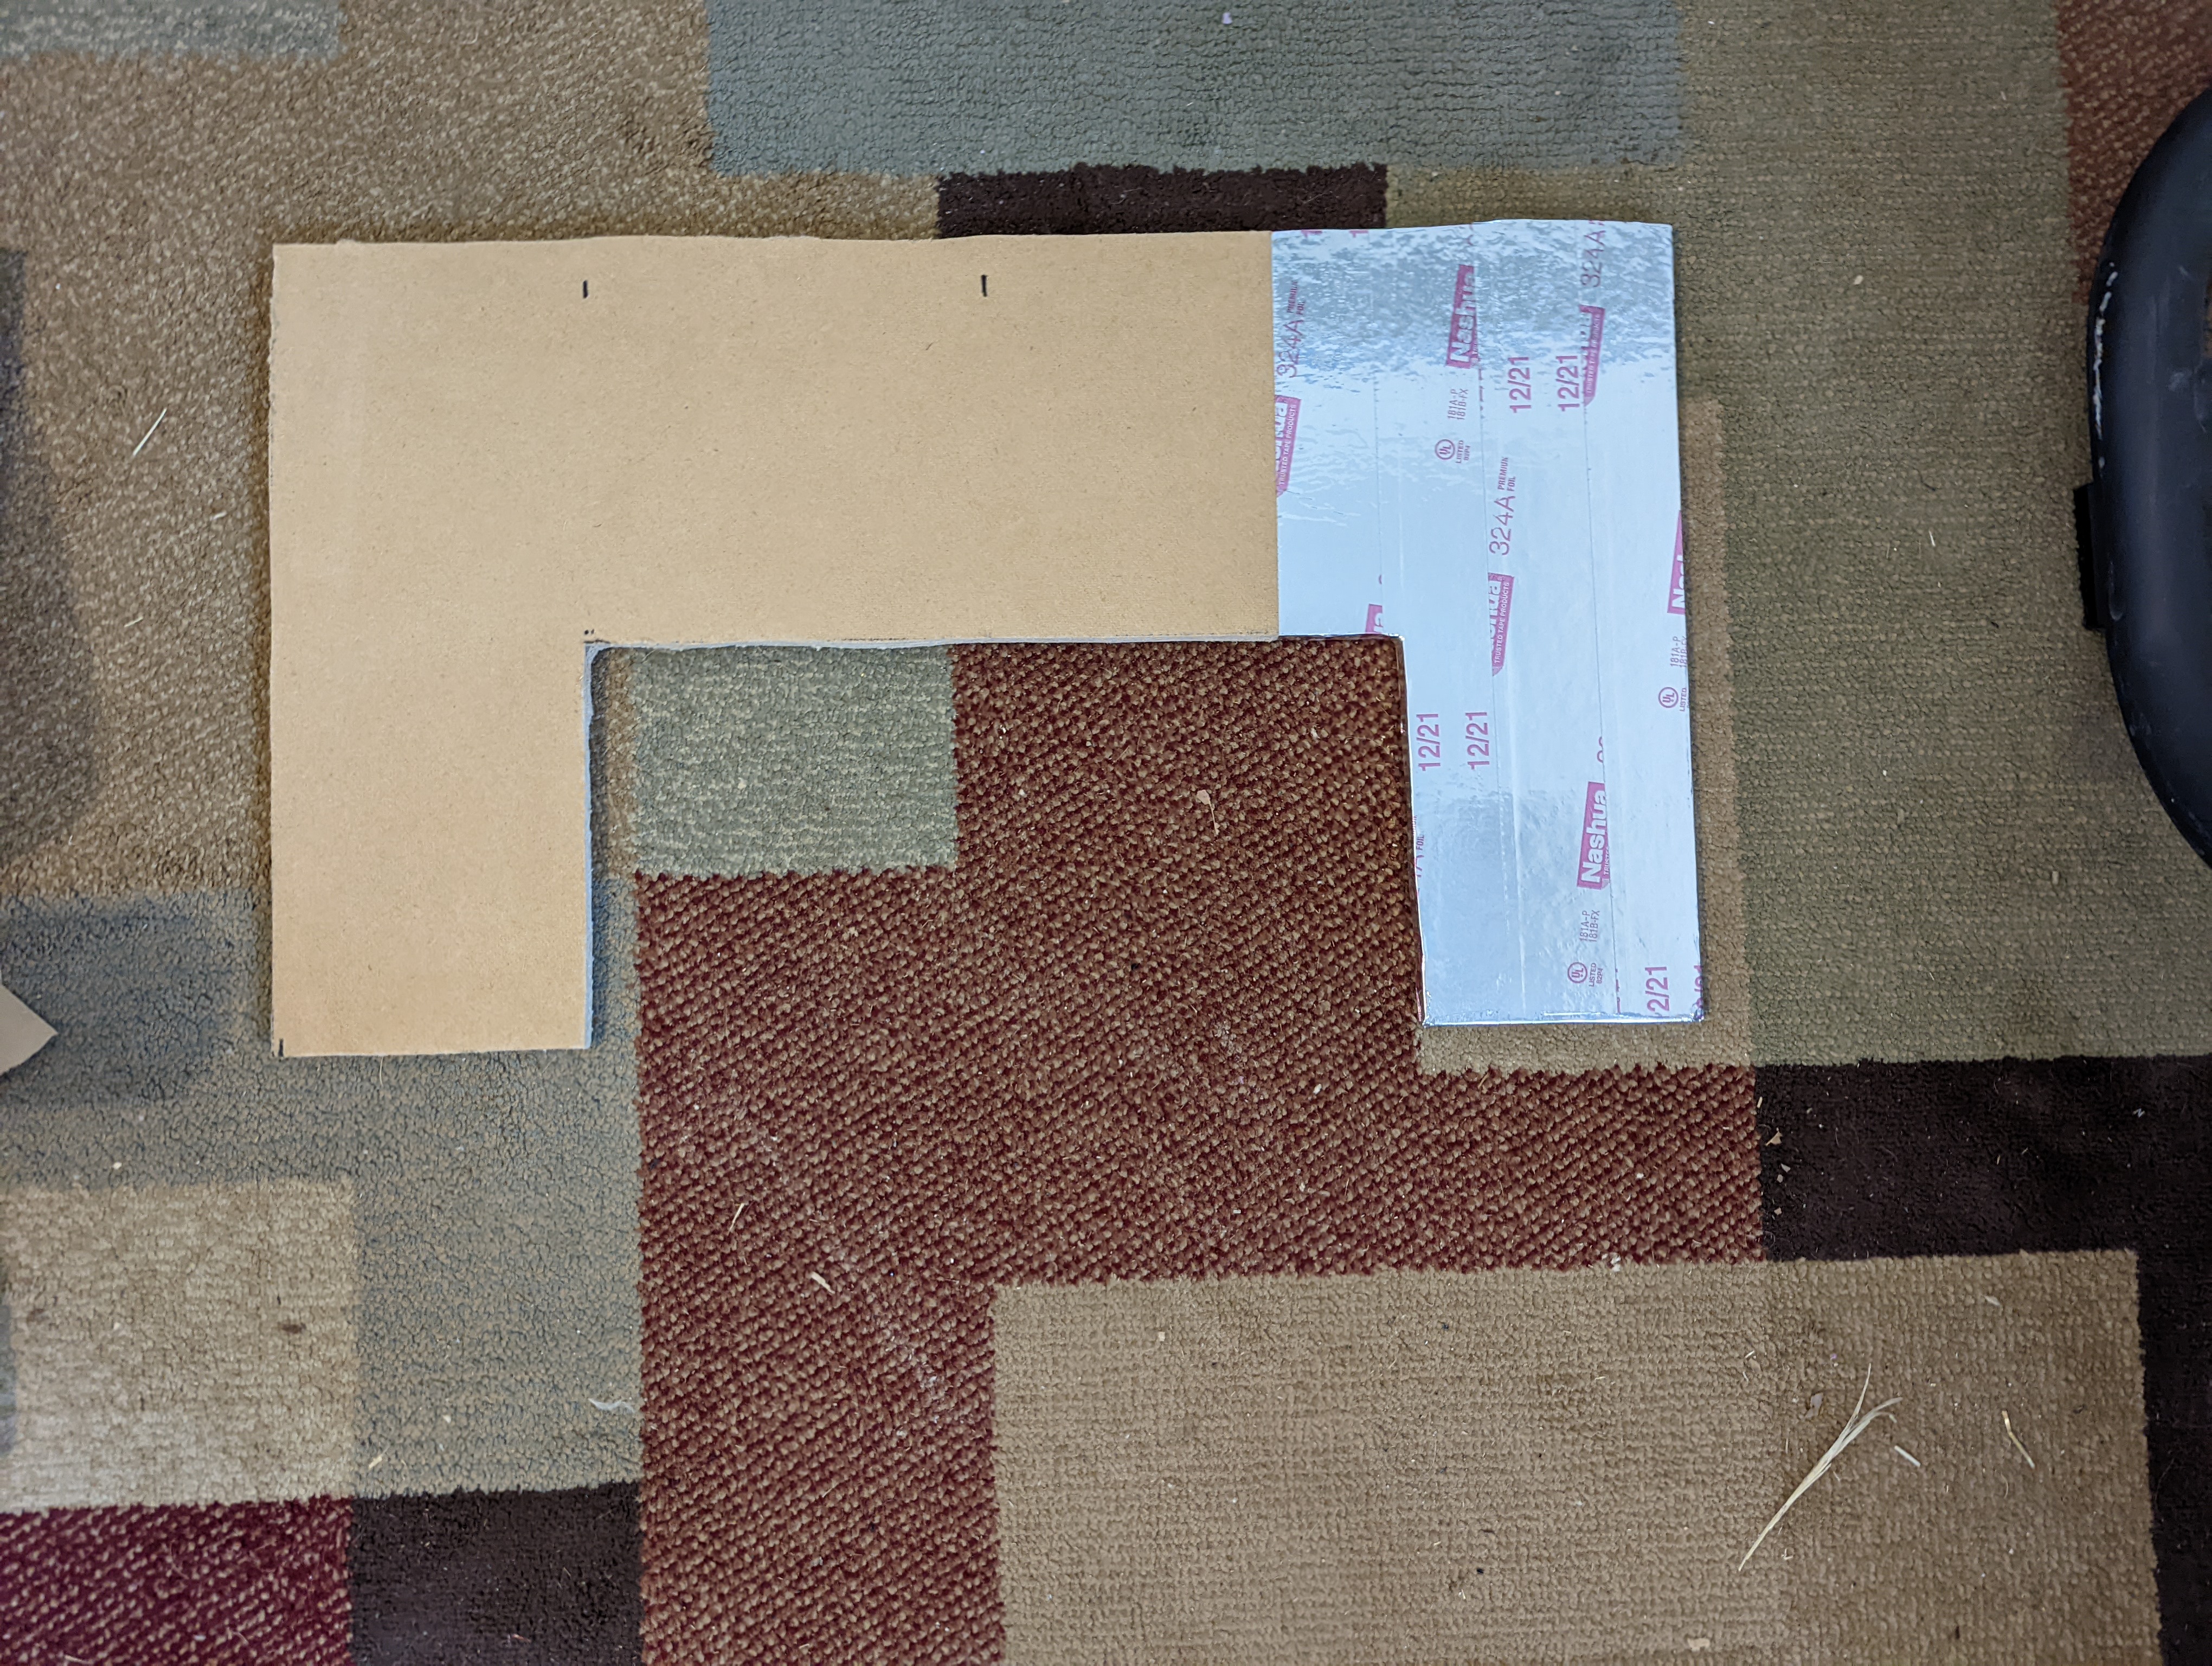
One important piece that you will need to manage making on your own is the pressure-barrier. The pressure-barrier will separate the cool side from the hot side, with only the ASIC passing through the barrier. This is how the hot air is forced out through the path of least resistance which is the exhaust port. Without a tight fitting pressure-barrier, then the hot exhaust air from the miner will be circulated back to the intake side of the ASIC where it needs to have cool air coming in. This will cause the miner to over-heat and have problems running smoothly. In this example, a 1" think foam insulation board was used. The advantages of this material are that it creates a good heat transfer barrier, it is cheap, and it is easy to work with as it can be cut to any shape with a razor blade.
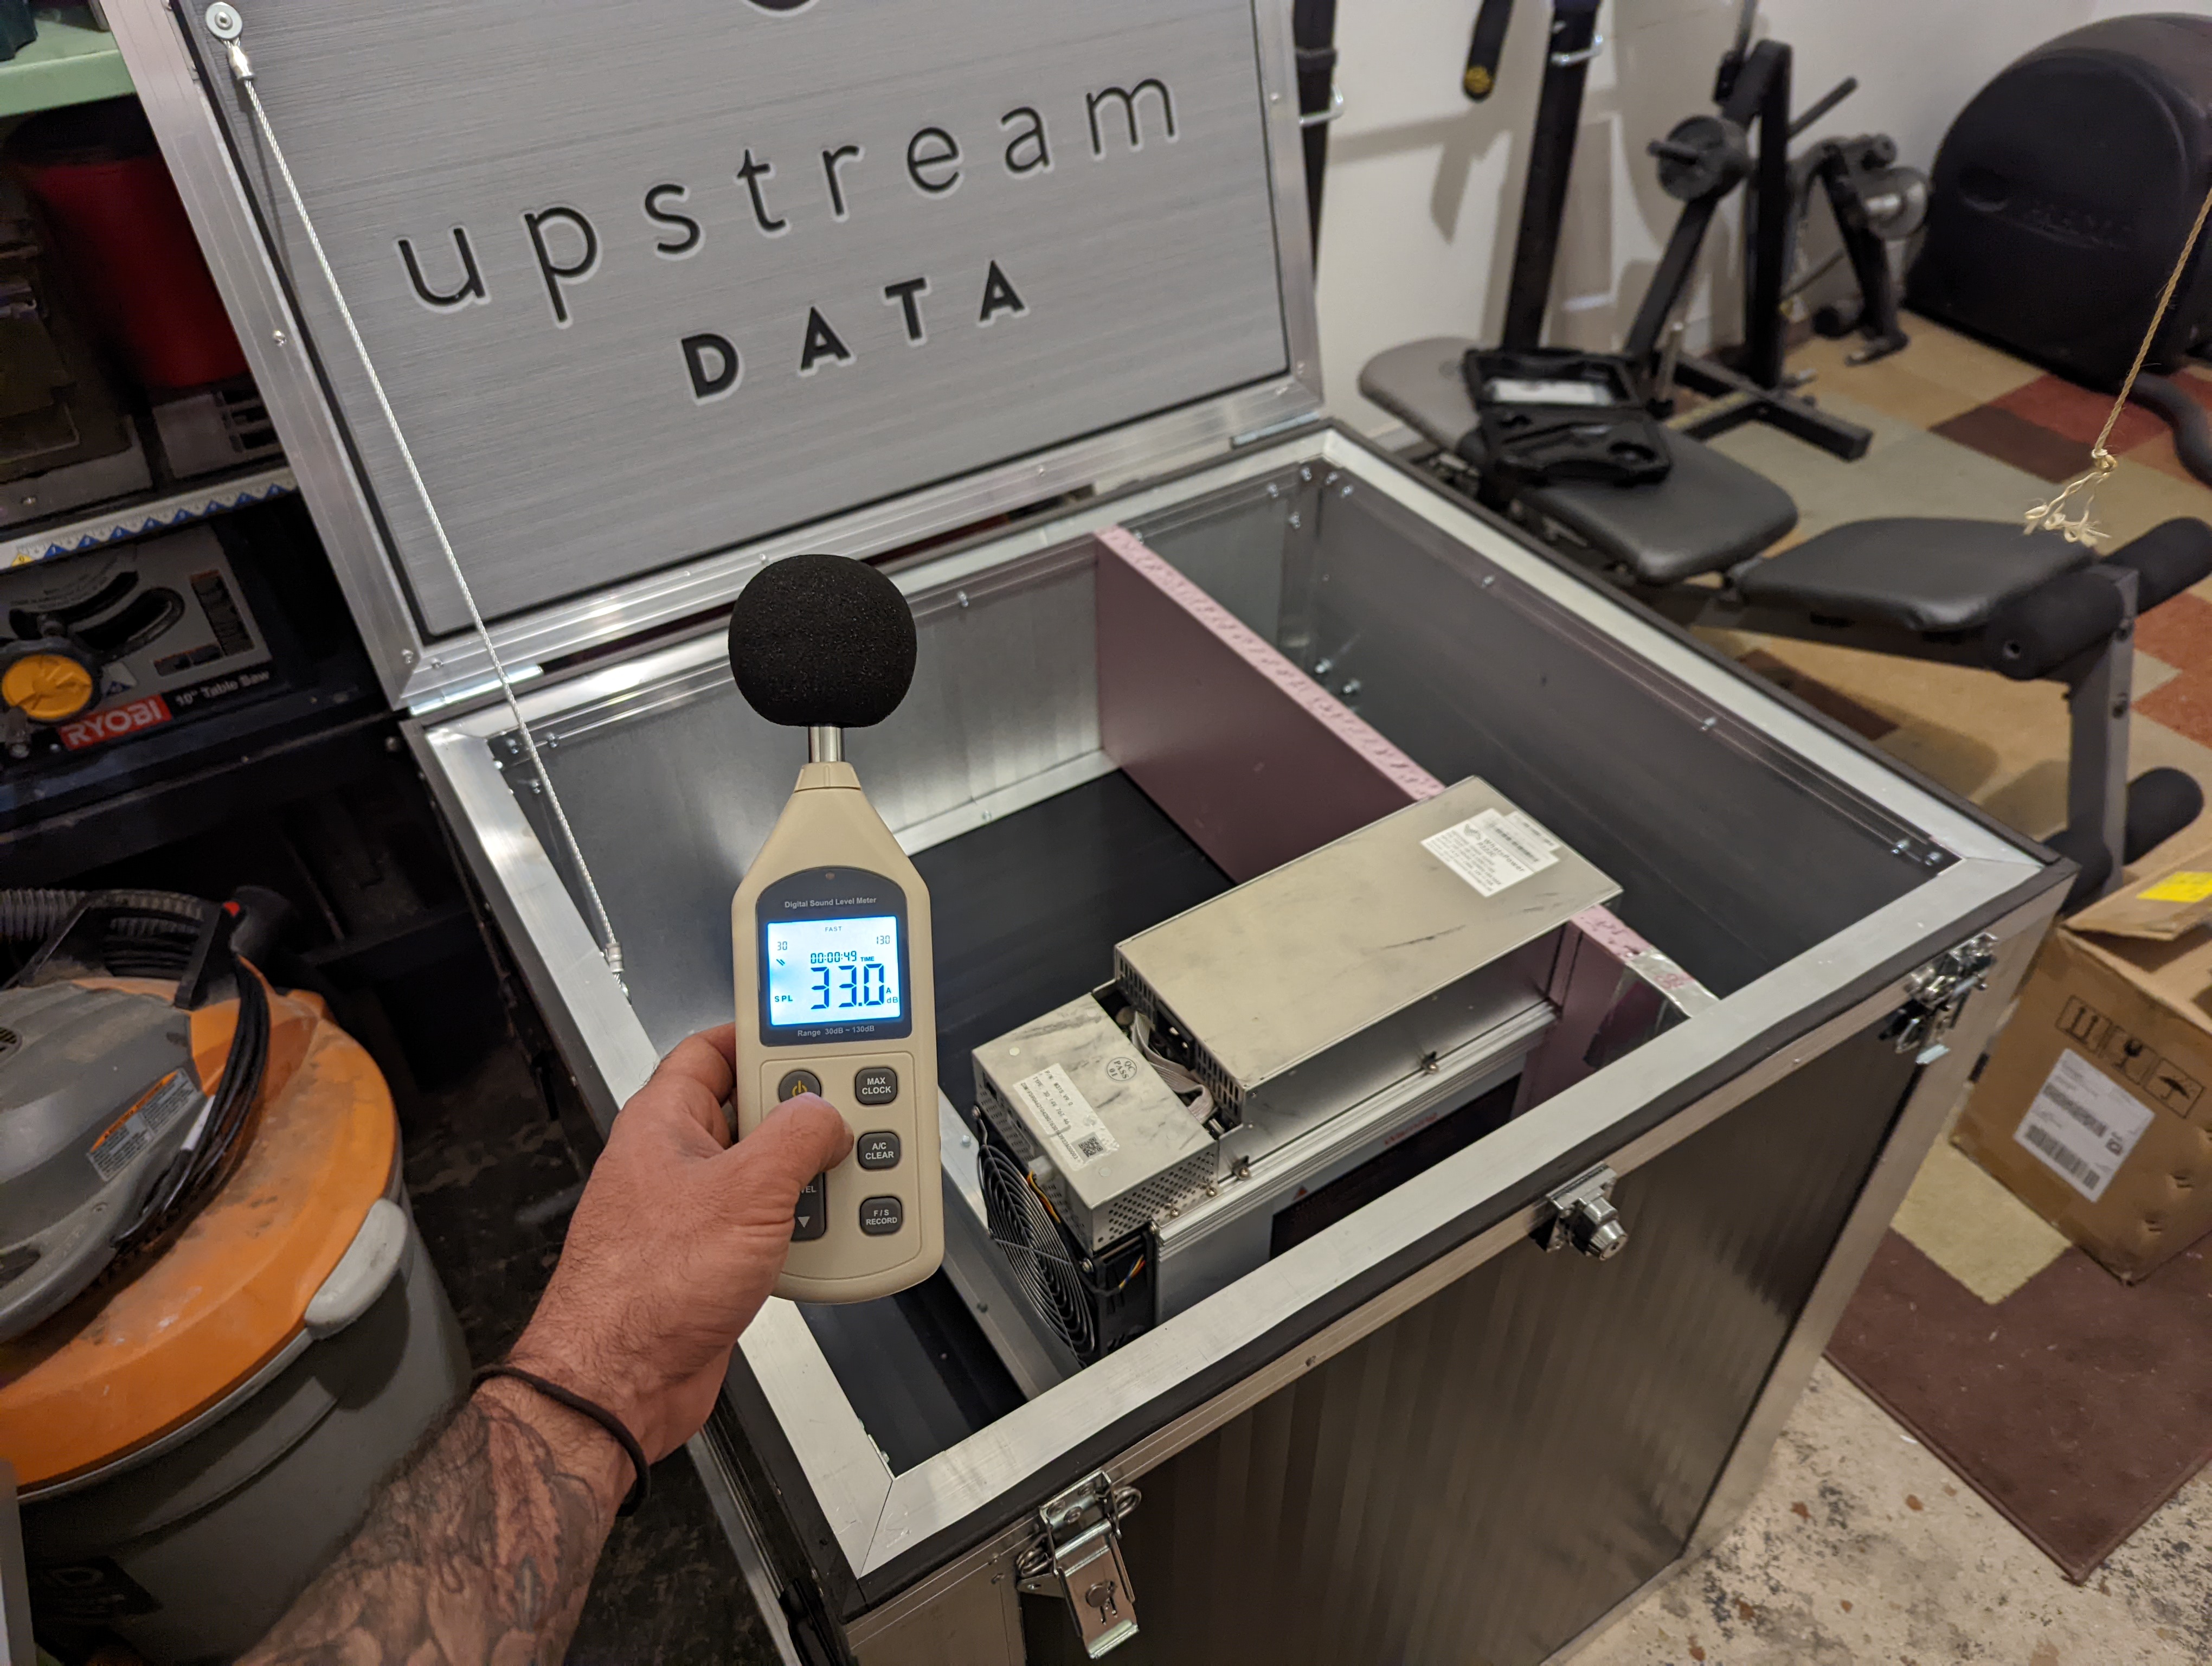
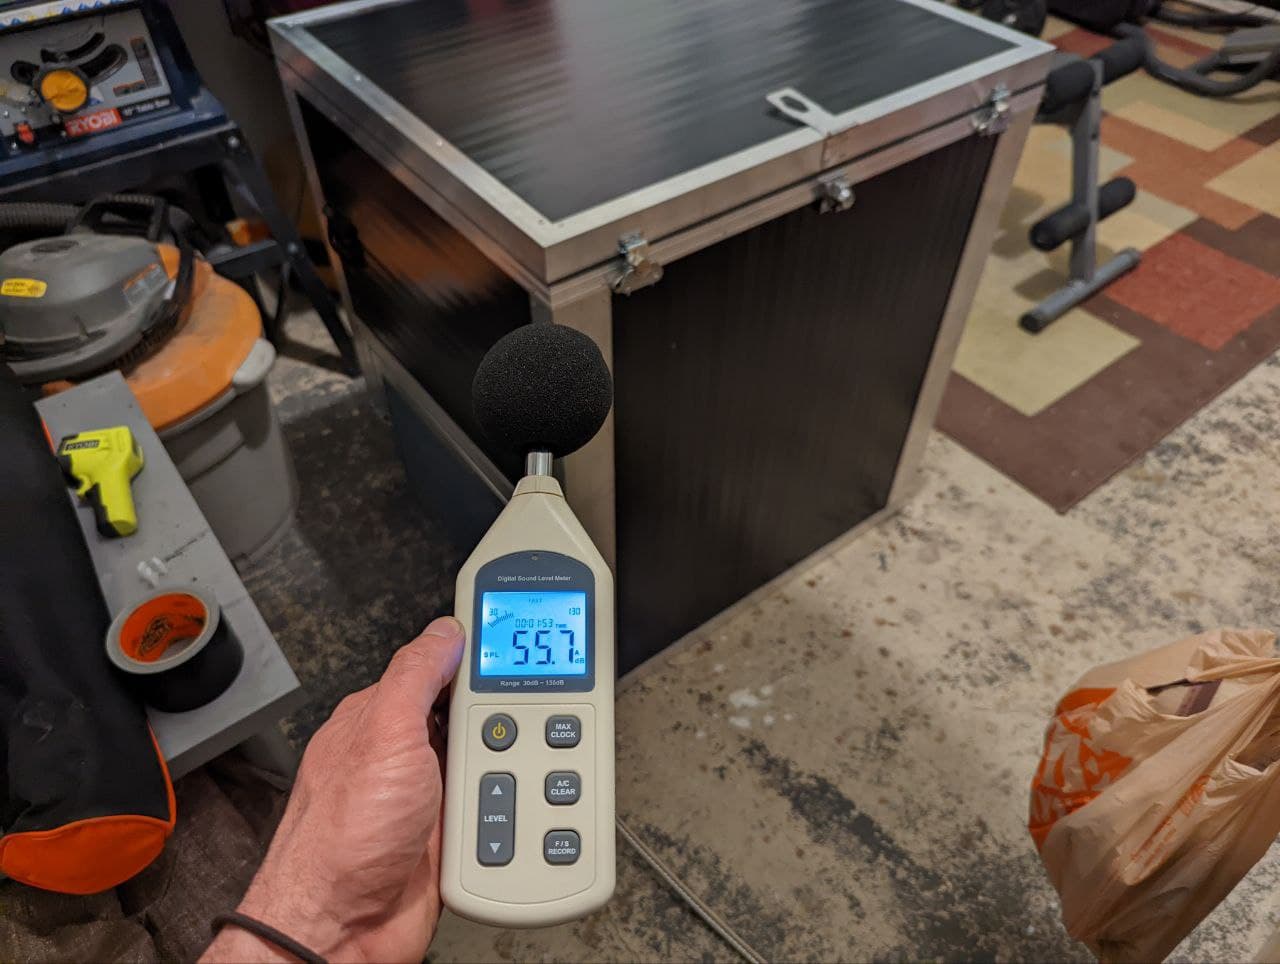
For this demonstration some testing was carried out to check the sound levels with a Whatsminer M31s 78Th miner. You'll notice that the pressure barrier in these photos is cut to the profile of the miner to fit tight against it.
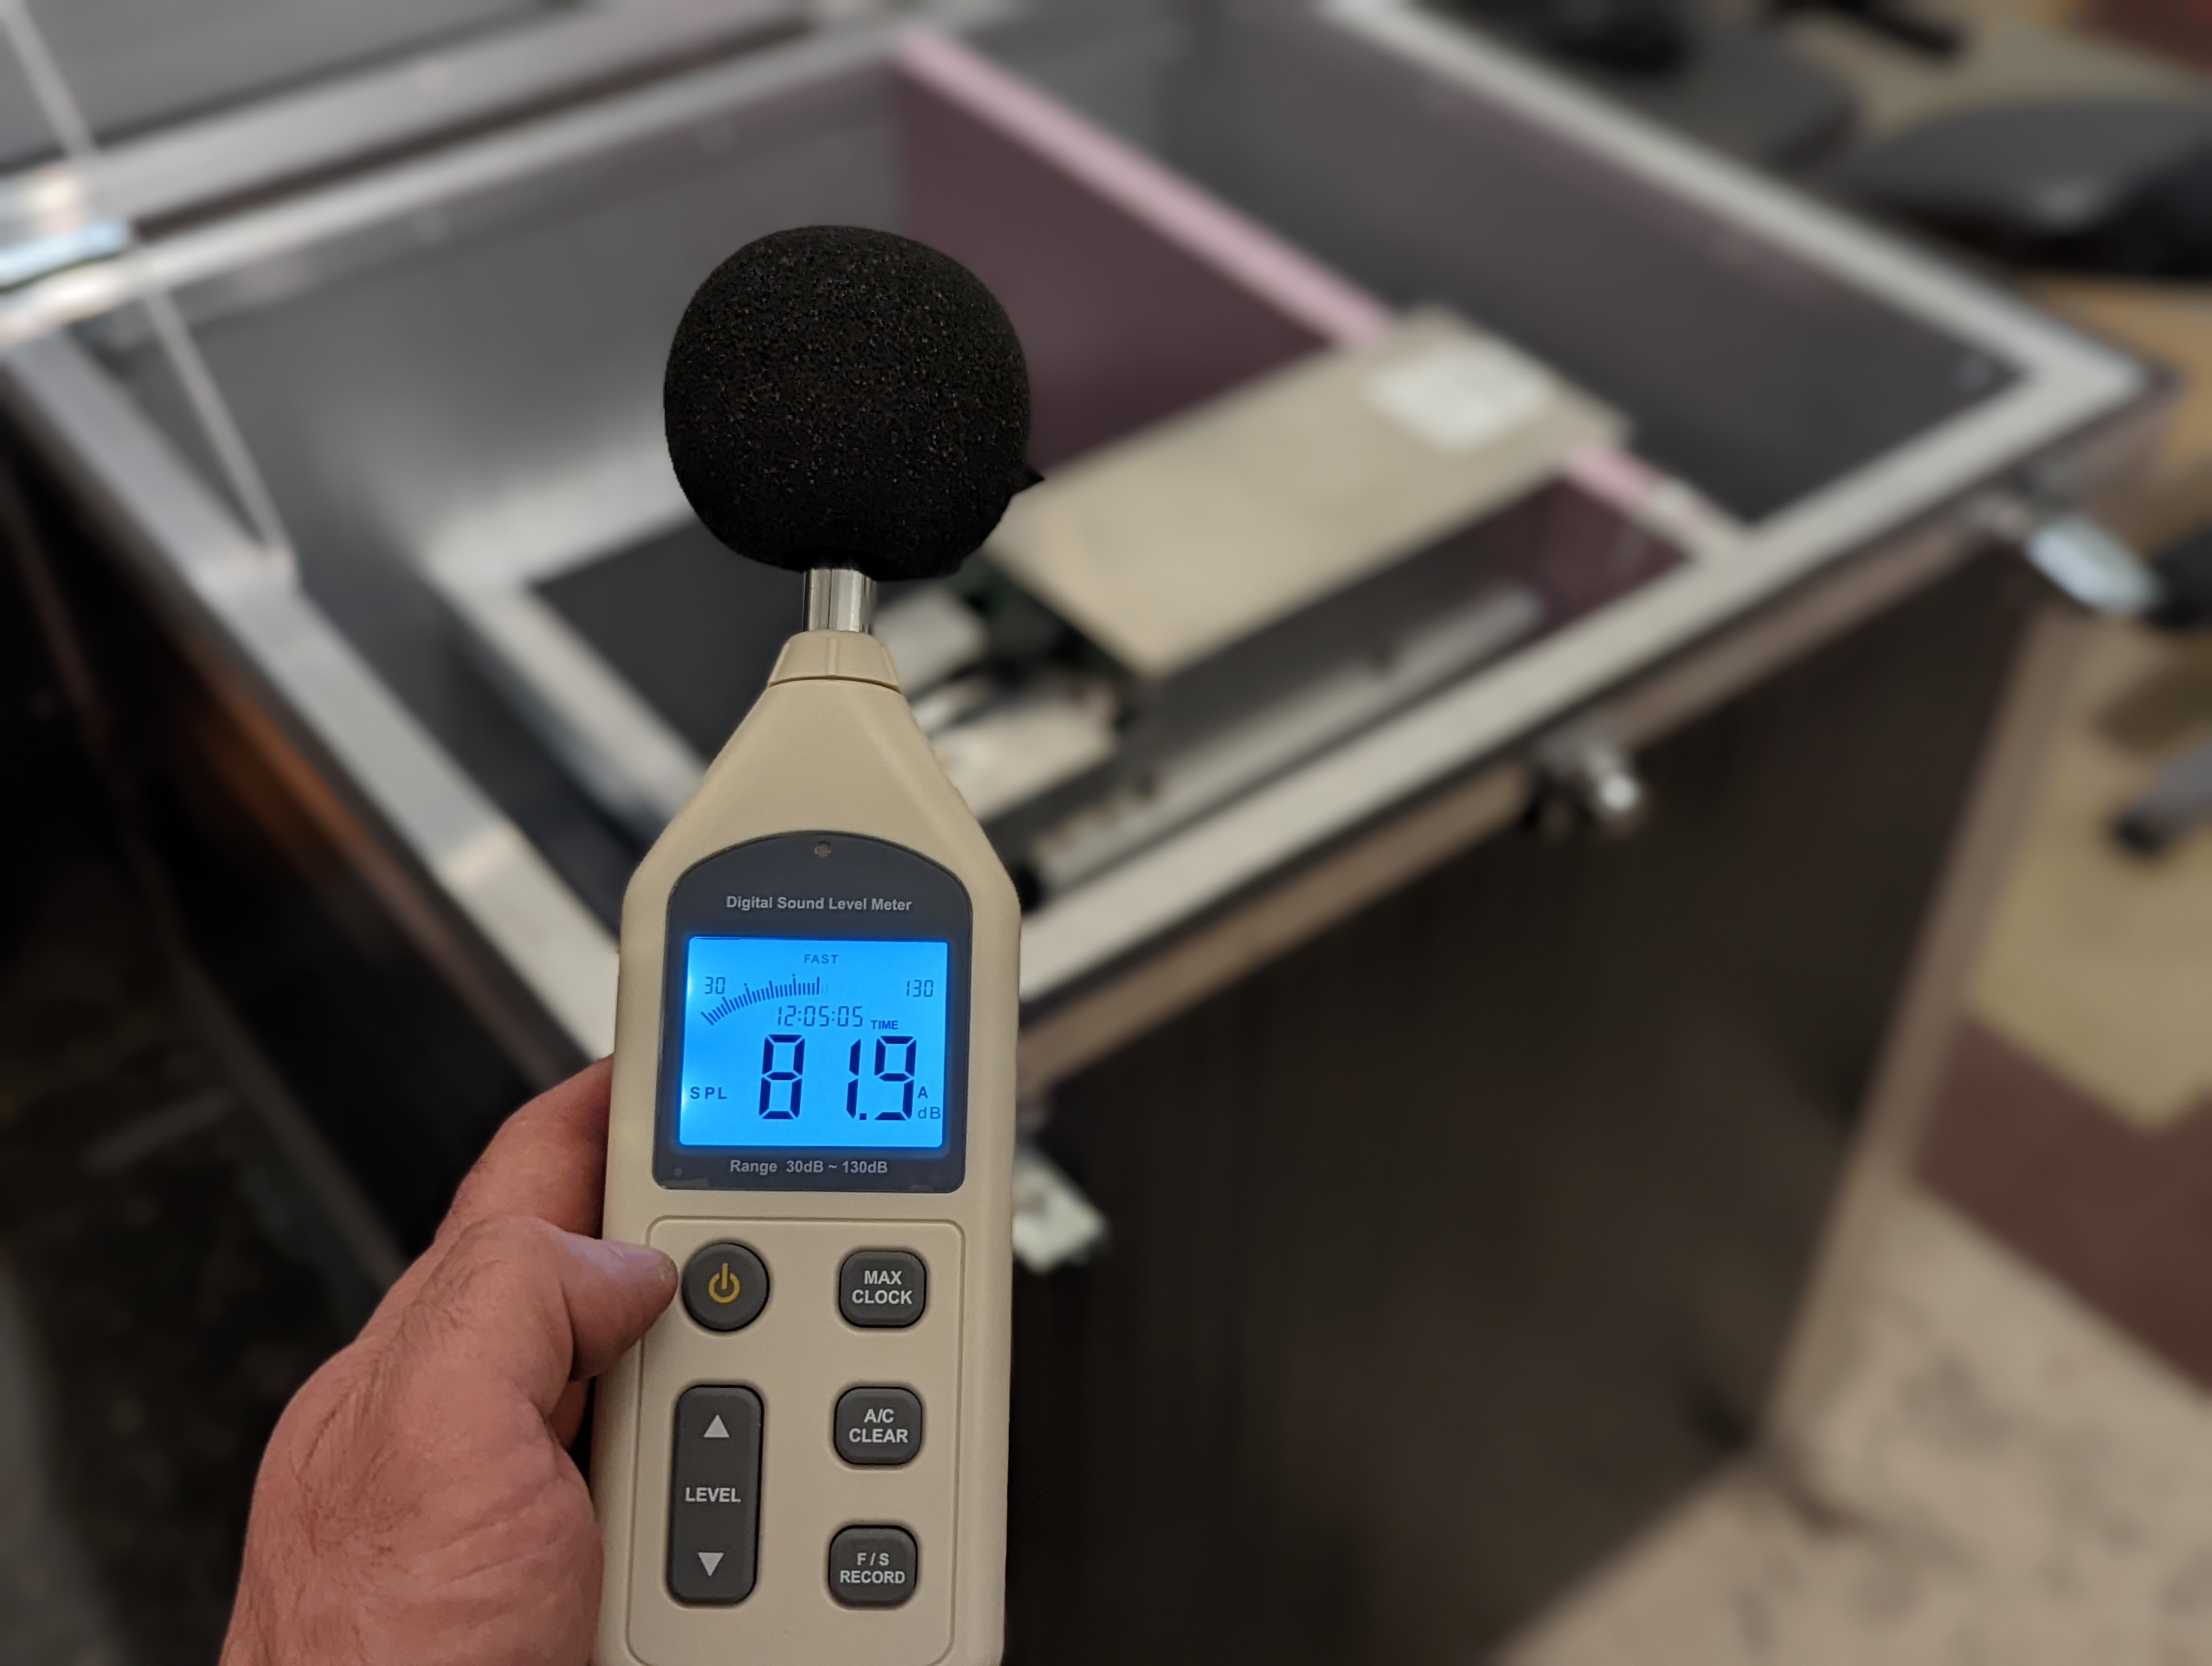
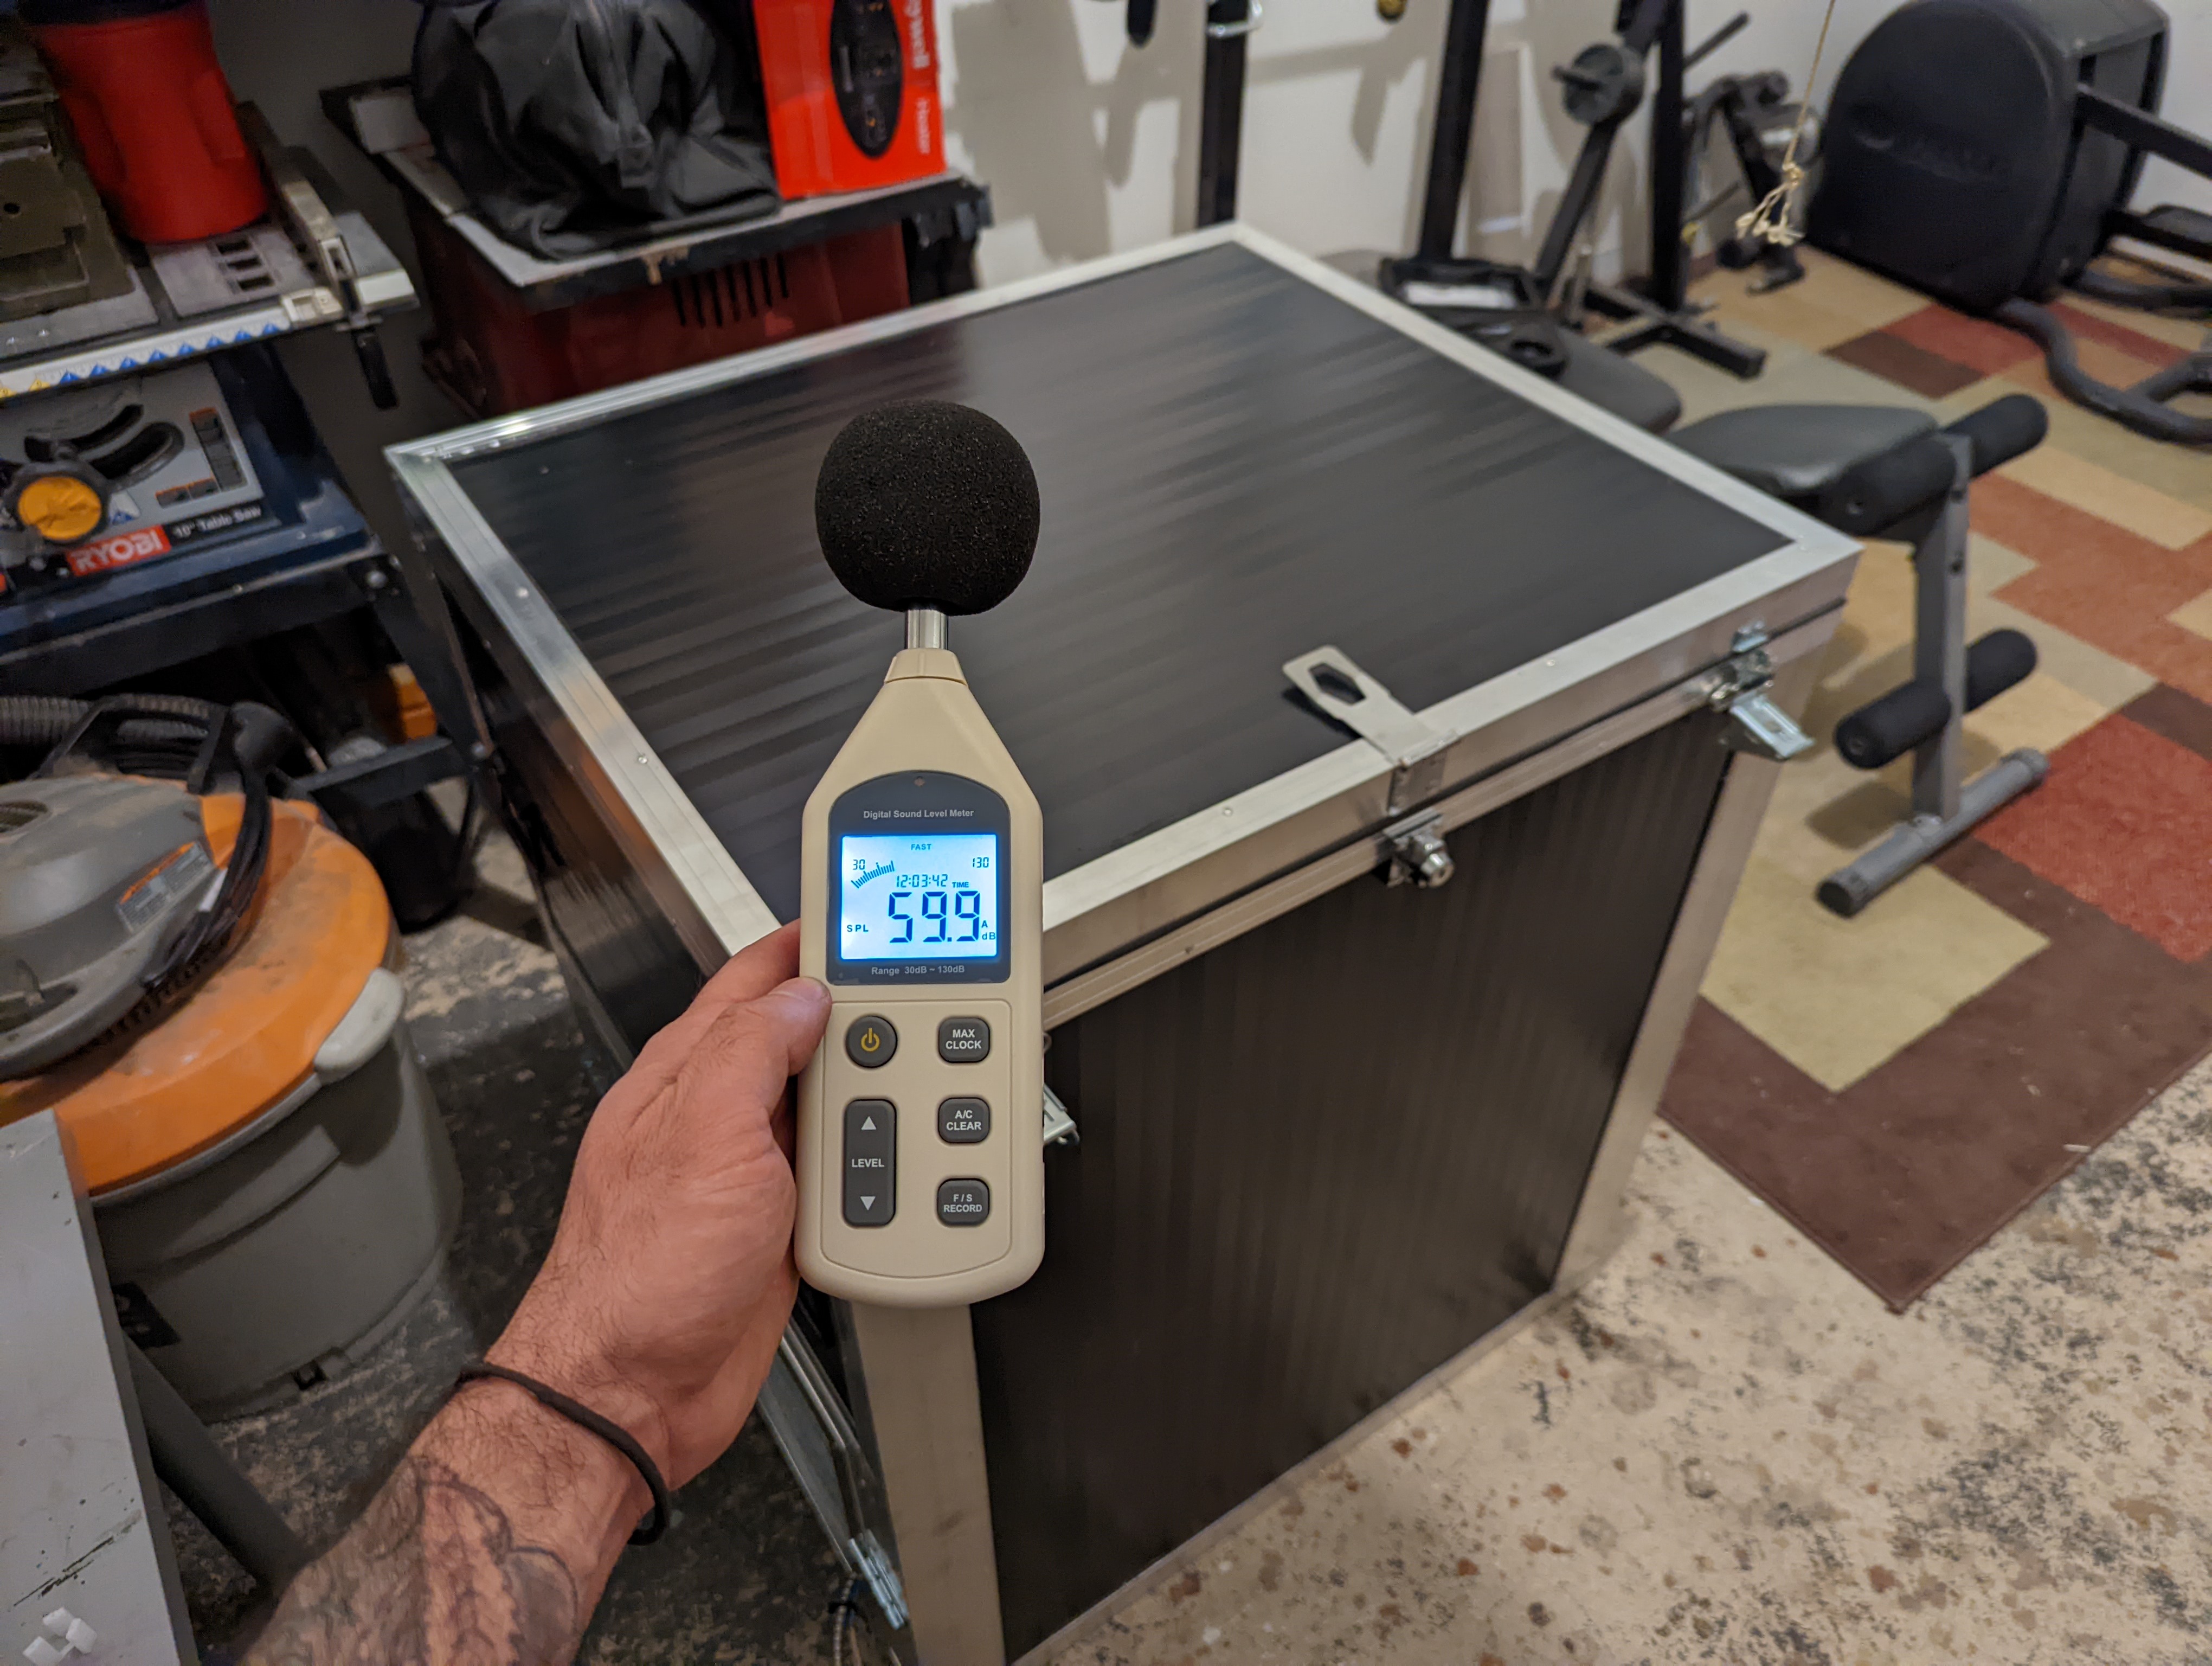
Just checking the ambient noise floor of the garage without the miner running, was ~33dB. With the miner running and the lid open, the noise level was ~82dB. With the miner running and the lid closed, the noise level was ~60dB. ~22dB reduction with no sound treatment is very good in terms of noise attenuation, humans perceive a 10dB attenuation in a noise source as being half as loud, a 20dB attenuation is perceived as a quarter as loud.
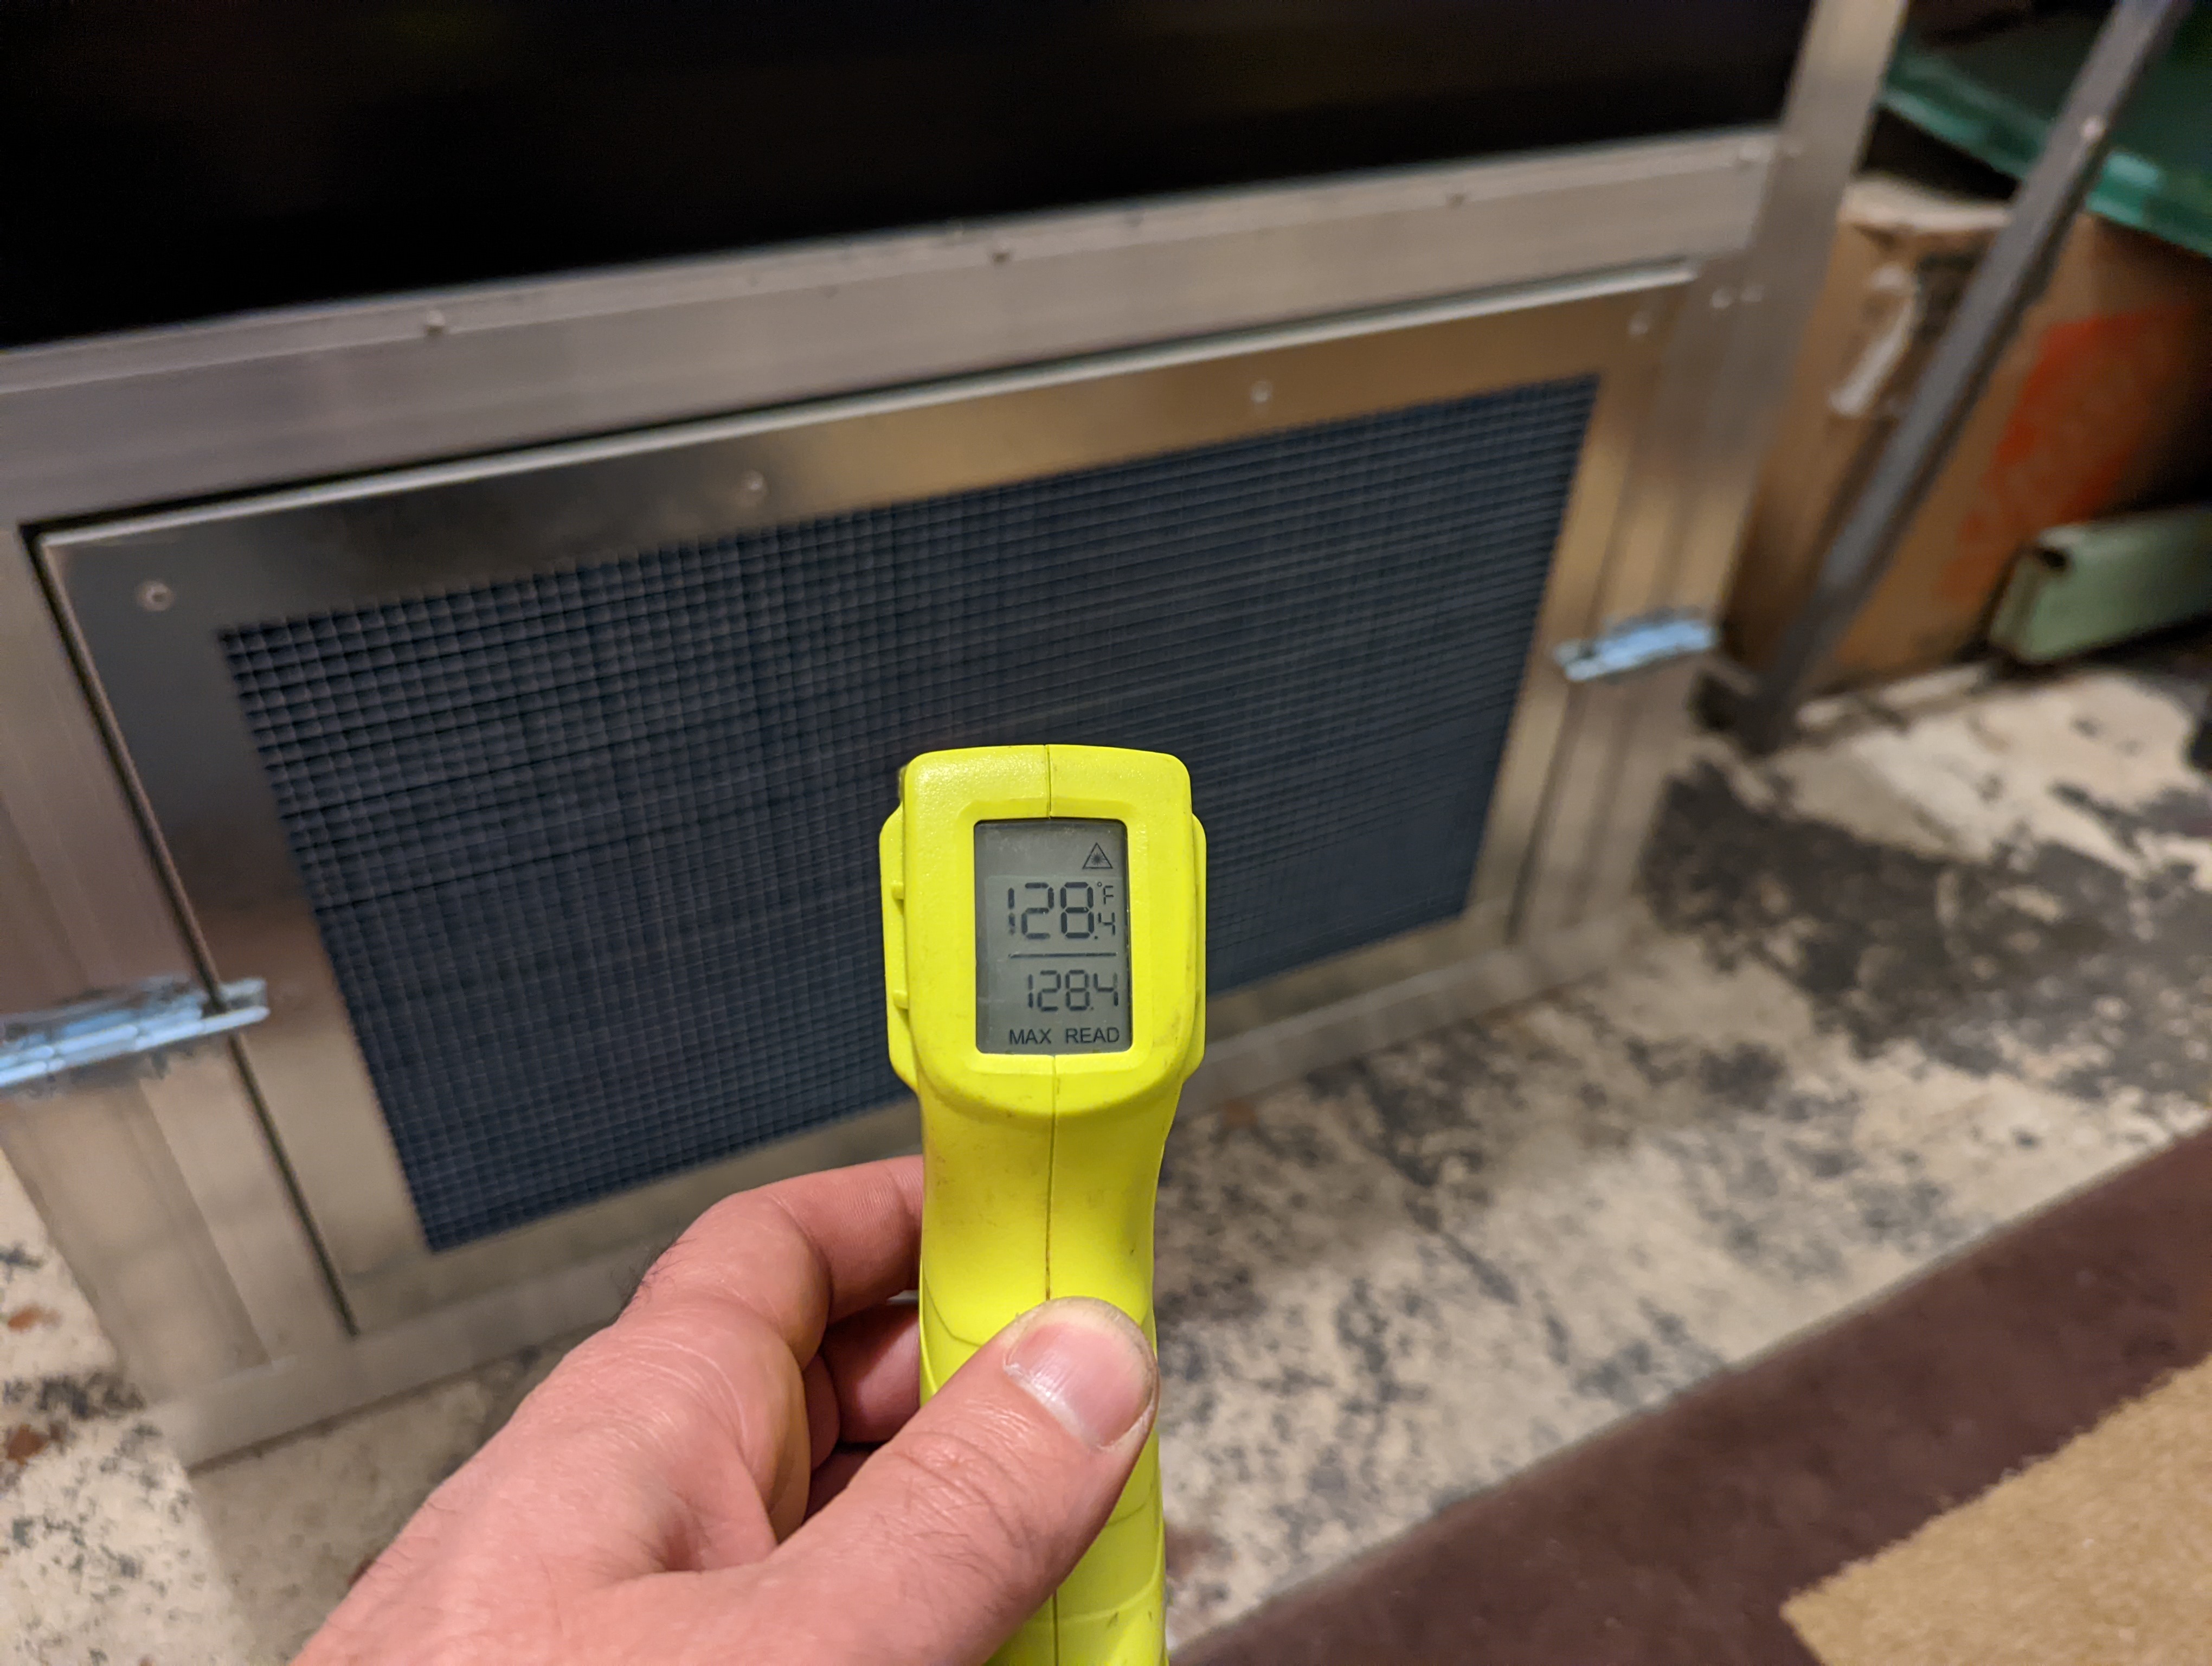
The heat coming from the exhaust port was ~130° F.
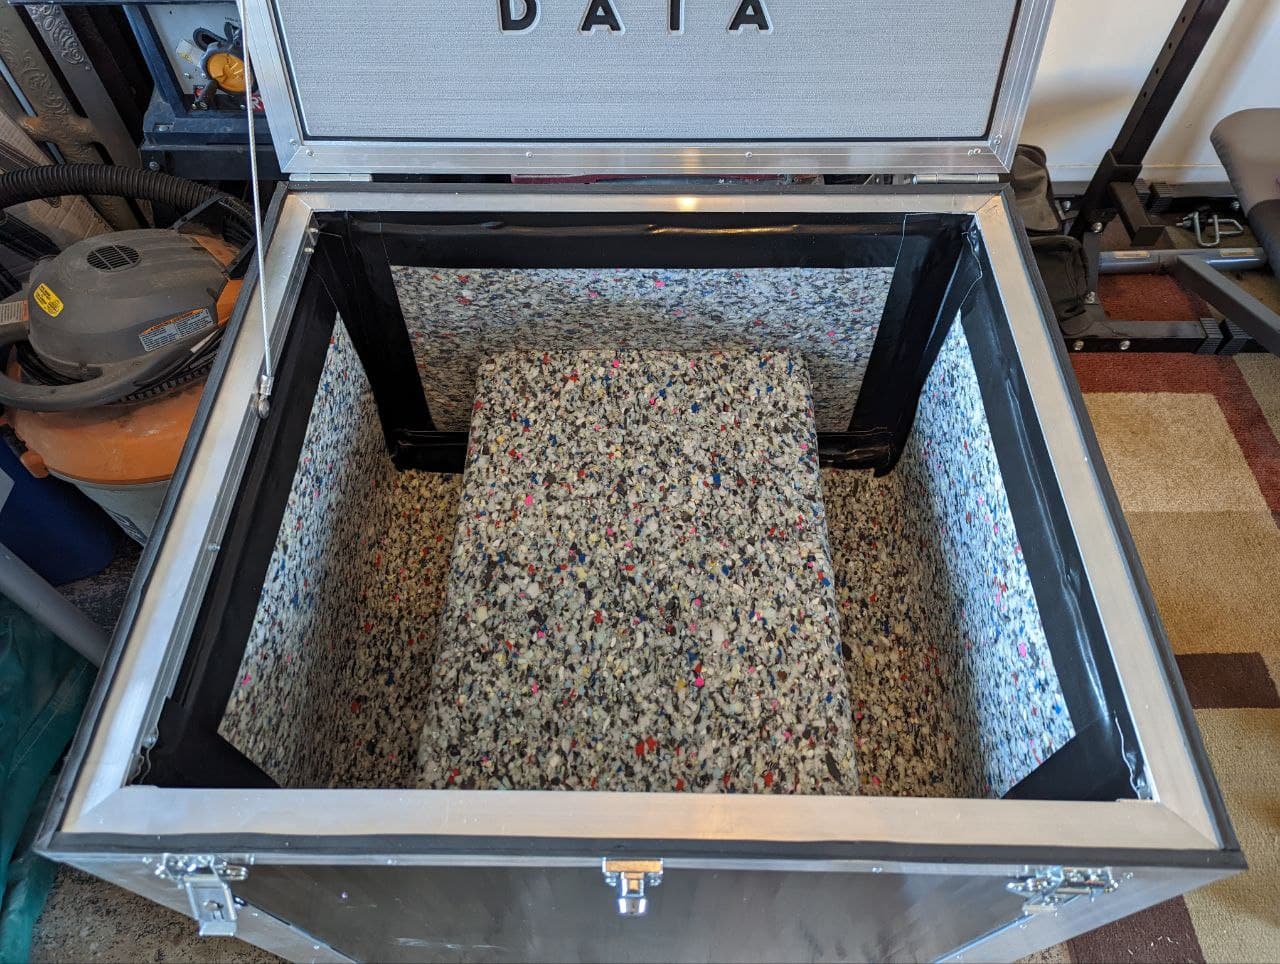
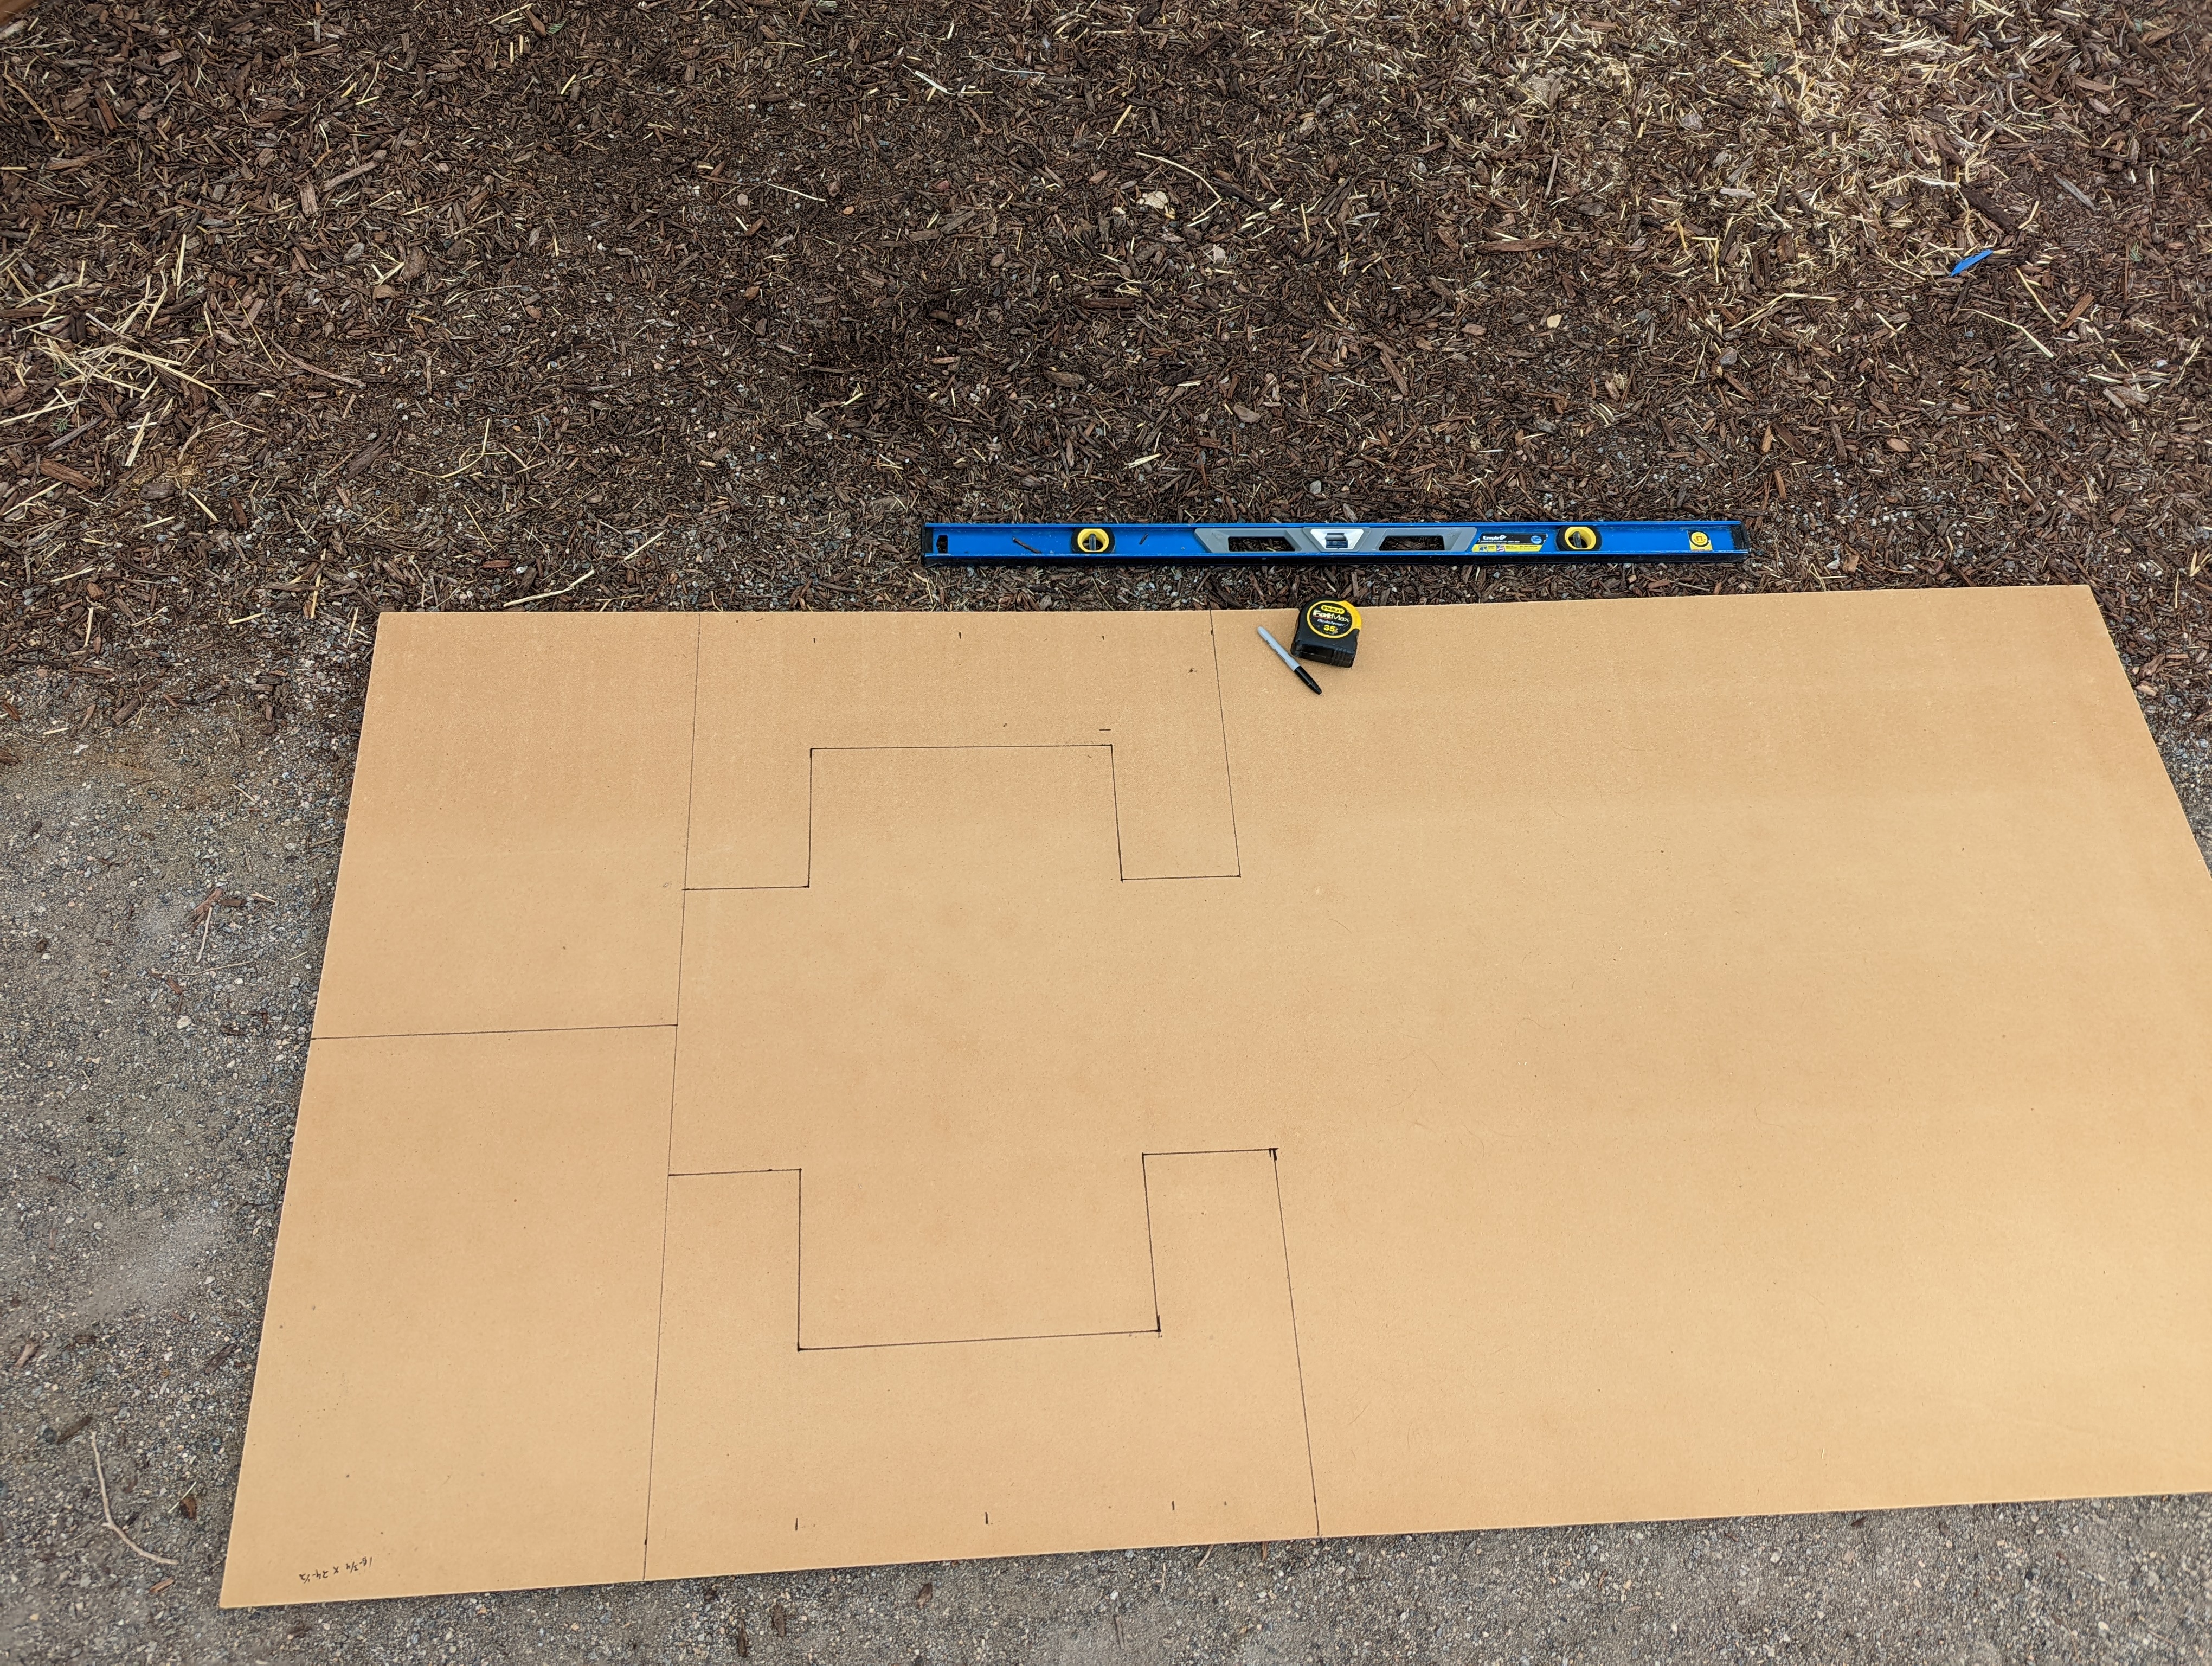
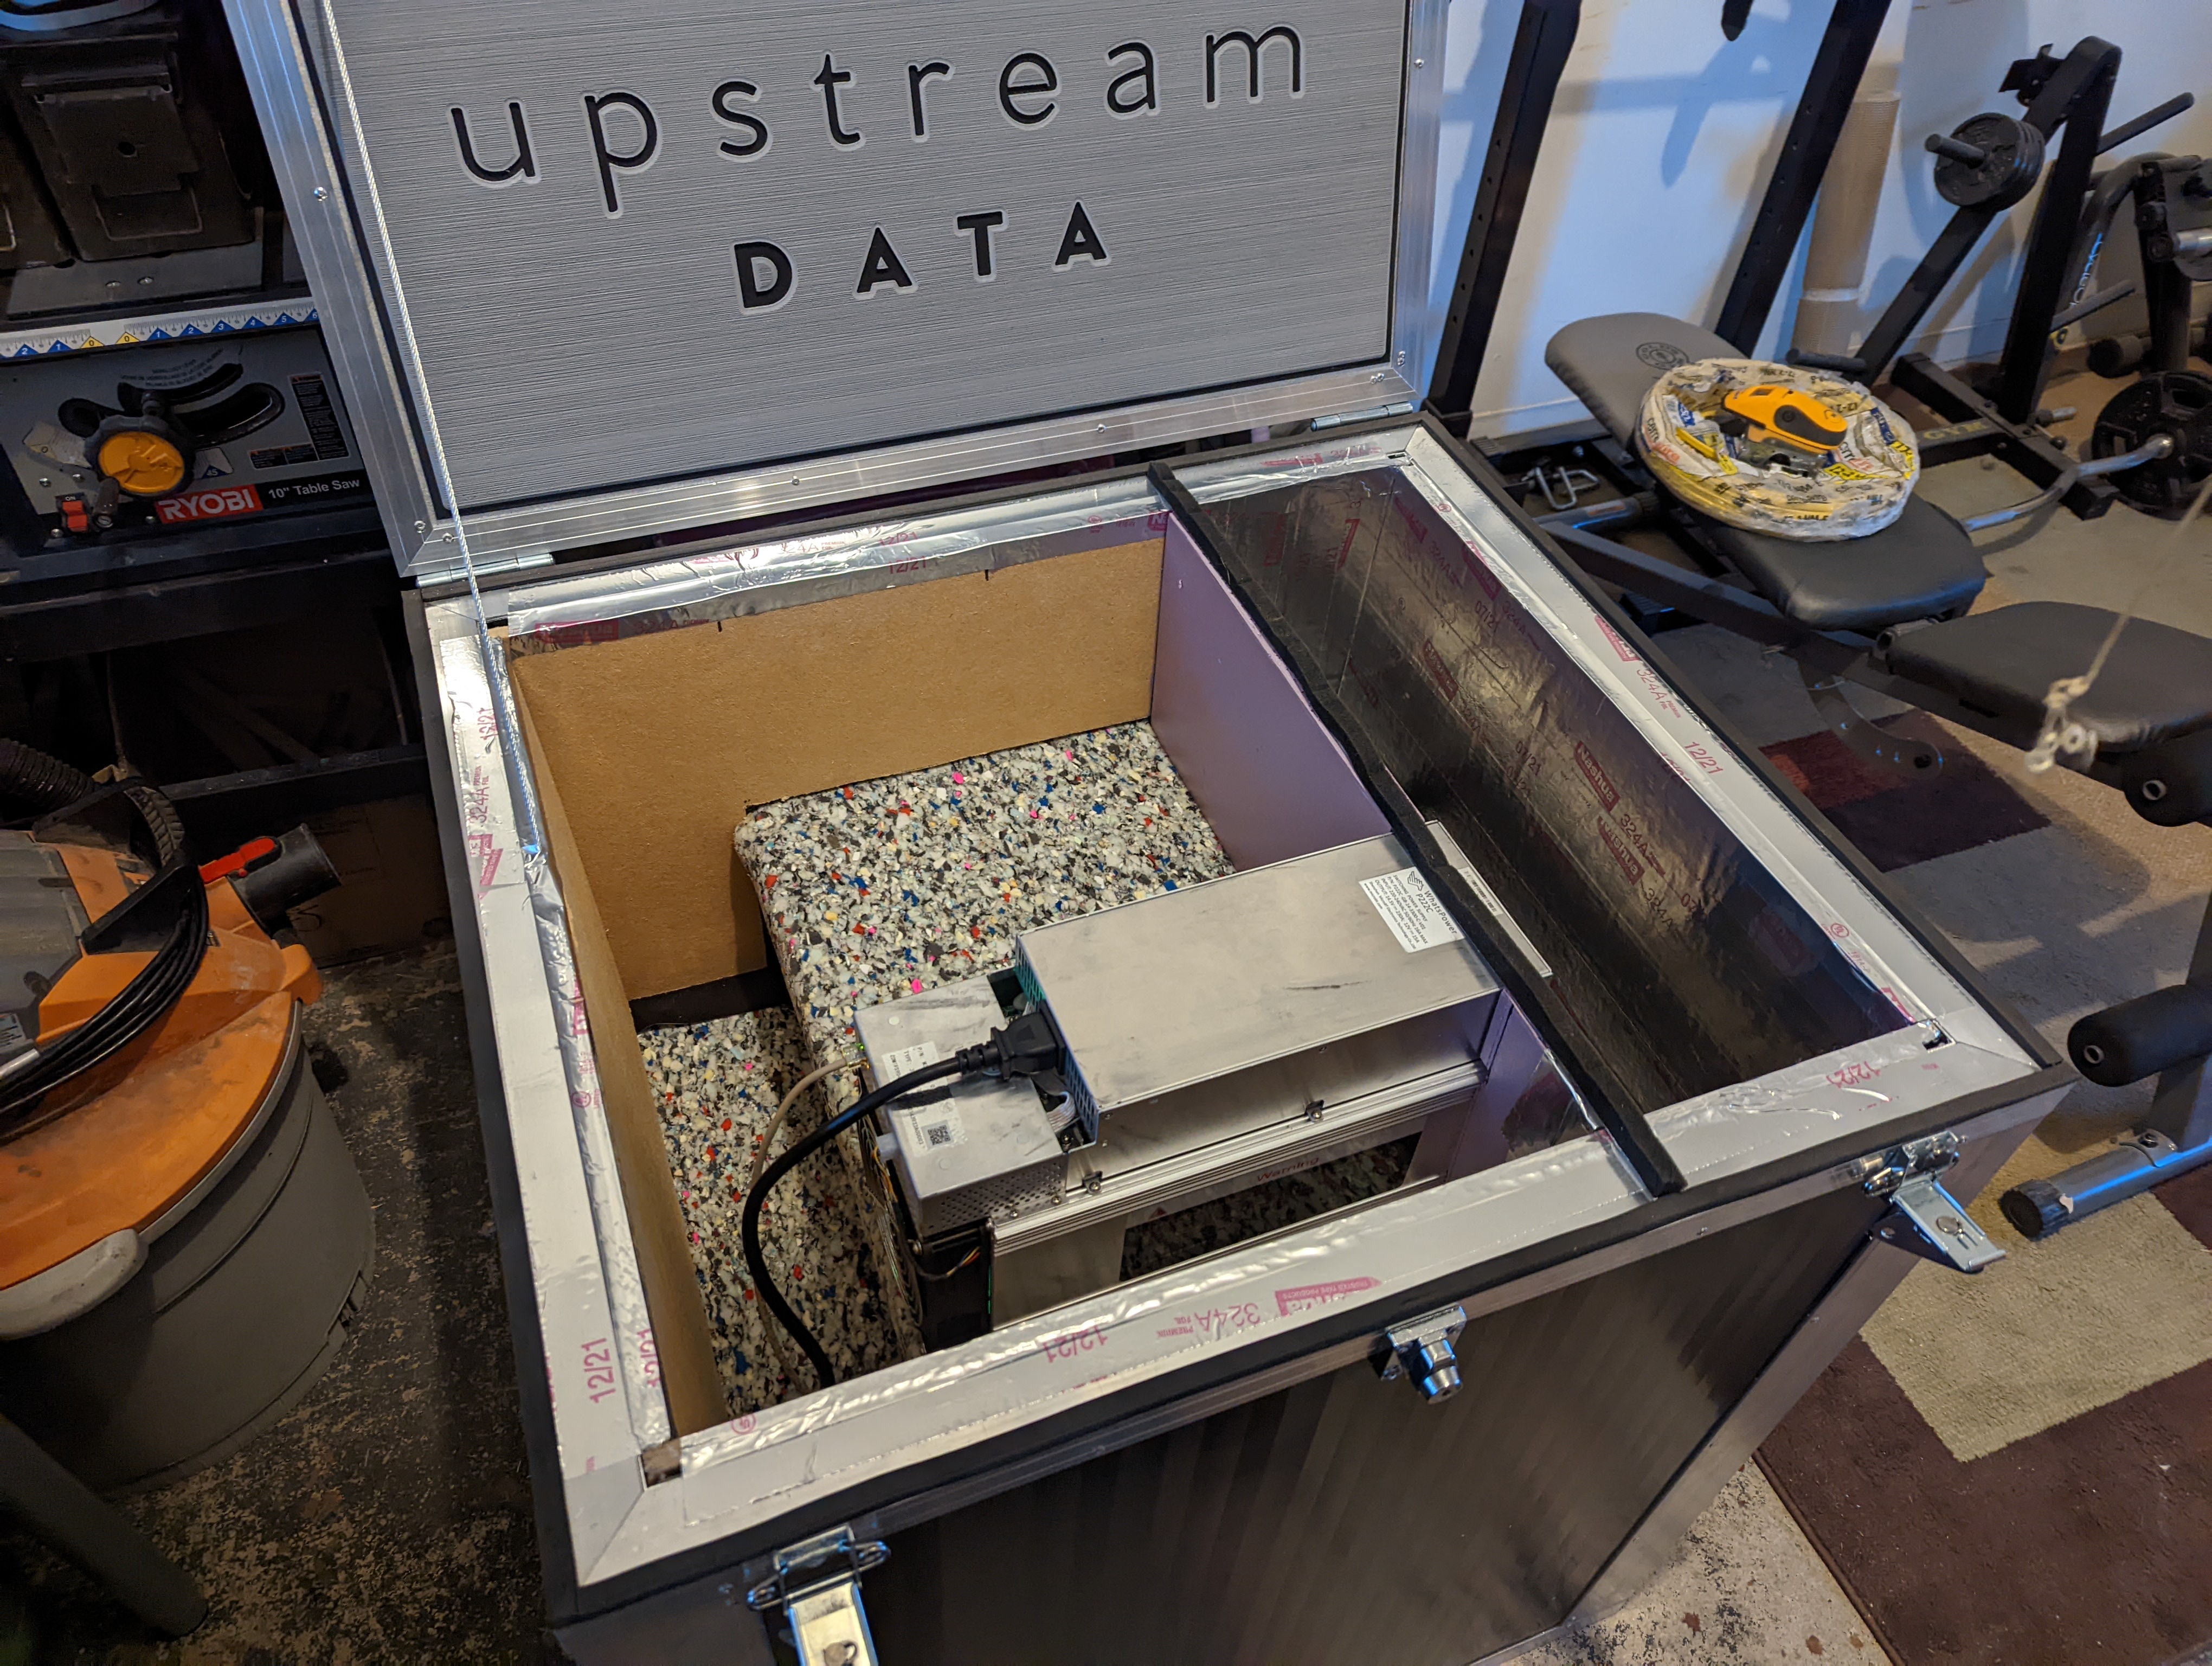
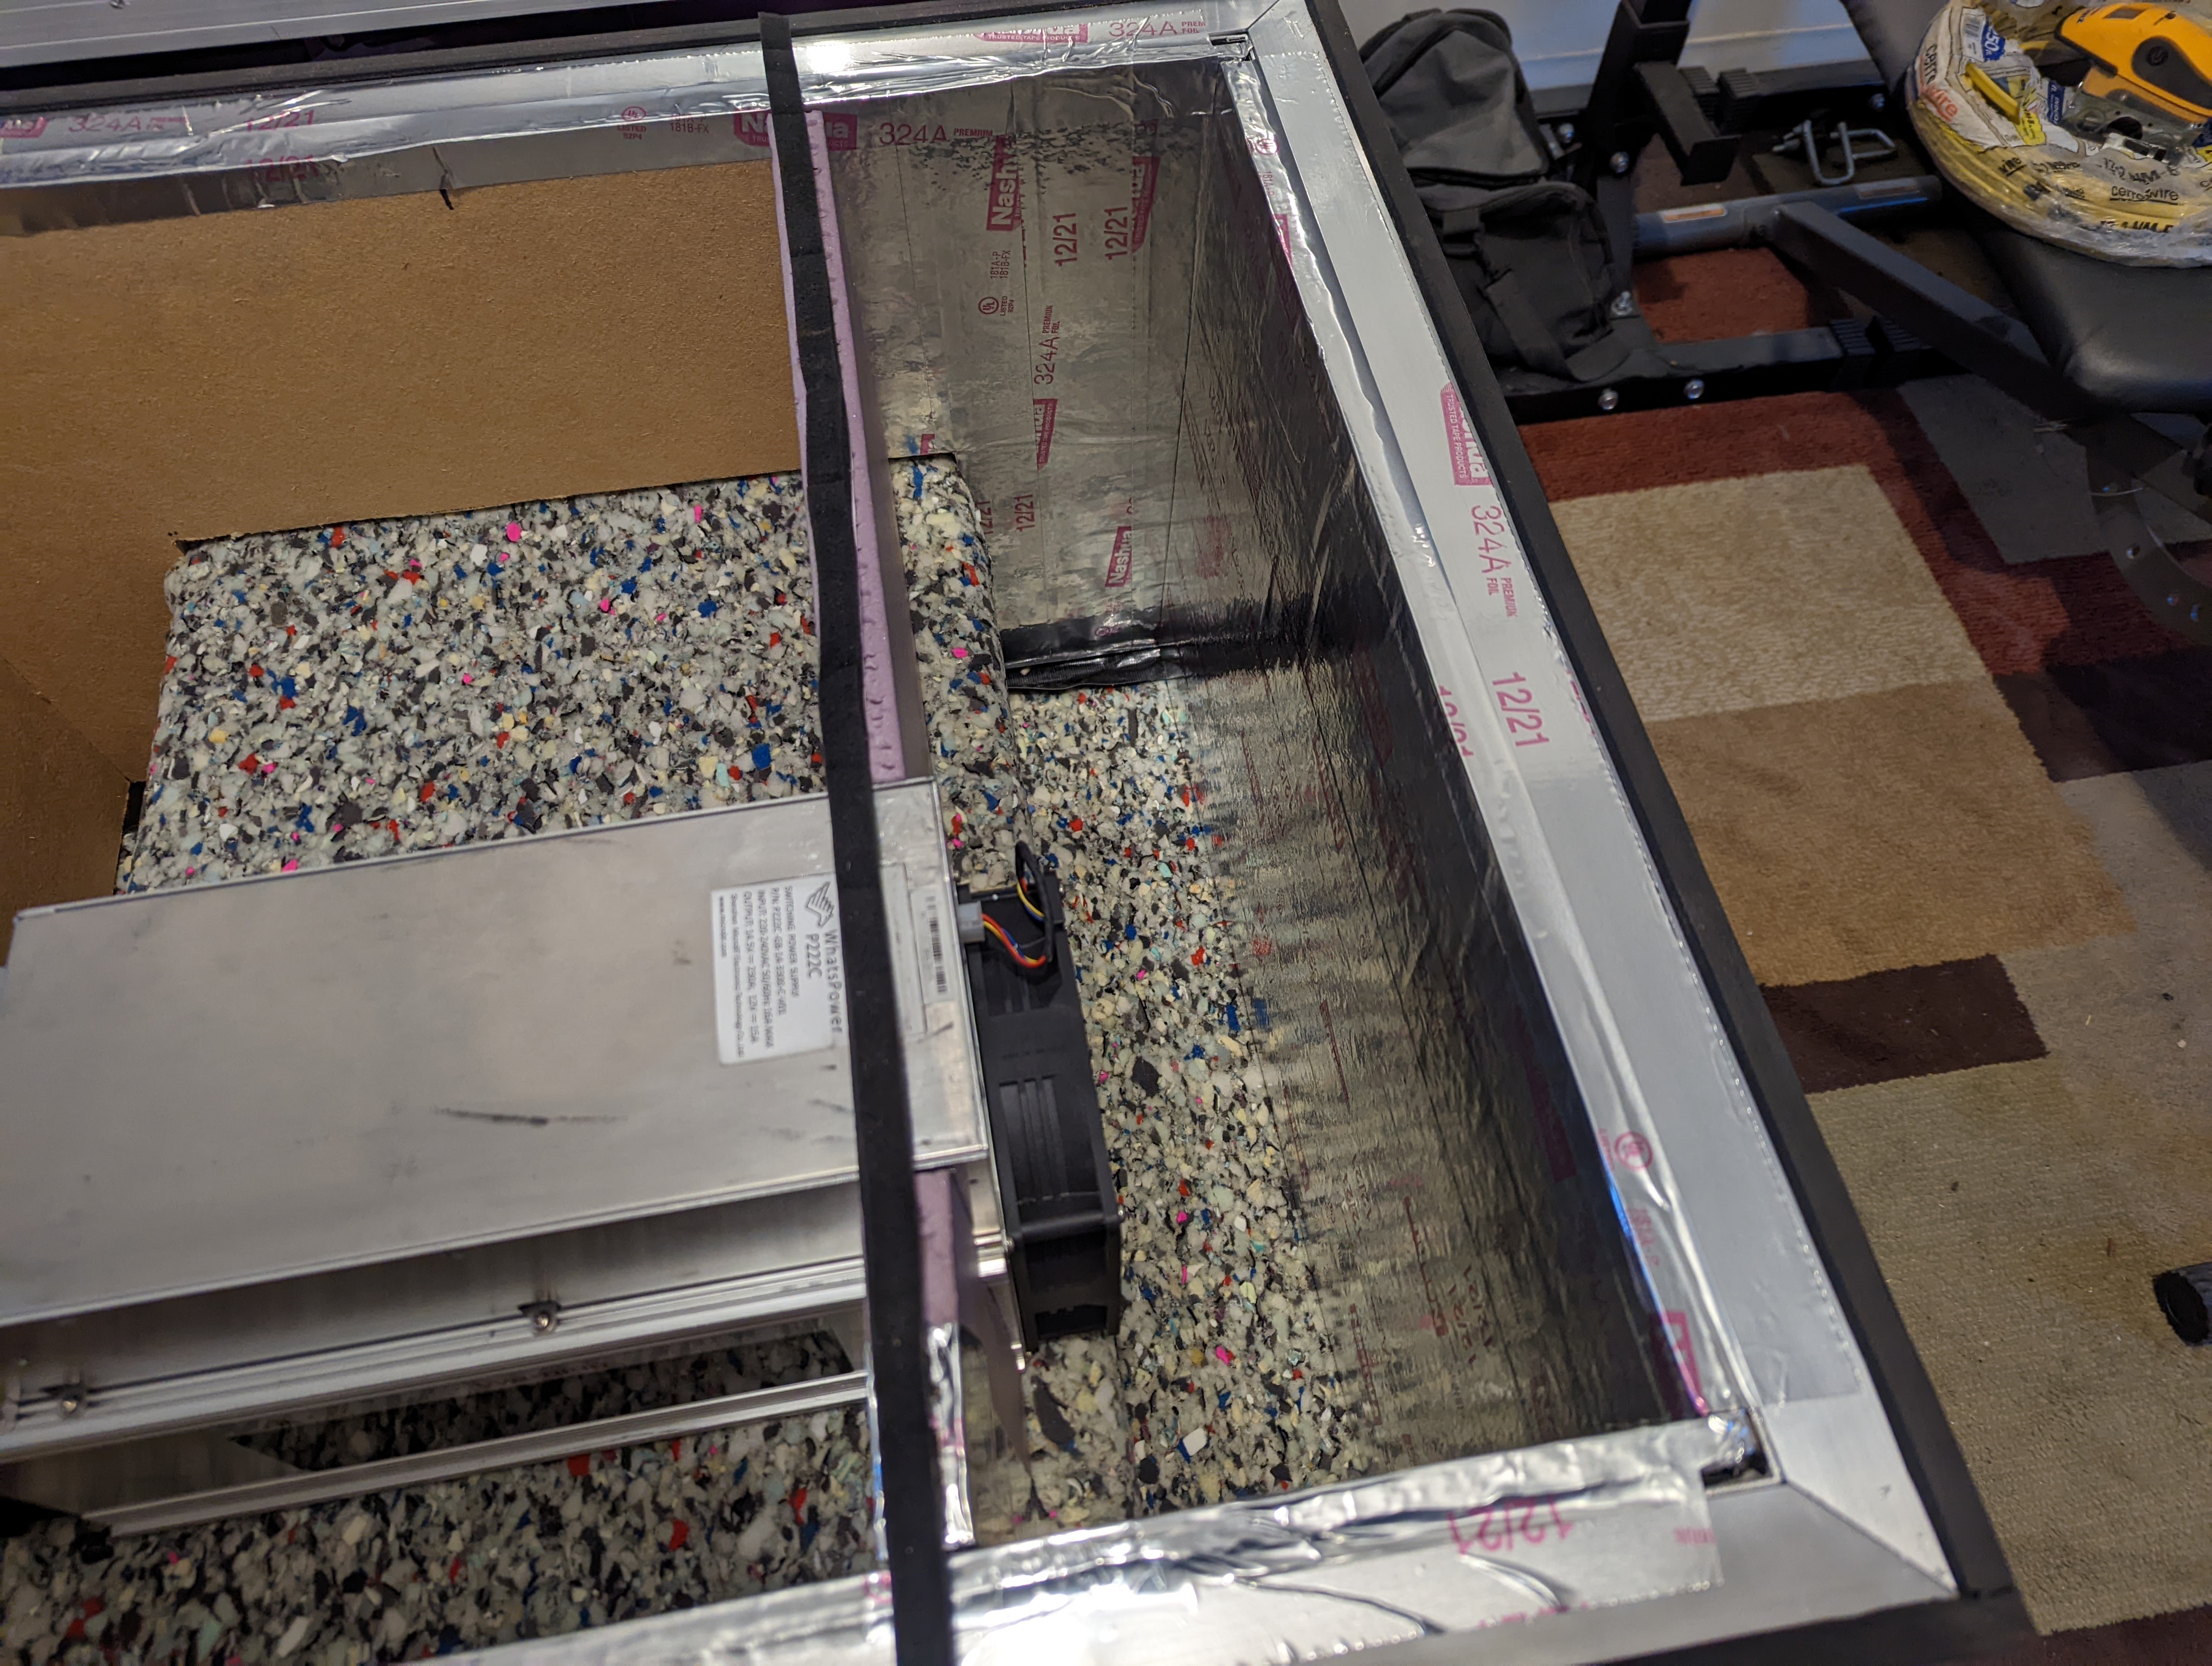
The first material used in this demonstration was carpet padding. Something similar to this product. The profile of the air path way inside the BlackBox was cut out from a piece of the carpet padding so that it could fit on two of the inside walls.
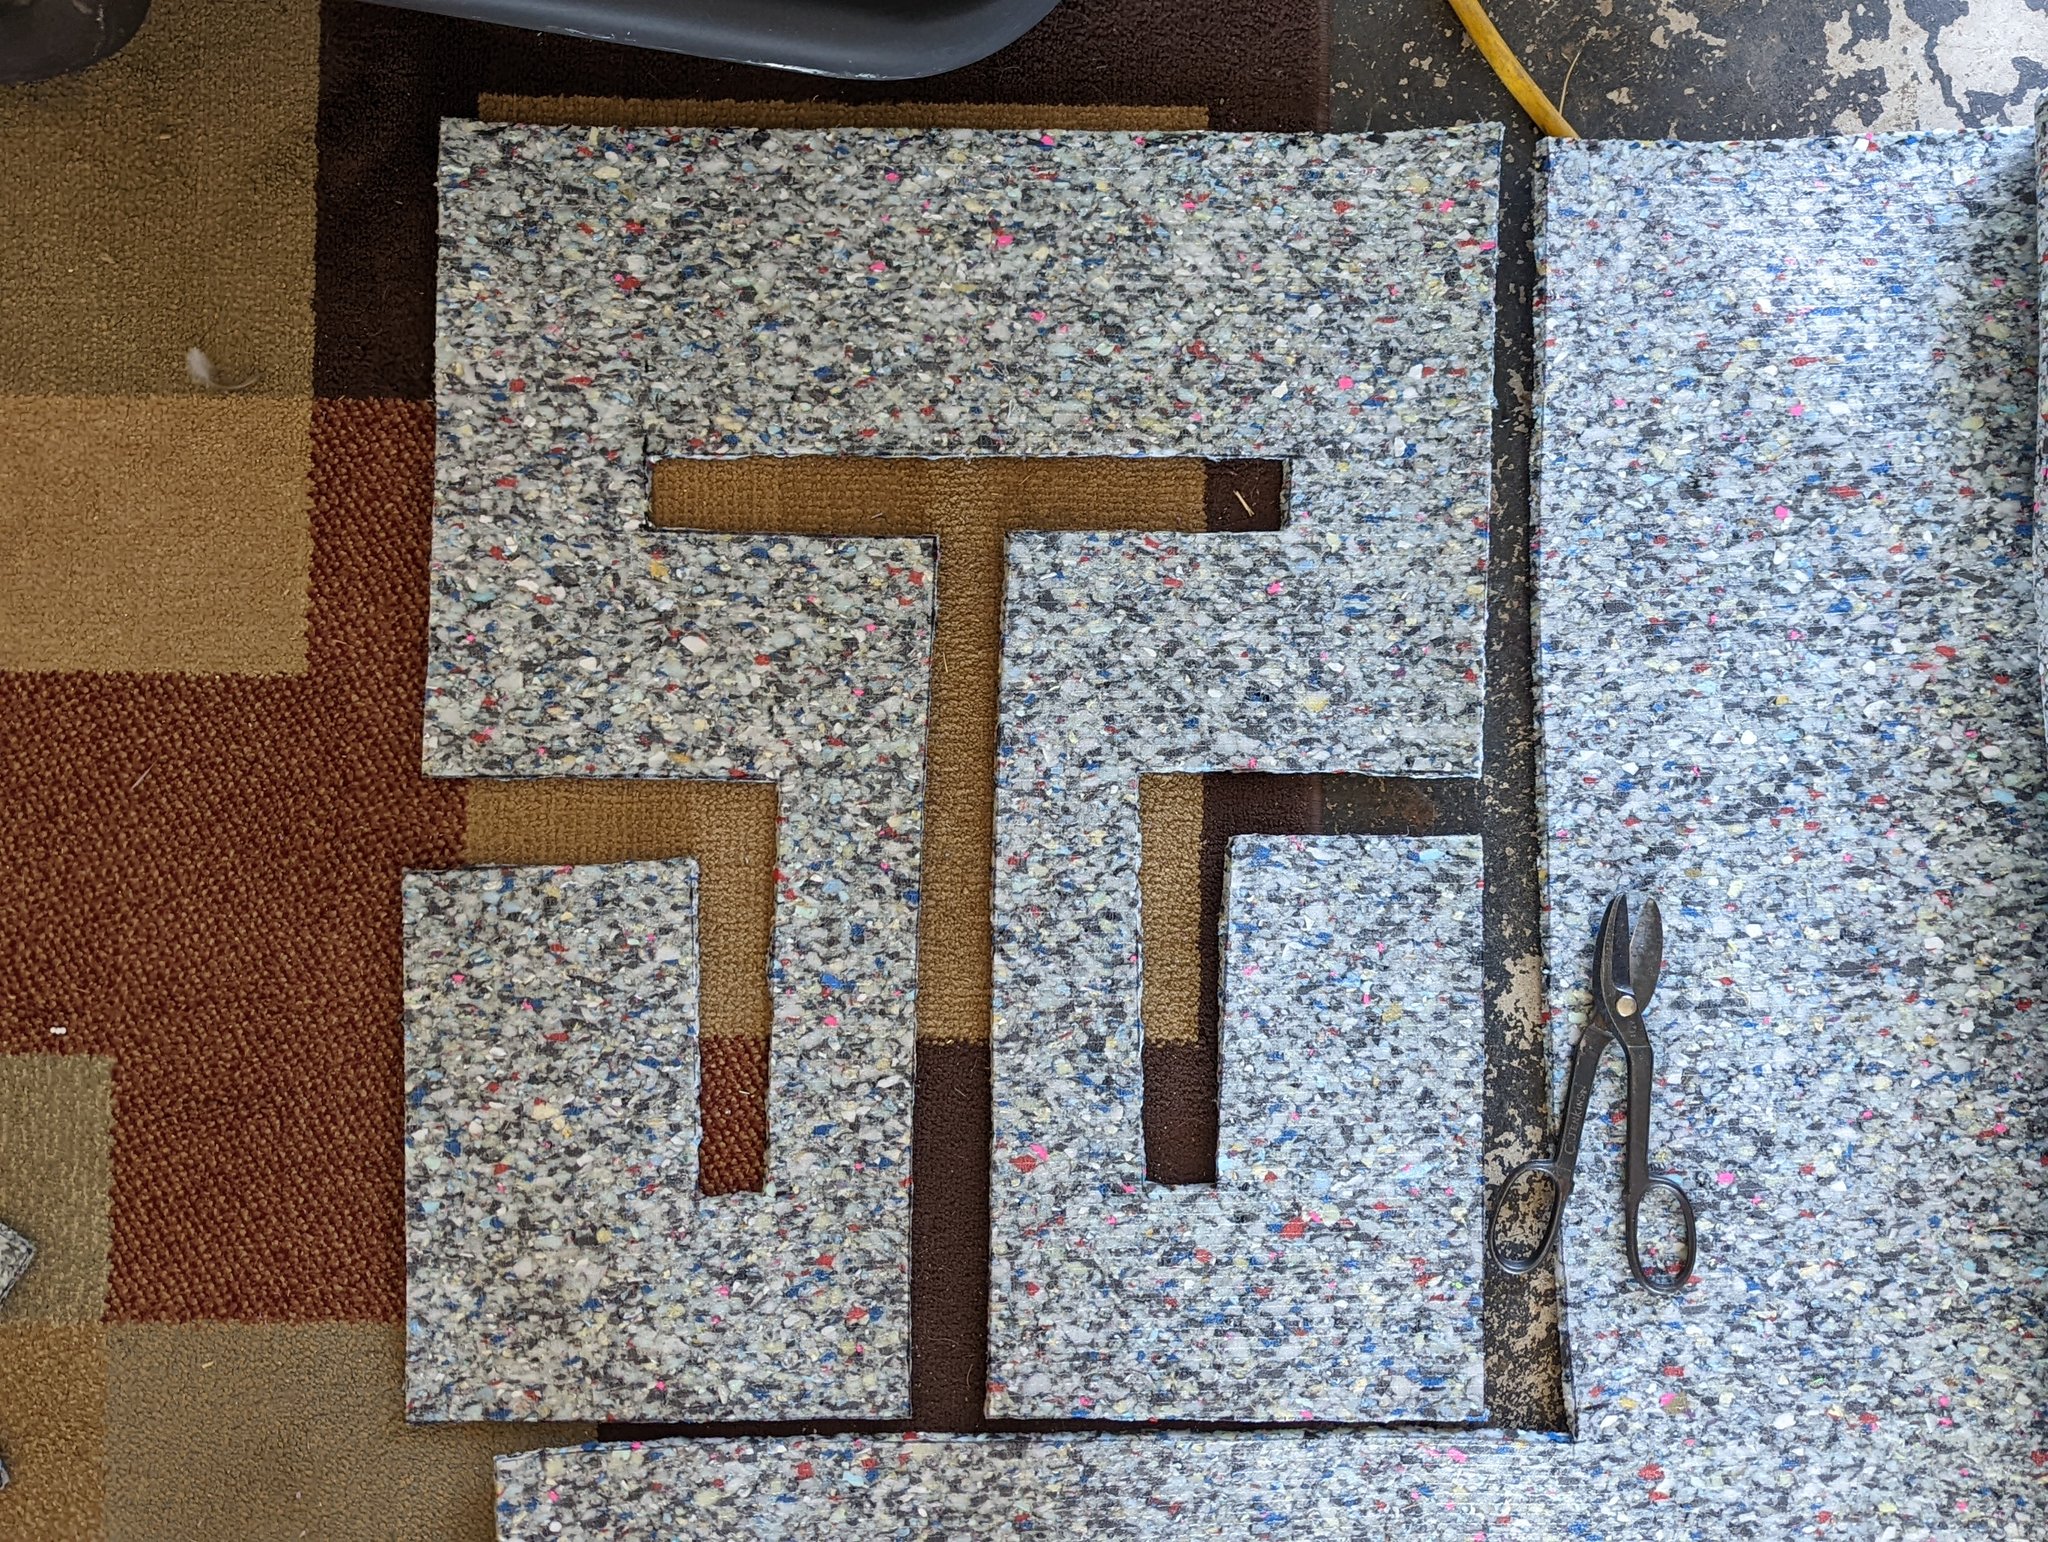
Then additional pieces were cut out and wrapped around the "T" section in the middle and also applied to the other two remaining walls. Carpet padding was also added to the lower sections. You'll notice in this photo that there is a vent register in the "T" section in the middle. This is how you can choose to allow hot air to circulate back to the intake side to help with intake air that is too humid and/or too cold.
Then the miner and pressure barrier were put back in place. The carpet padding got the noise level down an additional ~5dB.
In an effort to get the noise level down even further, a sound board material was used to add an additional layer on top of the carpet padding. After some time, the duct tape was no longer doing a good job holding down the carpet padding on the exhaust side.
The basic idea was to just cover the surfaces on the four walls in the upper section of the BlackBox. Two pieces were cut out to fit over the top of the "T" section.
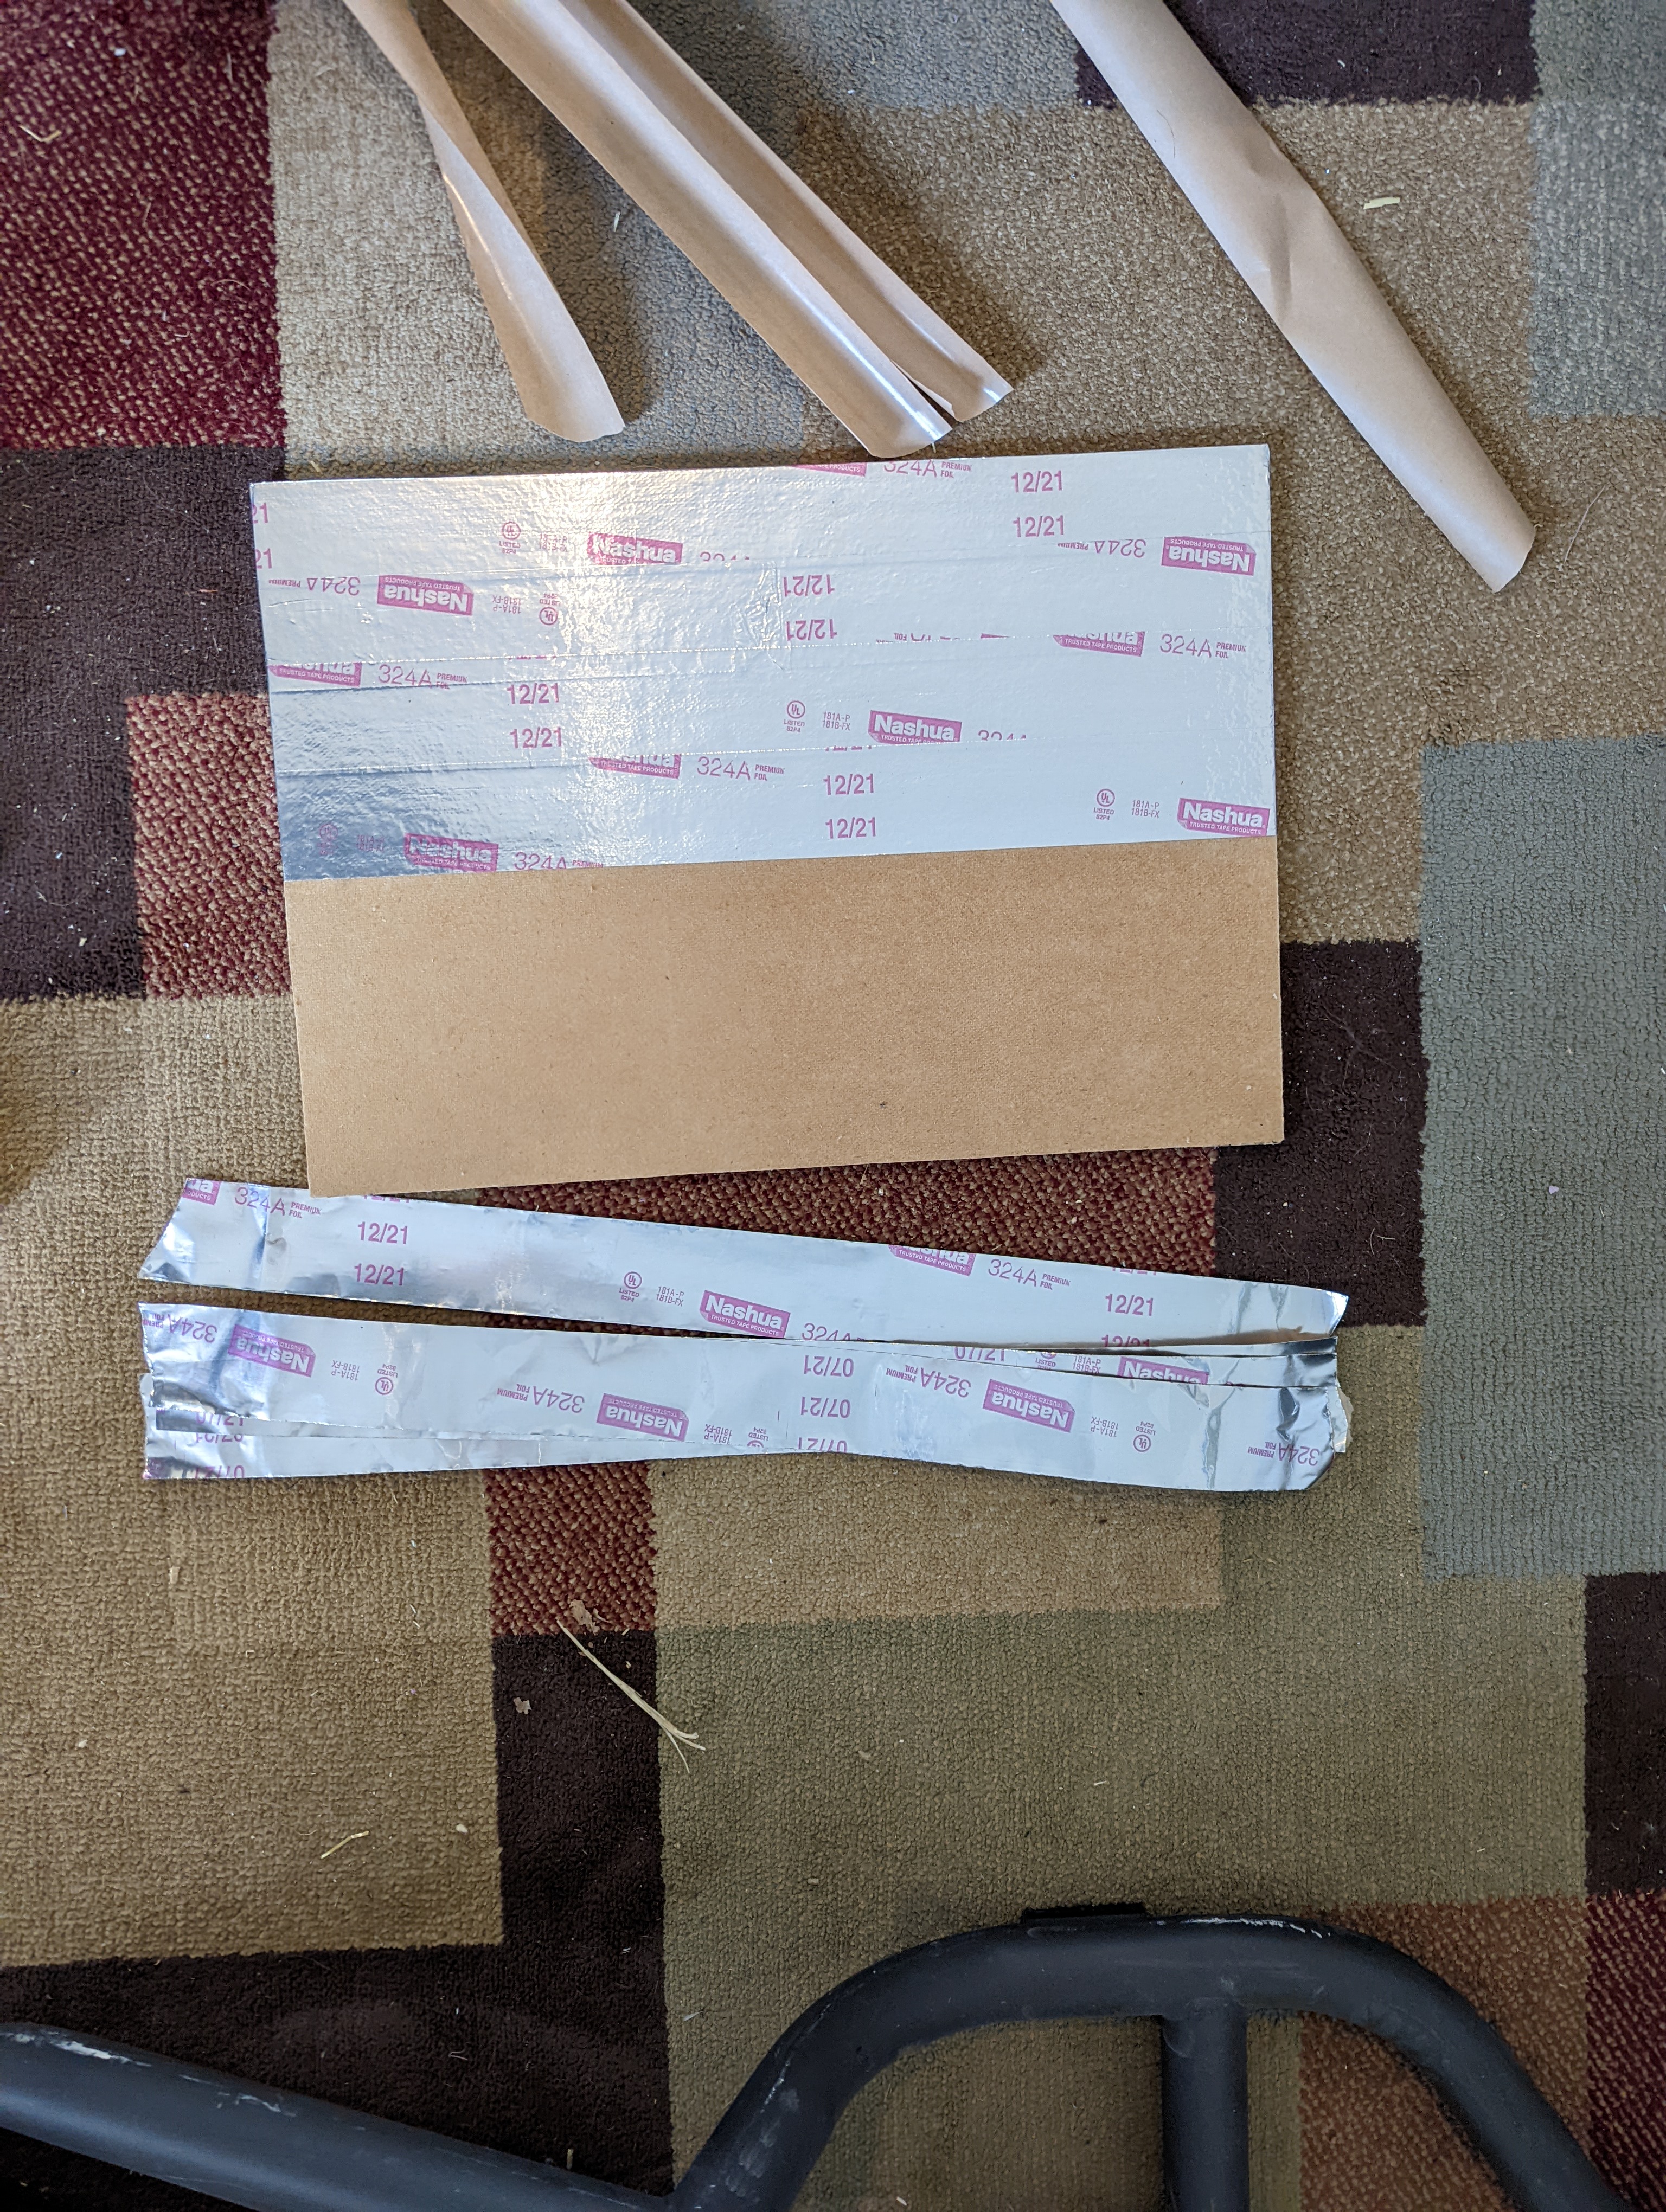
This particular sound board material is flammable. Just for good measure, a layer of foil tape was applied to the sections of board that would be in the hot exhaust path. The foil tape was also used to help secure the four panels against the wall.
Then the miner was placed back in the box, the pressure barrier was trimmed down to account for the added material on the sides of the box, and the sound levels were measured again, there was another ~5dB attenuation.
Now that the sound treatment is satisfactory, the BlackBox is ready to be installed in its permanent location. But first there needs to be a way to connect it to power and Ethernet.
Electrical and Ethernet
Each BlackBox ships with a coupling to run the cables through for the customer to install themselves. There is no way to know which side of the BlackBox the customer is going to need the cables to pass through, so it is better if the customer just drills the hole in the side of the BlackBox with a hole saw where they need it.
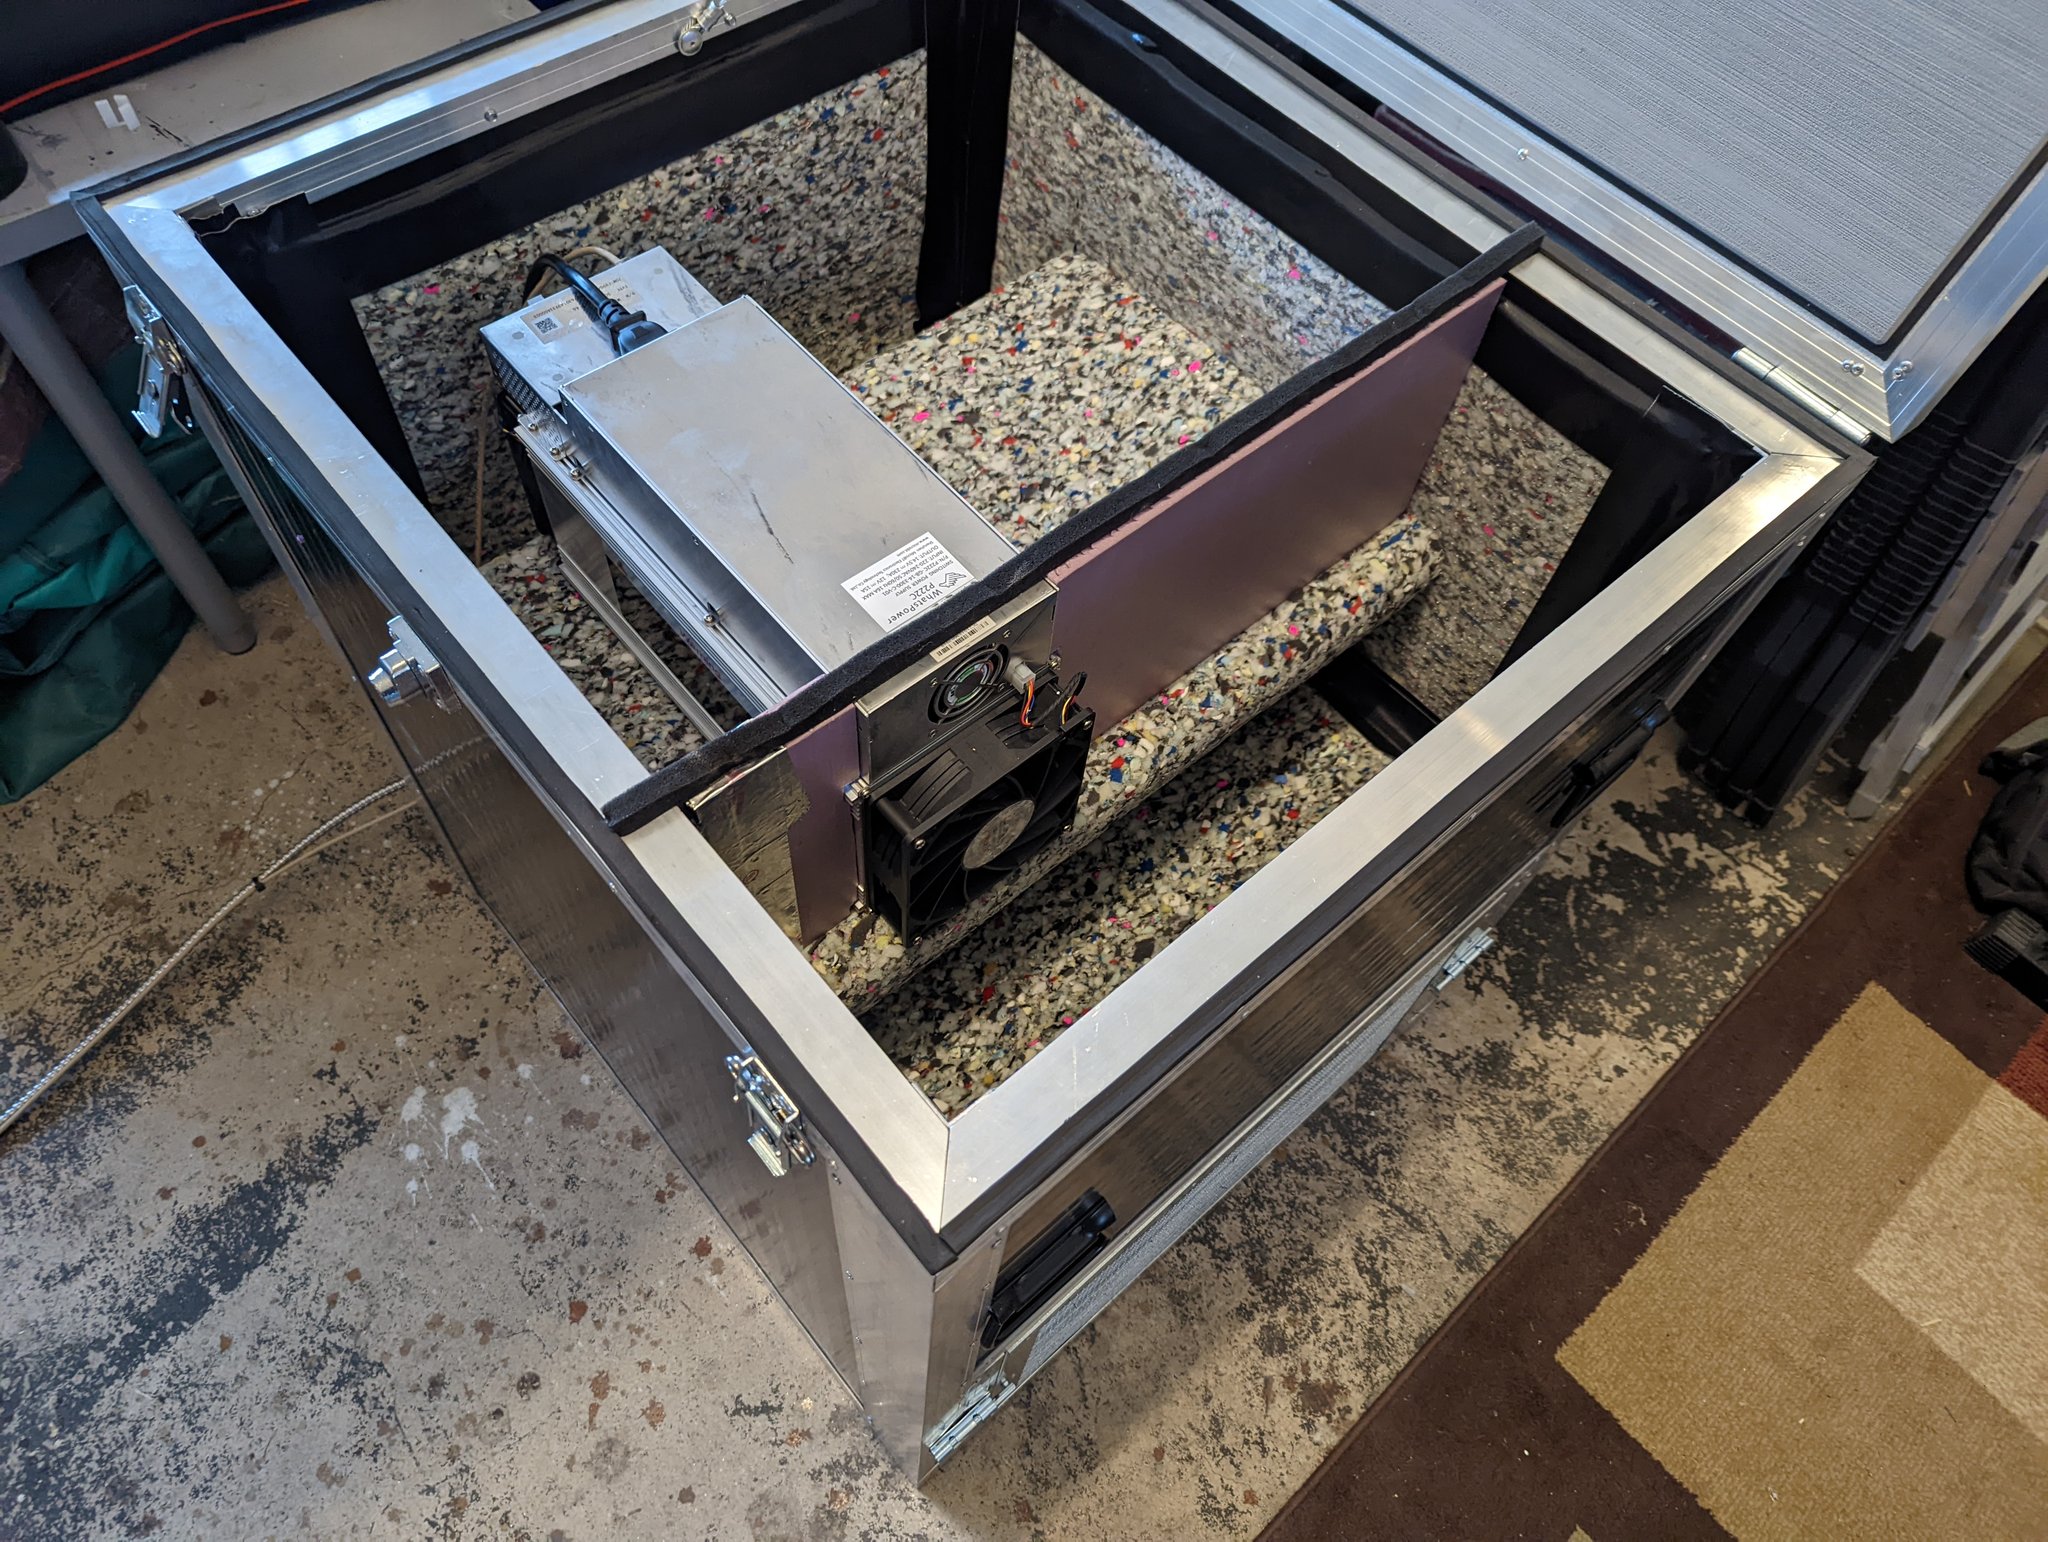
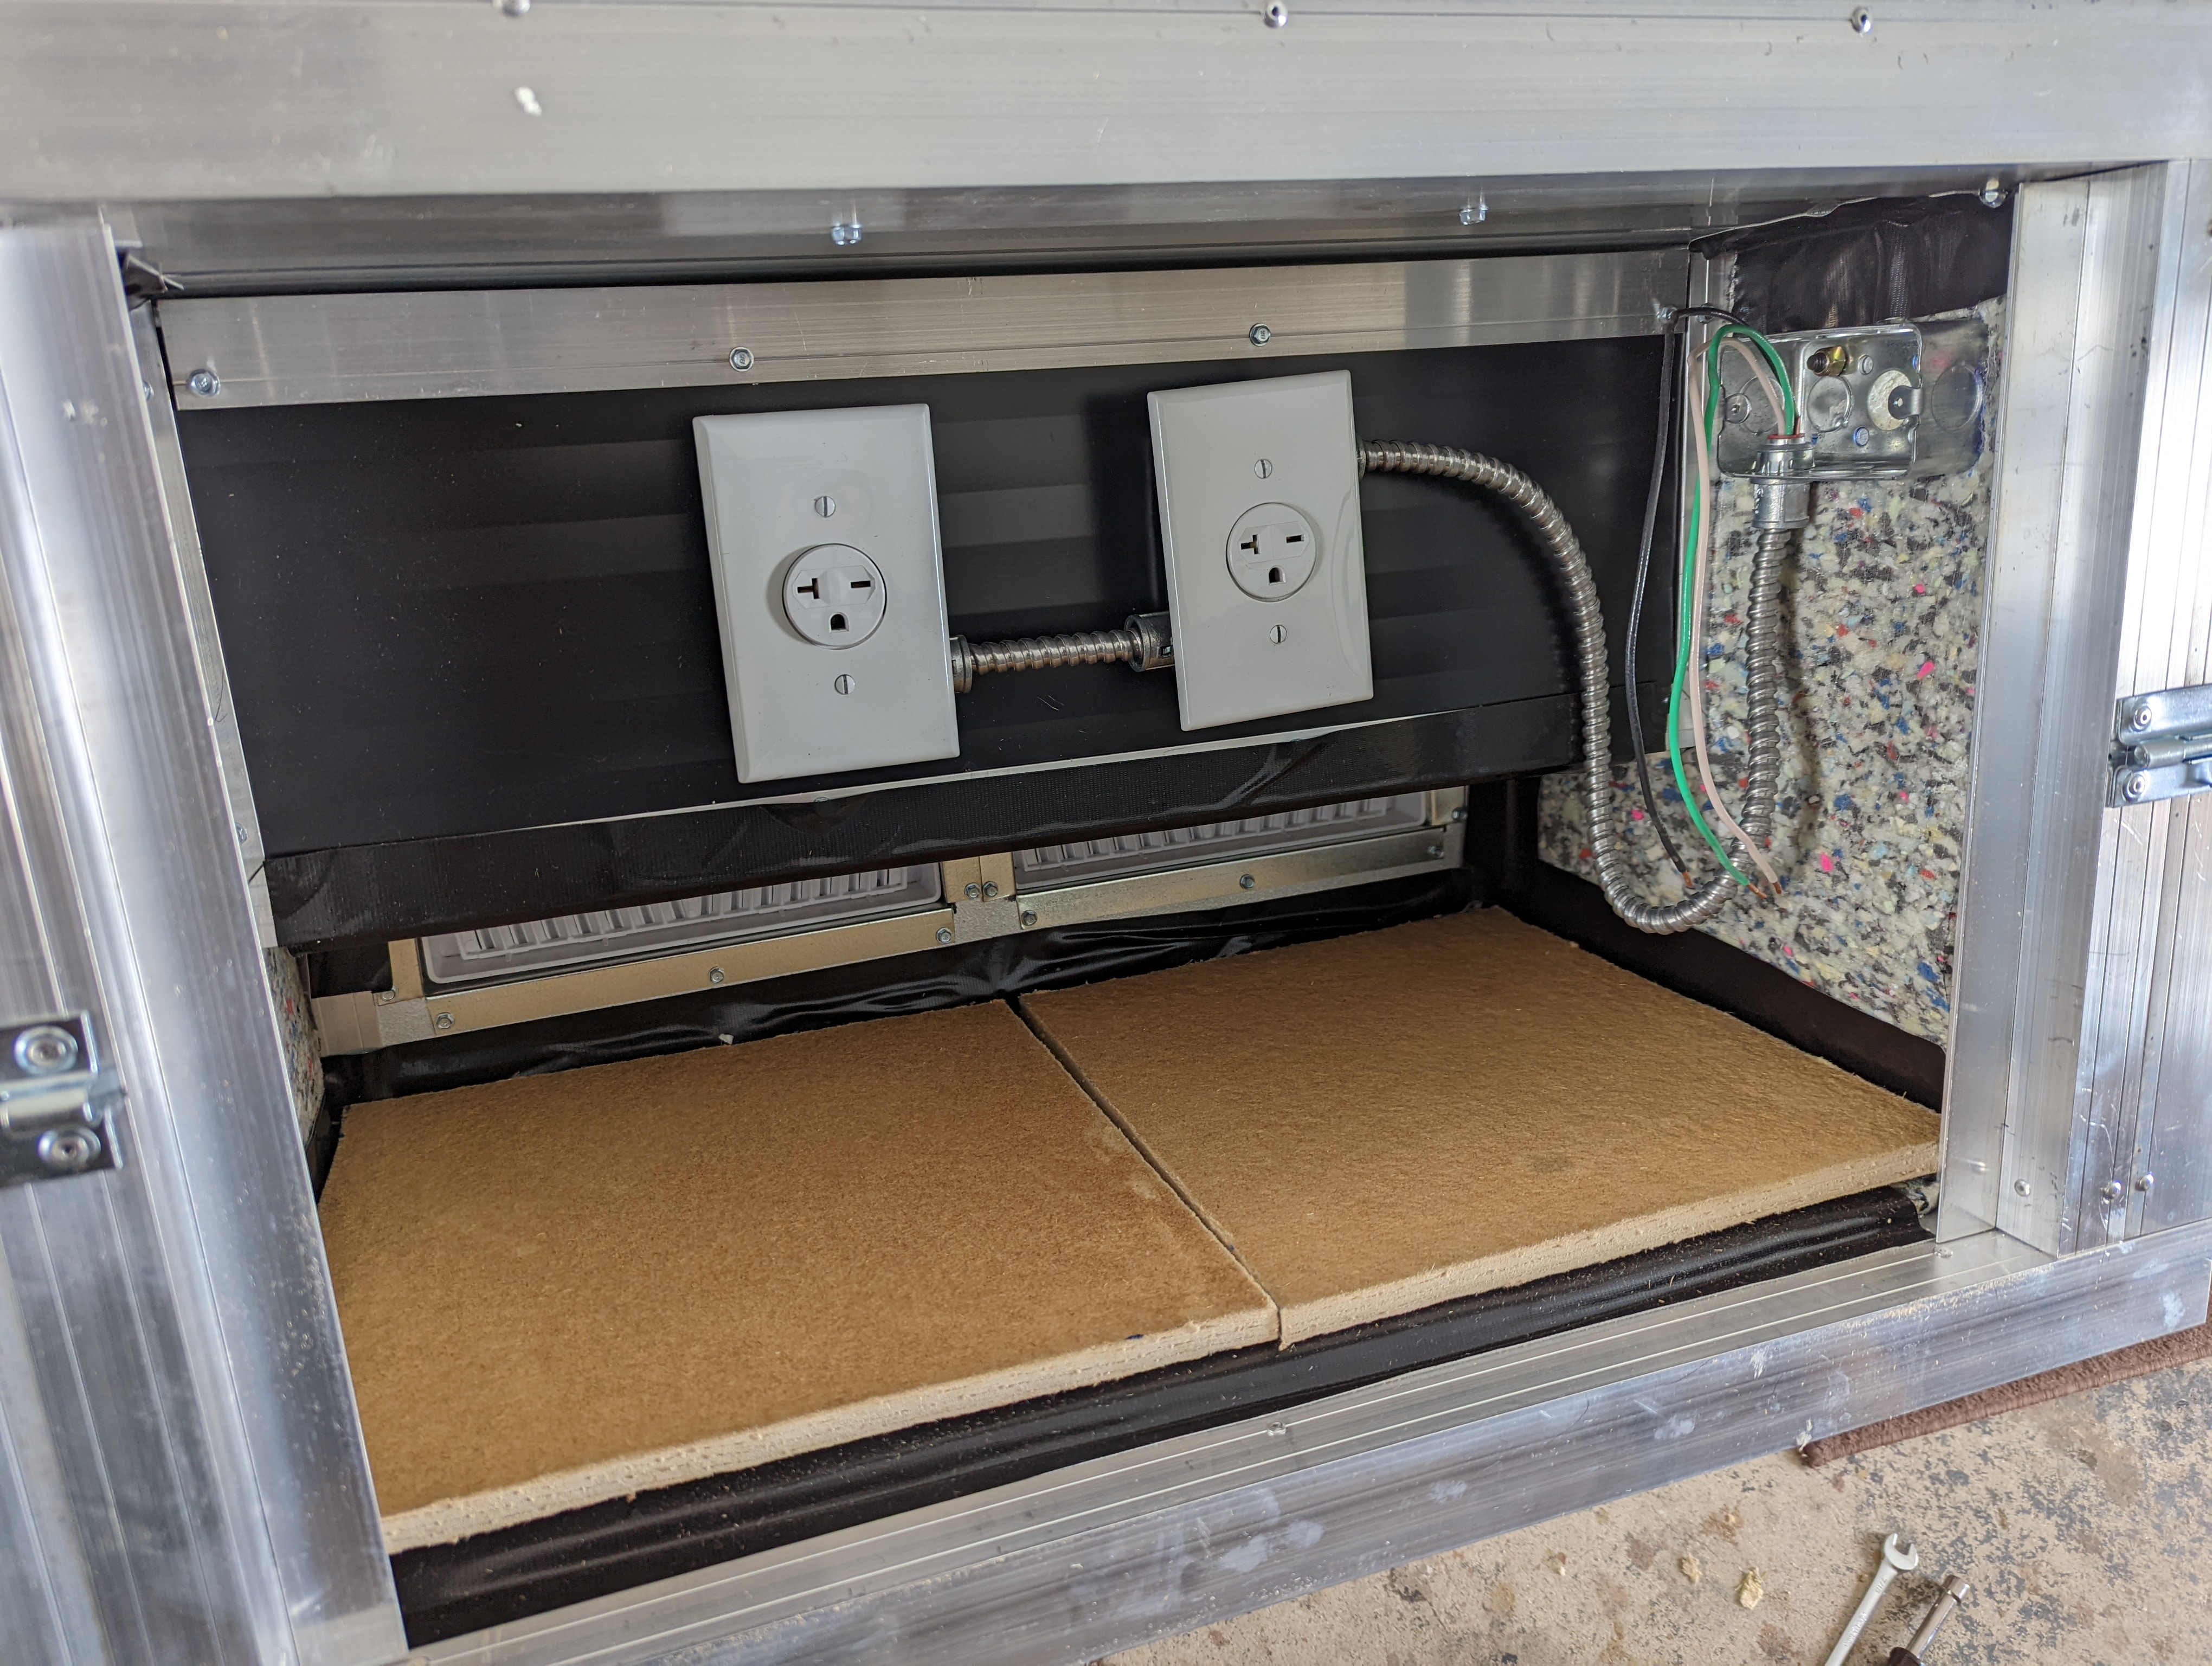
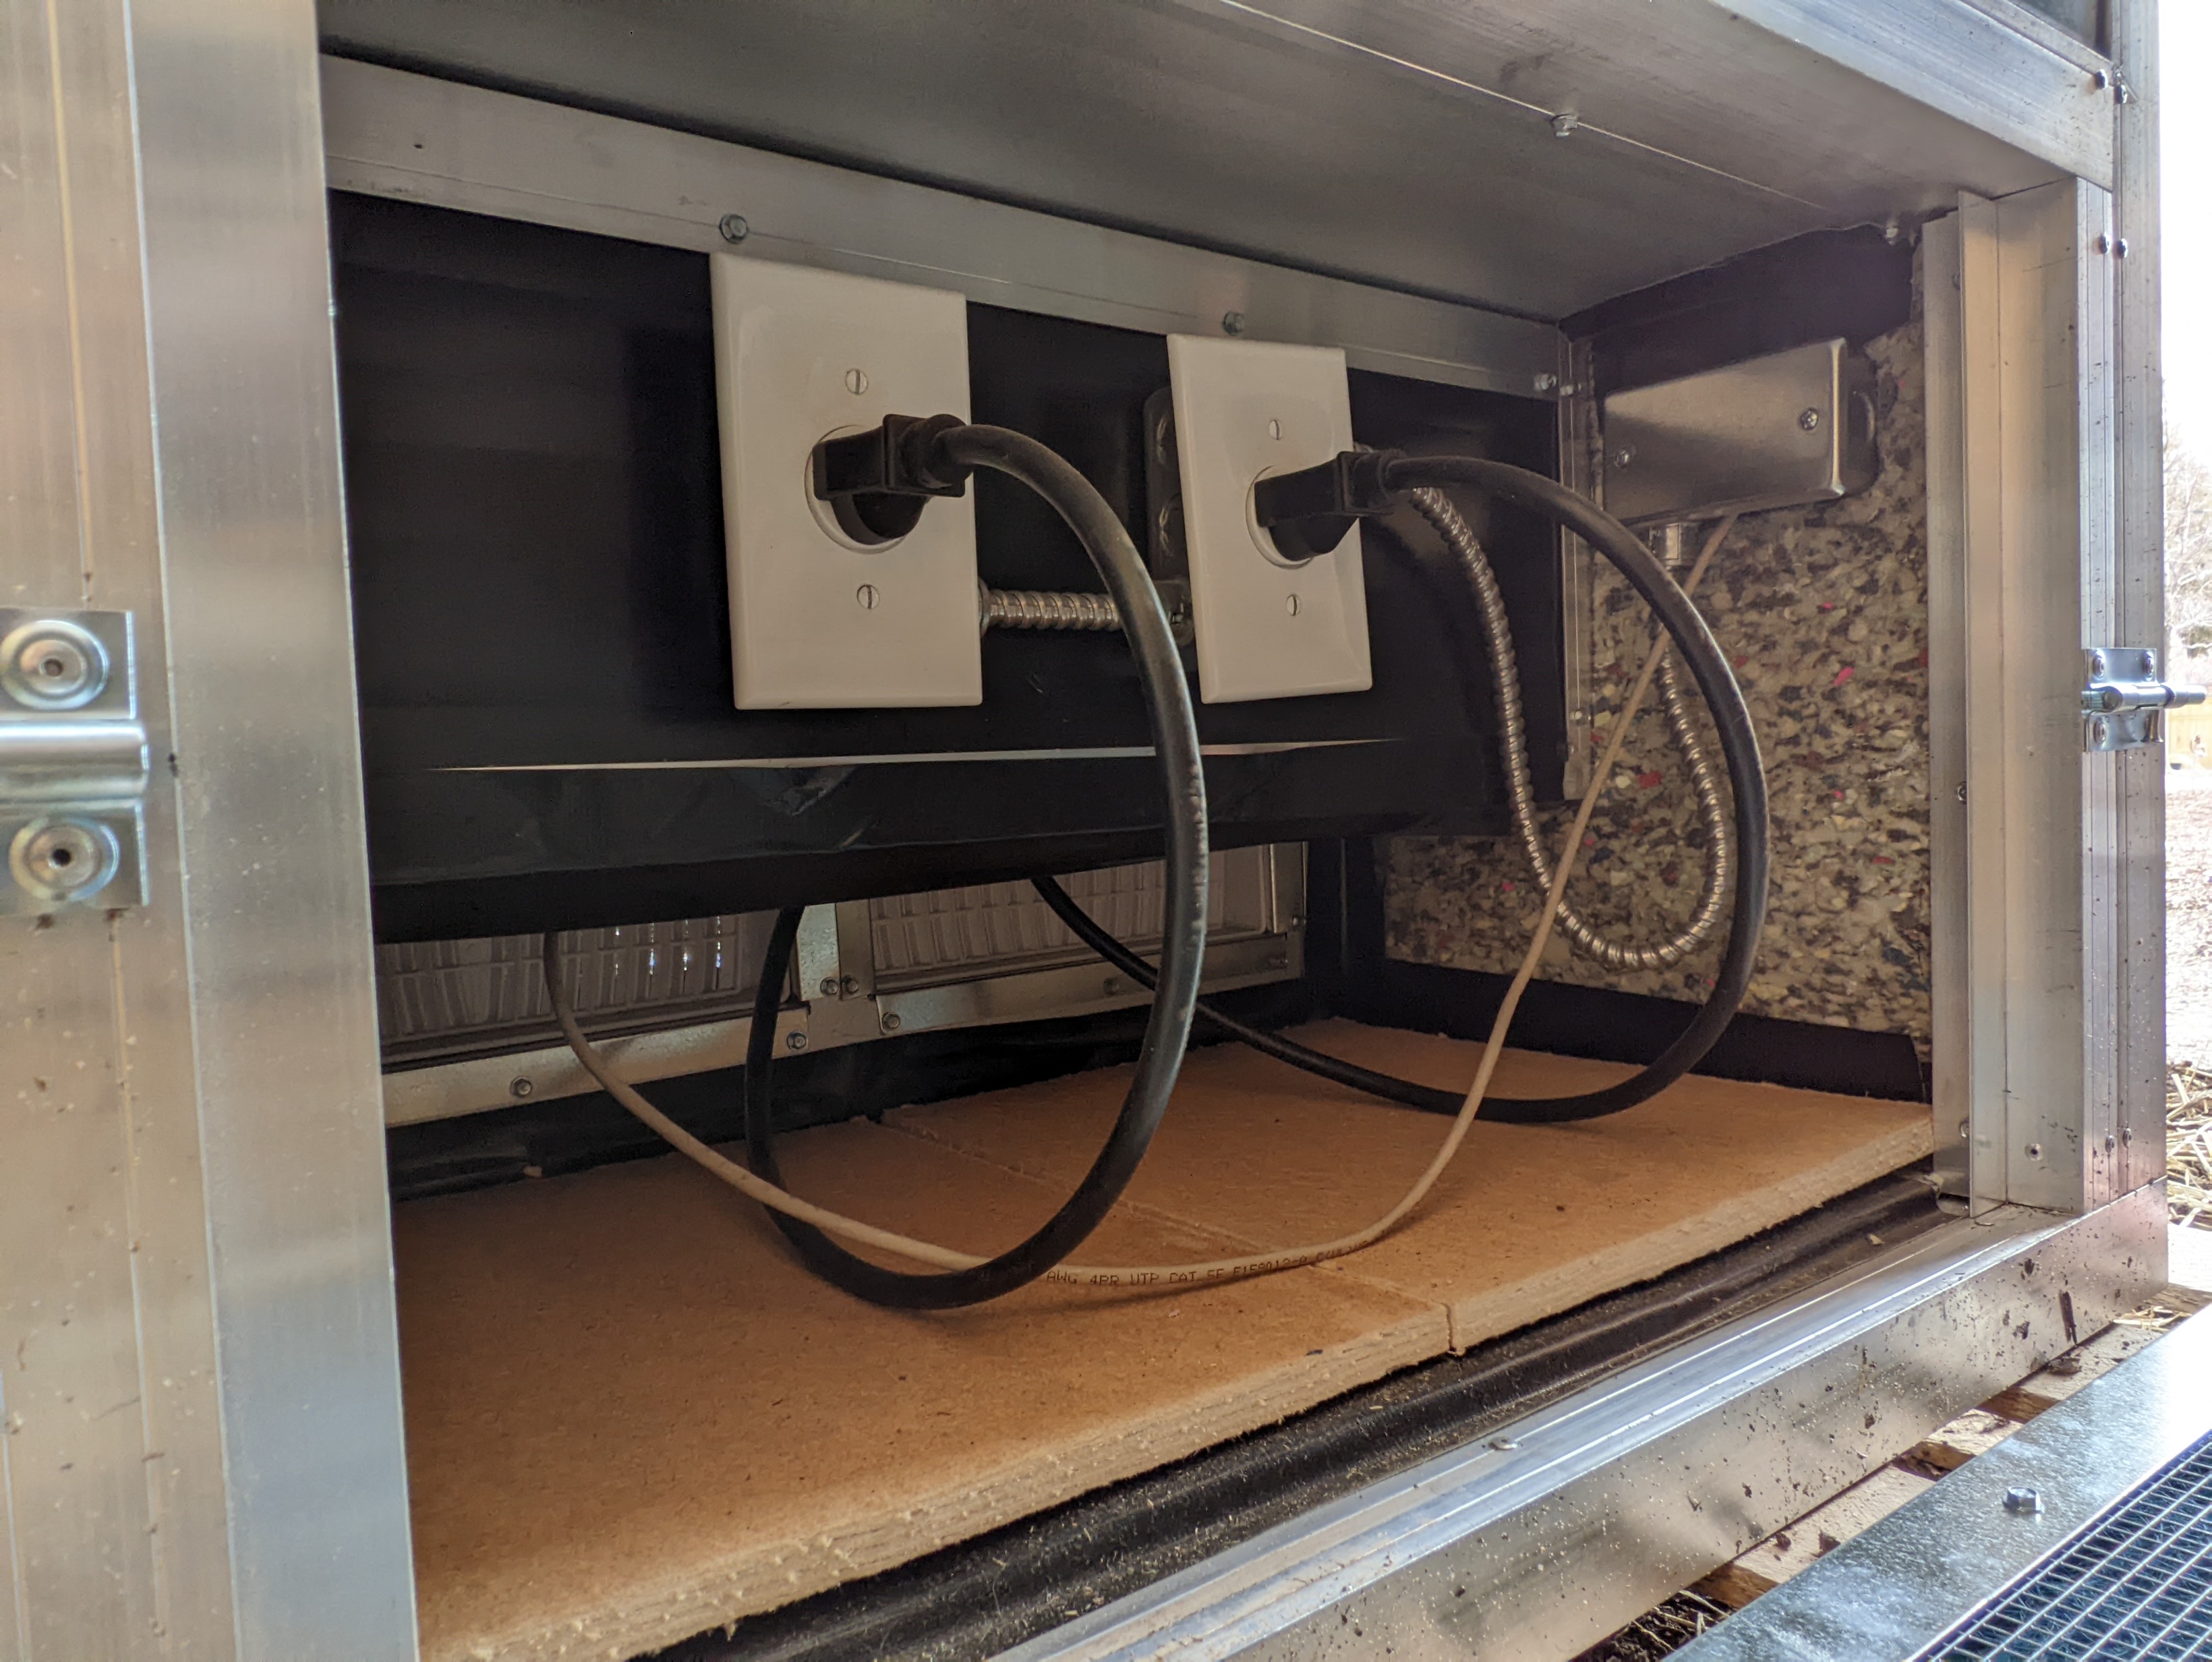
There are many different ways this can be configured. In this demonstration, an Antminer S19j Pro 110Th miner was used for the final install. These miners require two outlets. The outlets were installed inside the BlackBox in this case. Then the power was ran to the box using water-tight conduit. You may not want to install your outlets inside the BlackBox and may prefer to have them installed on a wall near by so that the wiring doesn't have to be un-done in order to move the BlackBox.
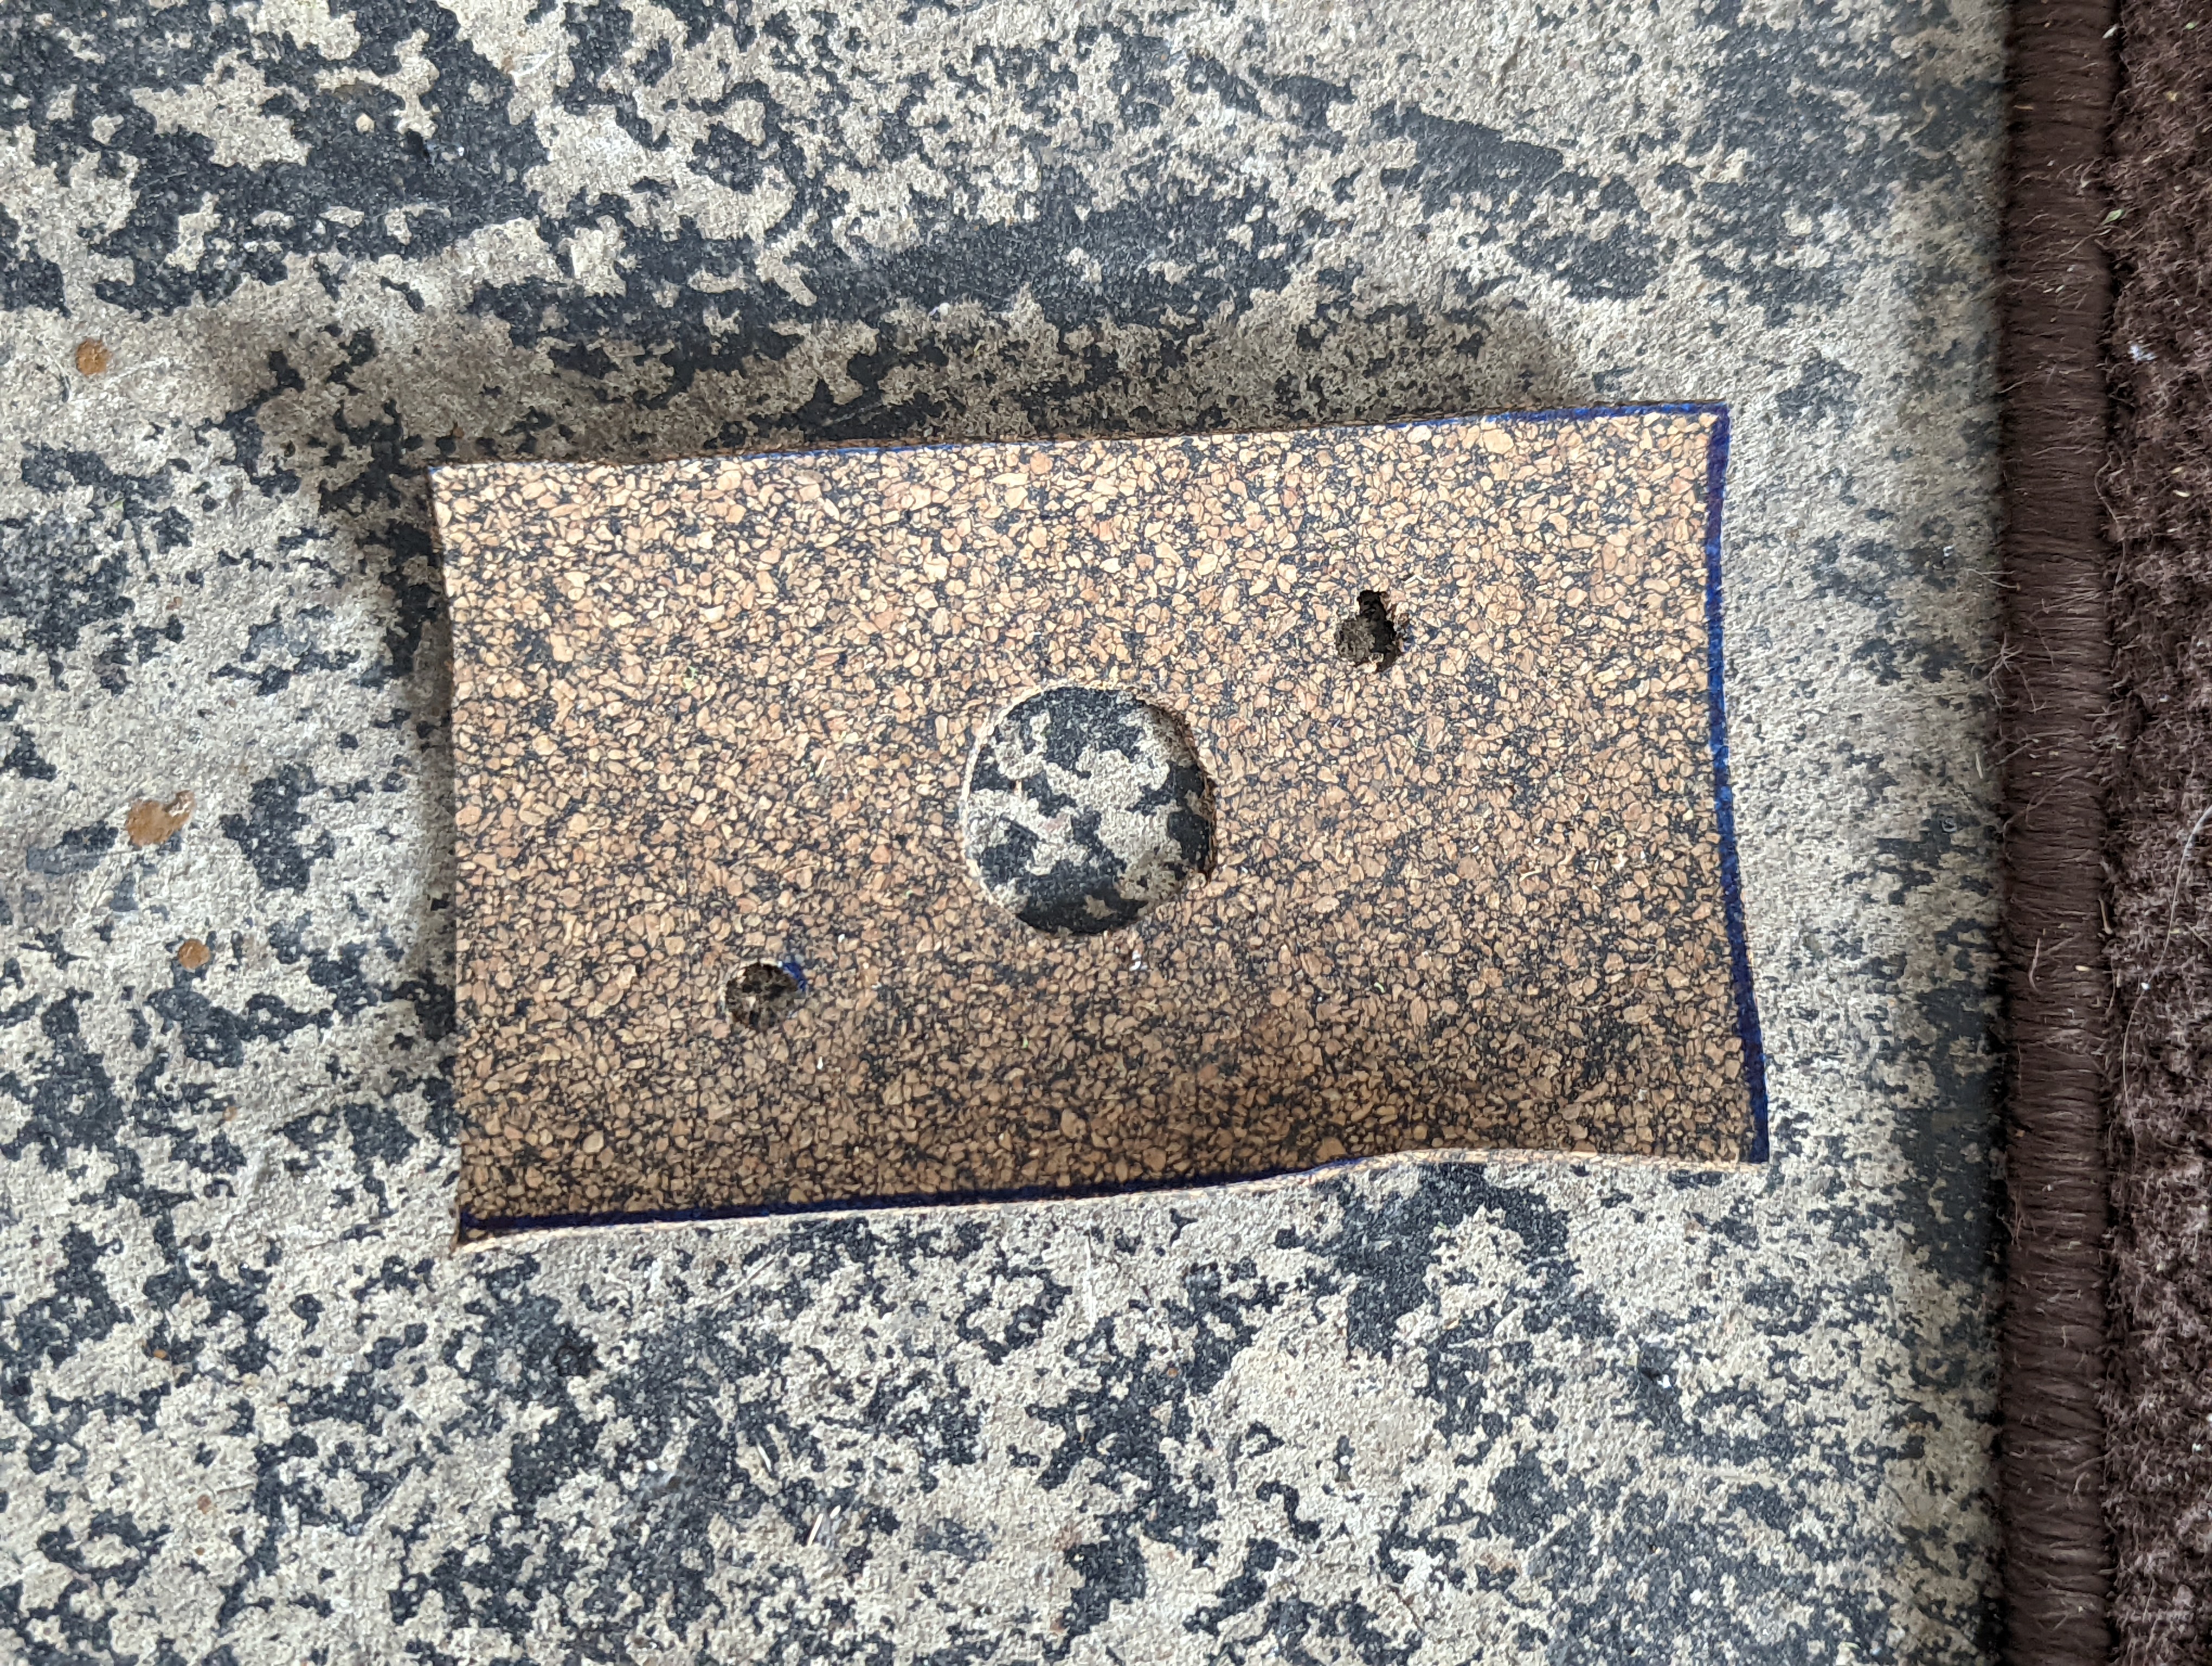
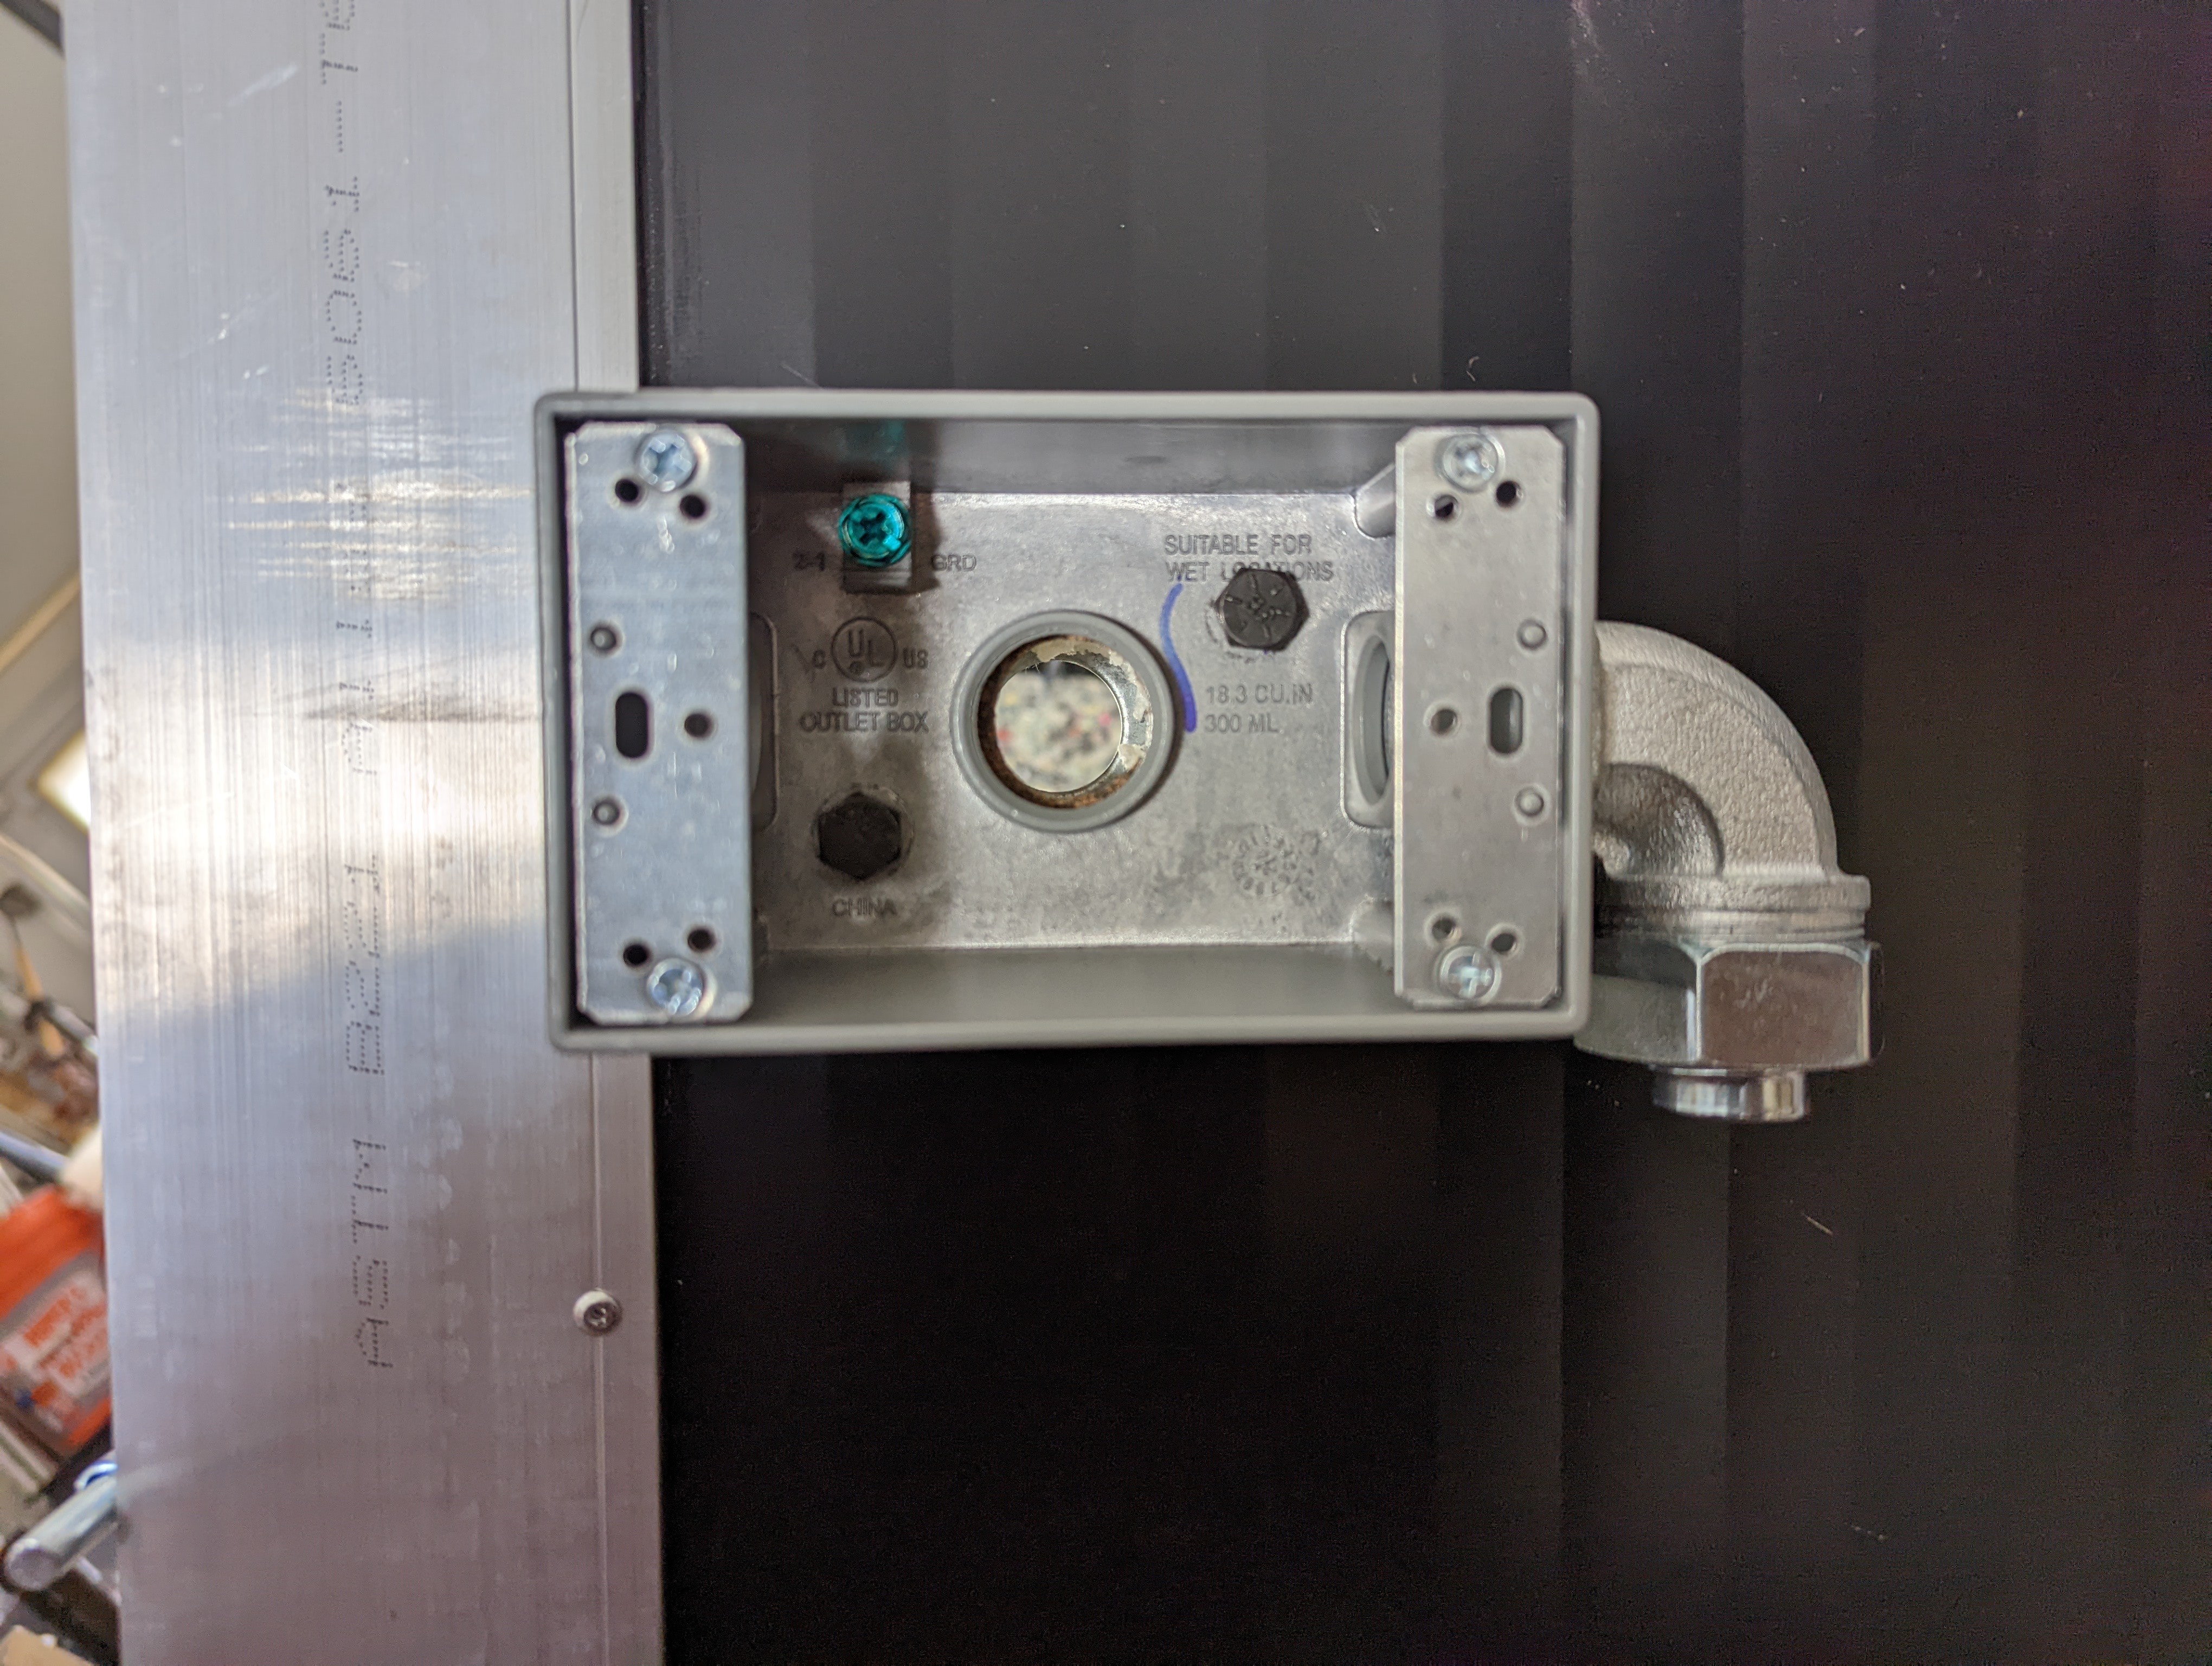
In this demonstration, two additional holes for 1/4" bolts were drilled into a water-tight conduit box. These holes lined up with an in-door conduit box which was mounted on the inside of the BlackBox, directly opposite from the water-tight conduit box. Then a gasket was made using some cork material to go behind the water-tight junction box, on the outside of the BlackBox.
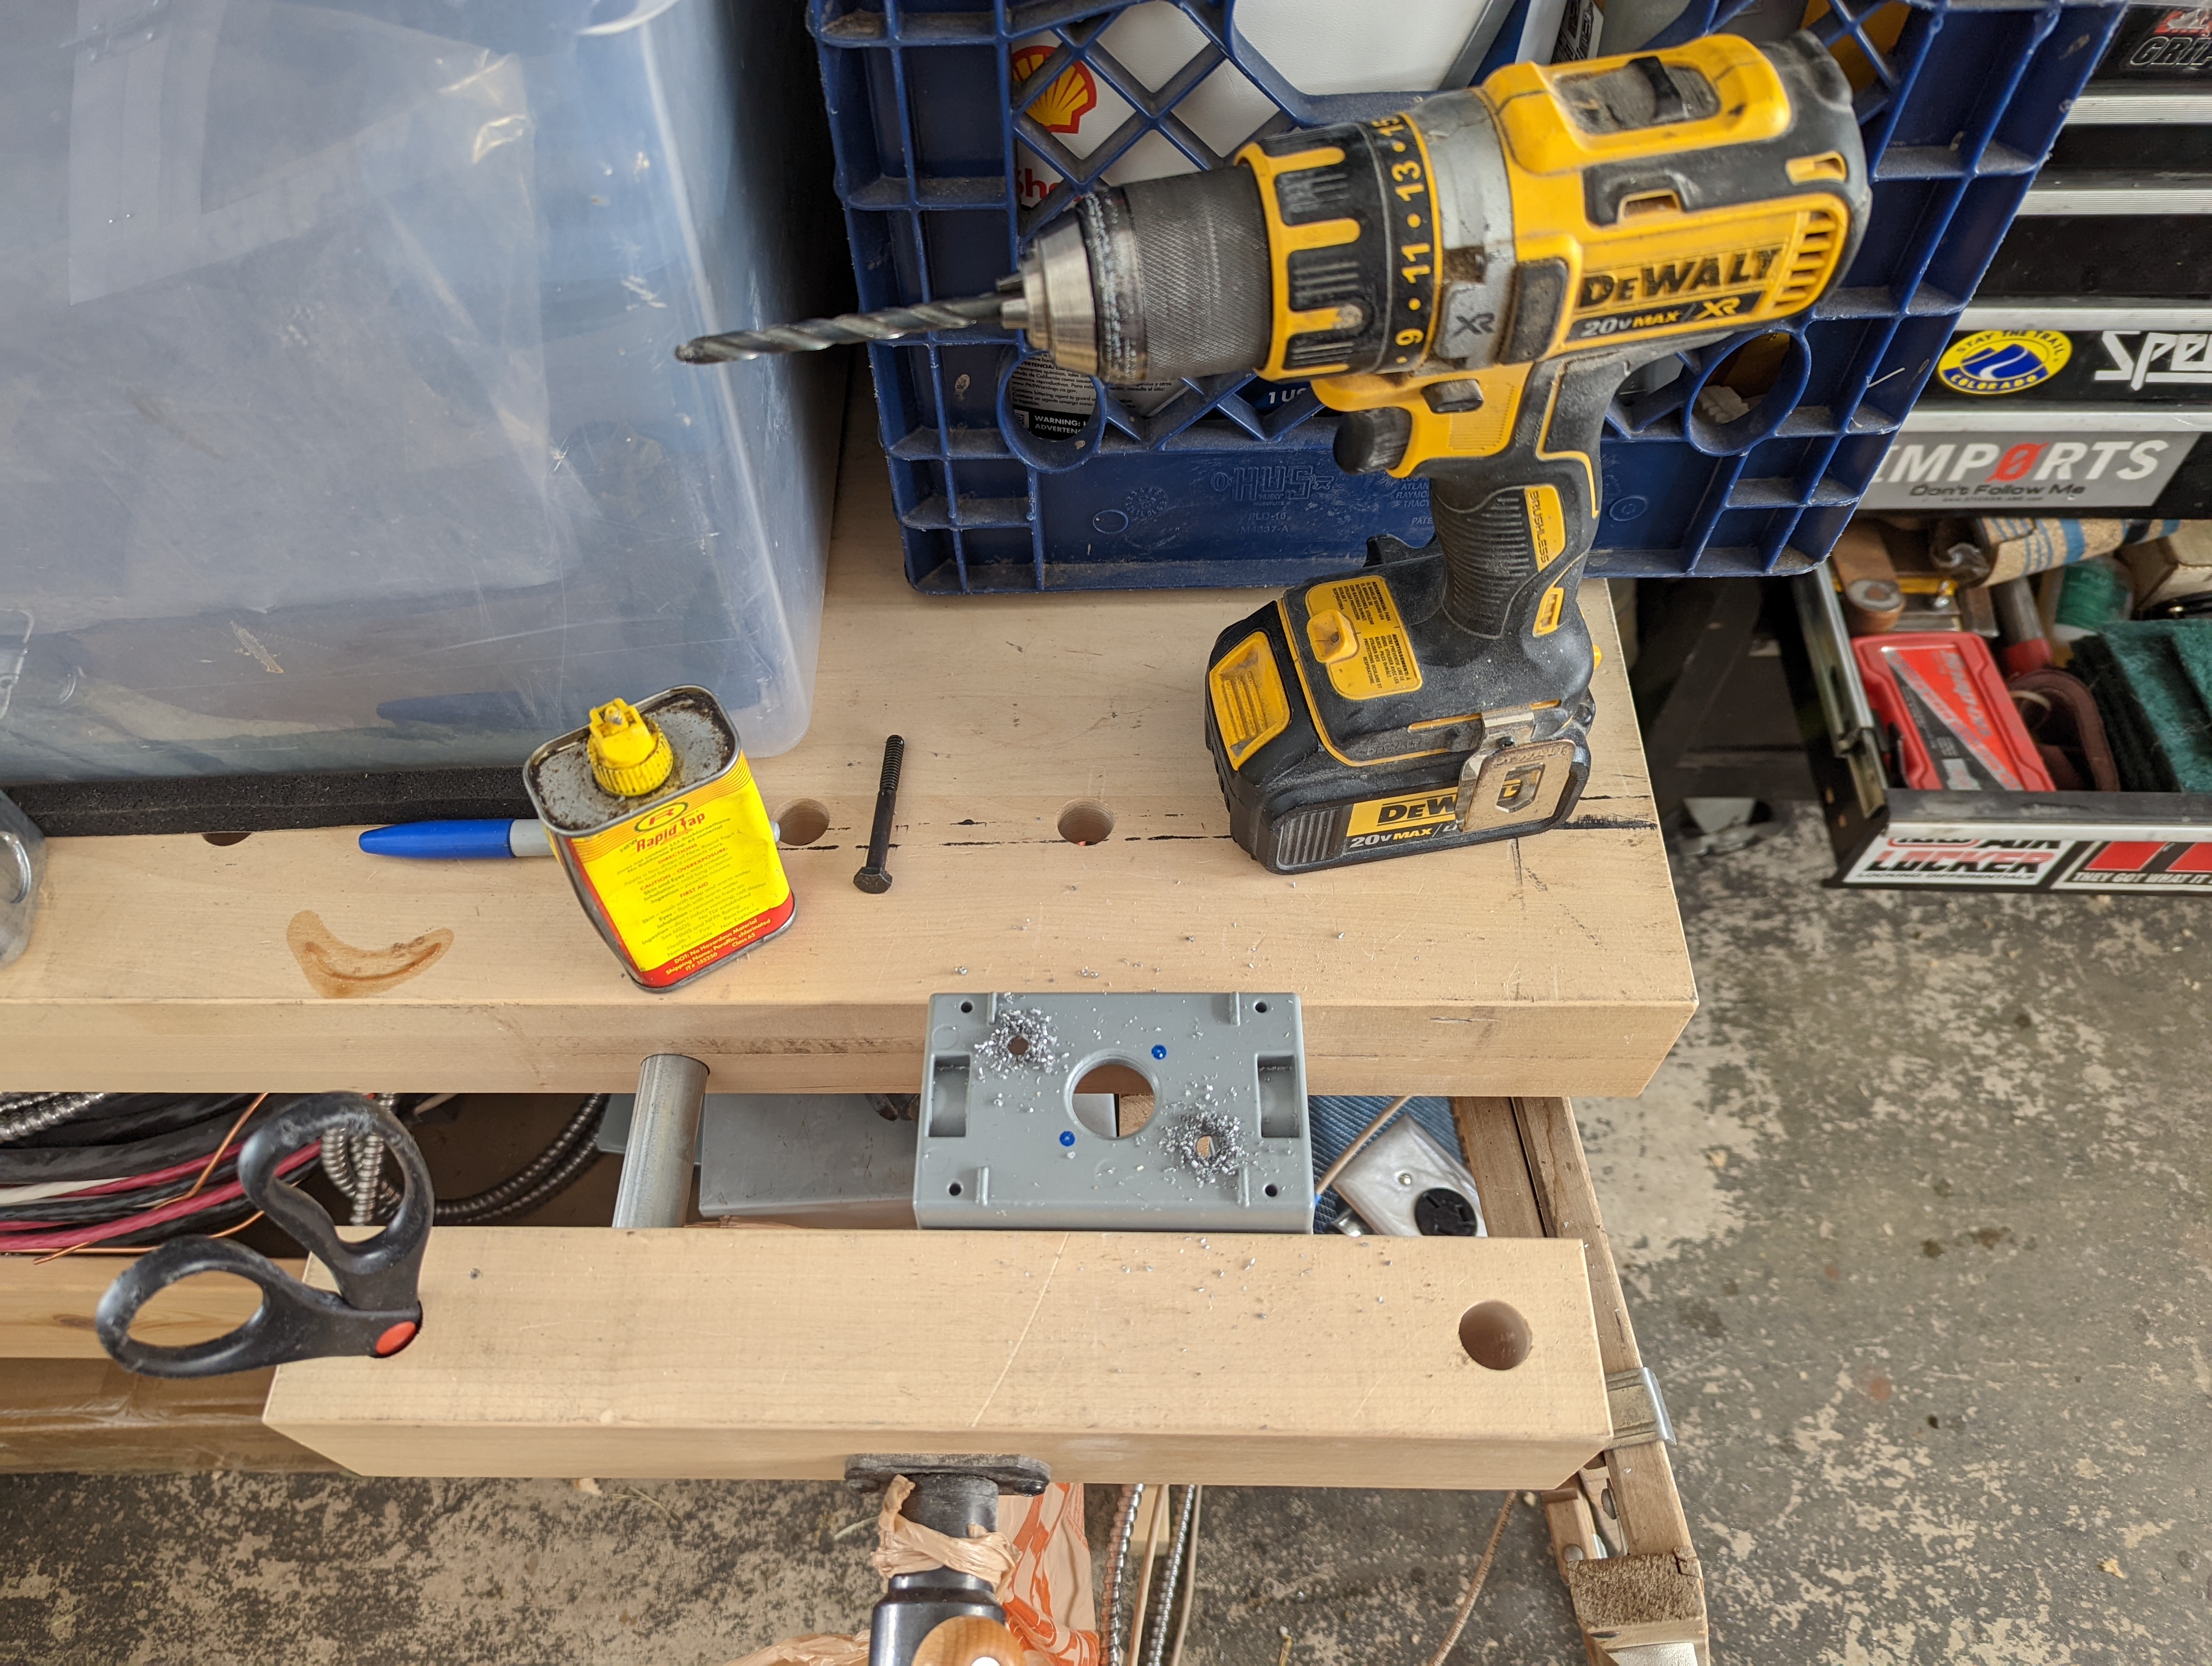
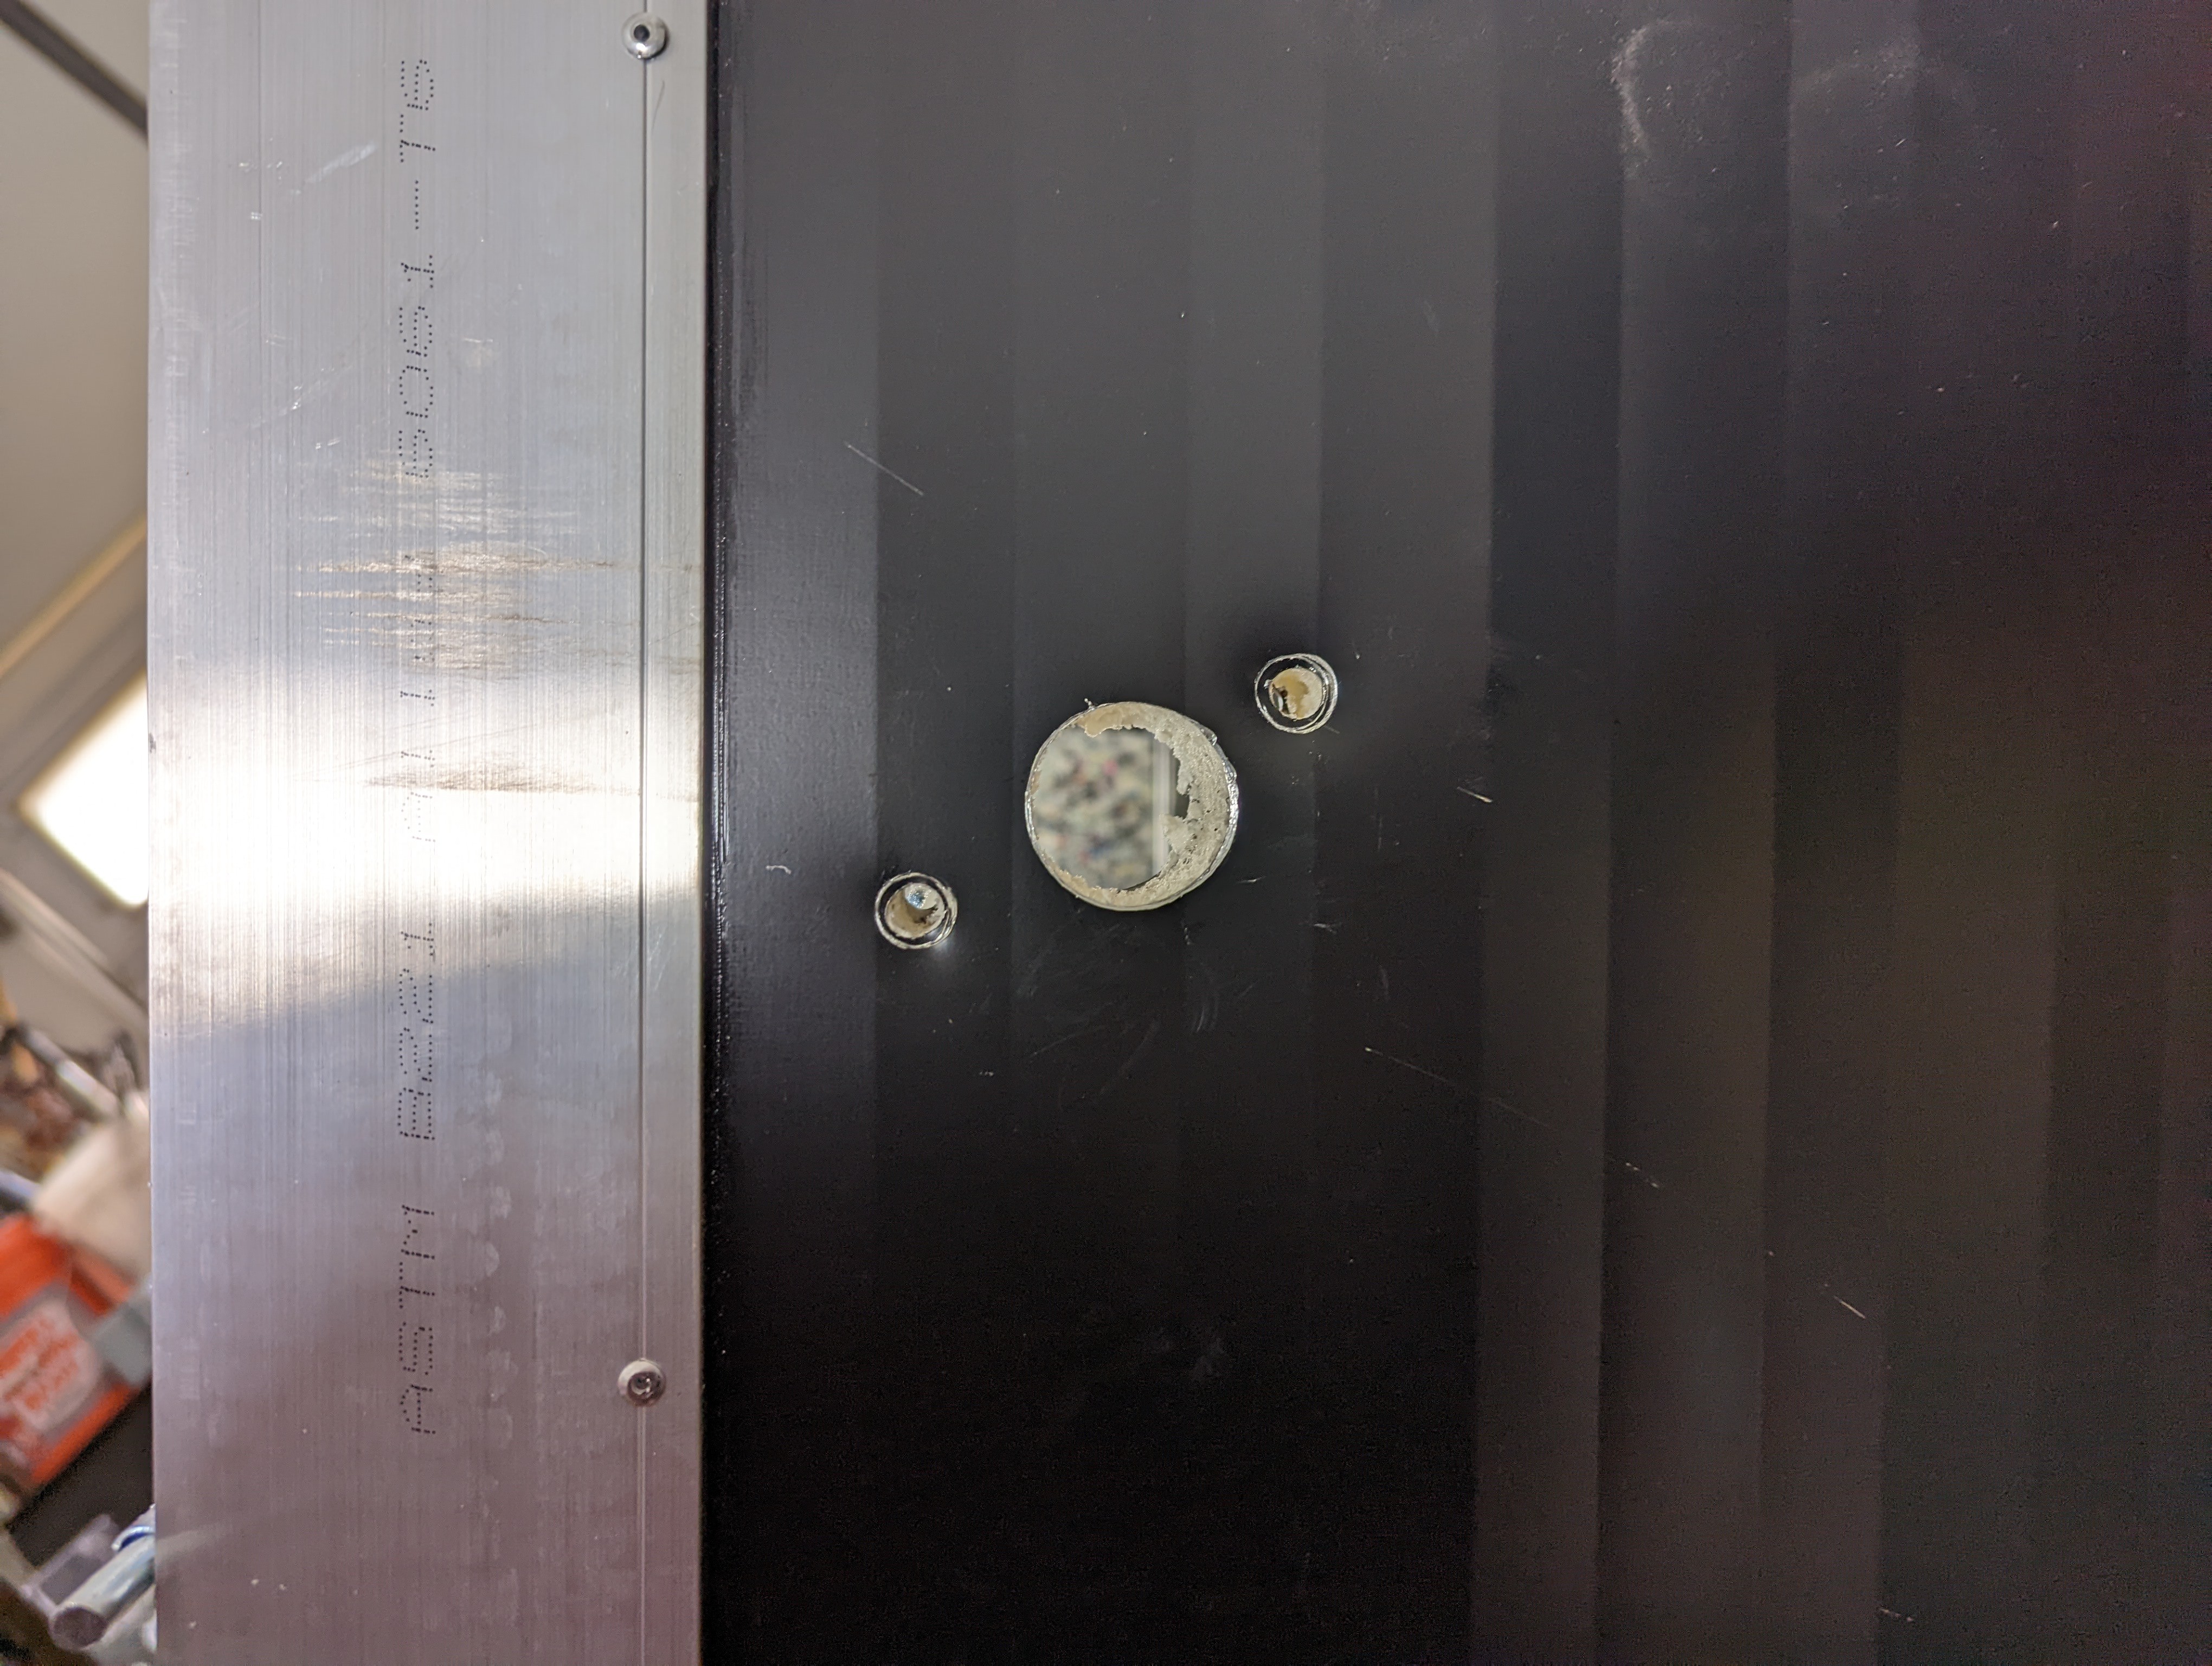
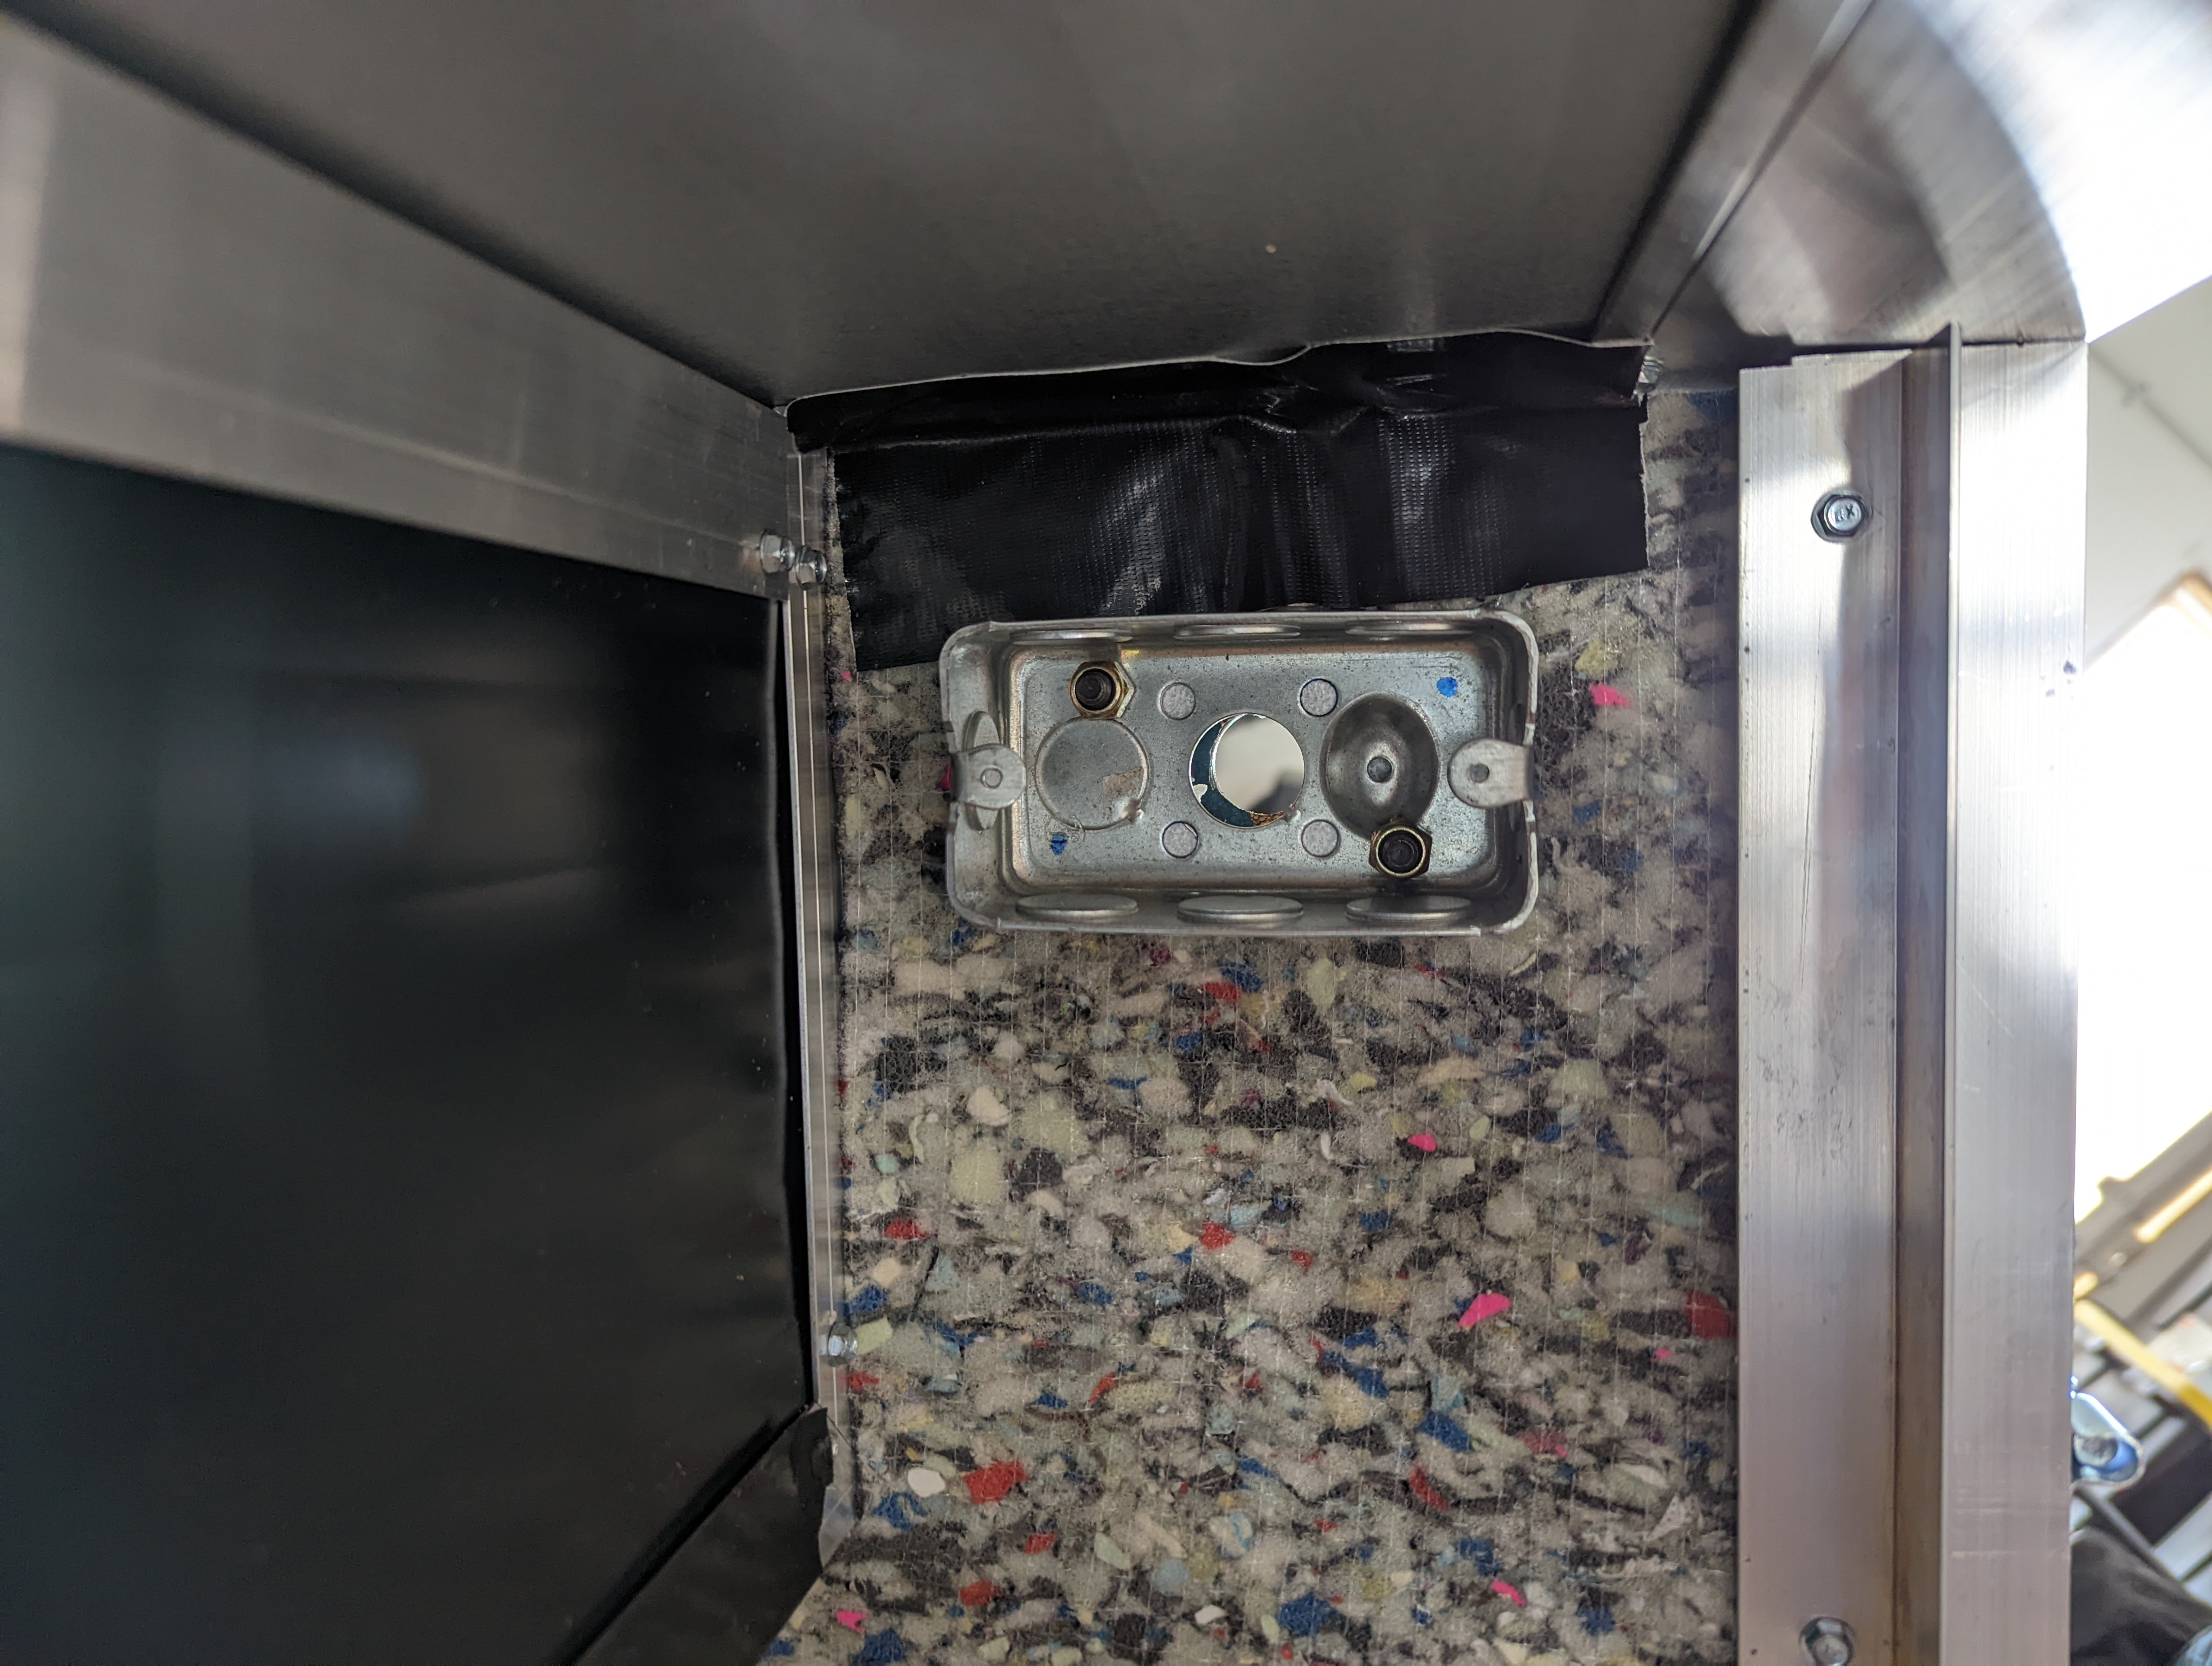
Using a hole saw, a 3/4" hole was drilled into the side of the BlackBox, then the 1/4" hole locations were marked on either side of it and then drilled out as well. Then using the 1/4" bolts to hold the water-tight conduit box in place, the in-door conduit box was lined up on the inside of the BlackBox and then the nuts were tightened down to secure both junction boxes, pinning the wall of the BlackBox in between.
Then the outlet boxes were mounted to the wing wall inside the BlackBox on the intake side. These were mounted using 1/4" bolts again that passed through the entire wall of the wing.
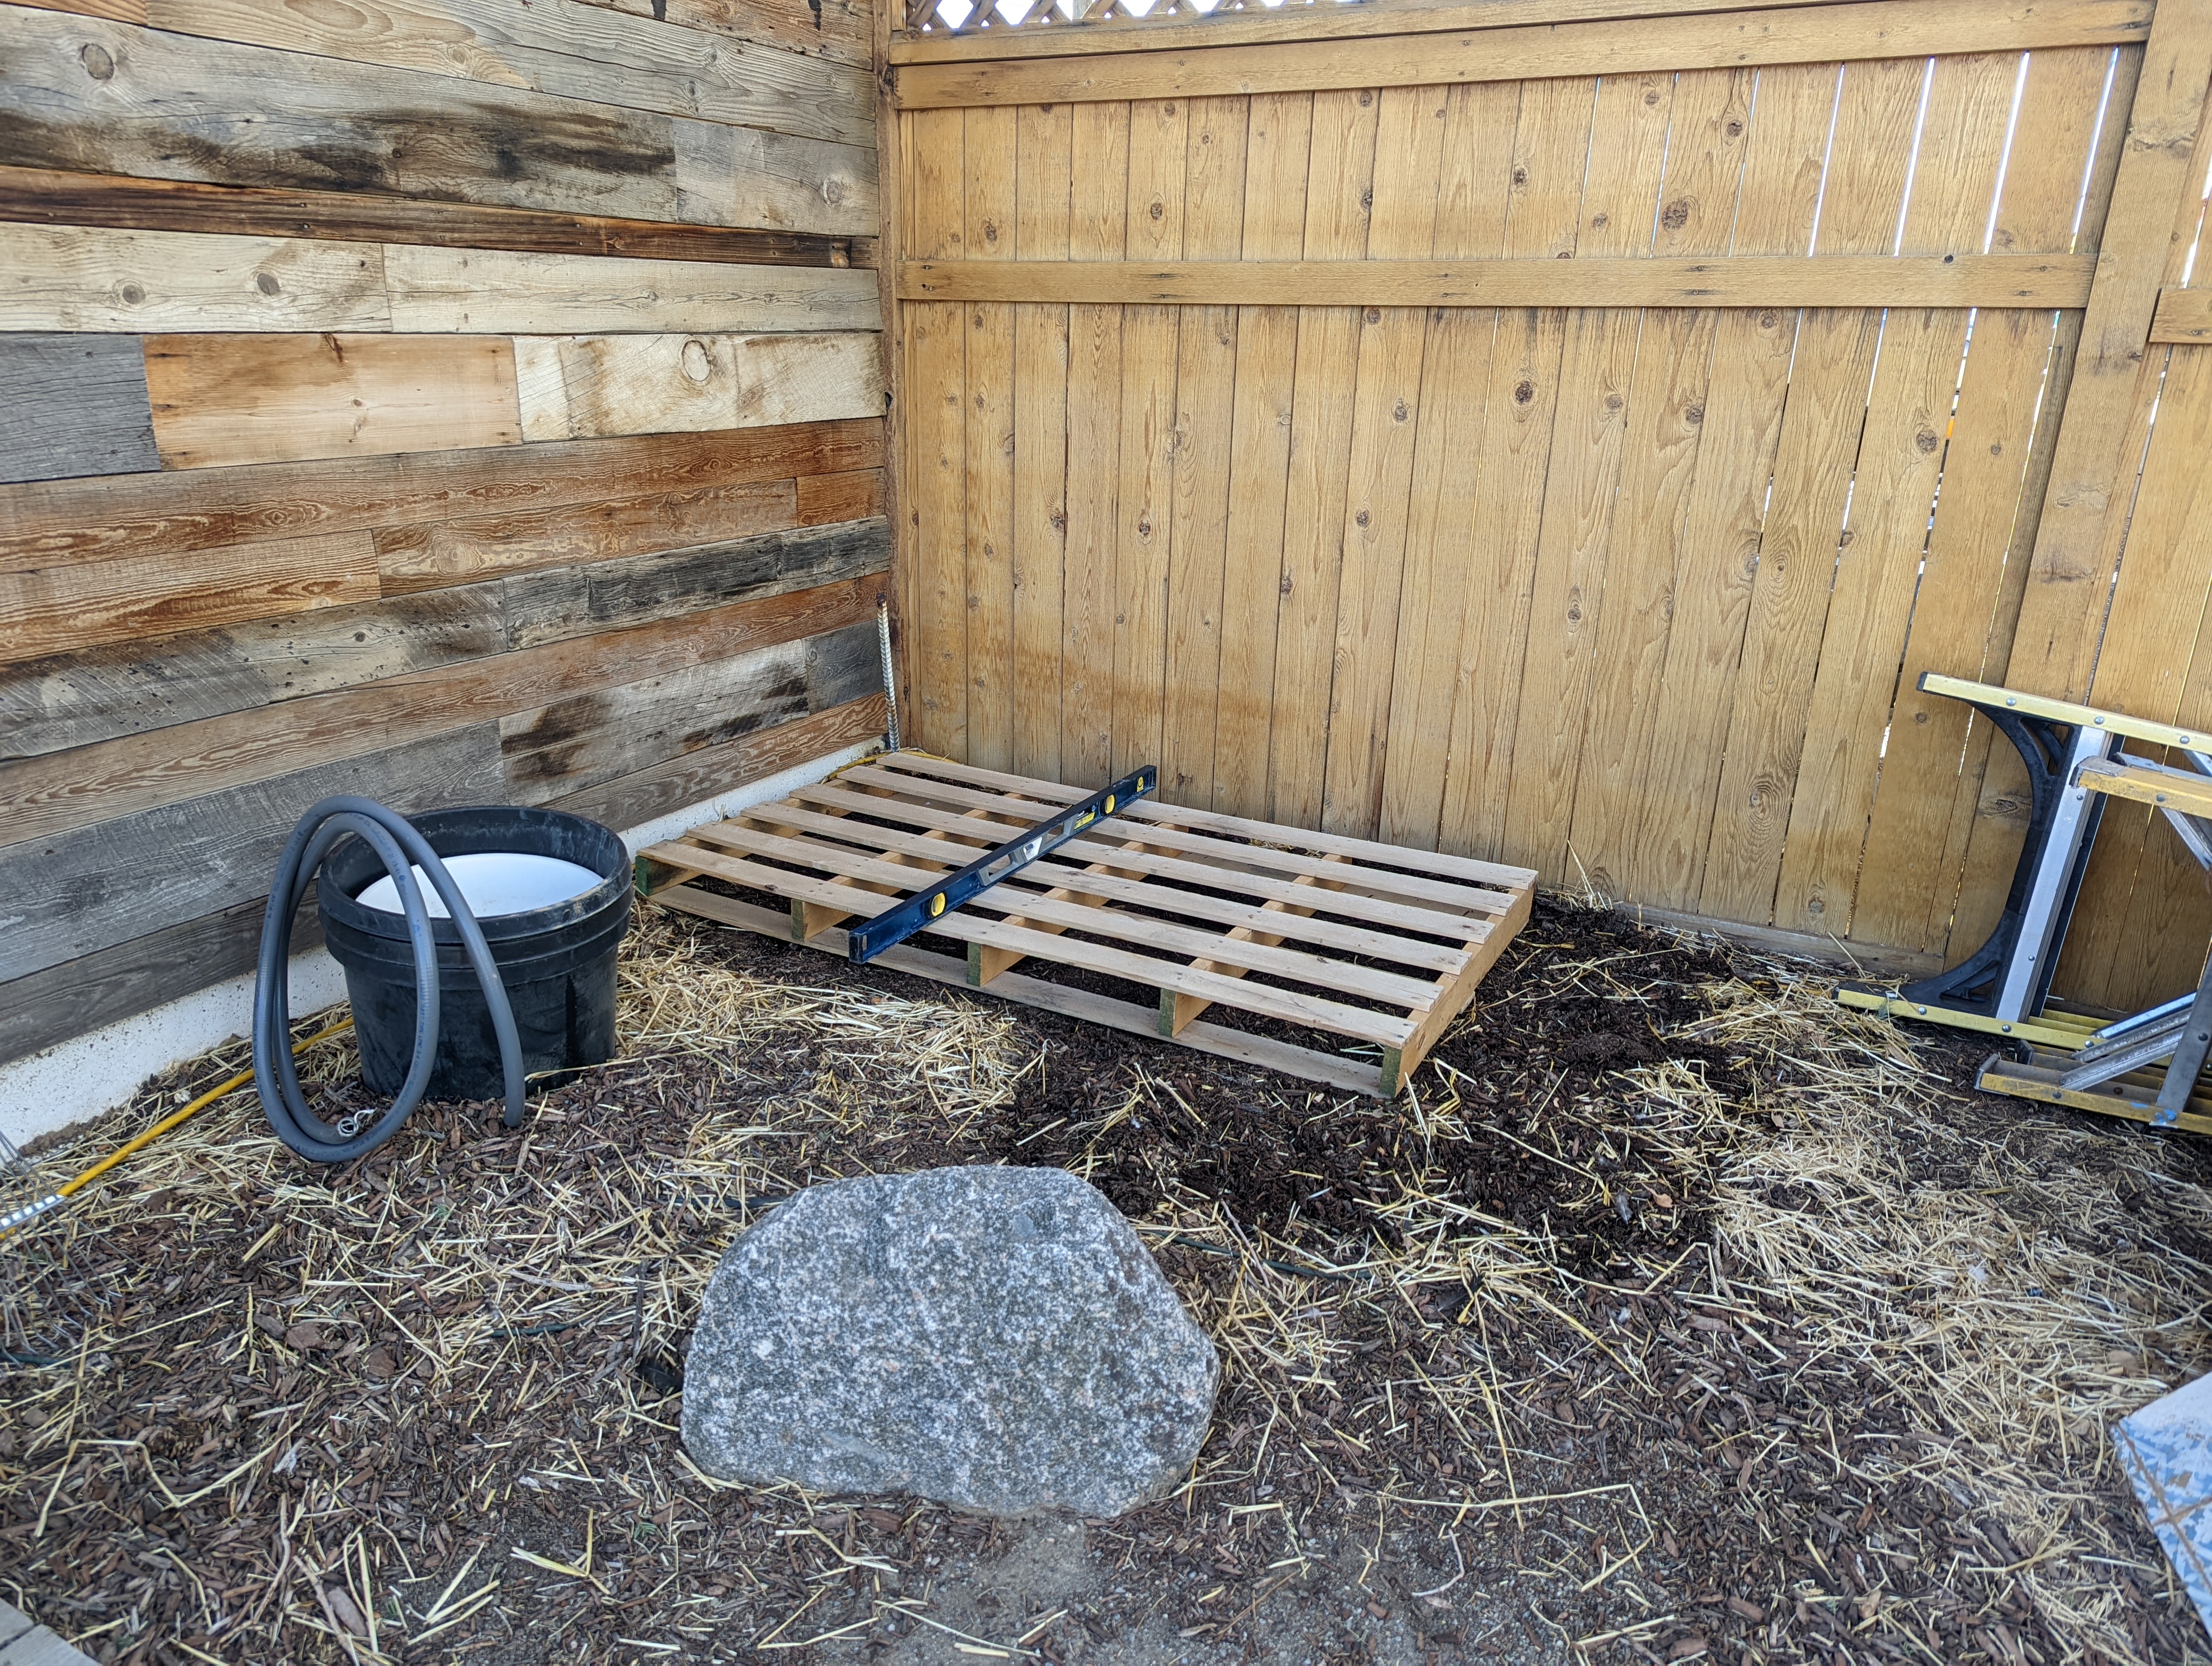
Now the site for the BlackBox could be prepared. In this demonstration, a pallet was used to keep the BlackBox up off the ground. The dirt/wood-chip was shuffled around to make sure the area was level first.
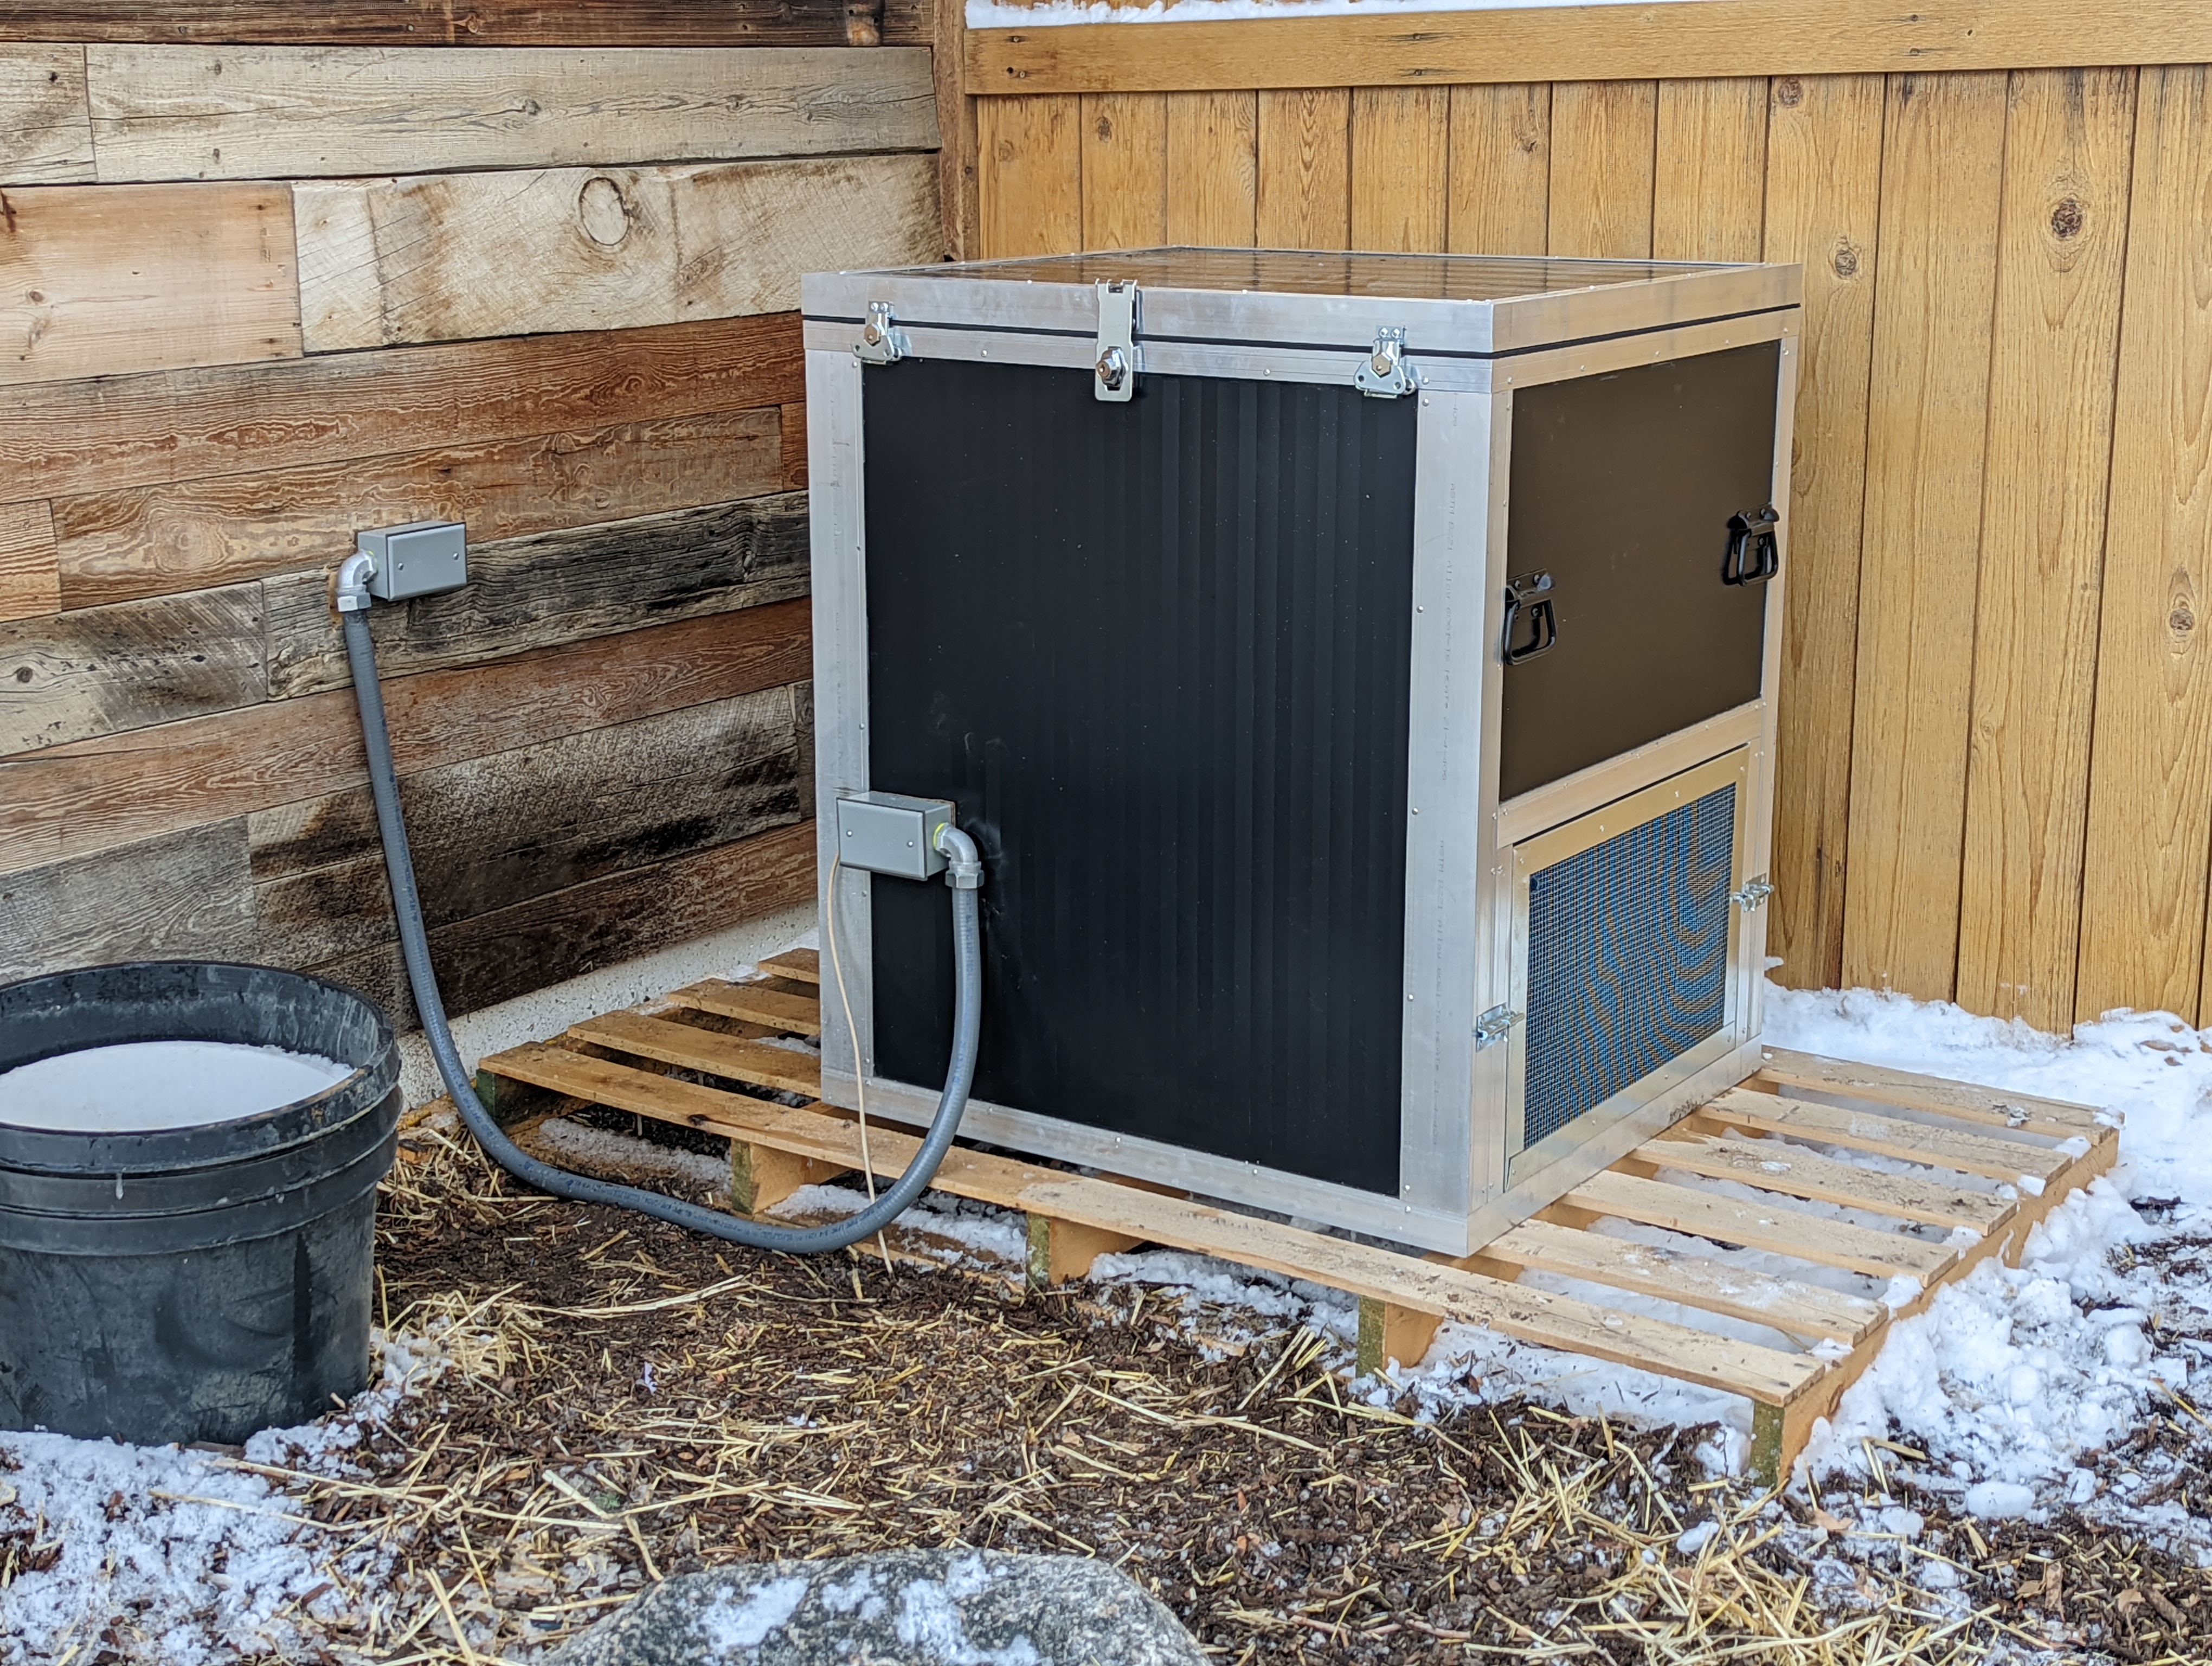
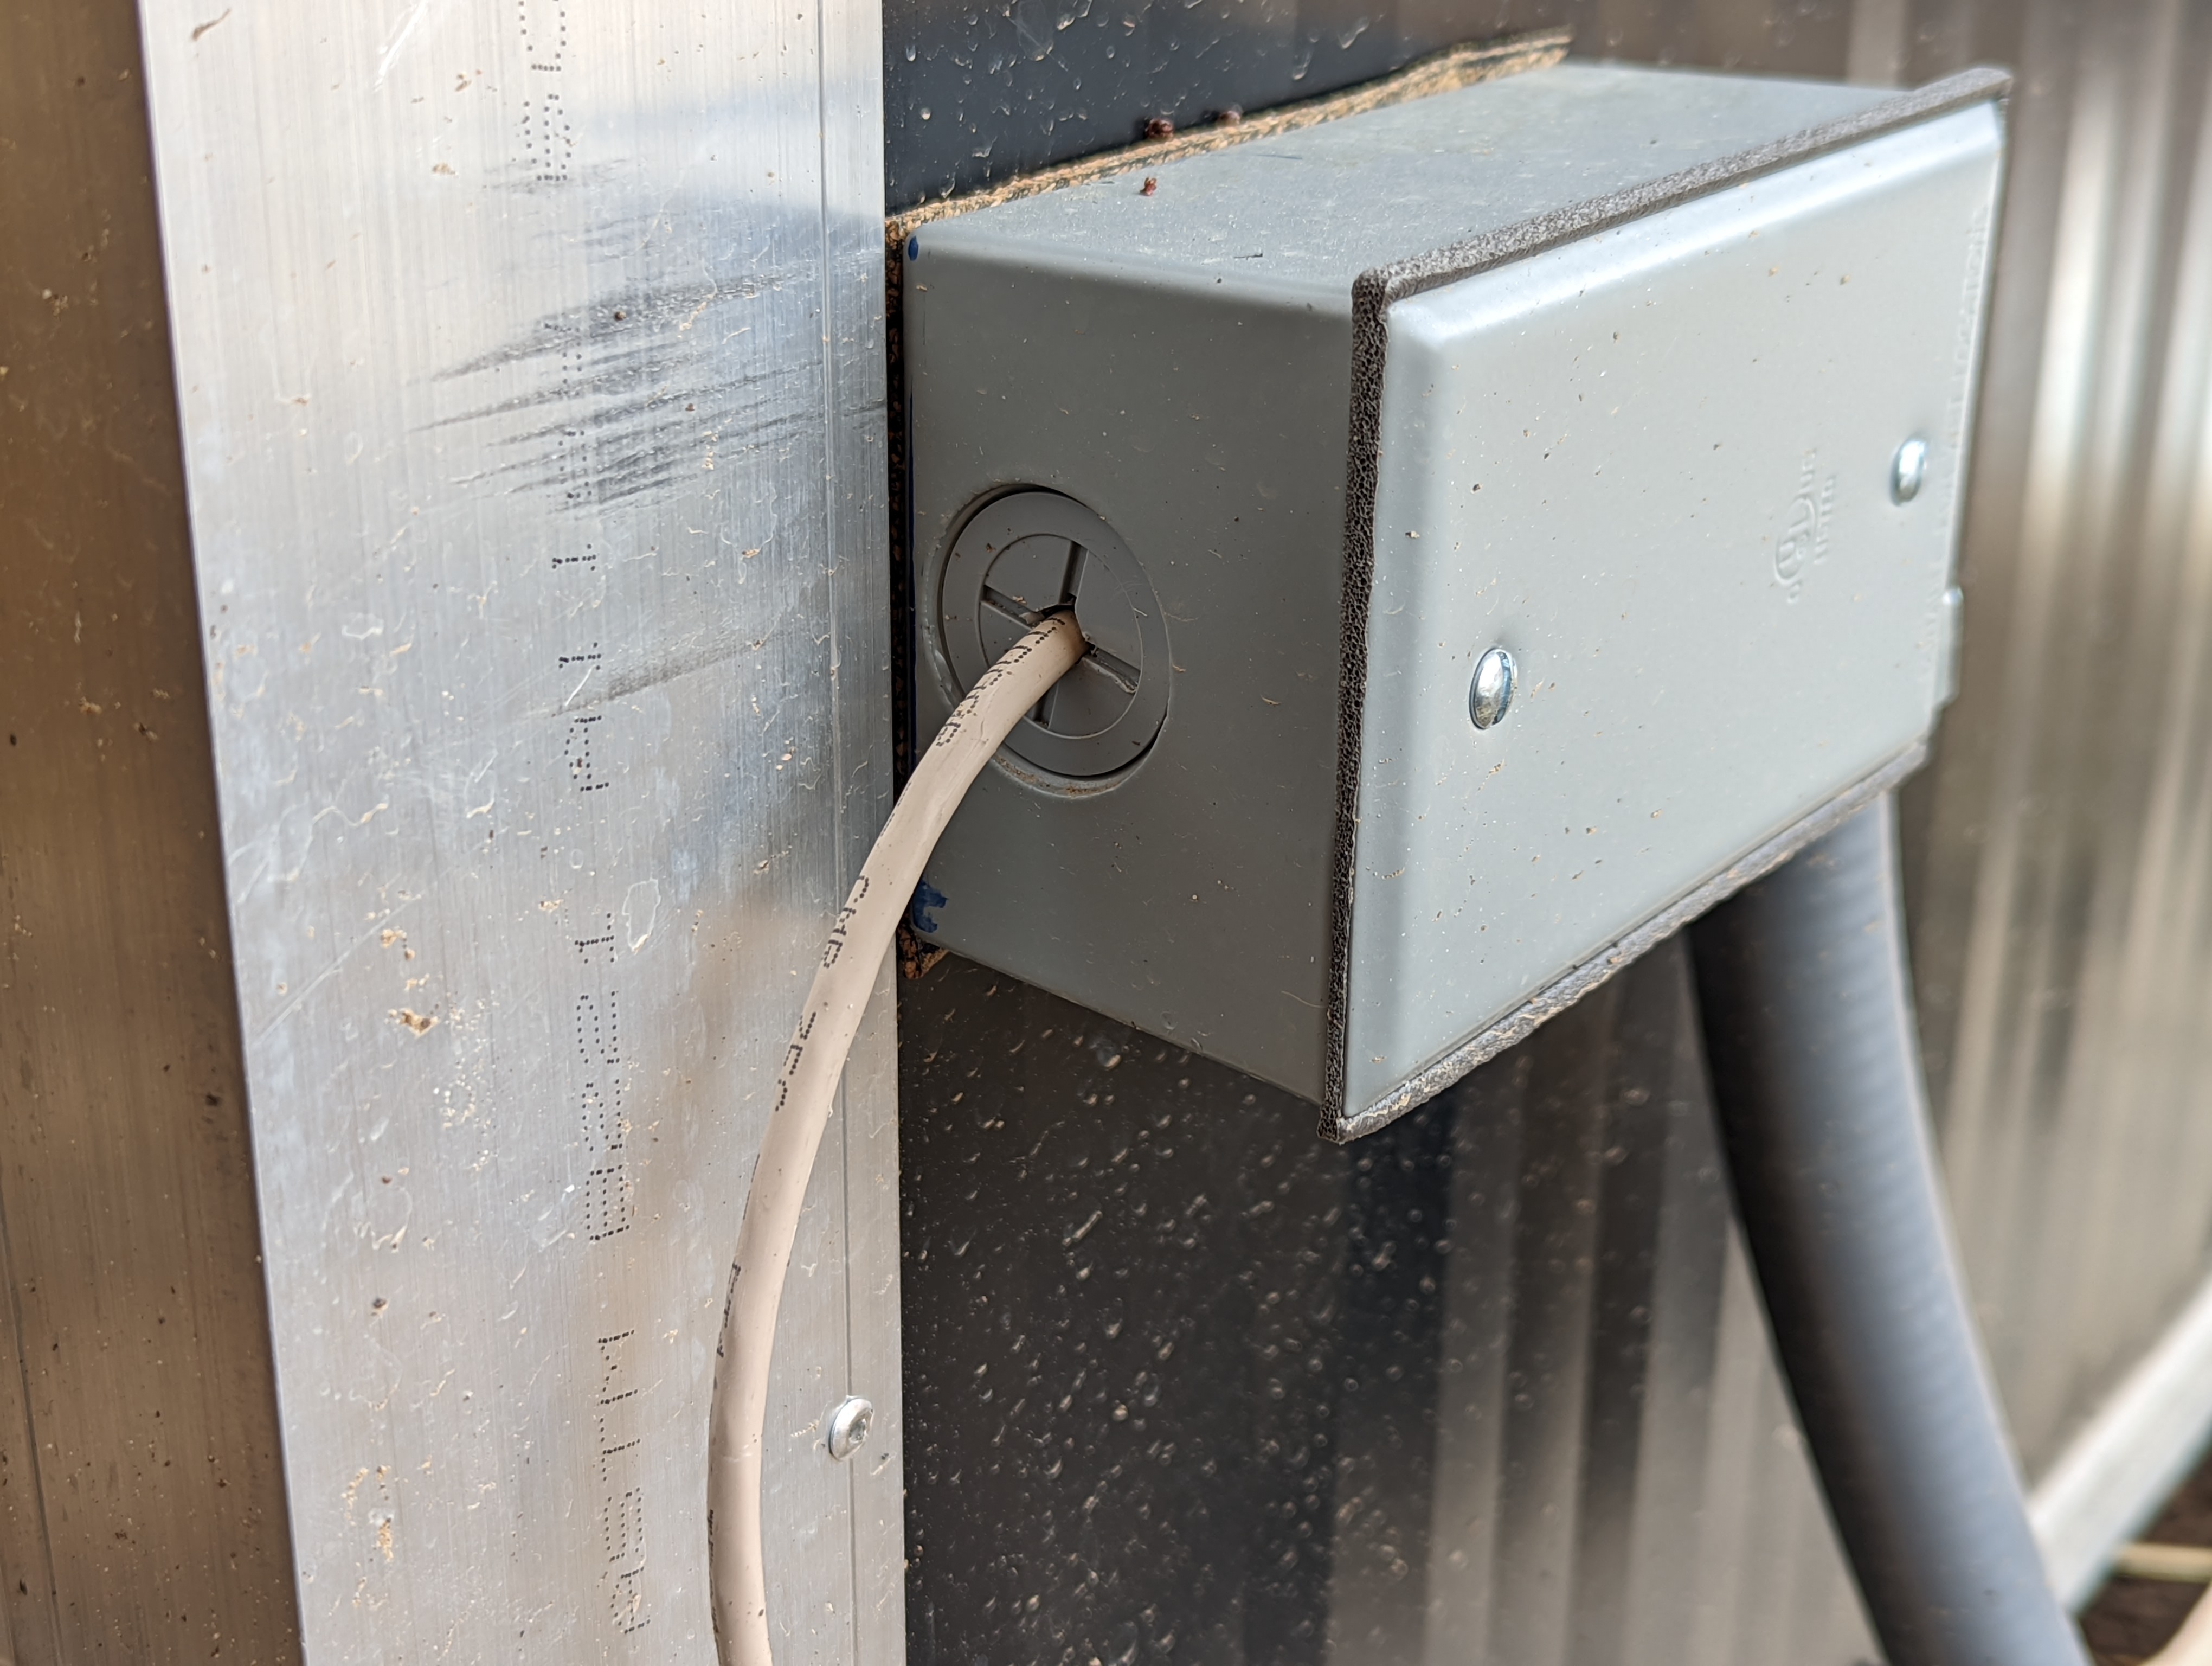
Inside the garage, there was a 100 amp sub panel. A 20 amp dedicated breaker was installed. Then using 12/2 MC, a line was ran on the inside of the garage, along the wall from the sub-panel to the opposite side of the wall where the BlackBox was going to be installed. Then a hole was drilled through the wall. An in-door junction box was mounted on the inside wall where the cable would pass through. On the exterior, another water-tight conduit junction box was mounted on the outside wall. Then using water-tight conduit, 12GA wire was ran through the conduit and then it was connected to the water-tight conduit elbows on the junction boxes. With the cable ran into the BlackBox, the connections were tied together with the MC cable from the outlets inside the in-door junction box mounted inside the BlackBox.
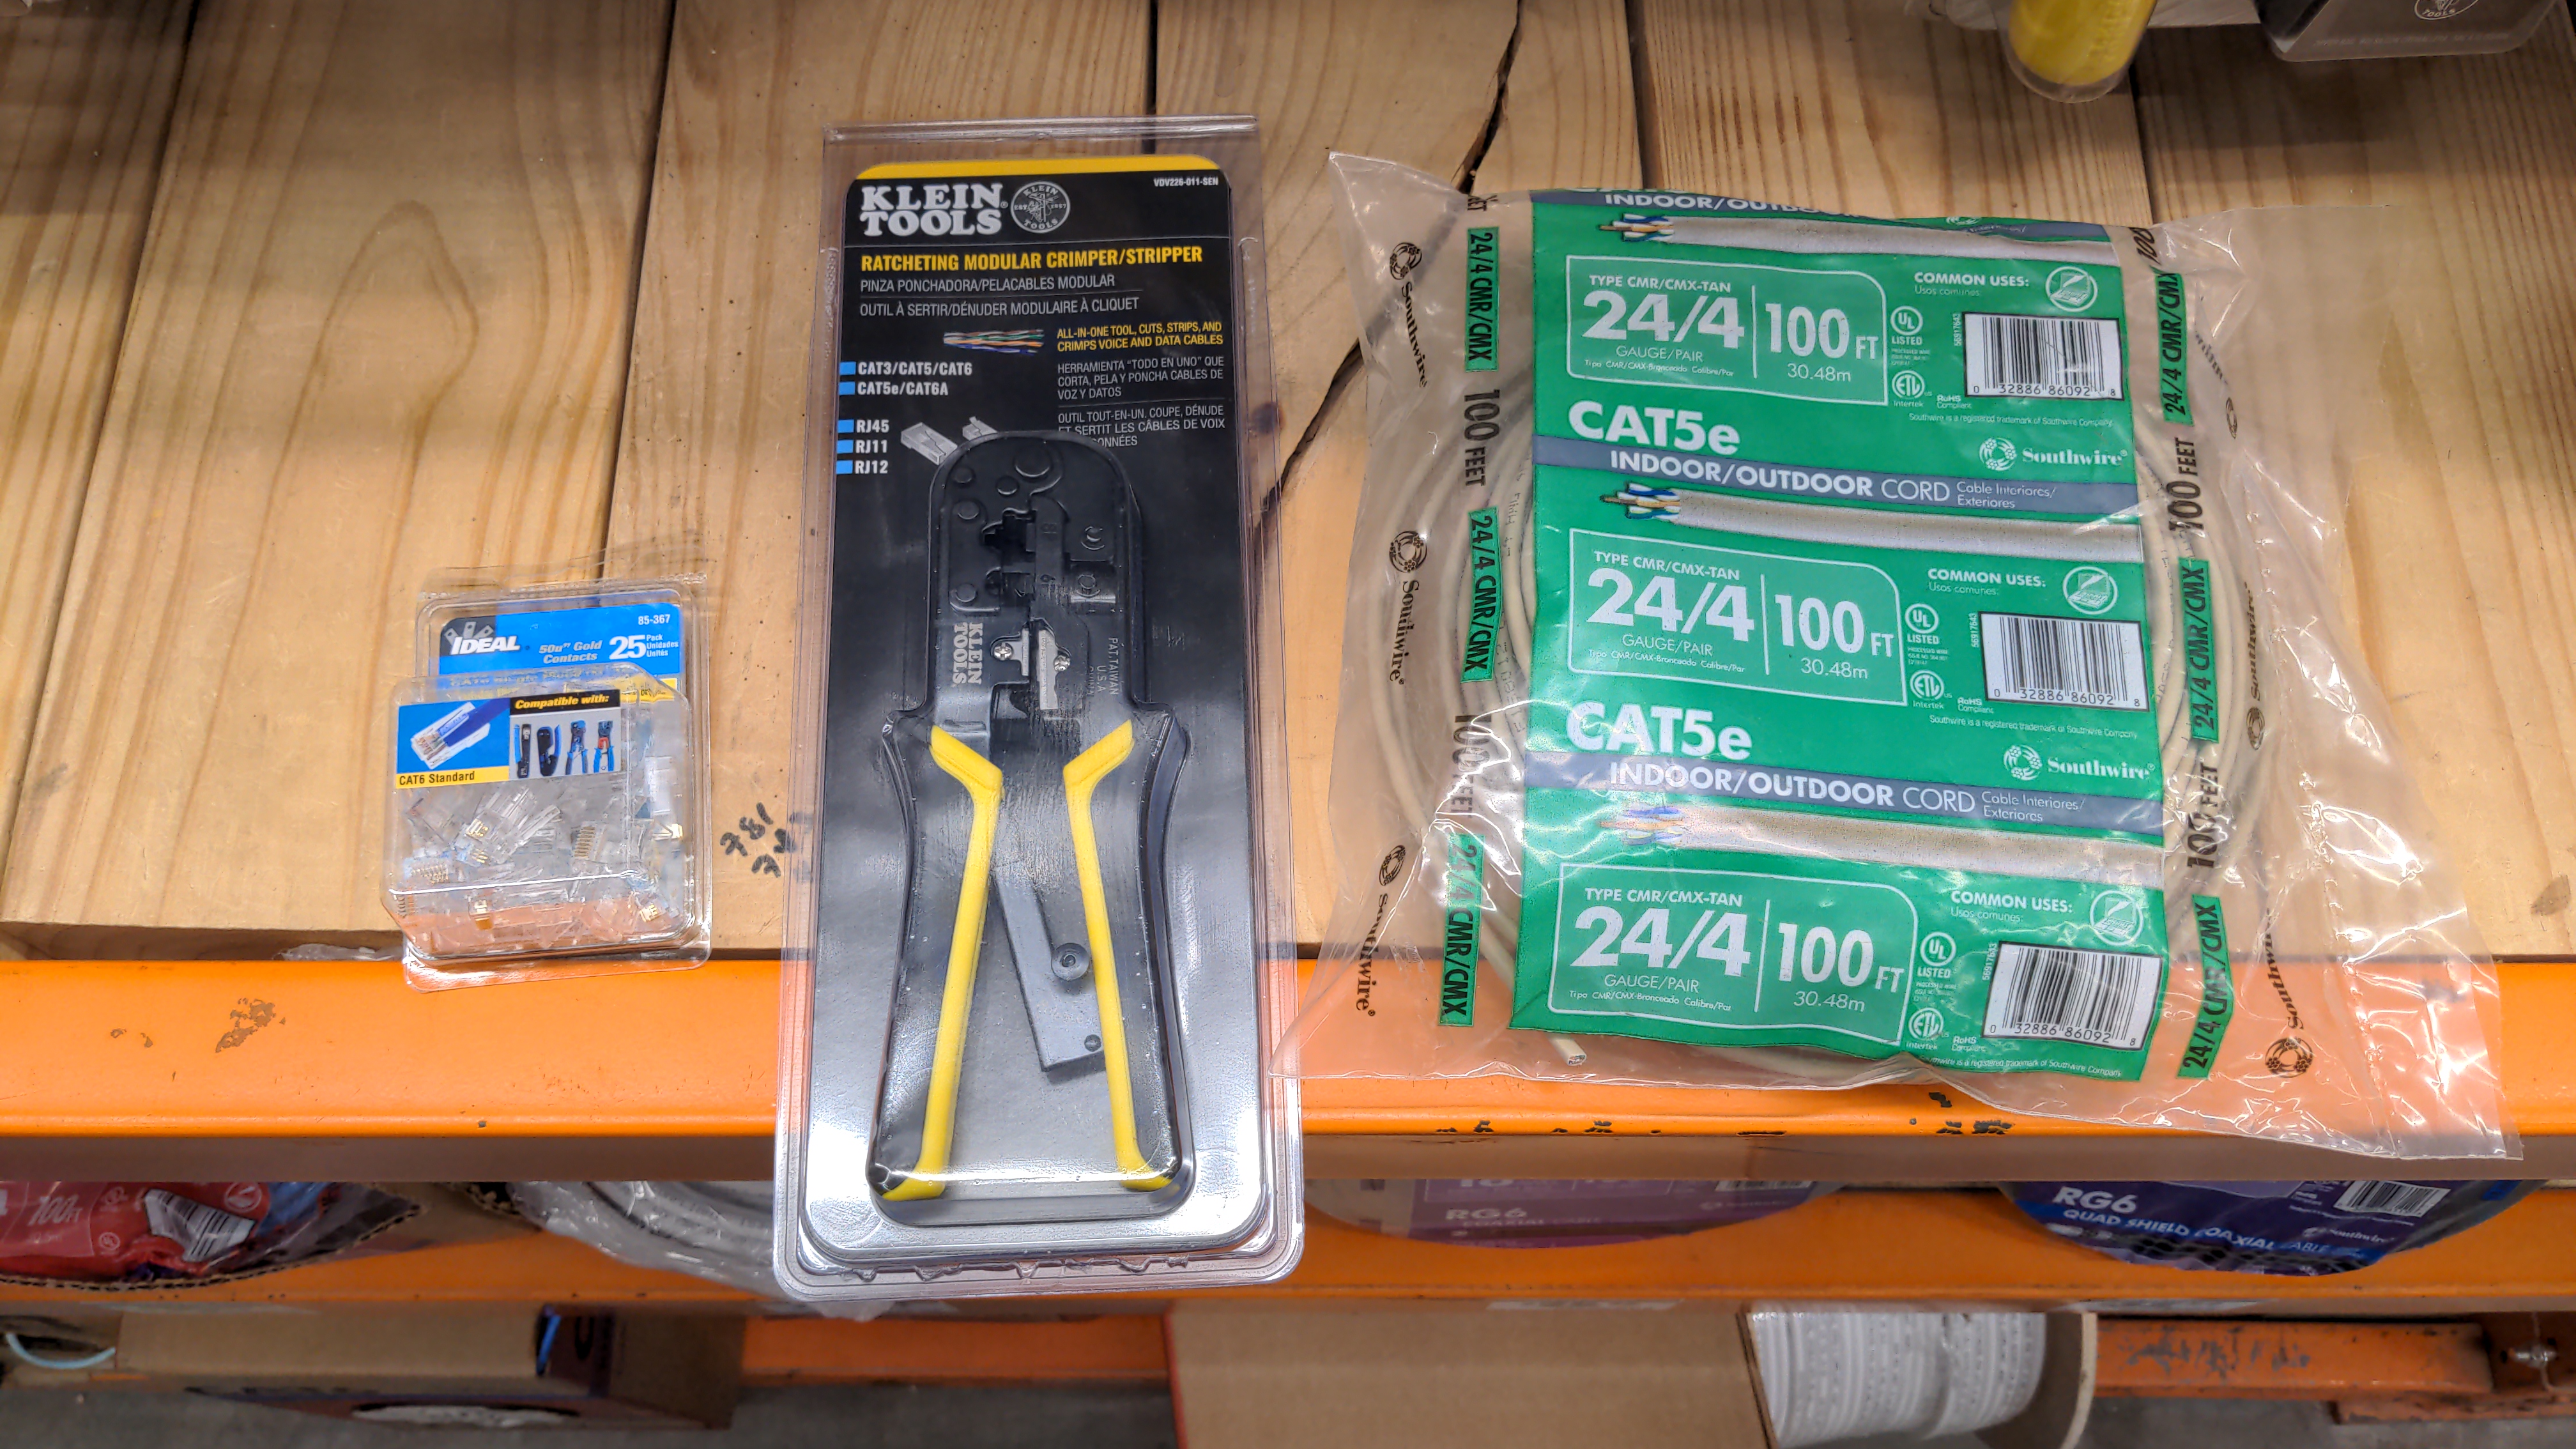
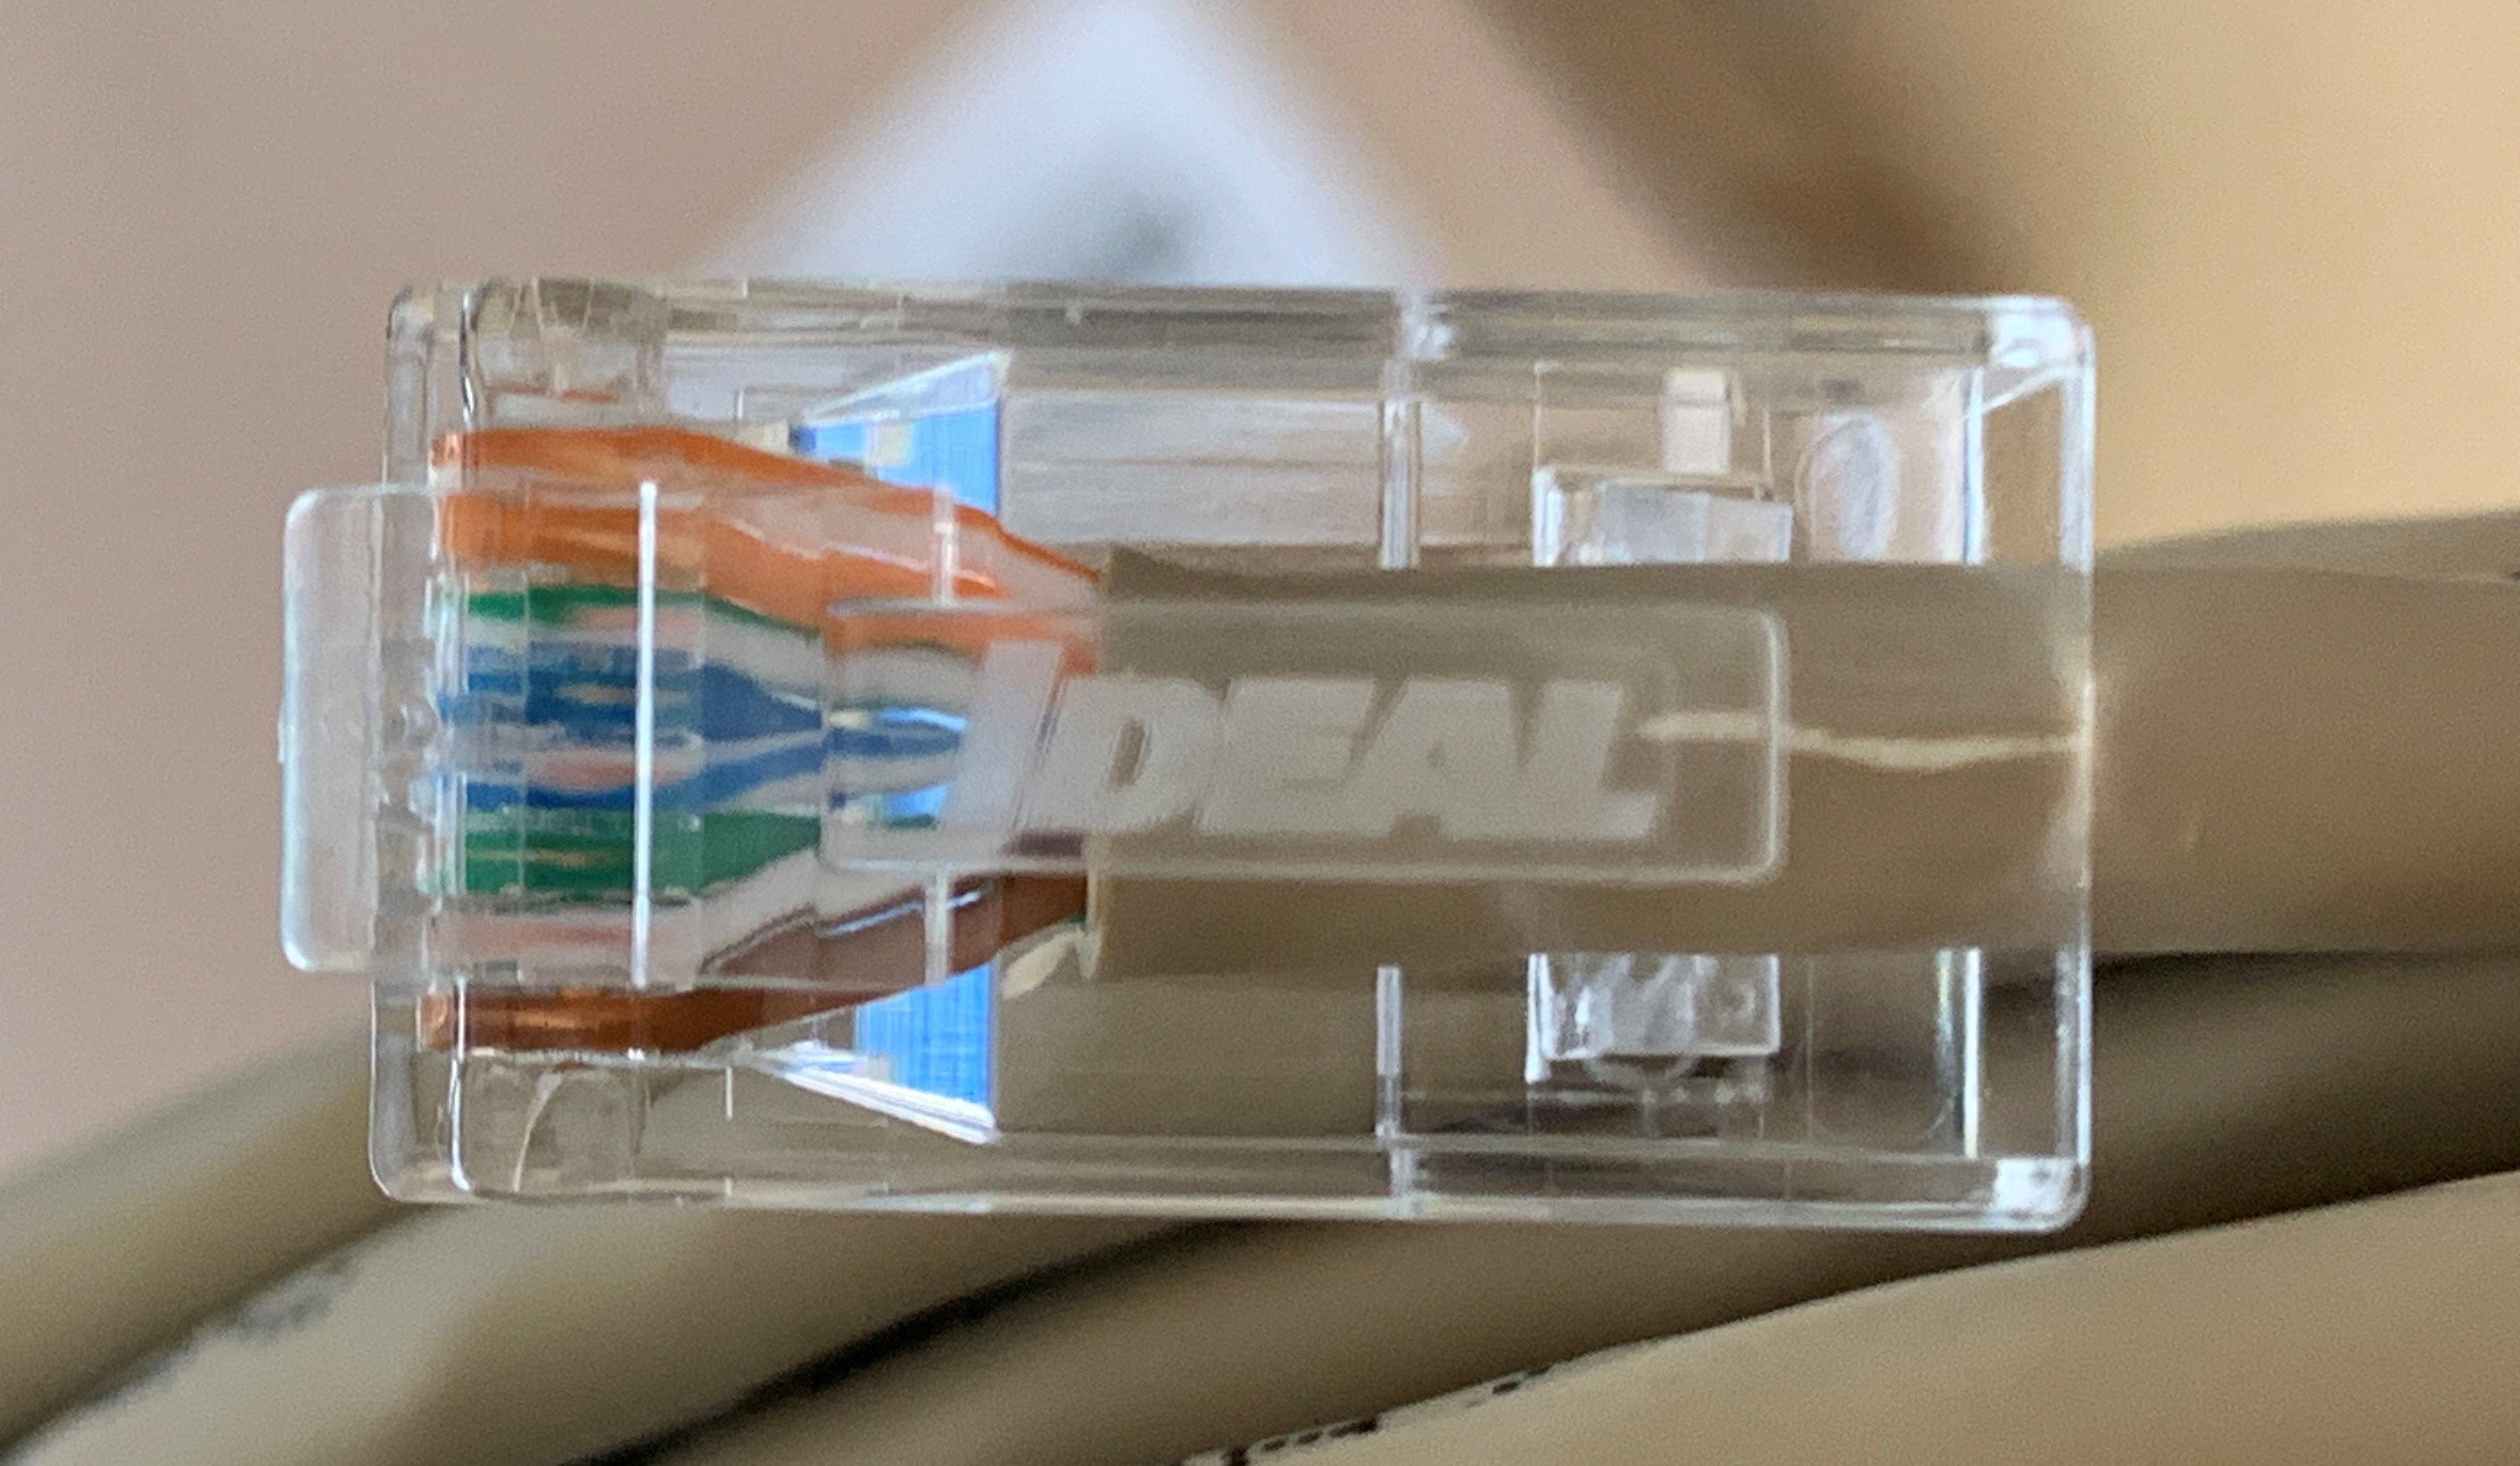
You will also need an Ethernet connection for your BlackBox. There are several different solutions for making the required network connection such as power line adaptors or mesh WiFi satellites. In this demonstration, the Ethernet cable was ran from a switch inside the home, buried in the ground along the run through the yard over to the garage, and through the water-tight junction box. If you are not comfortable installing your own cable then call a licensed professional. Depending on your installation you may need to terminate your own cables, drill holes in your walls, and enter your attic or crawlspace. You can buy 100 feet of outdoor rated CAT5e Ethernet cable, a box of RJ45 connectors, and the crimping tool from your local hardware store.
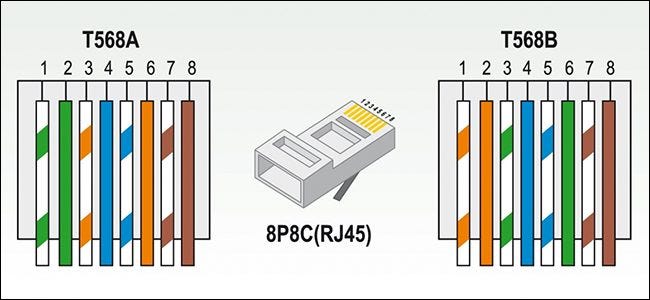
Then you need to decide which standard you want to use for your Ethernet cable, either T568A or T568B. So long as you terminate both ends of the cable with the same configuration, it really shouldn't matter which one you choose. All the wires are the same color on the inside after all.
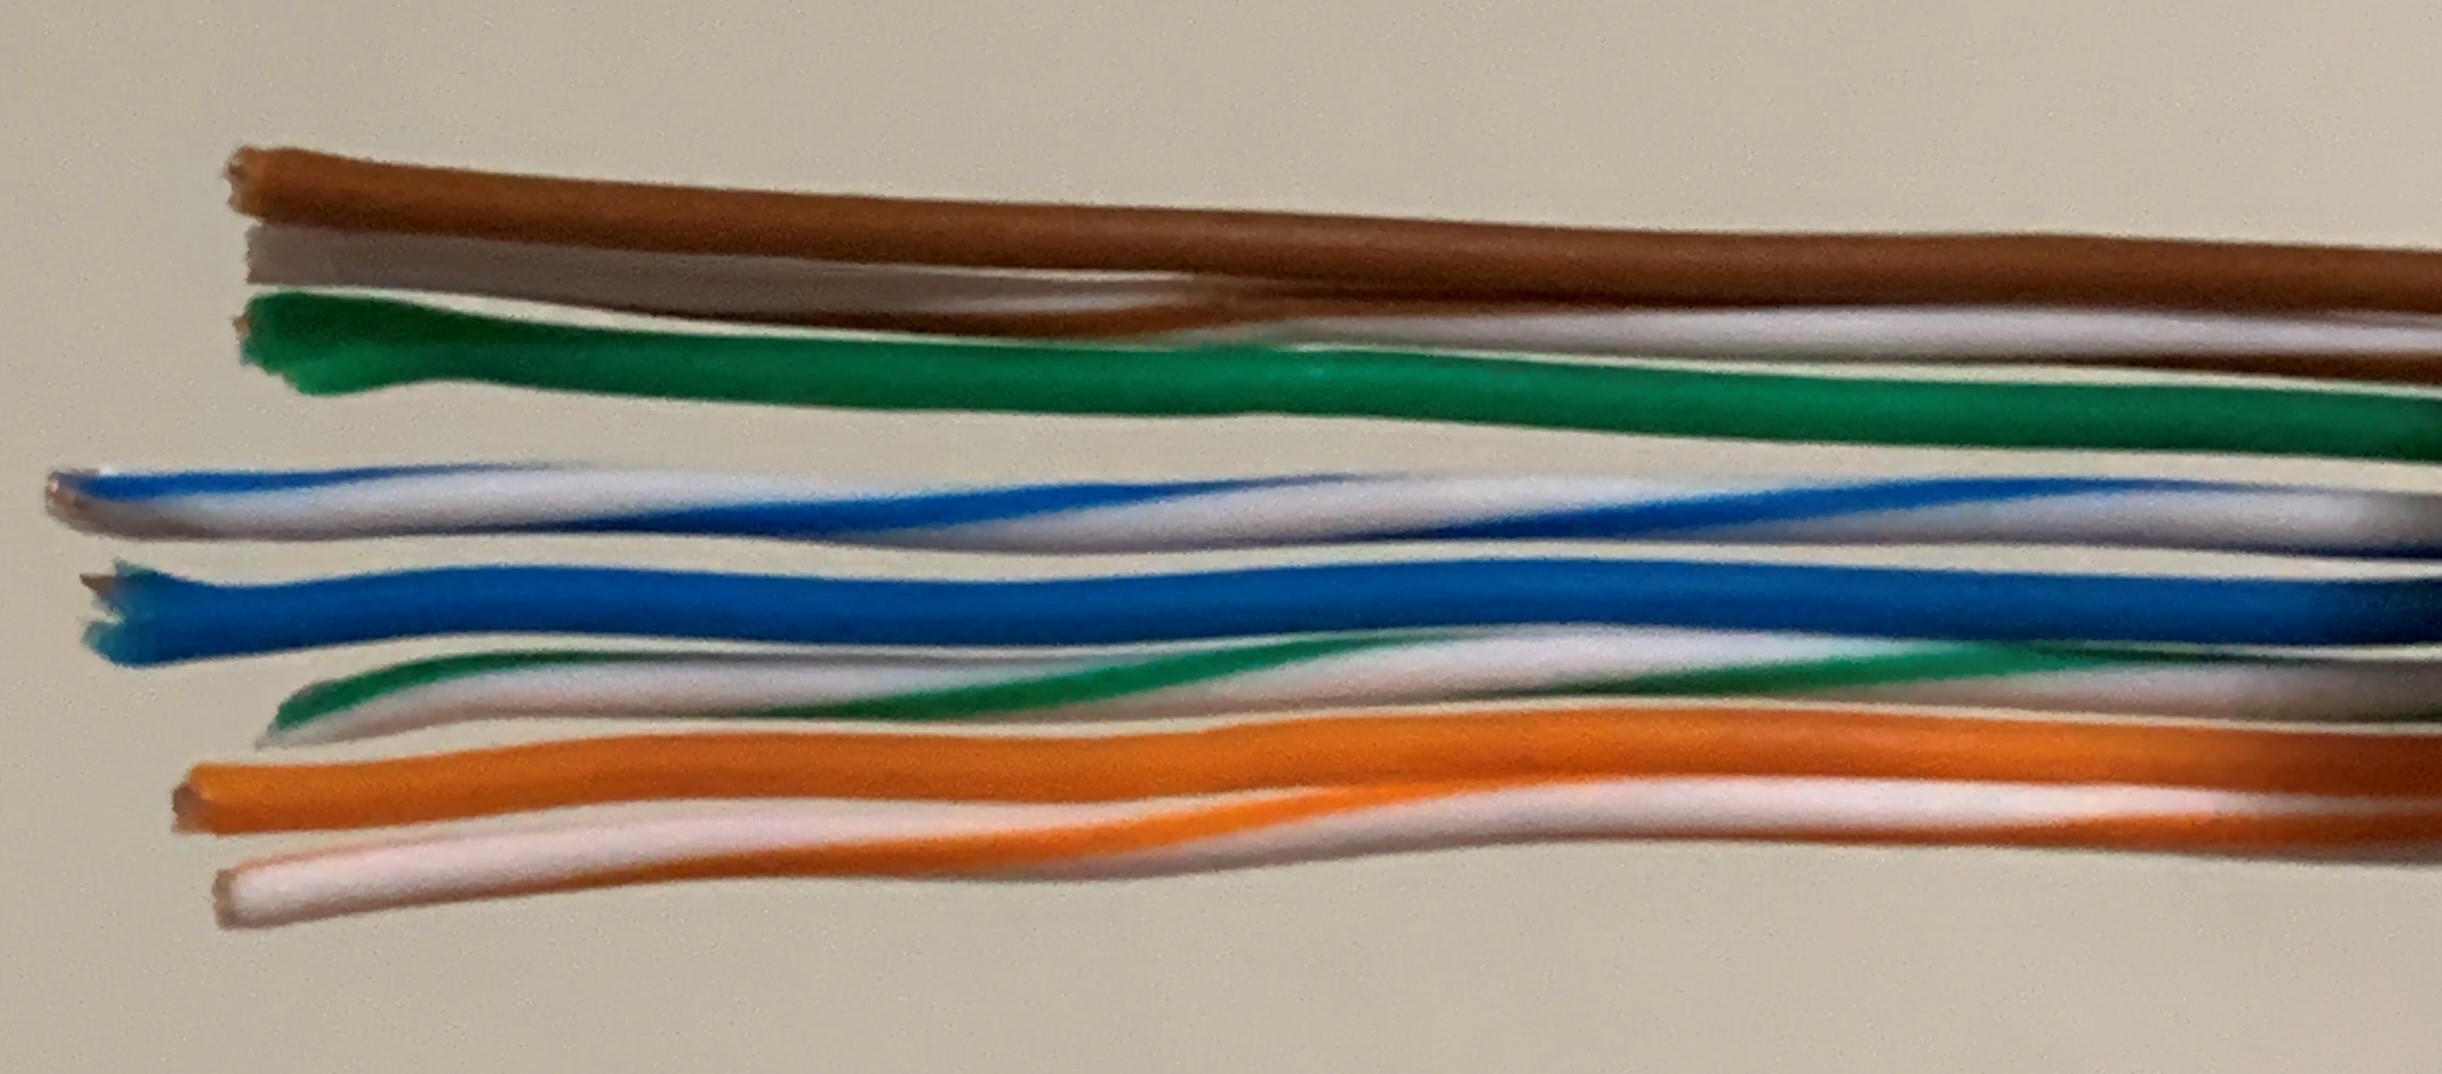
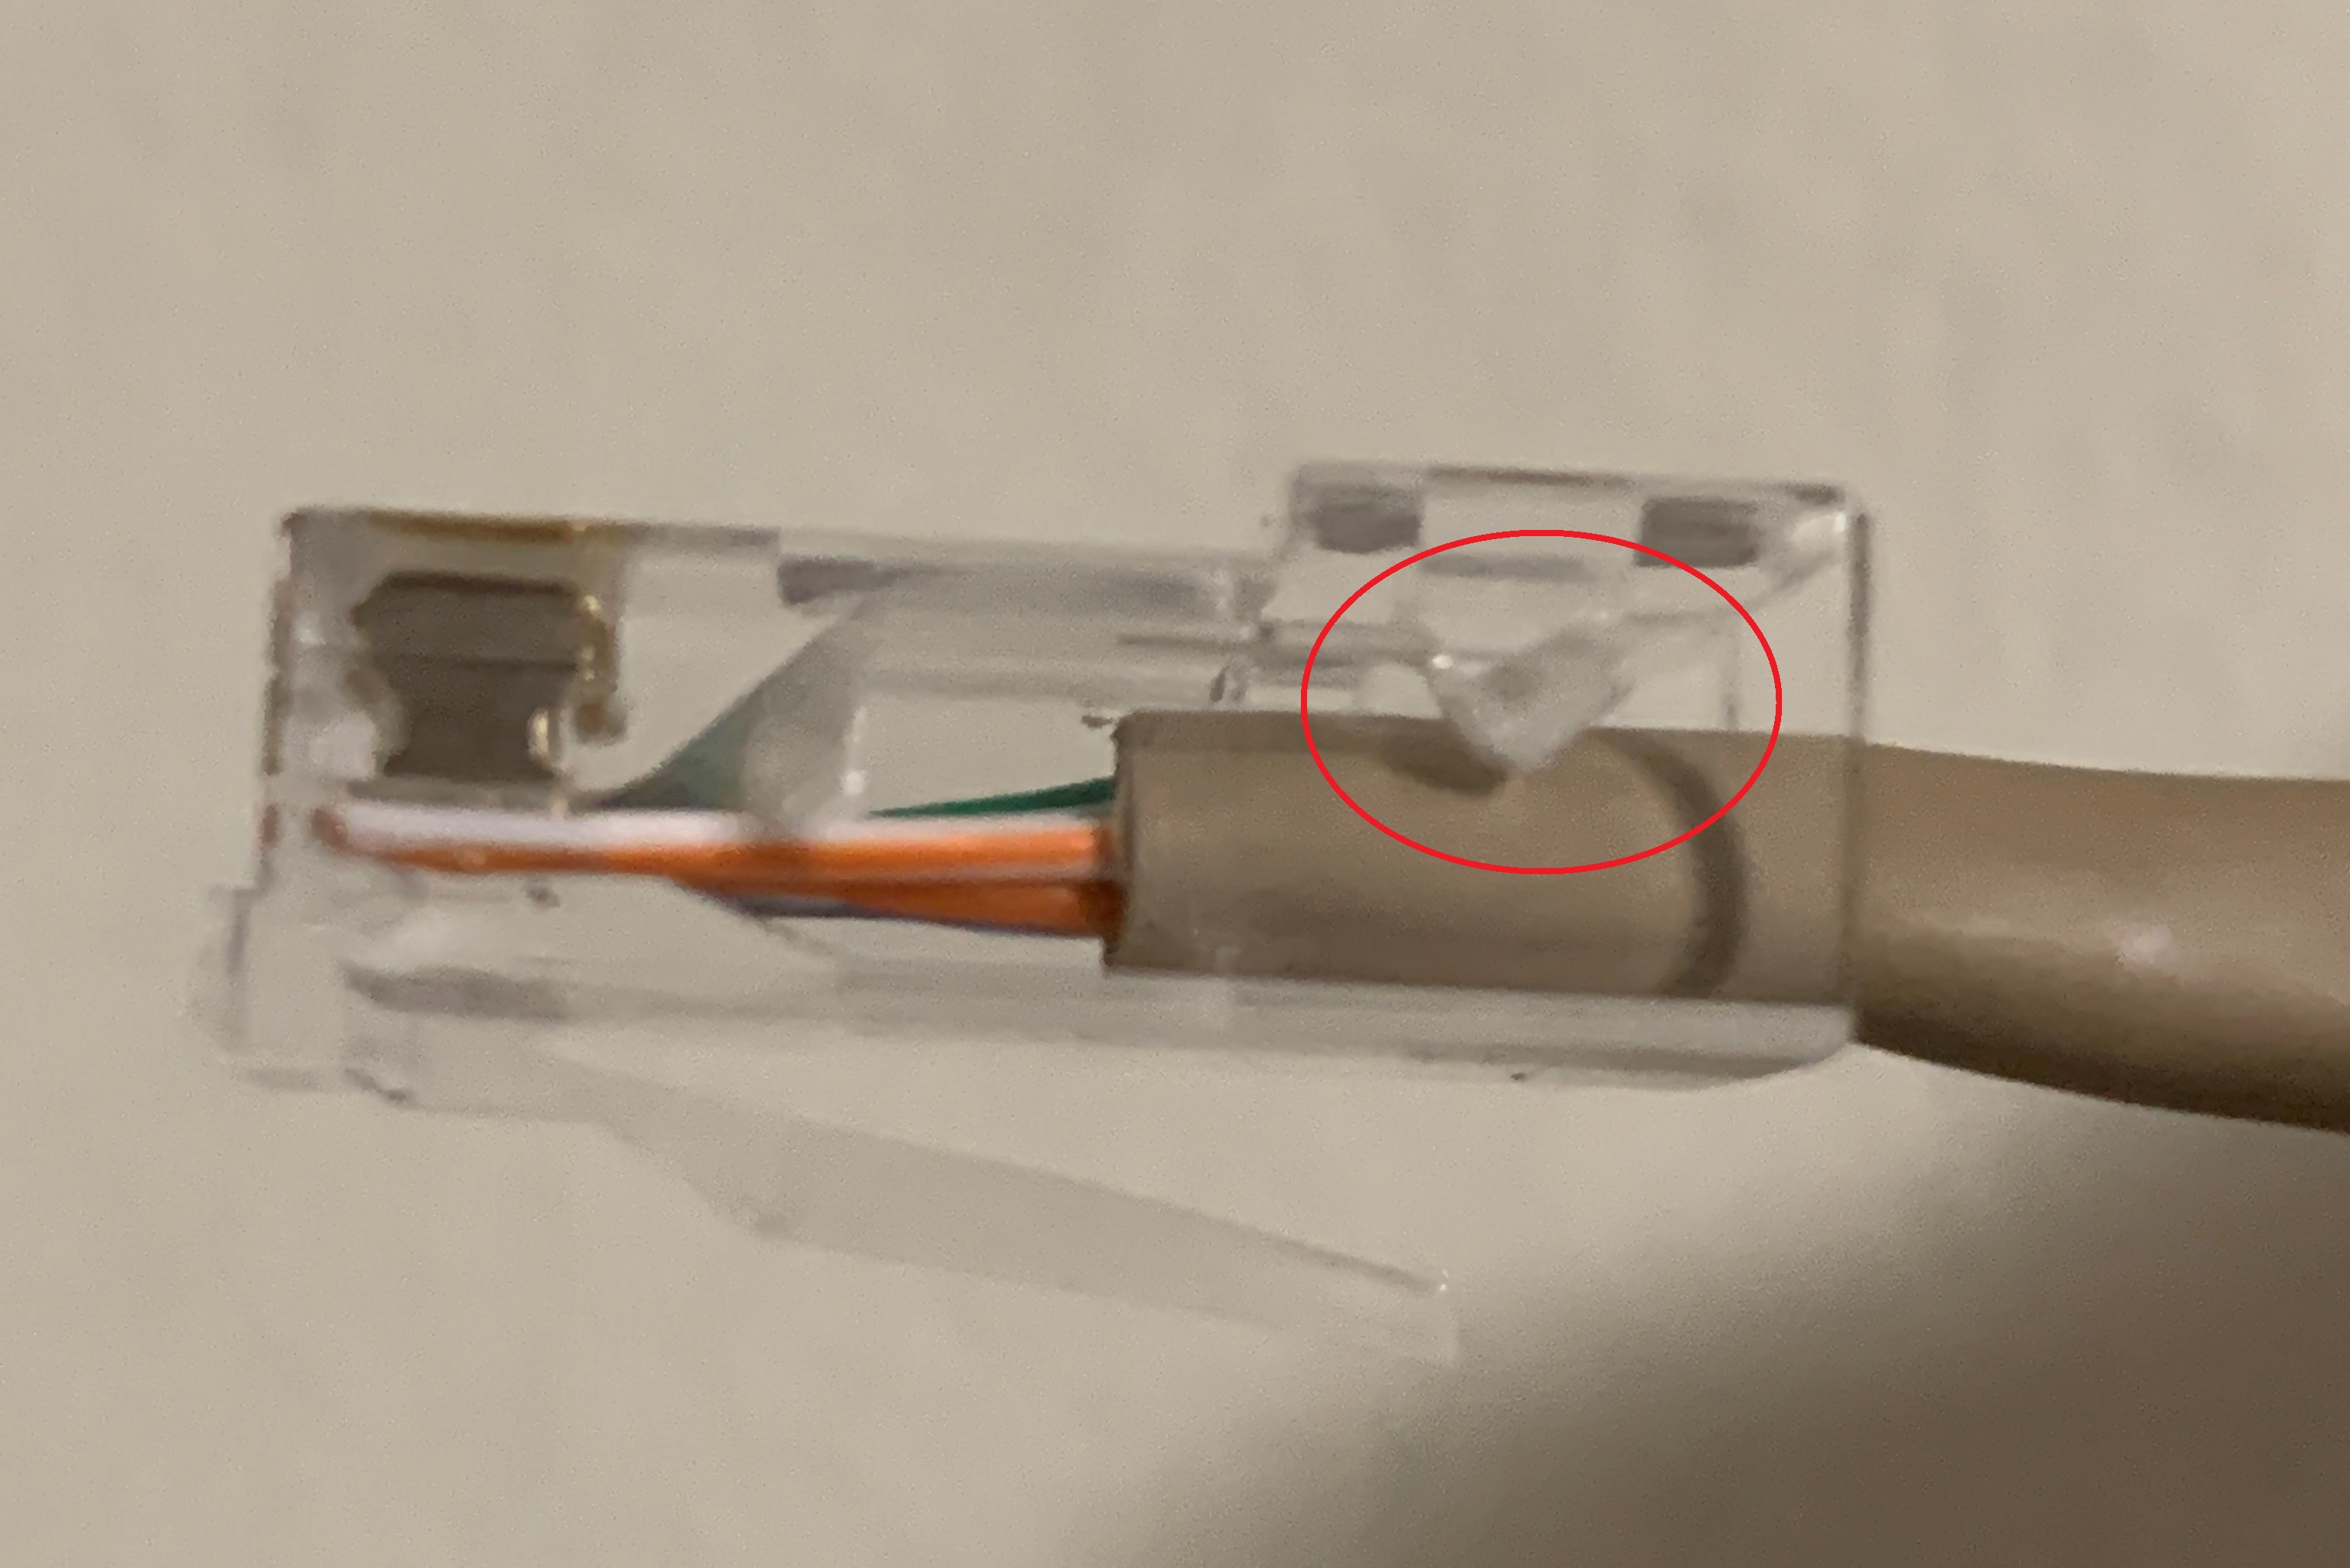
There are some good guides online for making your own Ethernet cables, such as this one. The full details here on how to terminate your Ethernet cables won't be covered here since there are so many good videos and guides online. But just a few things to point out; make sure your wire color order is the same on both ends, make sure the wires go all the way to the end of the RJ45 connector, and make sure there is some of the insulated outer jacket where the pinch point clamps down on the cable in the RJ45 connector.
The Ethernet cable was routed through an extra port on the water-tight conduit junction box. These junction boxes come with little plastic threaded caps, you can simply drill a hole through them and feed the un-terminated Ethernet cable through to the inside of the BlackBox.
Then the Ethernet cable can be routed through the in-door junction box using a cord-grip protector in one of the 1/2" knock-outs. The power cables and the Ethernet cable can just be routed up along the intake air pathway to the miner on top of the "T" platform.
With that, everything is ready to be connected and powered on. If you are looking for additional information on the startup procedure best practices, check the Upstream Data Startup Guide.