Setting Up the Hodlr Disks
In this example, I'm demonstrating a scenario you may find yourself in. If you have taken the first steps in self-custody then you probably have your wallet's seed phrase (typically 12 or 24 words) written down on paper. Congratulations on taking the first step in securing your sovereignty. But you may have thought about or even lost sleep over the idea of your Bitcoin seed phrase going up in a blaze of fire or being damaged by flood or other environmental hazards. This is where secure metal backups come in handy, products like the Hodlr Disks offer a robust, stainless steel backup for your seed phrase that will survive extreme environmental conditions. There are a wide variety of products and DIY methods for creating a secure metal backup, such as my previous article explains here.
Next, I will demonstrate how to transfer a seed phrase written on paper to the stainless steel Hodlr Disks.
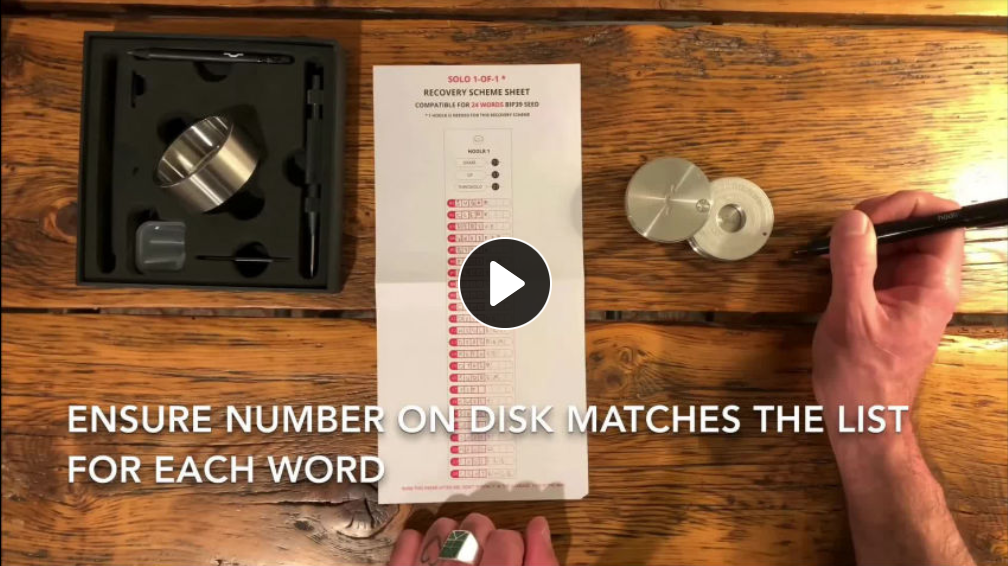
Transfer your existing seed phrase to the provided and appropriate slip of paper that came with the Hodlr Disks. There are a few different formats available such as a 2 of 3 scheme, Shamir 3 of 5 scheme, and a twins scheme. In this example, I am demonstrating the solo 1 of 1 scheme.
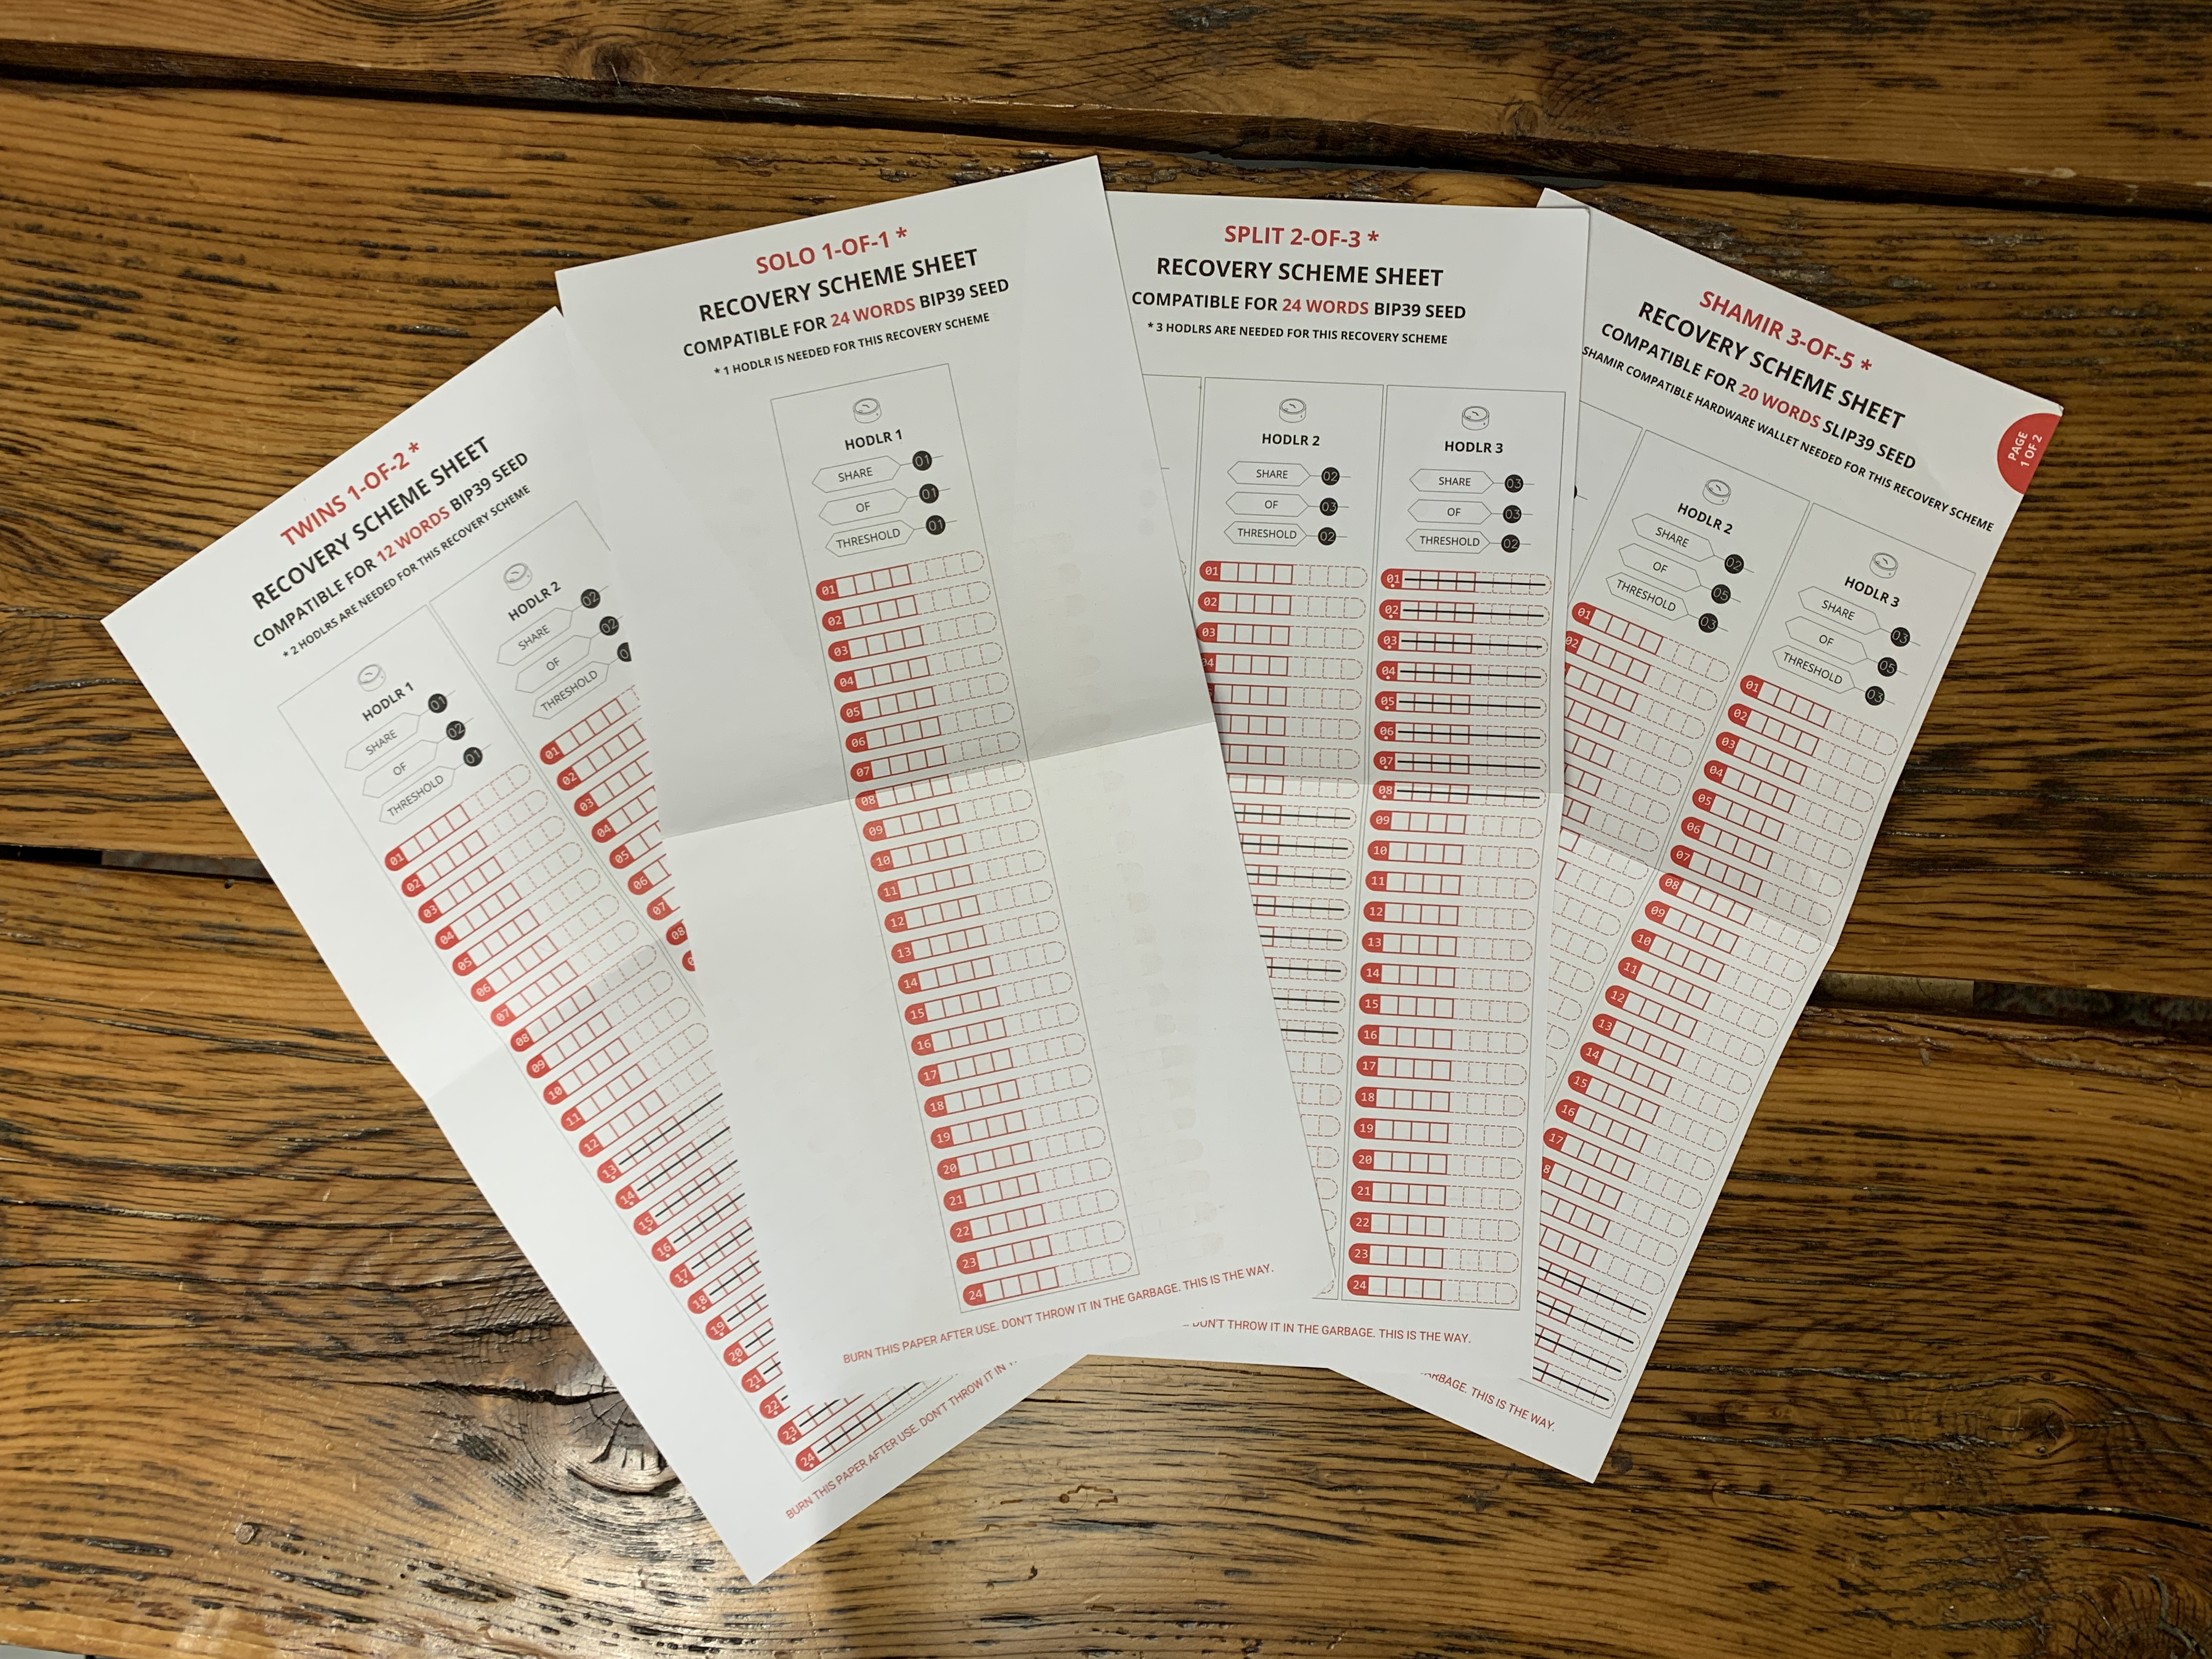
A common theme among all the schemes is that only the first 4 letters of each word are required in order to secure your backup. This is because the industry standard BIP39 Word List is comprised of 2,048 words, none of which share the same first 4 letter sequence. So by securing the first 4 letters of any word on that list, you know that there can be no mistaking it for a different word. Each of the selected 24 index numbers on the scale from 0 - 2,047 are calculated from 24 groups of 11 binary bits that make up your private key, but that is a topic beyond the scope of this article.
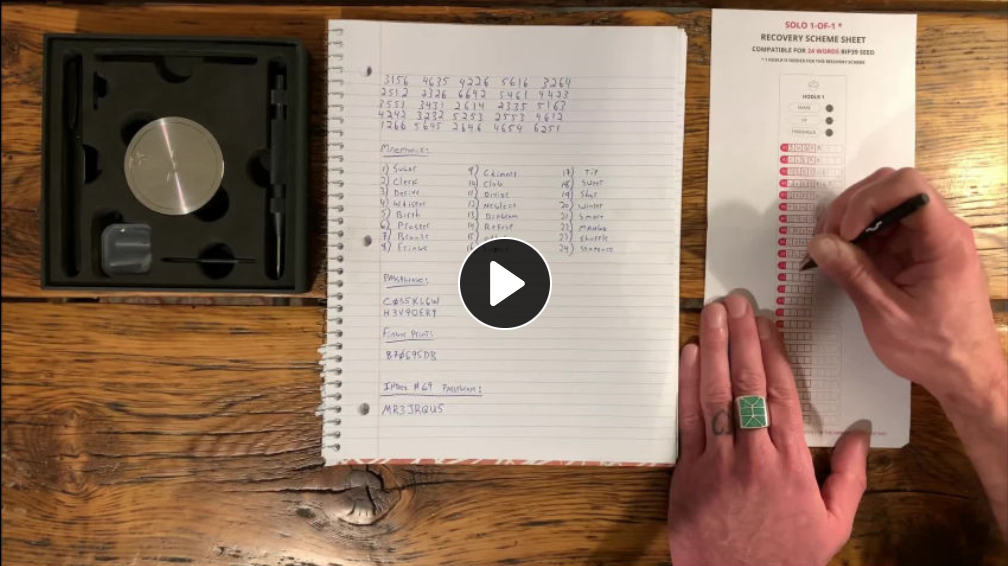
In this video, I demonstrate how to transfer an existing 24 word Bitcoin seed phrase from a notebook to the provided slip of paper. This helps to ensure that my focus is only on the first 4 letters of each word in the next step. If you have a phone or other camera-equipped device near by, you can use the provided camera covers to ensure that no prying eyes see your seed phrase. Make sure you don't read your seed phrase out loud either, as some devices may be recording you.
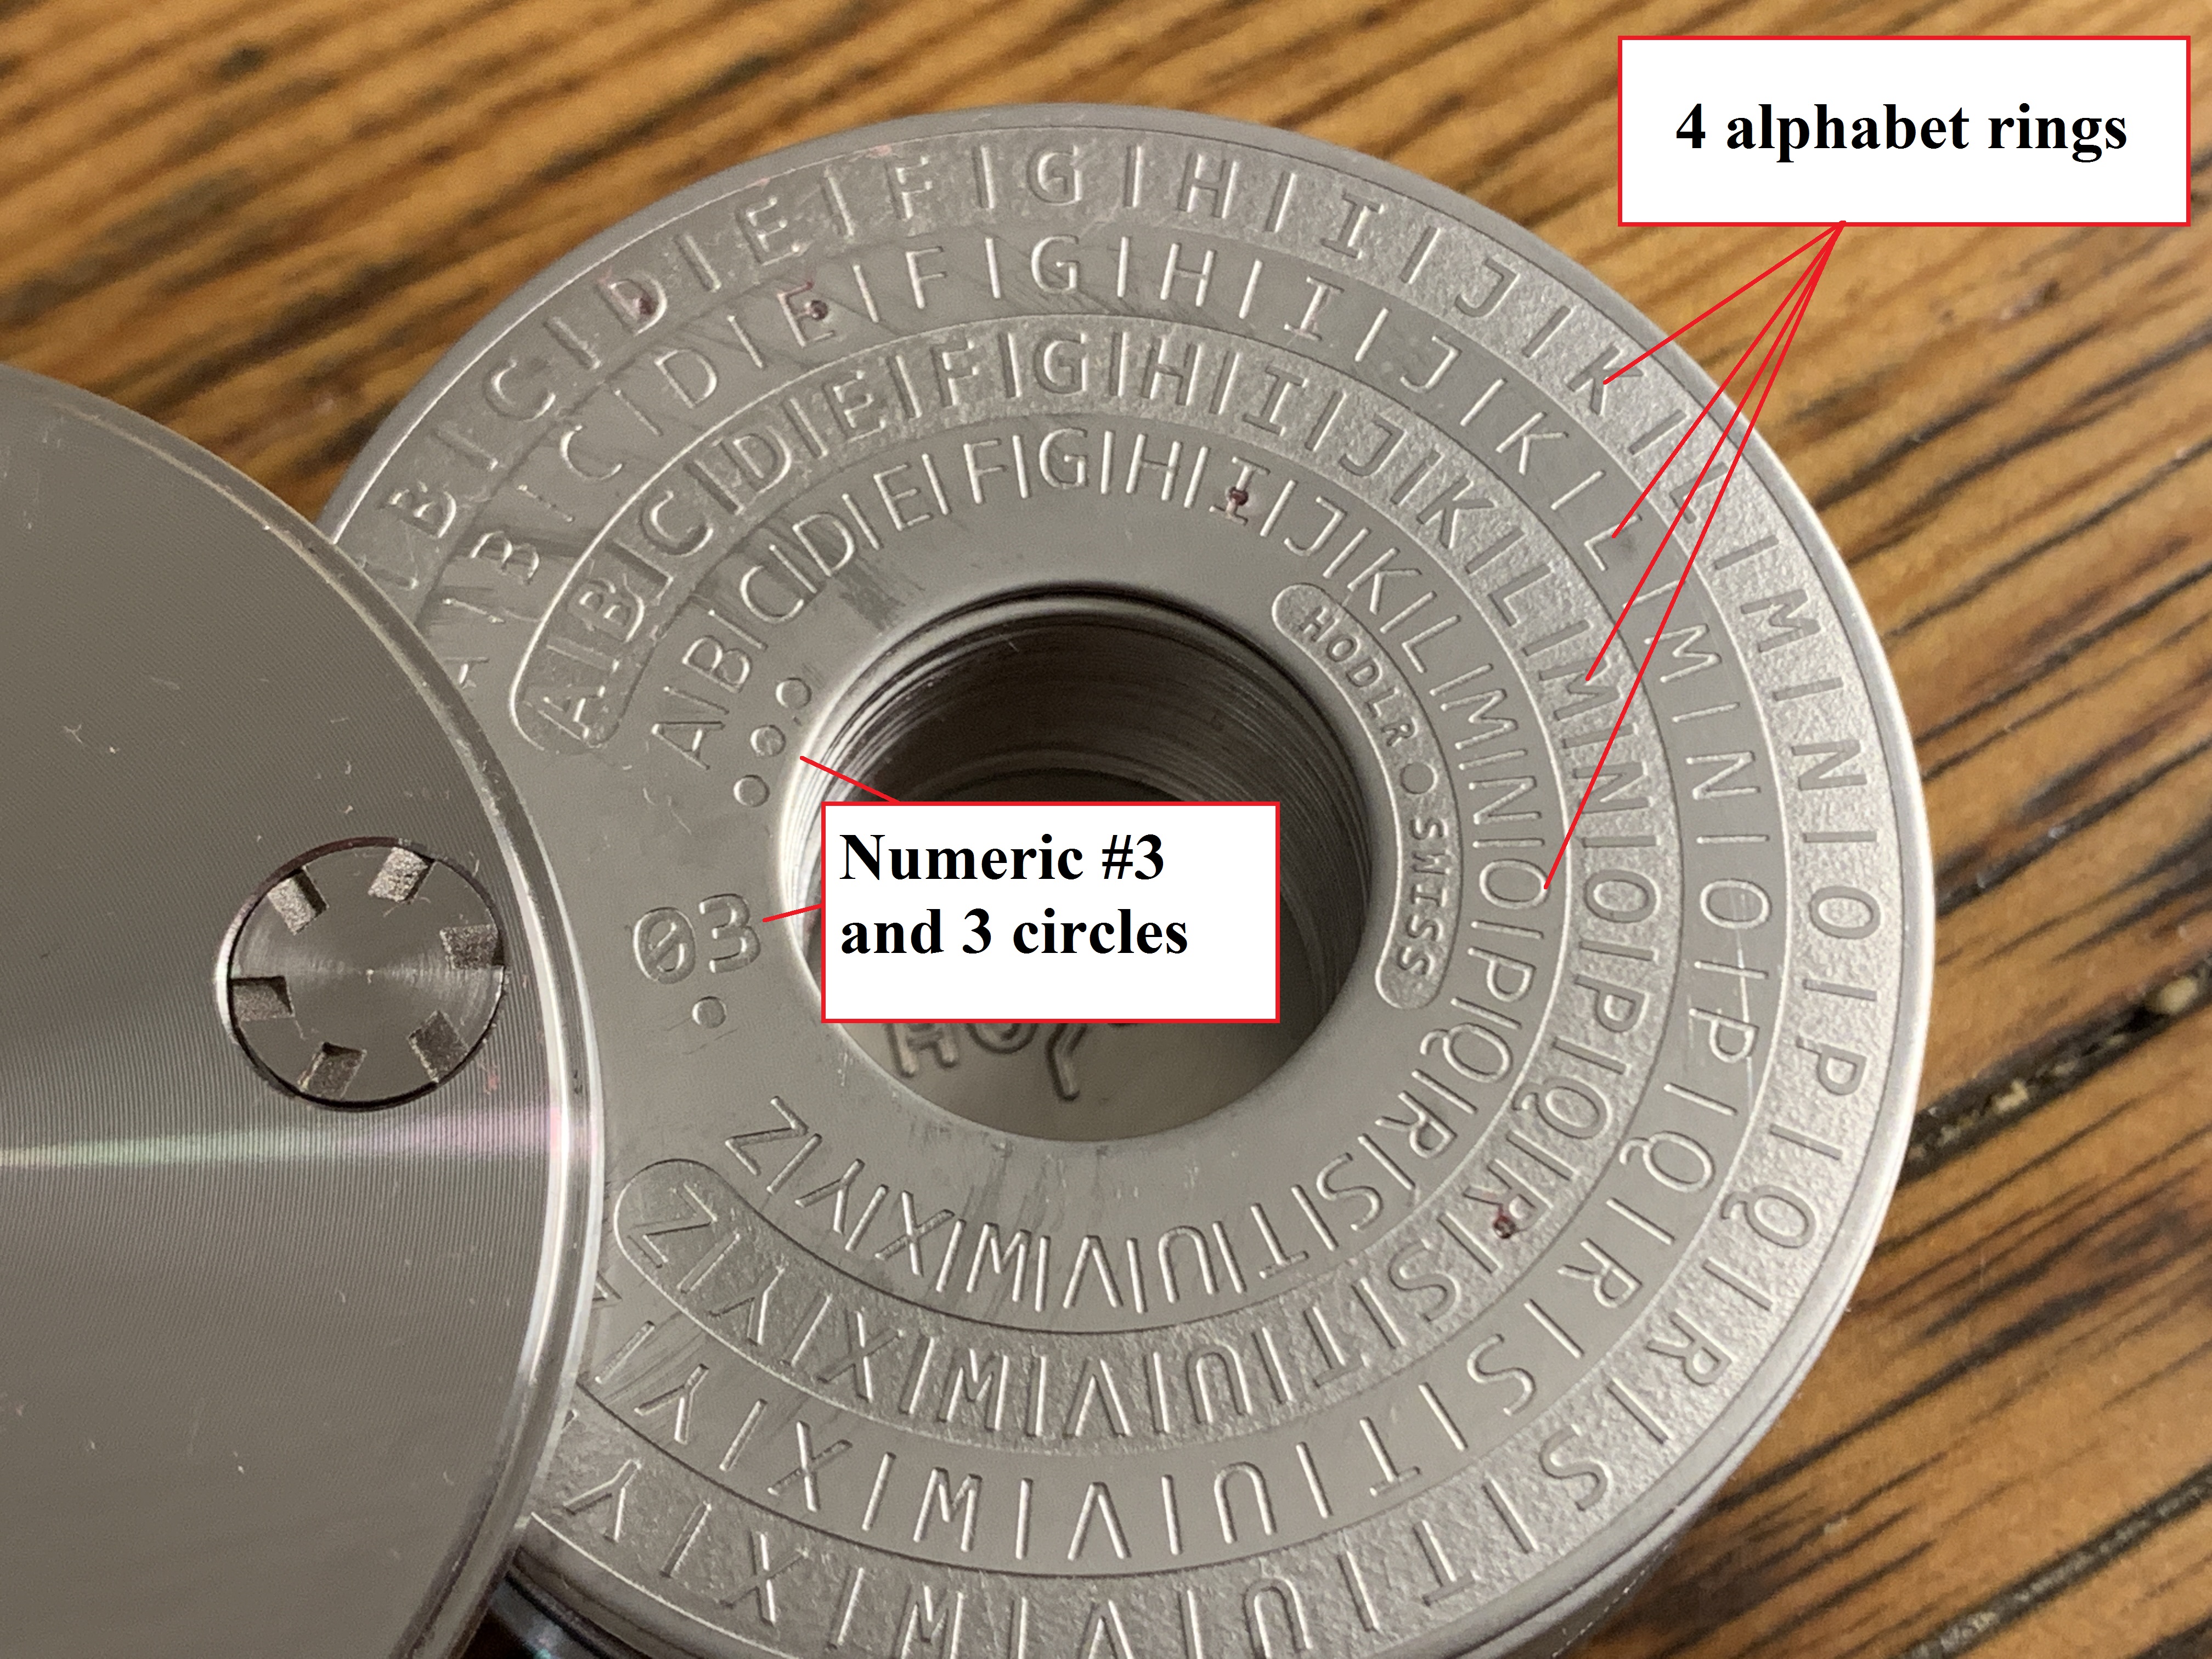
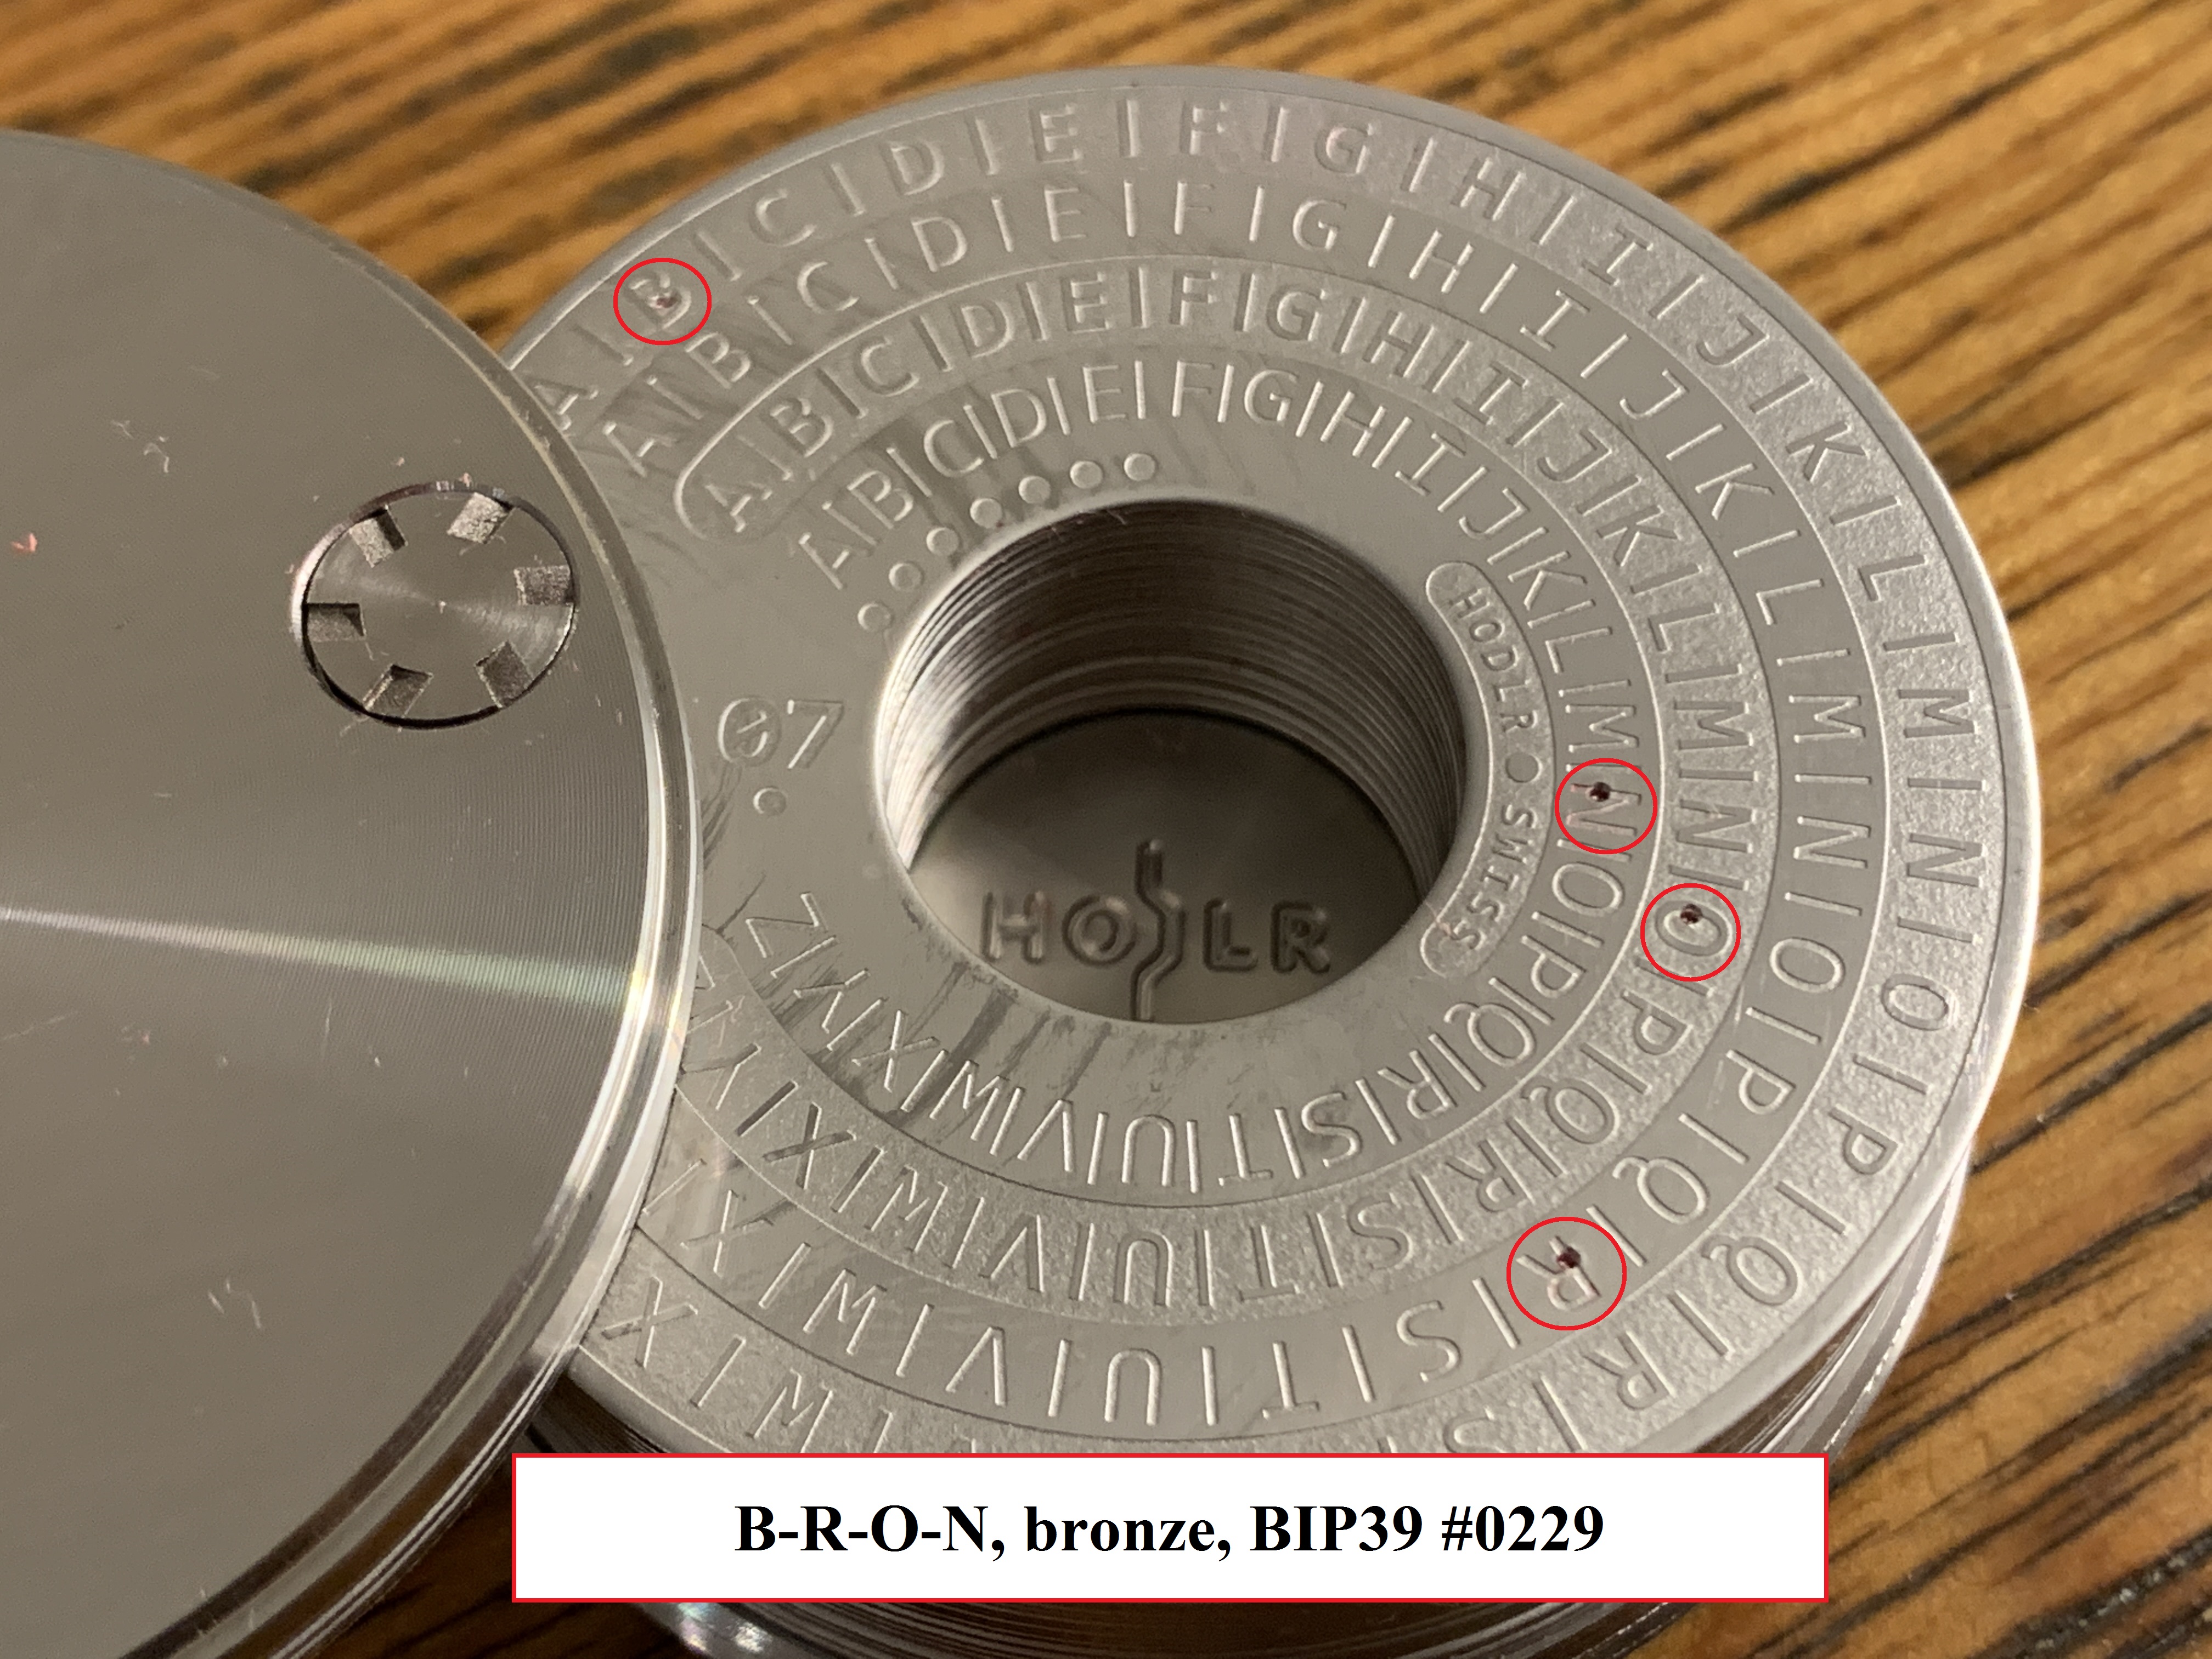
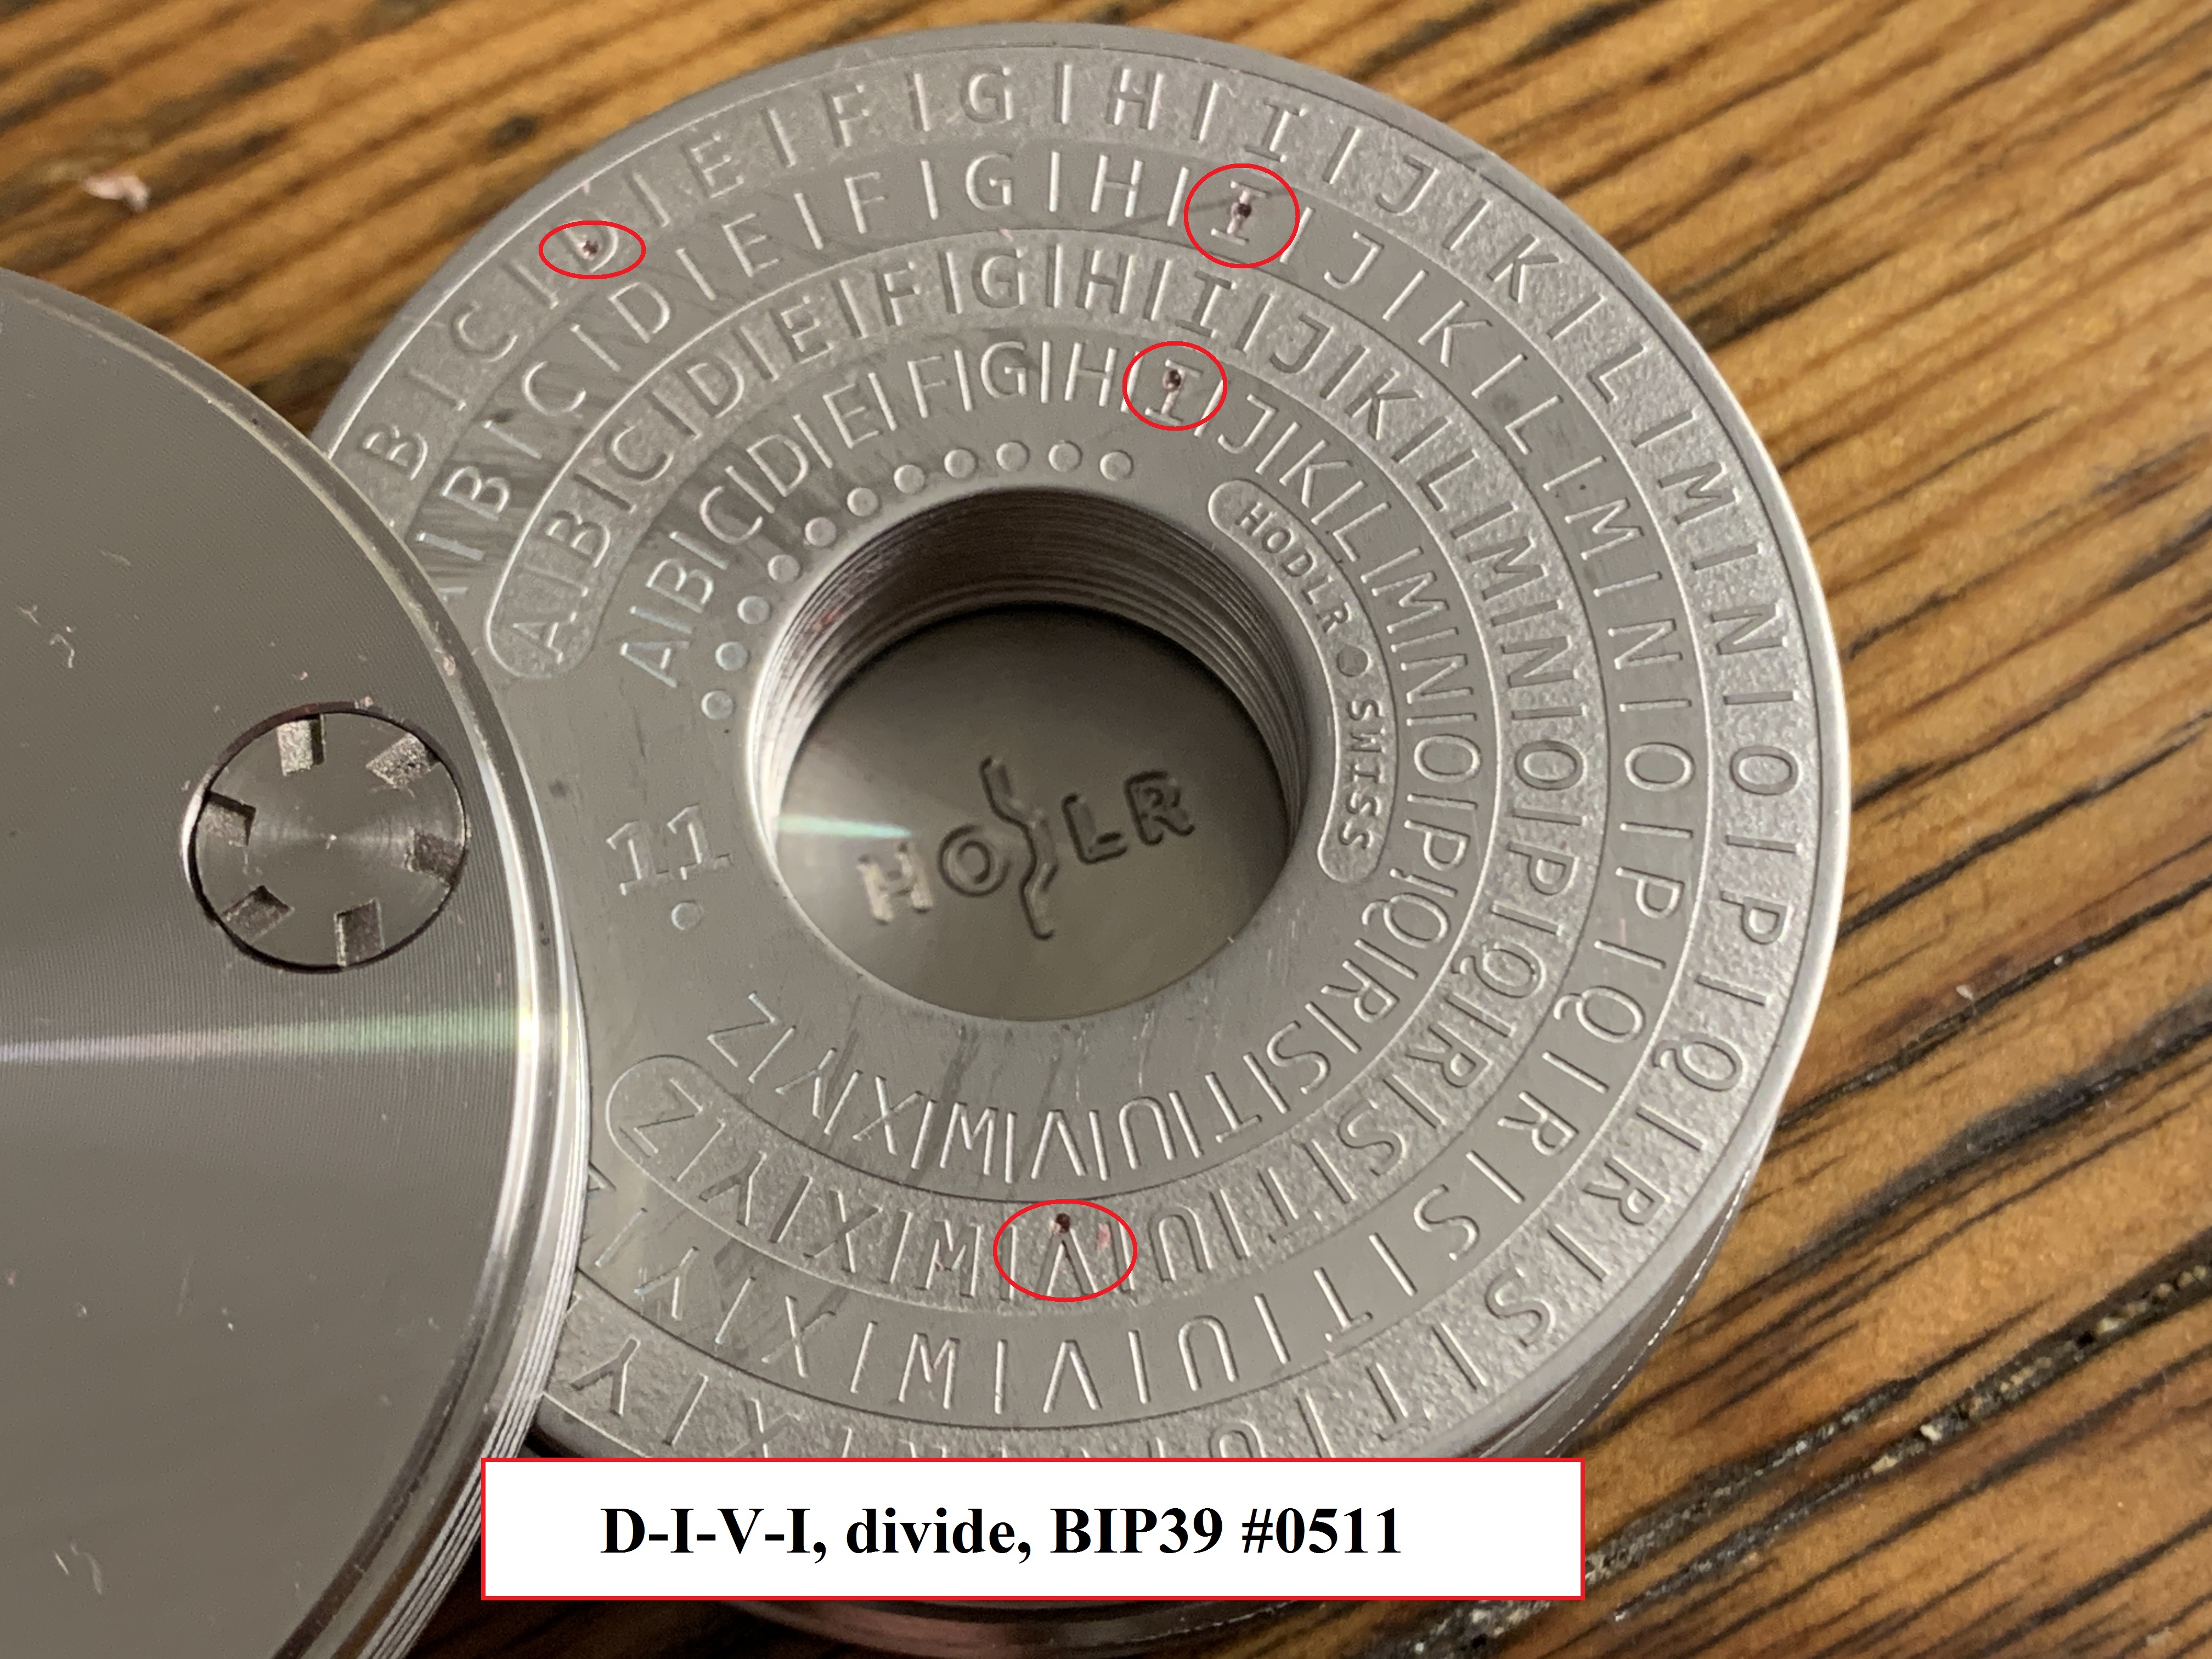
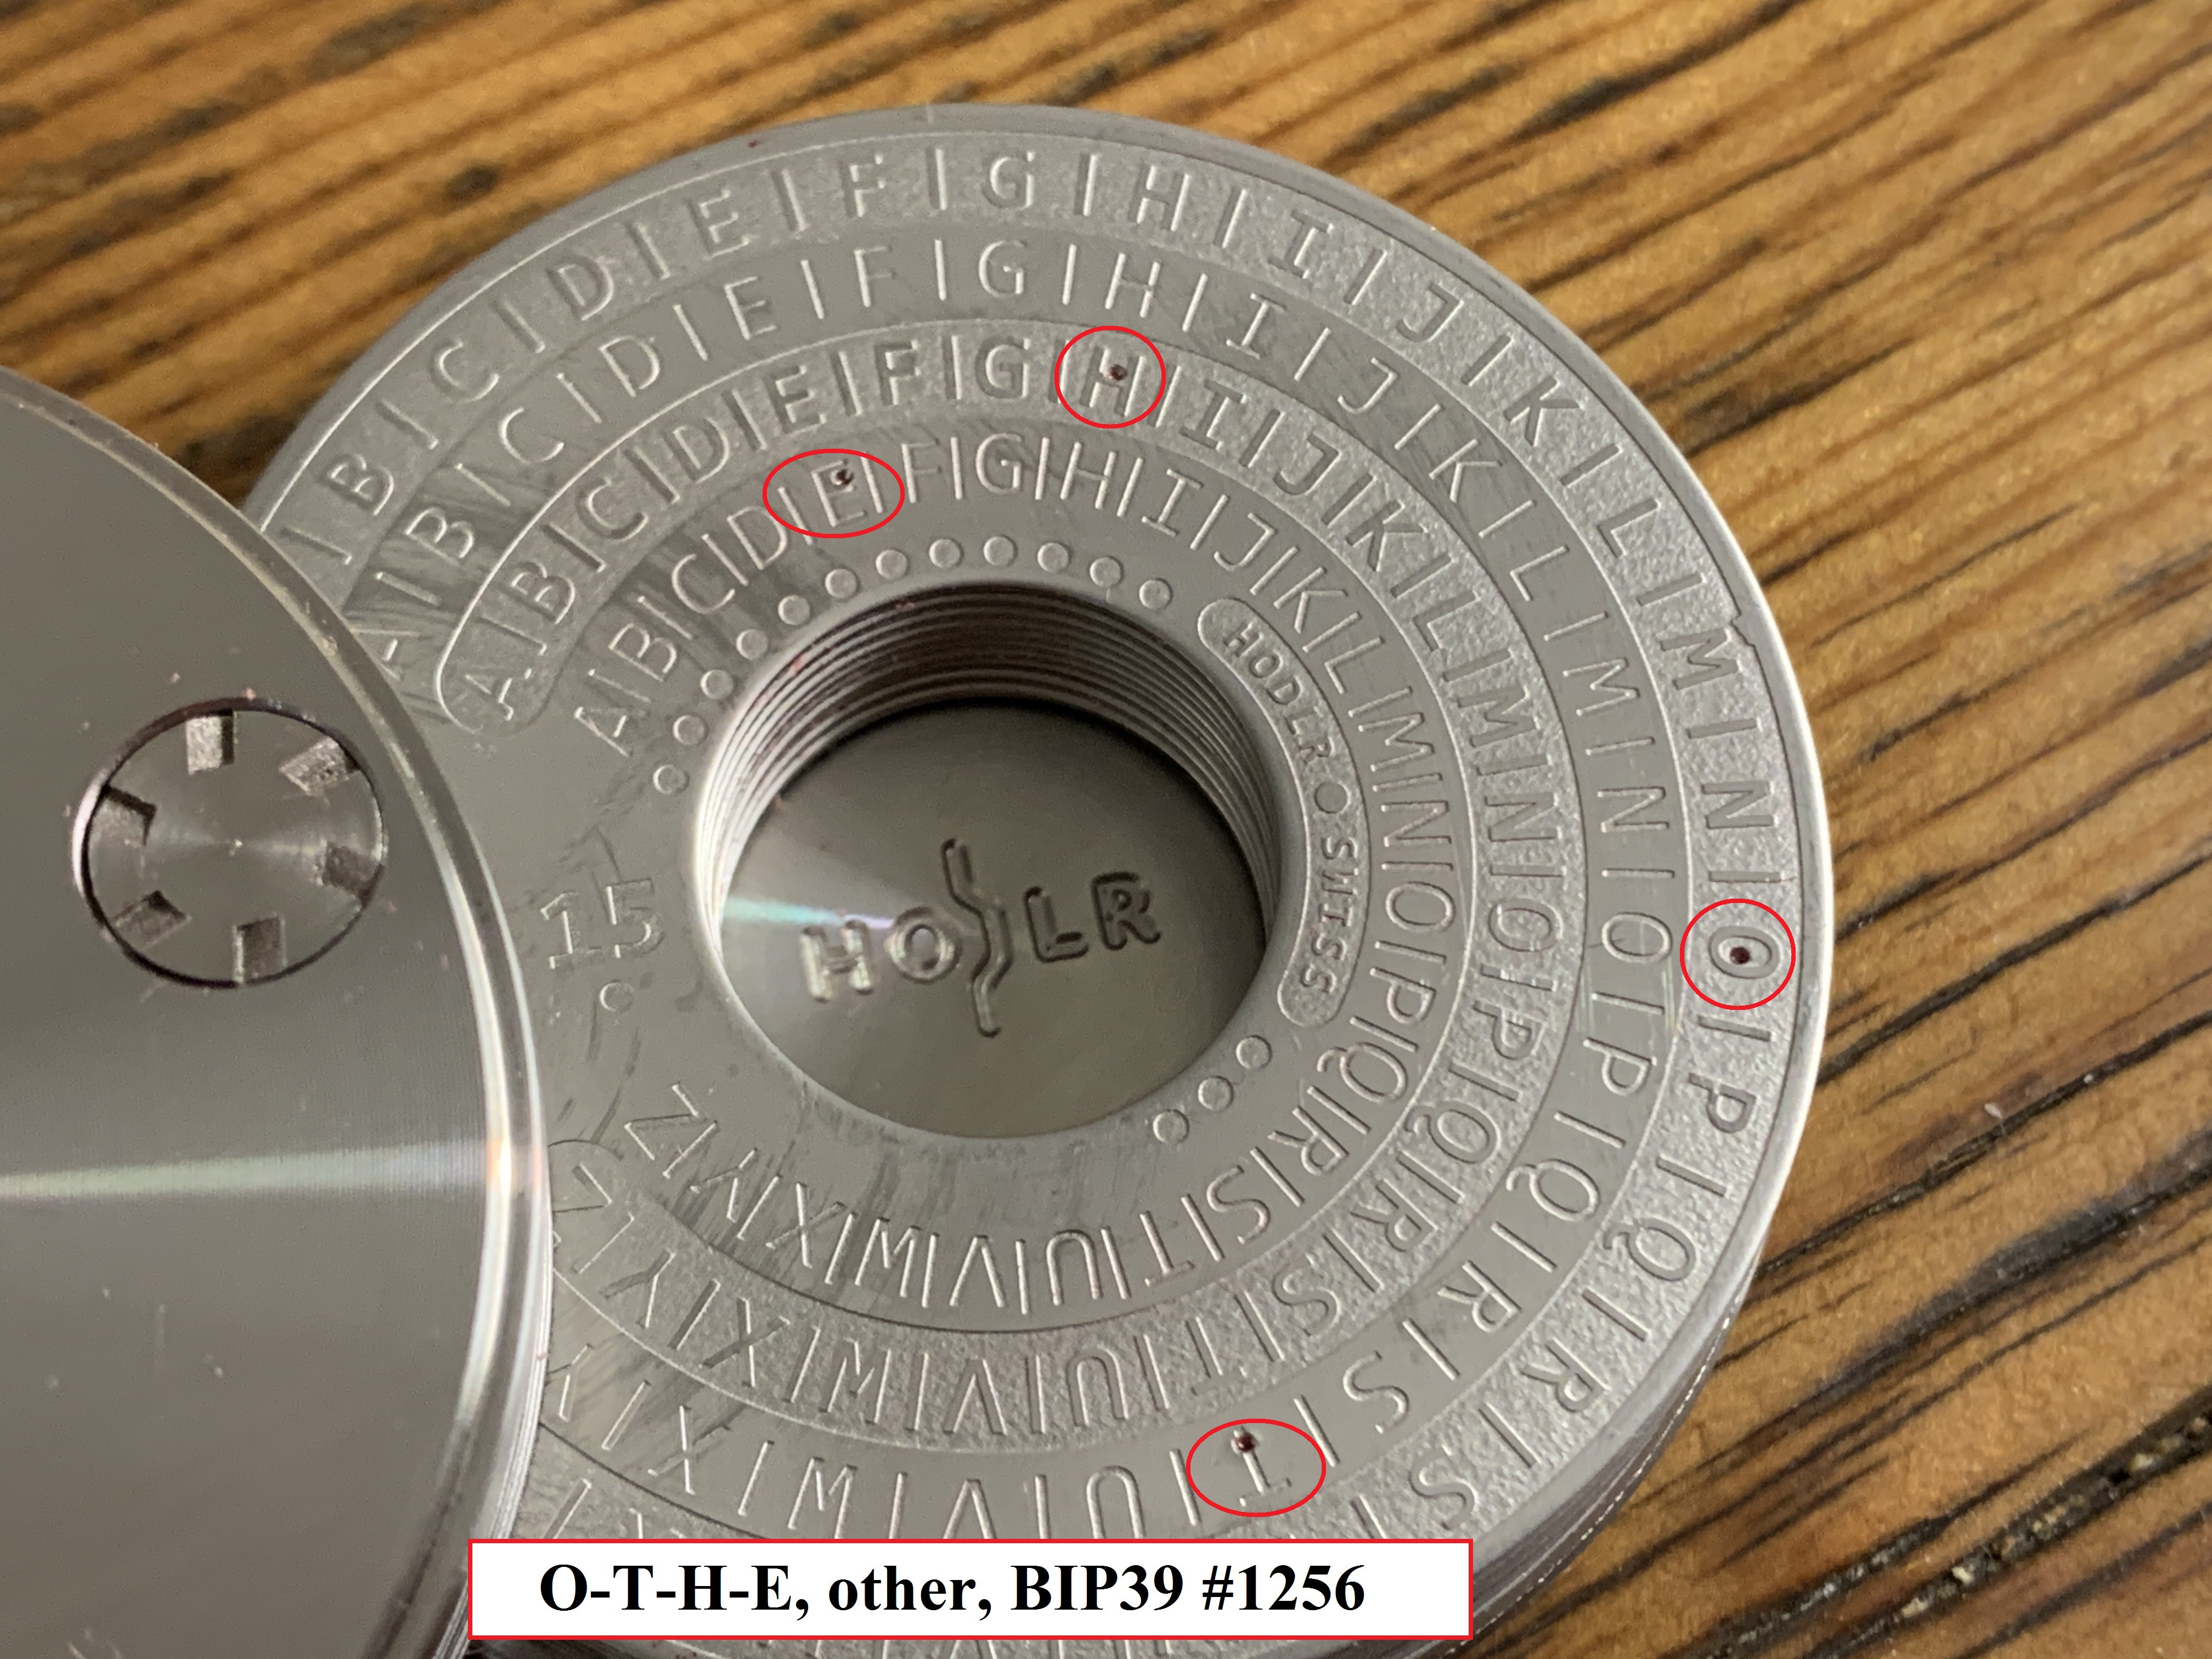
Now that the 24 seed words have been transferred to the slip of paper, the next step is to use the marker to indicate each letter on each ring of each disk that needs to be stamped. Each Hodlr Disk has 24 disks inside of it. Each of these disks has 4 rings impressed on it. Each ring contains the entire alphabet. This way, the outer most ring will be used for the first letter, the second ring for the second letter, the third ring for the third letter, and the fourth ring for the fourth letter. Each disk is also marked with a number 1-24 and also has small circles on it that correspond to the disk number. This is helpful for cases of restoration after exposure to extreme environments where either the numeric value or the circles are damaged.
In the next video, I demonstrate how to use the marker to indicate which letter in each ring that needs to be stamped. Using the marker first, allows you to double check your work before proceeding with the irreversible spring-loaded punch. After marking your letters with the marker, make sure to double check your work. If you made a mistake you can easily clean the marker off with some alcohol.
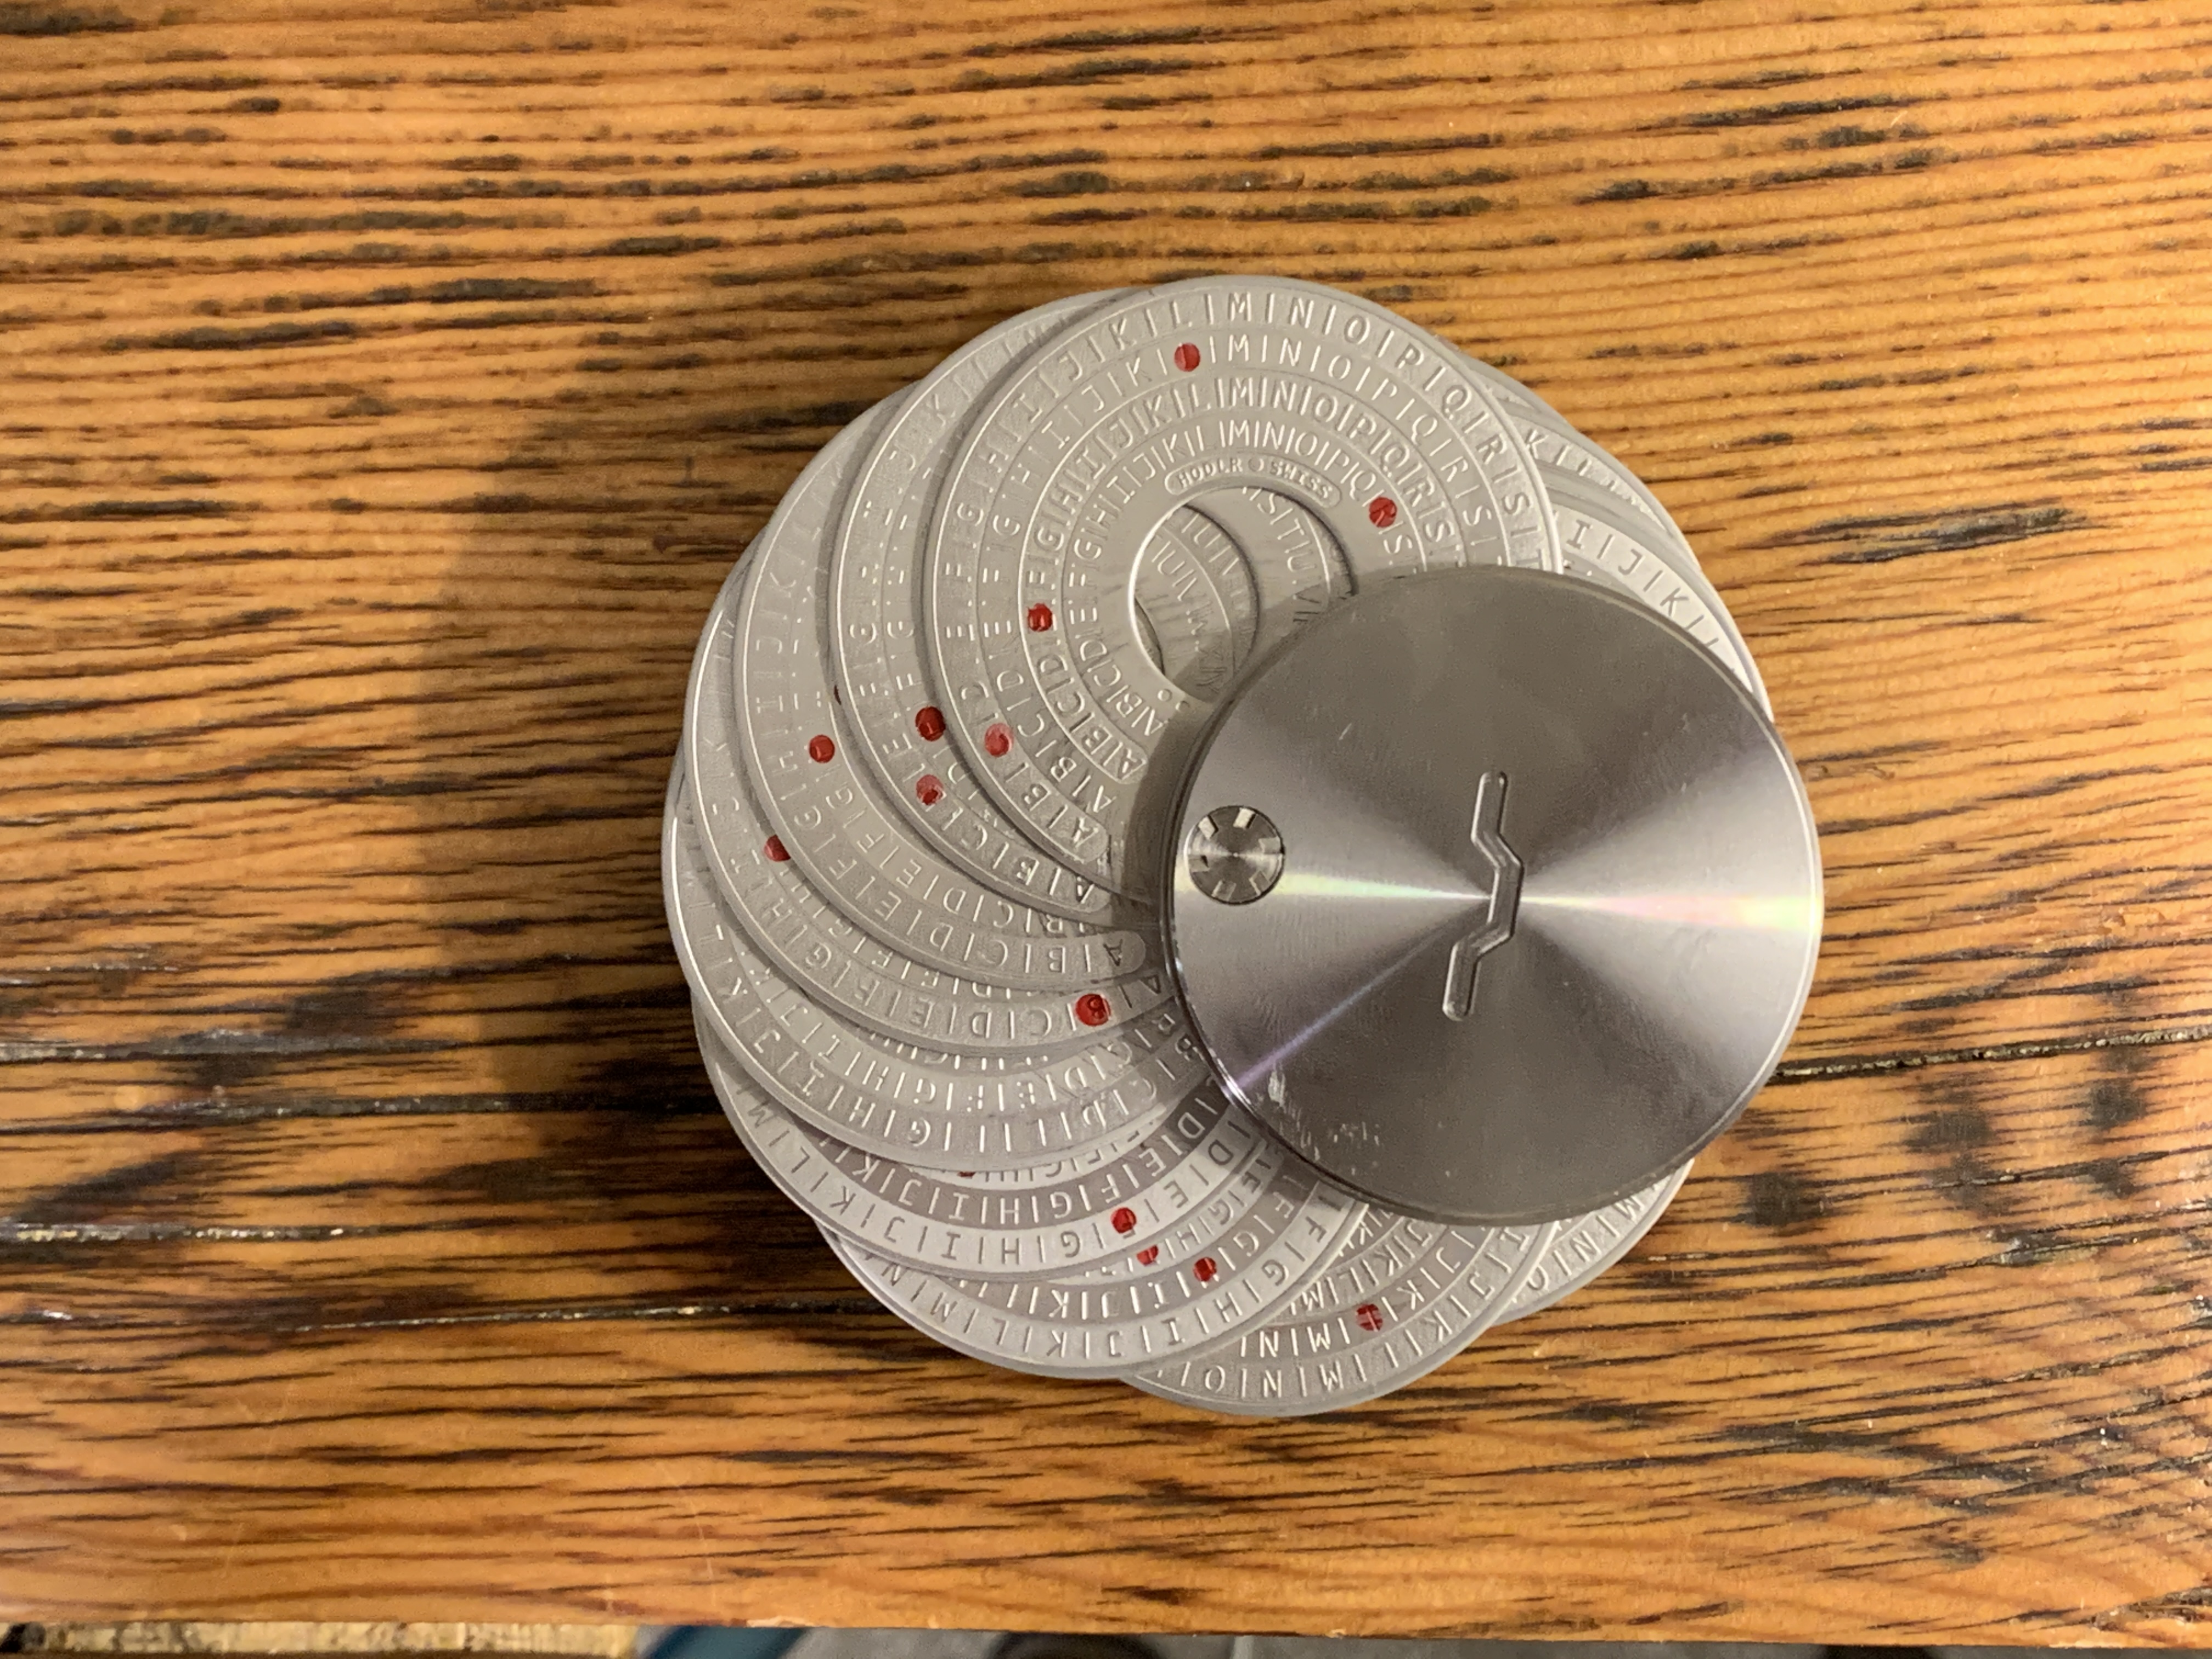
Once all the letters have been marked on all the disks and the work has been double checked, it is time to stamp the letters with the included spring-loaded punch. Simply put the pointy end of the punch on the desired letter and apply pressure until the spring releases and punches the disk with an indentation on the intended letter.
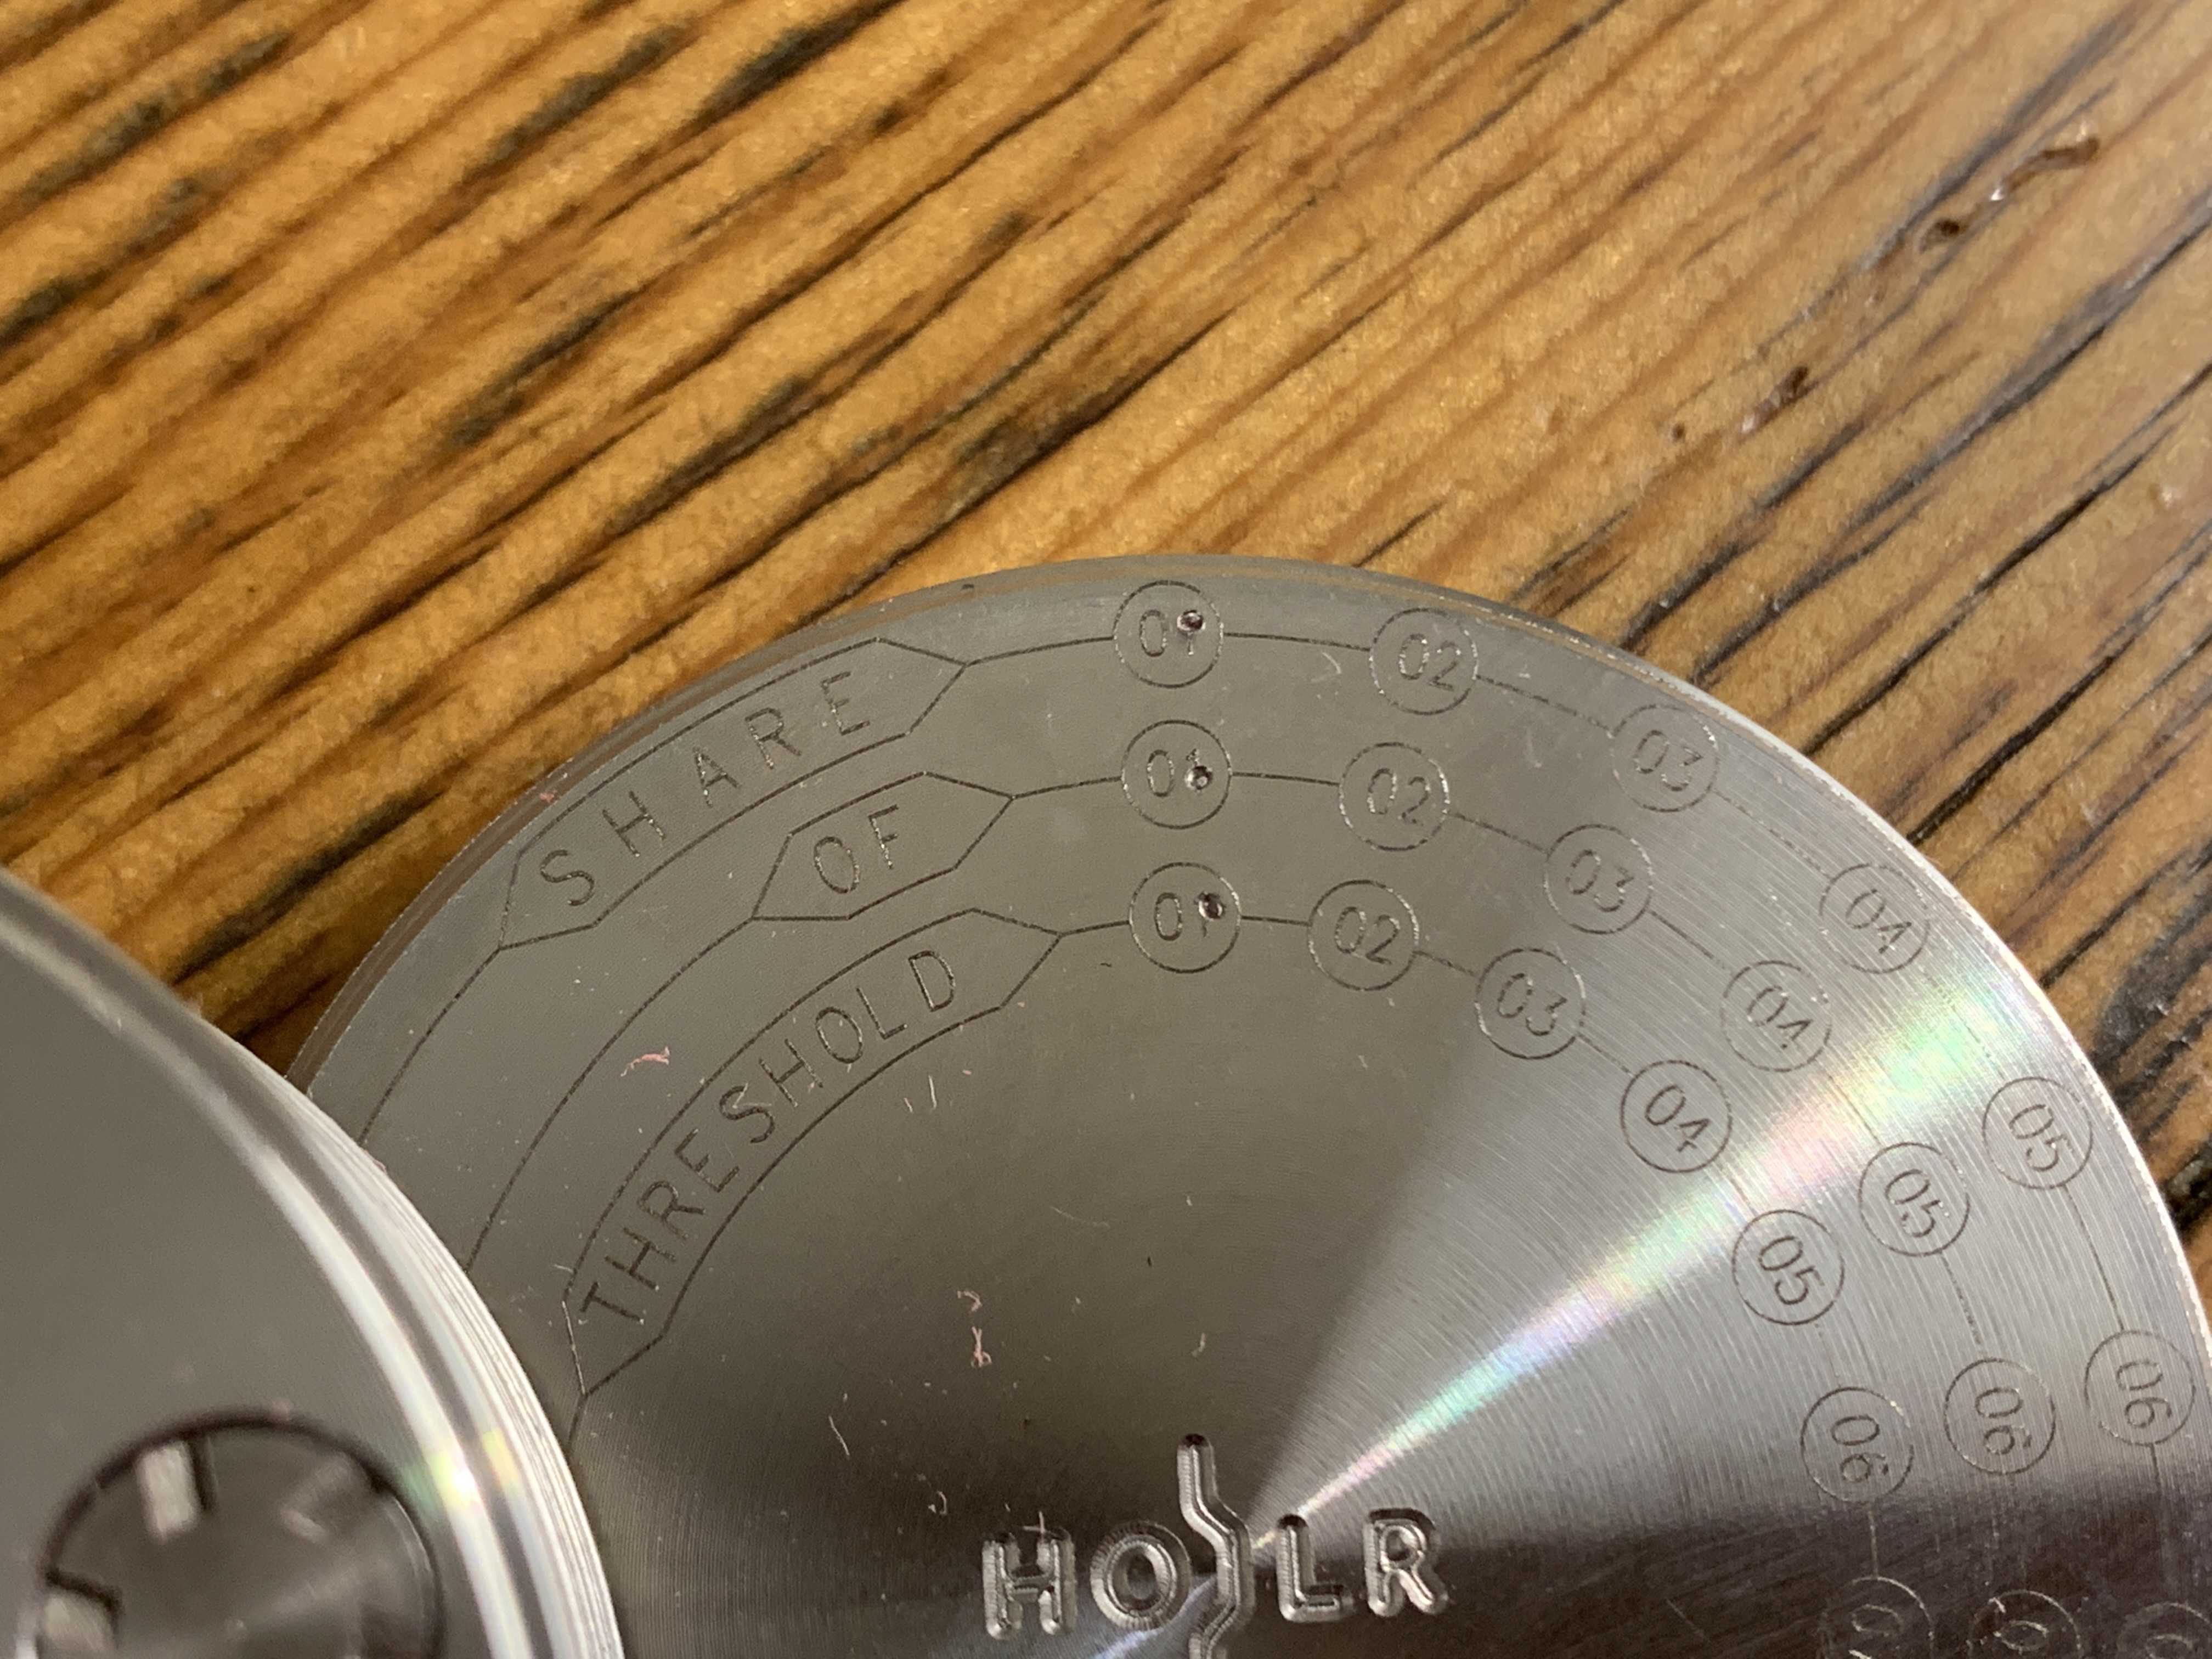
After the first 4 letters of each seed word have been stamped into the disks, it's a good idea to indicate the Share-Of-Threshold. This makes it easy to keep track of which piece in a set the disks are, how many pieces belong to that set, and the minimum threshold required from that set to restore your wallet. For this demo, it was just 1-1-1 because this is the first share of one piece with a minimum threshold of one piece necessary to restore.
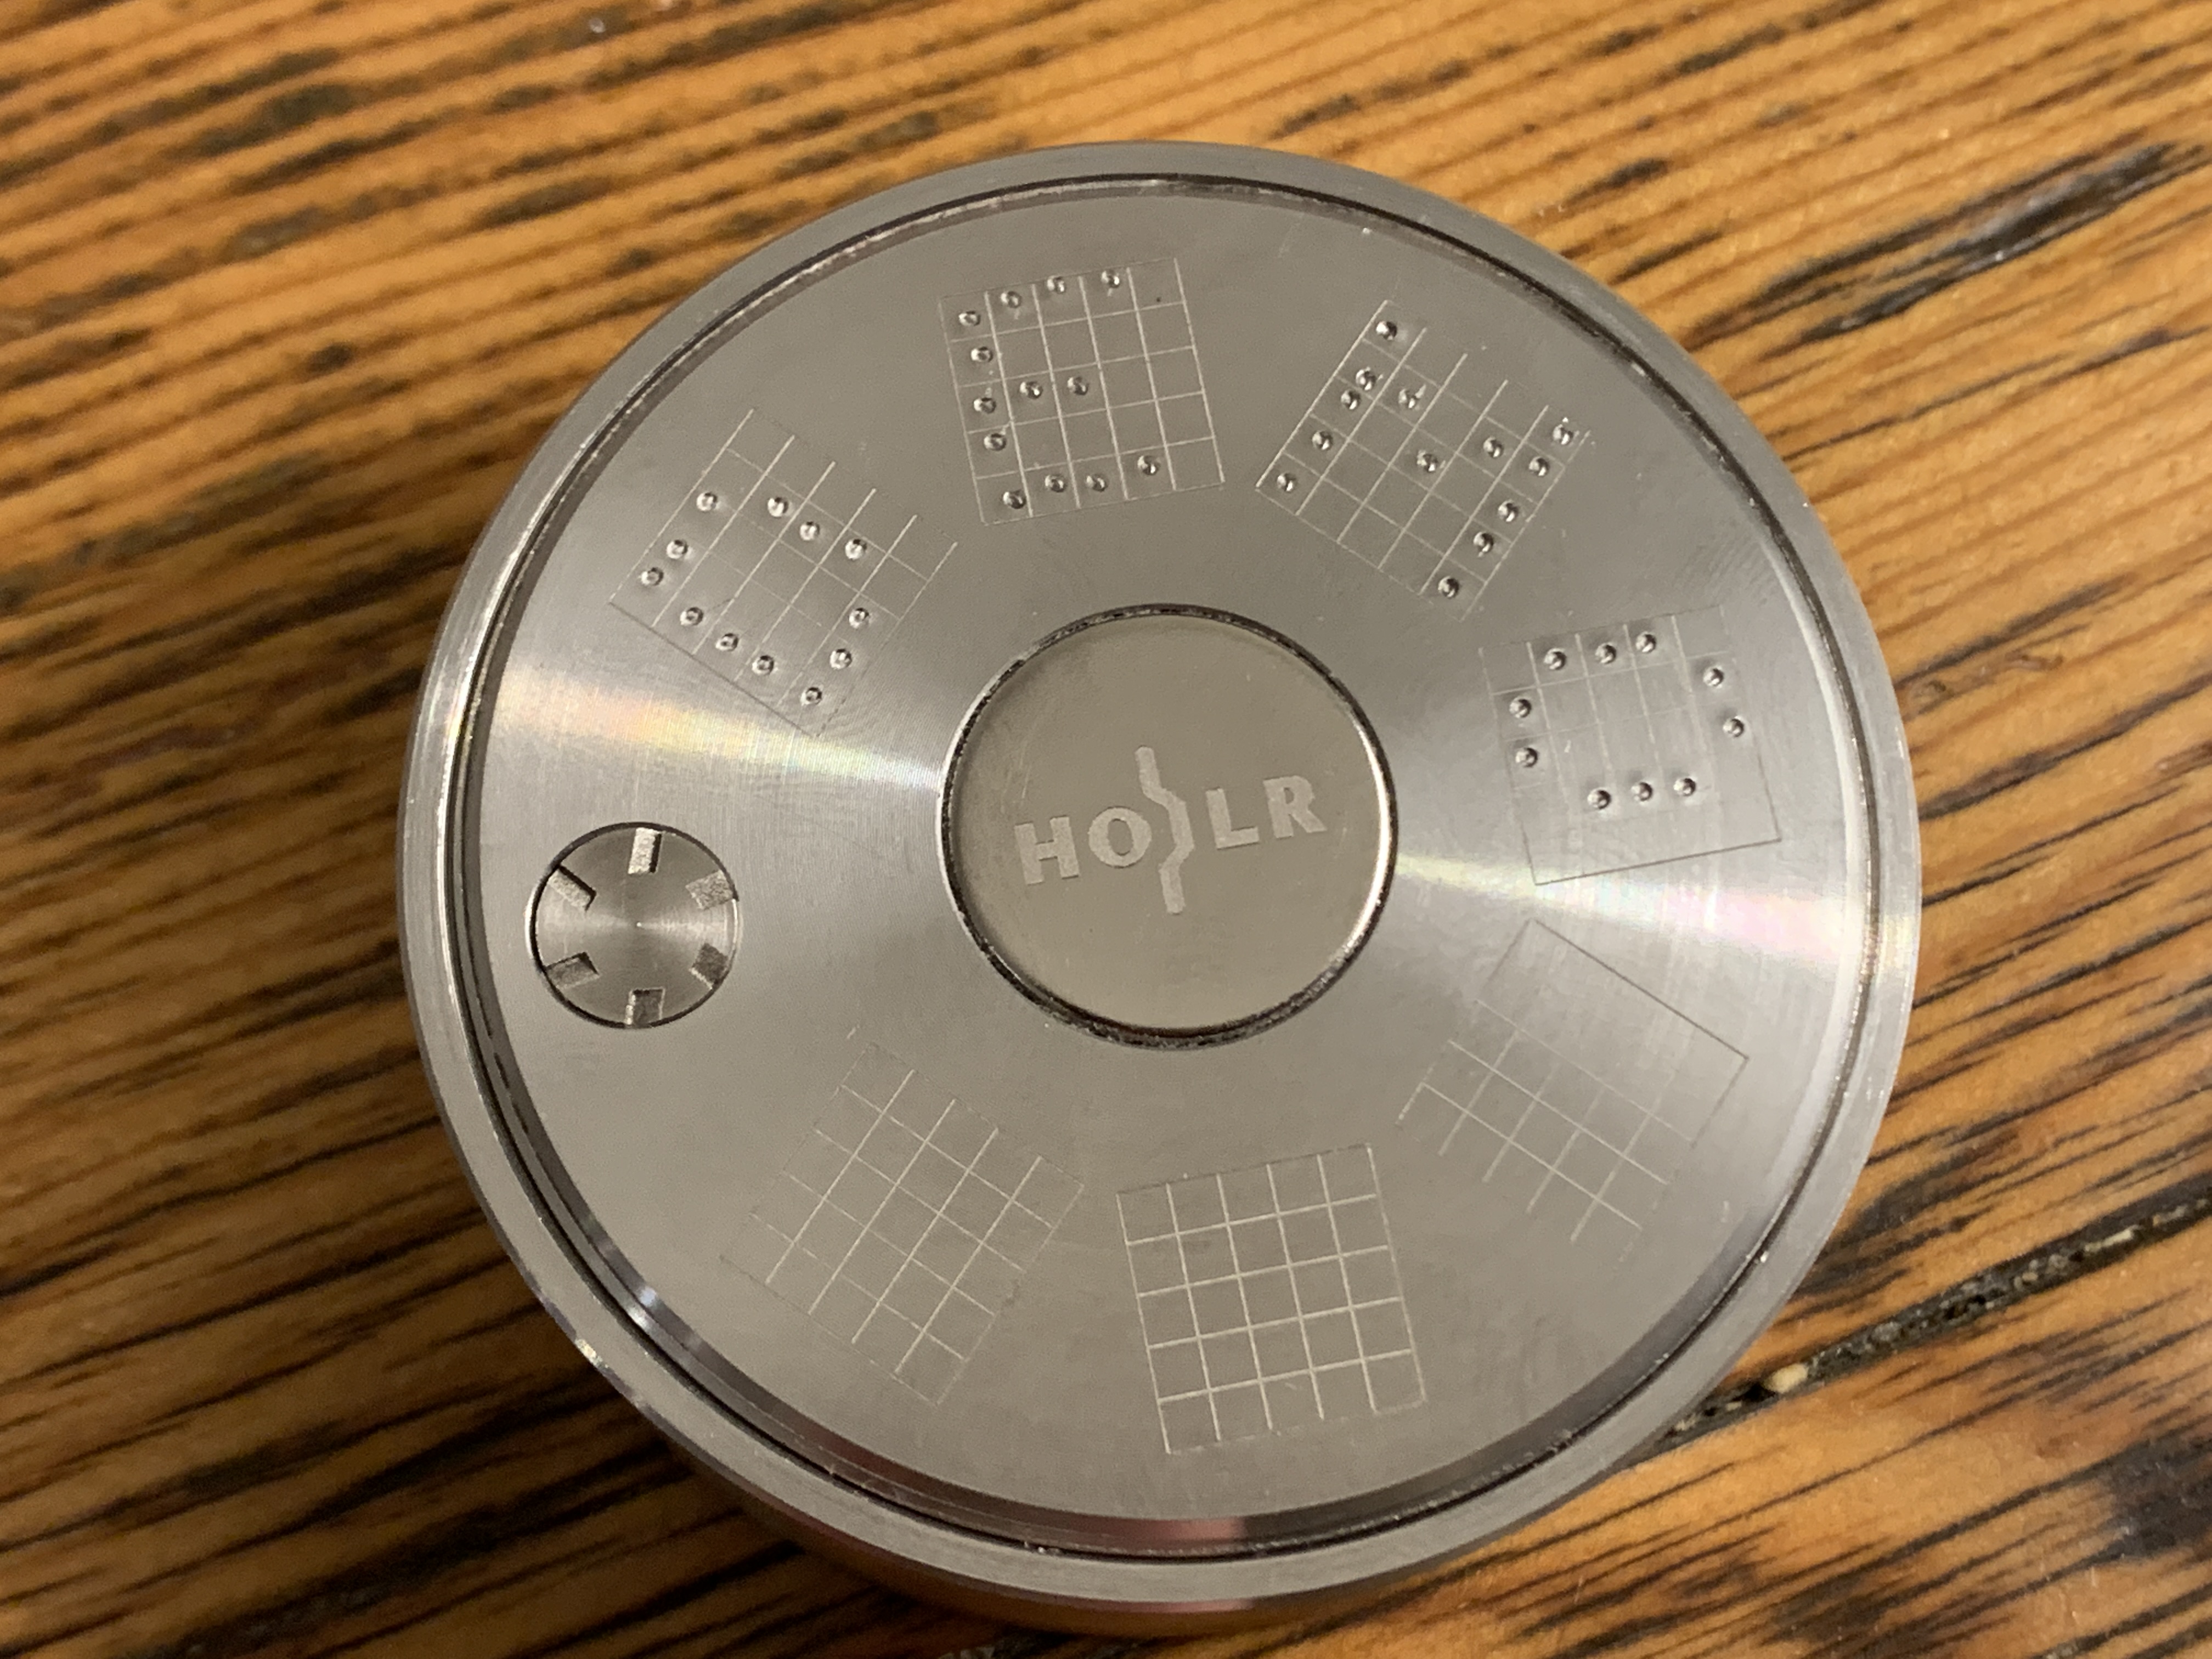
Also, there are some grids on the back of the Hodlr Disks where the user can punch a unique identifier for the disks. This one was named "DEMO".
Once the Hodlr Disks are all stamped and good to go, it is a good idea to verify that your wallet can be restored based on the information available in the backup. Try to use only your backup to recreate your seed words. Then use those seed words to try and restore your wallet on your hardware or software wallet. If everything checks out, then it is probably safe to burn the paper copies of your seed phrase.
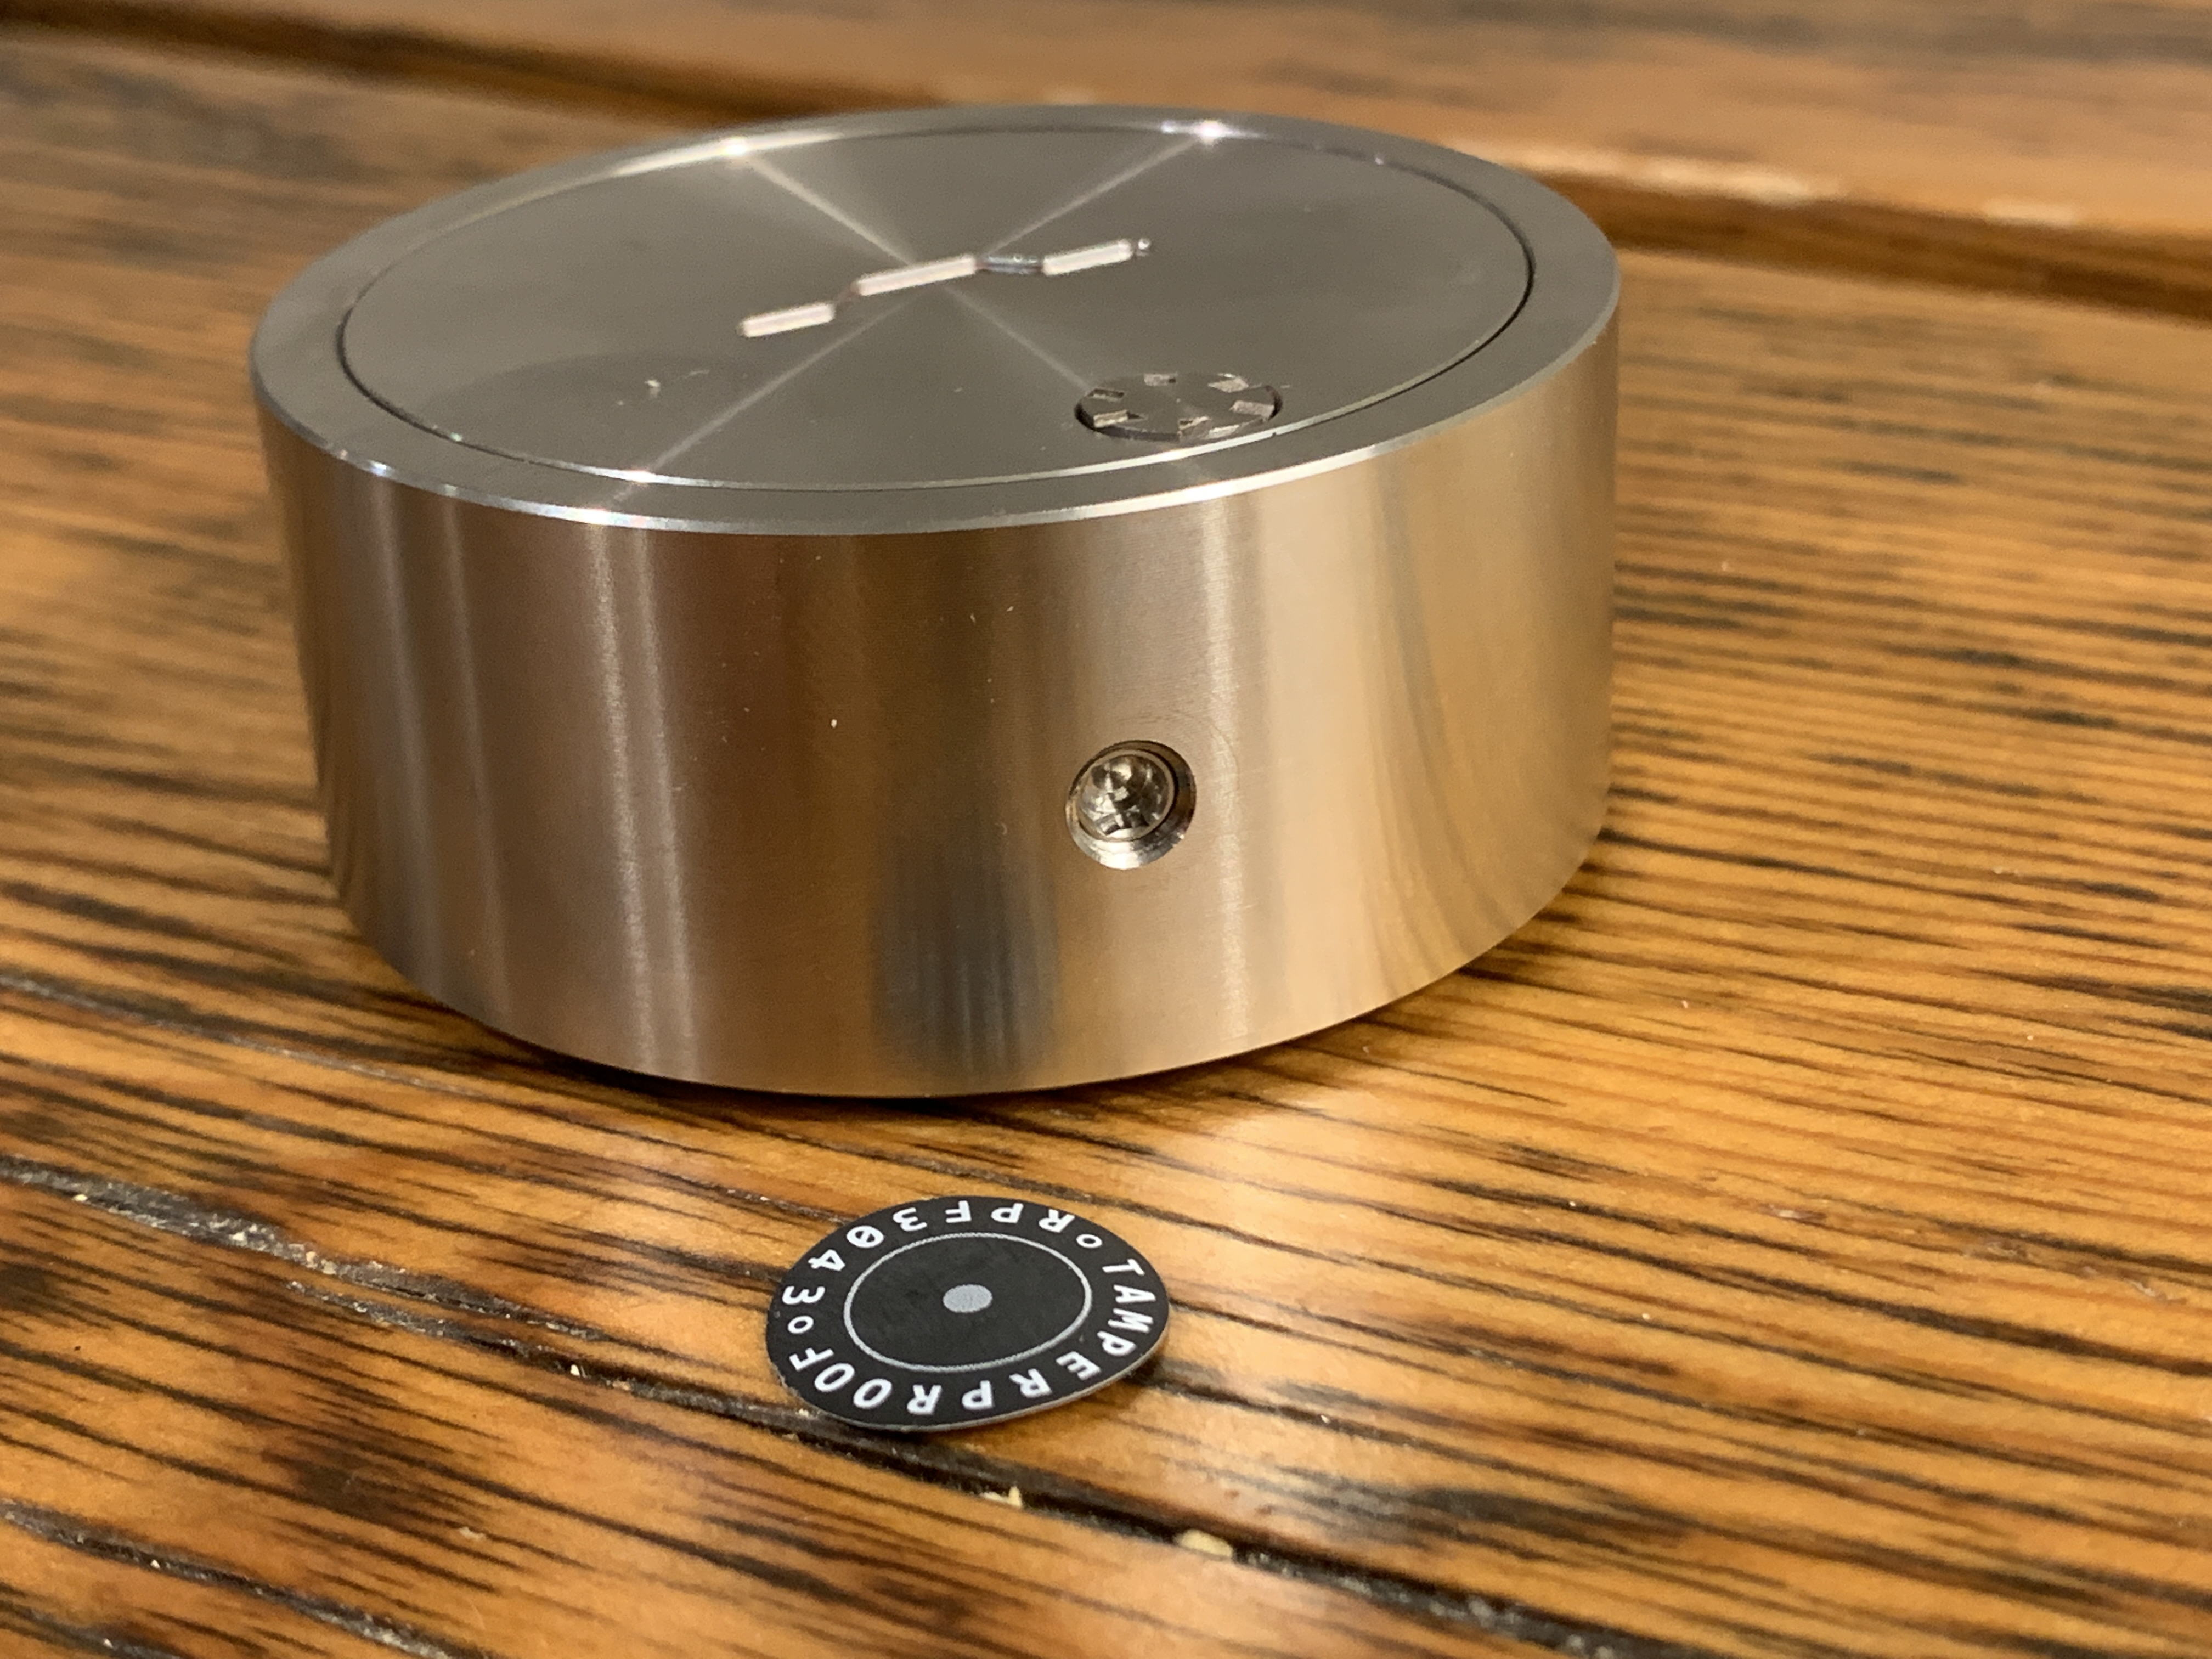
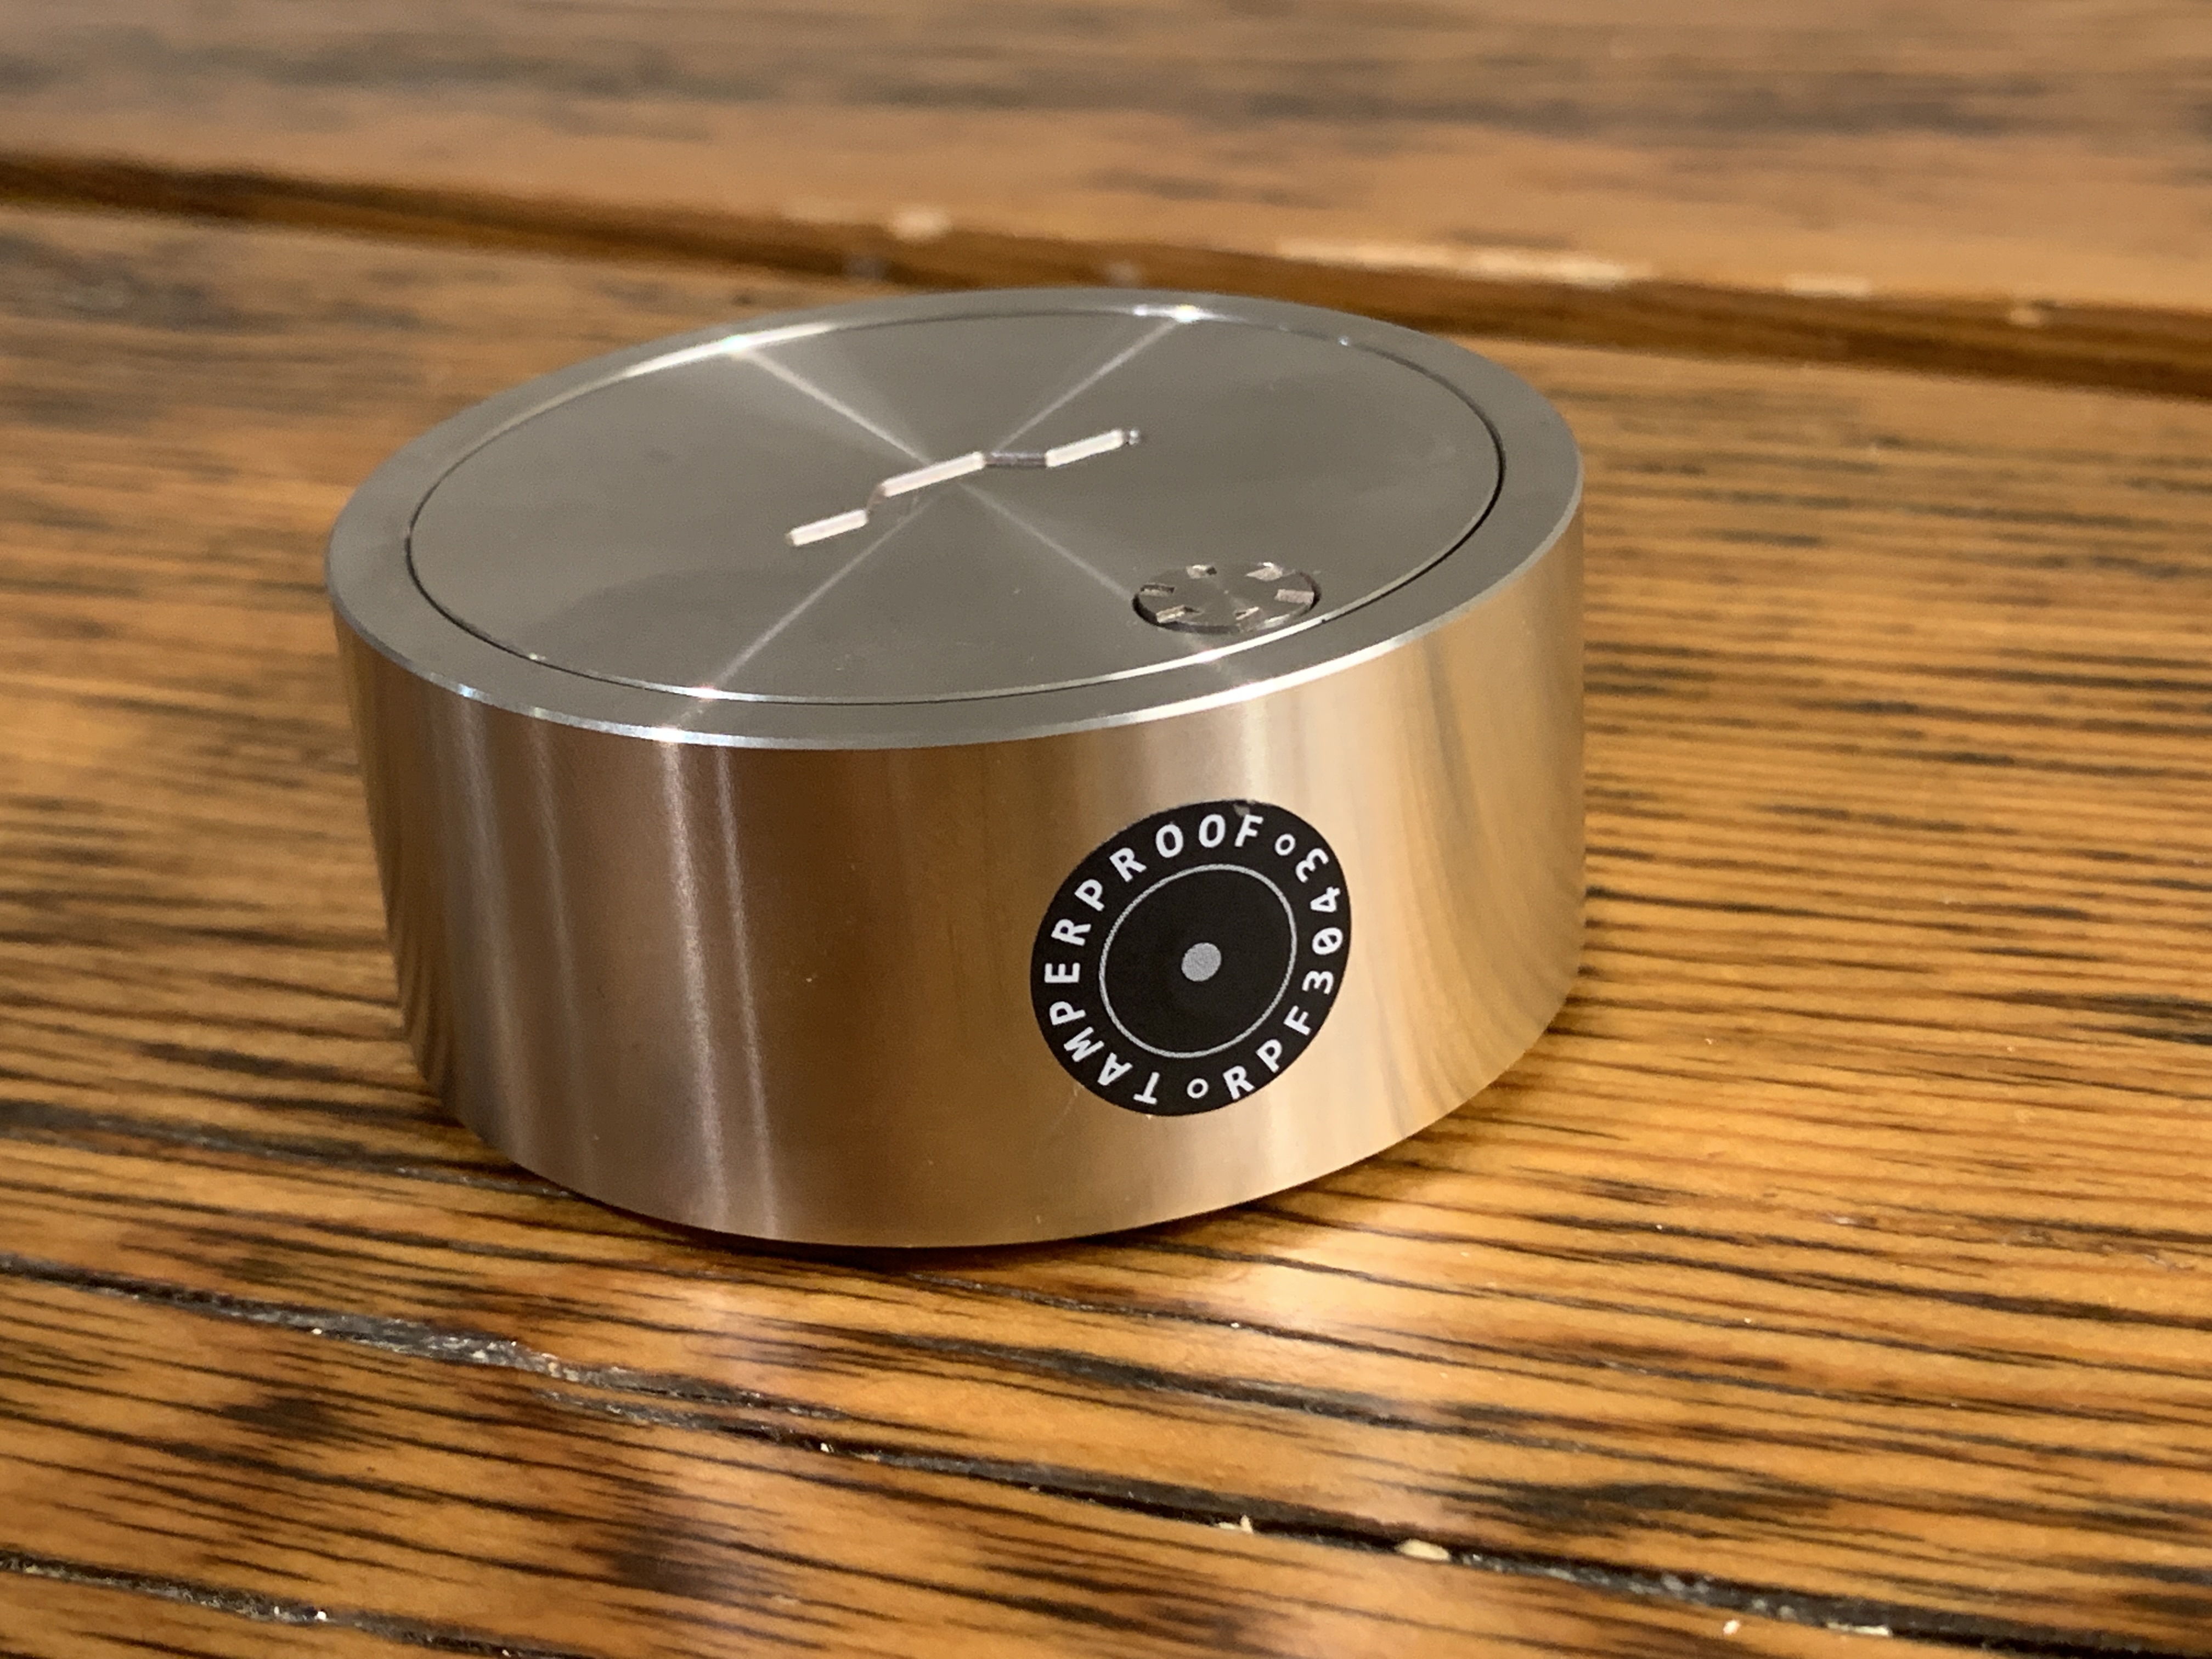
The Hodlr Disks come with tamper evident stickers that are to be placed over the locking set-screw once everything is finished. There is a unique identifier on each sticker; so it is a good idea to notate that number and keep track of it so you can be sure that no one has accessed the backup and placed another replica sticker back in its place.