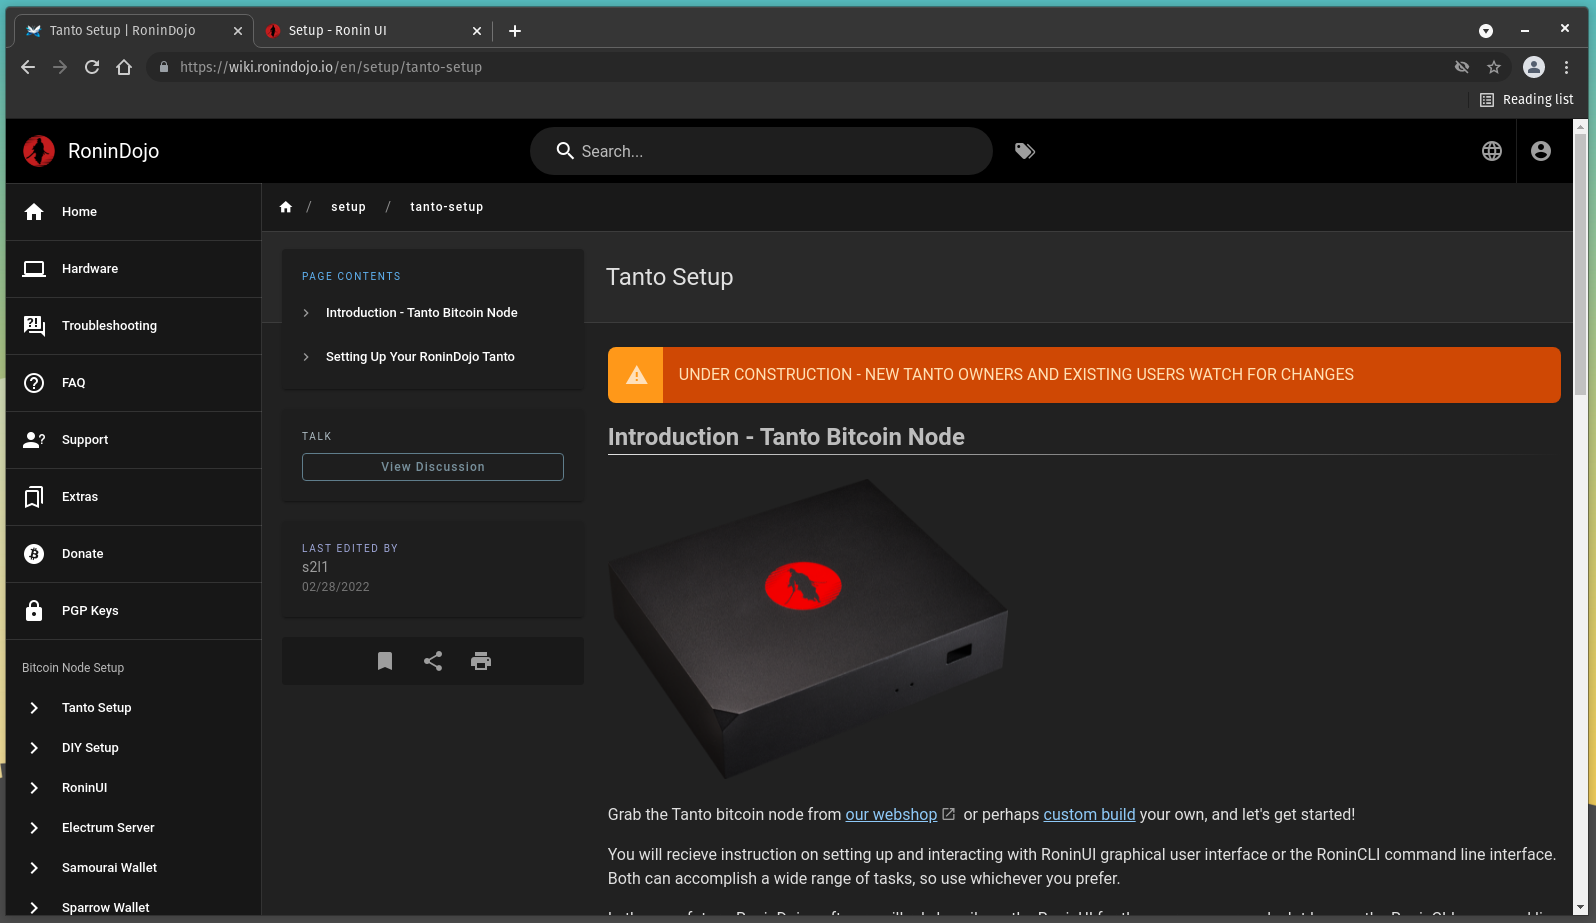
Configuring
Configuring the Tanto is also very easy, it only takes a few minutes and the basic steps are to set your password then login.
Visit the official RoninDojo Wiki for detailed instructions and more.
Using a PC connected to the same local network as your Tanto, open your favorite web browser and type https://ronindojo.local into the URL bar. This should bring up the RoninDojo welcome page.
If that did not work, then you can achieve this same process by using the local IP address of your Tanto instead. This IP address can be found by logging into your router and checking the list of devices under the DHCP leases section. Your router should have the local IP address needed to login, along with the password on a label somewhere on the device. If not, the directions are usually pretty easy to find with an online search for your manufacturer's router. Typically, you can just type 192.168.0.1 or 192.168.1.1 or 10.0.0.1 into your web browser and that will bring you to your router login page. From there the username/password can vary depending on manufacturer but they are usually something like admin/admin or admin/1234 or admin/password. Alternatively, programs like AngryIP may be used.
In this example, the local IP address 192.168.69.17 is the one used to type into the URL bar.
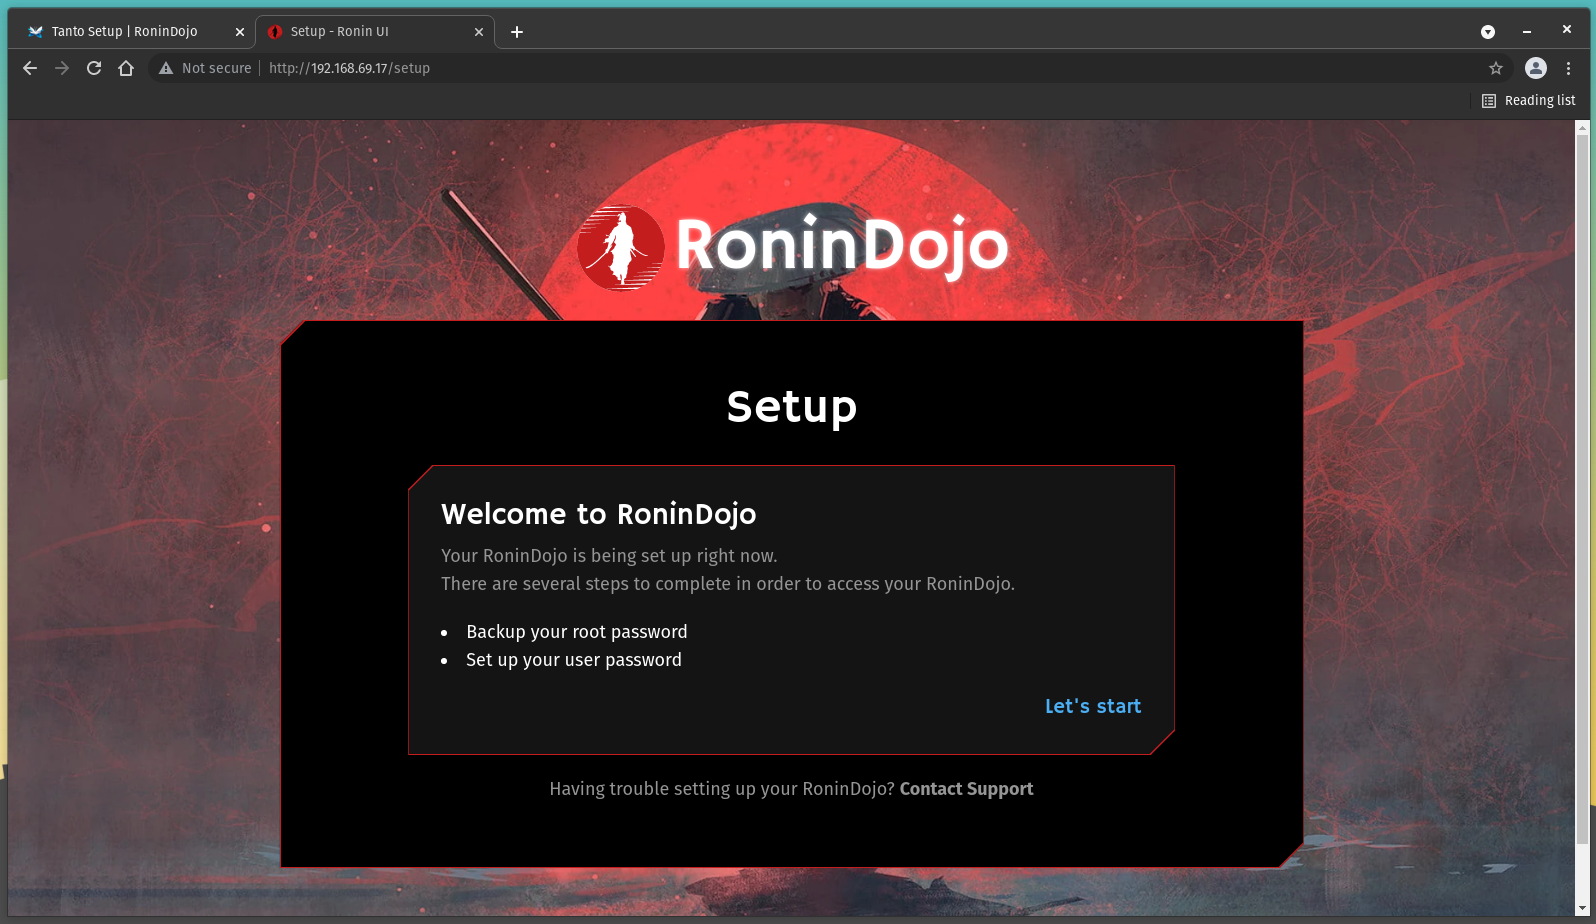
Once you are at the RoninDojo welcome page, select Let's start.
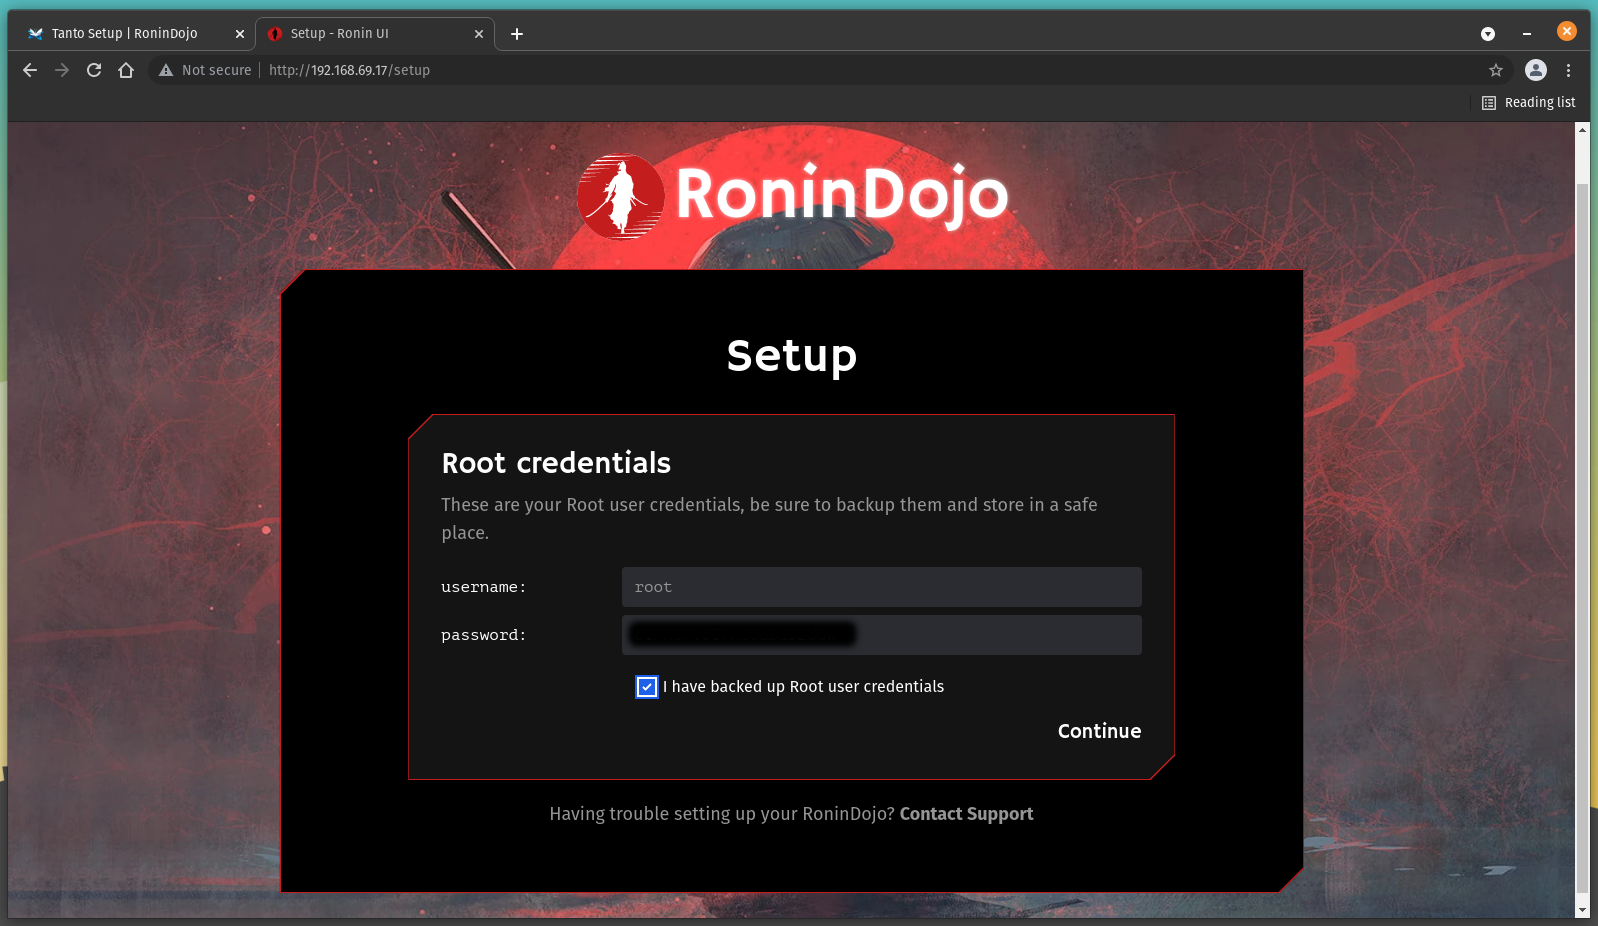
You will be presented with your Root credentials, these are like the master username and password for the Tanto's backend. Save these details in a secure place like a password manager and do not share these with anyone for any reason. You cannot change these, they are pre-selected for you. Ensure that you select the box that says I have backed up Root user credentials, then click on Continue.
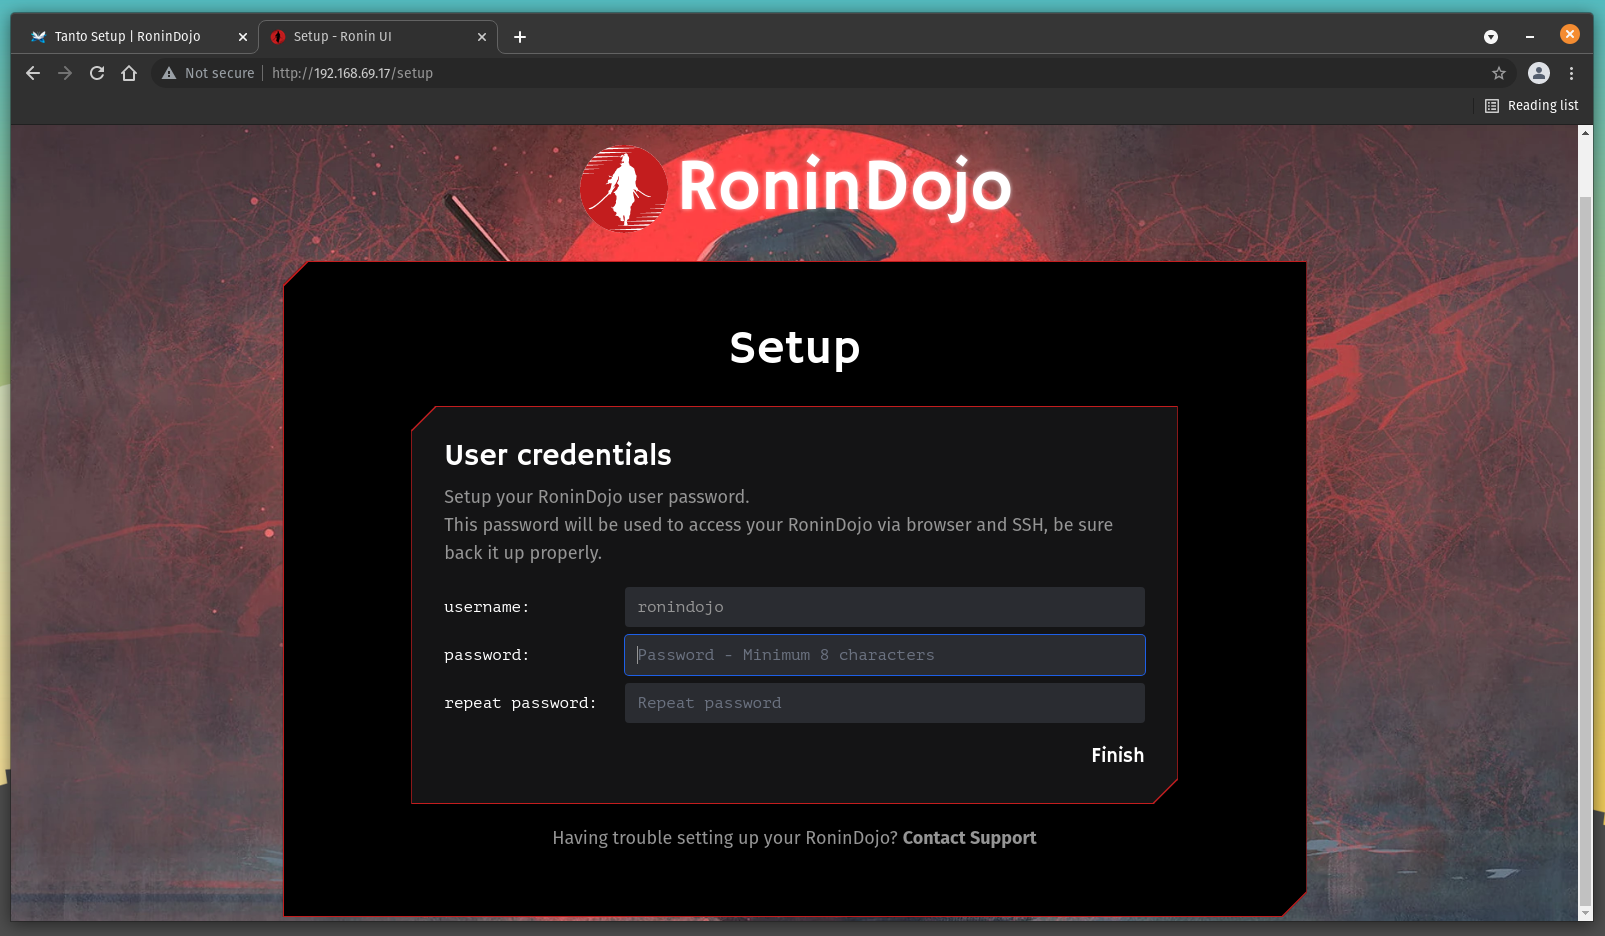
Next, you will set your user credentials, these are the ones you will use to access the Tanto through the webinterface. The username is pre-selected for you, ronindojo. You can create any password you would like to use, just ensure it is at least 8 characters. Repeat this password and make sure you secure these credentials in a safe place like a password manager and do not share them with anyone for any reason. Then click on Finish.
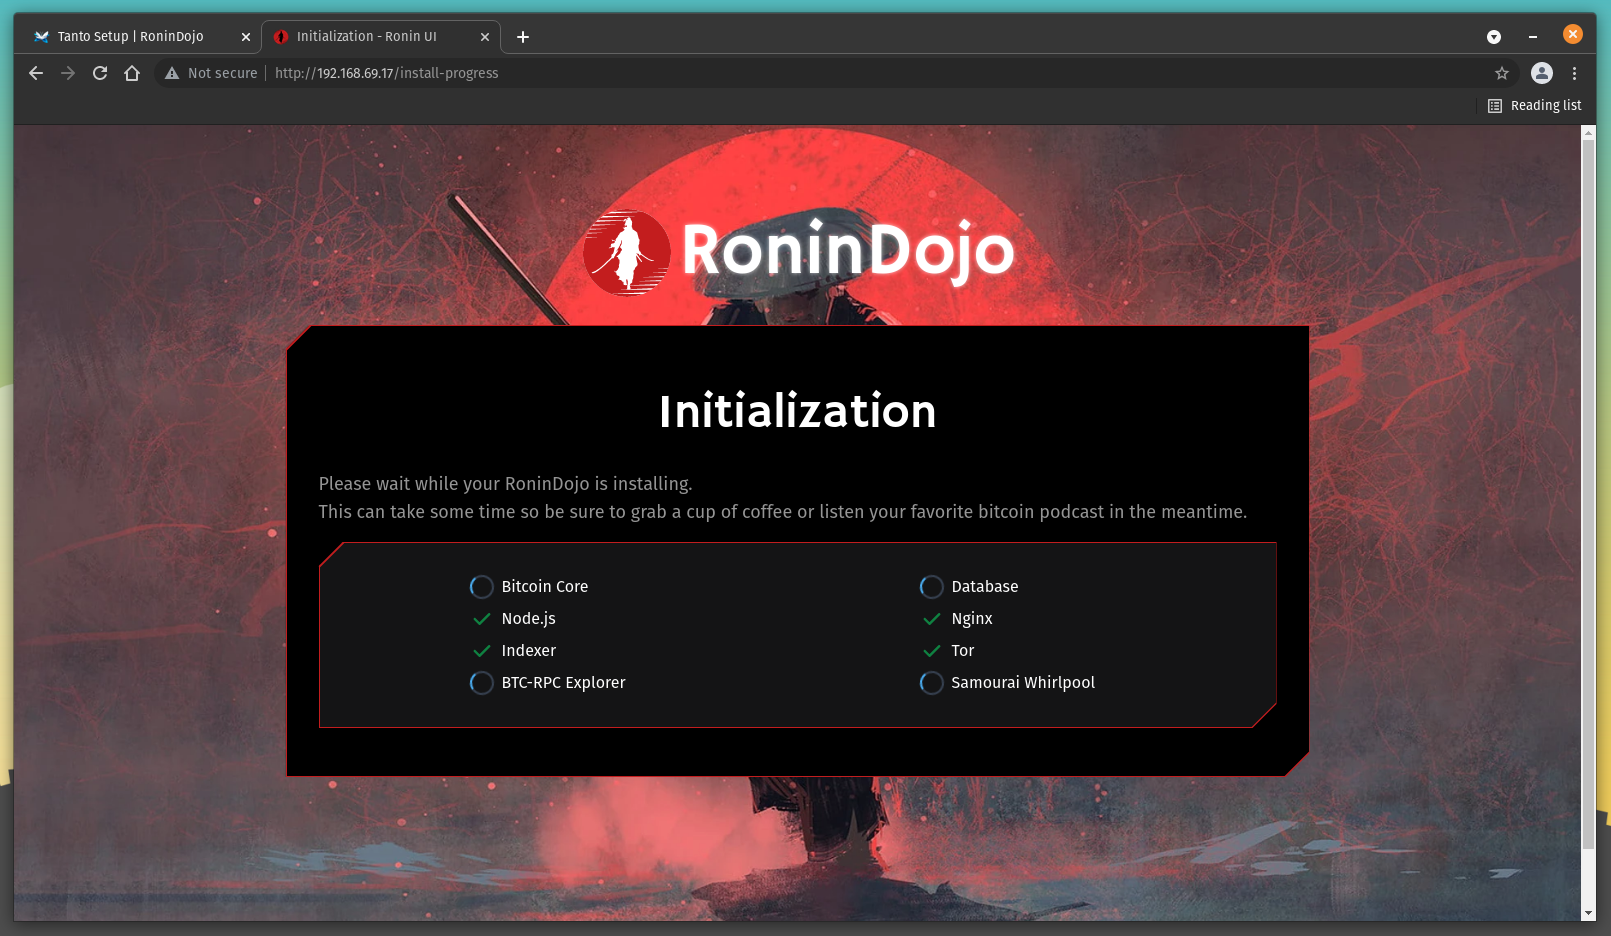
Next, you will see several services such as Bitcoin Core, Node.js, Indexer, BTC-RPC Explorer, Database, Nginx, Tor, & Samourai Whirlpool start. This takes a few minutes.
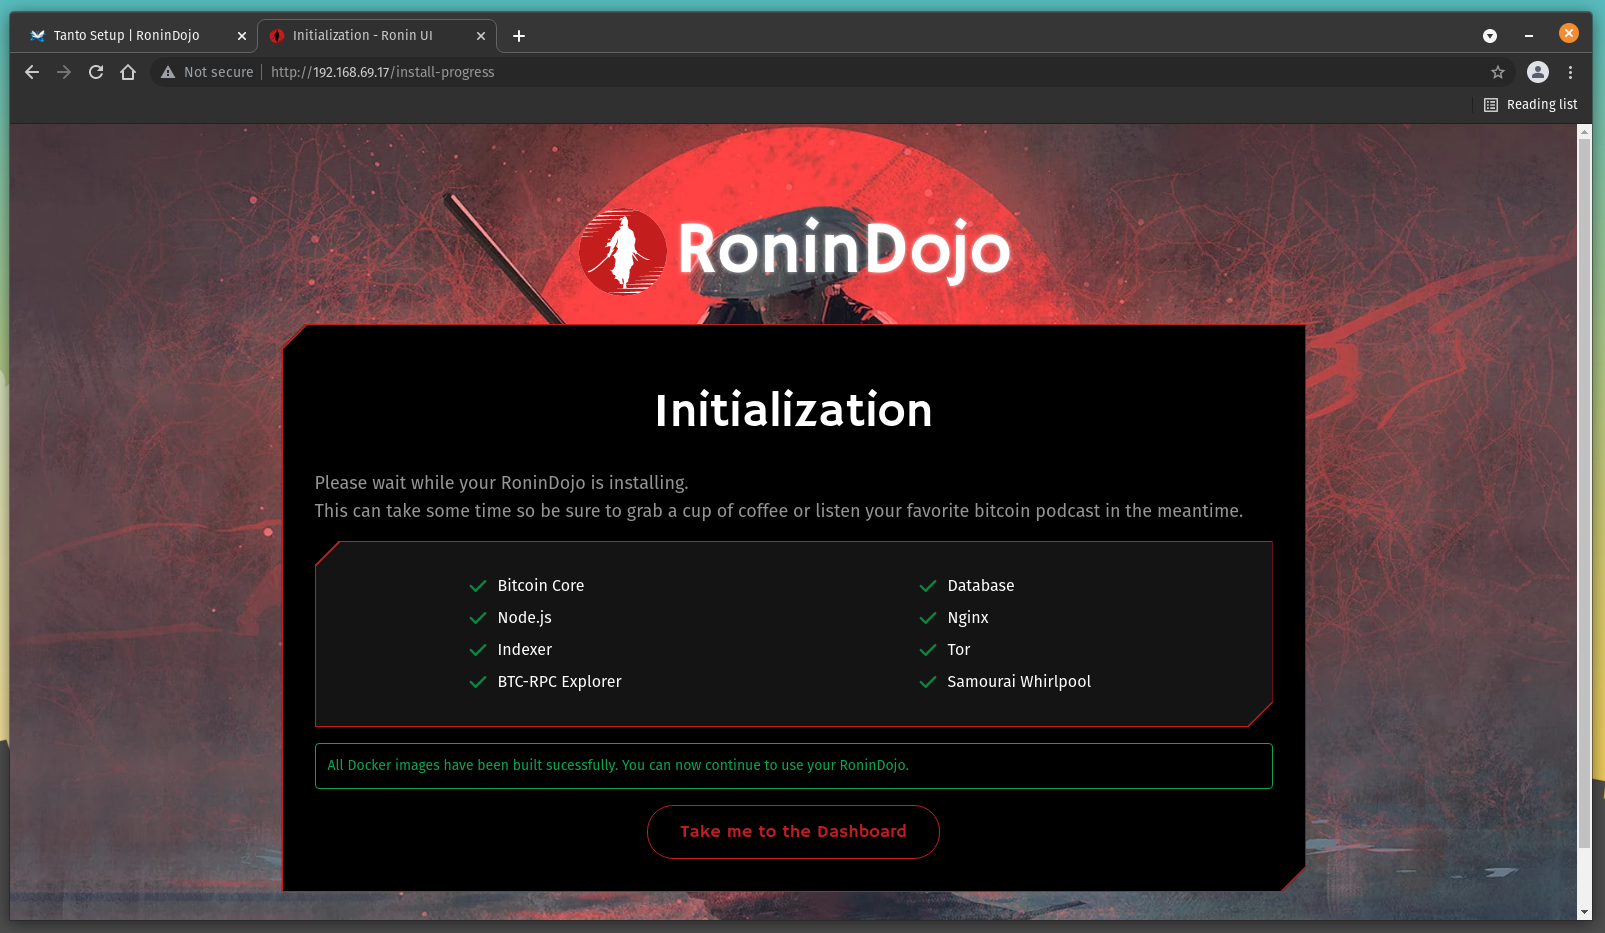
Once there is a green check mark next to each service, you can click on the Take me to the Dashboard button.
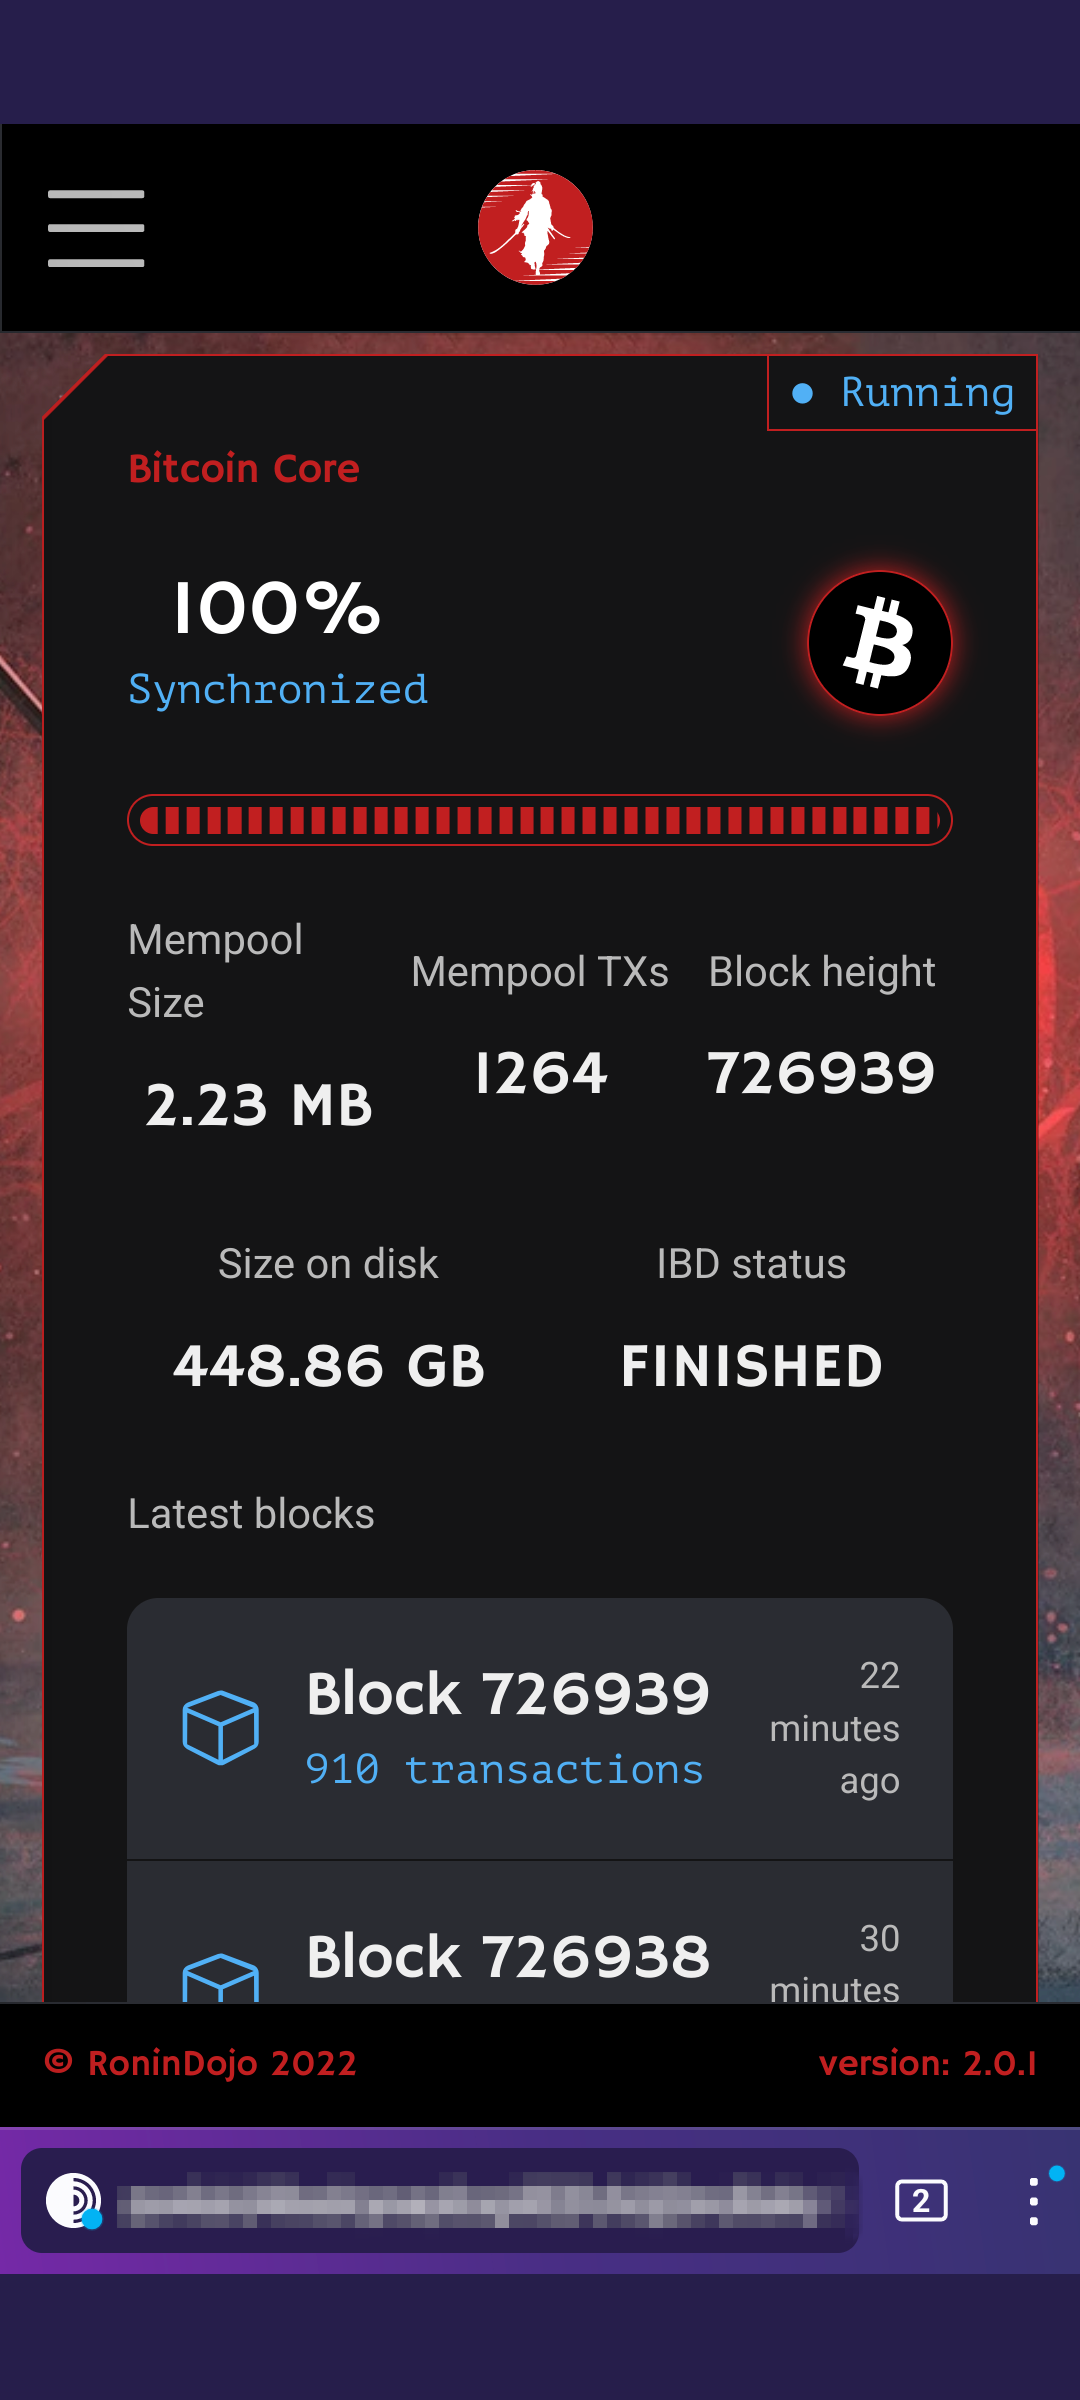
Once you are at your dashboard, you can see the progress of the Bitcoin Initial Blockchain Download (IBD) and the vitals of your Tanto. The IBD will take about three days to complete, the Tanto is connecting to other Bitcoin nodes and downloading the entire Bitcoin blockchain all the back to the first block from January 2009. Once the IBD completes, you will have your own full copy of the blockchain and you will use your own copy to verify your transactions against.
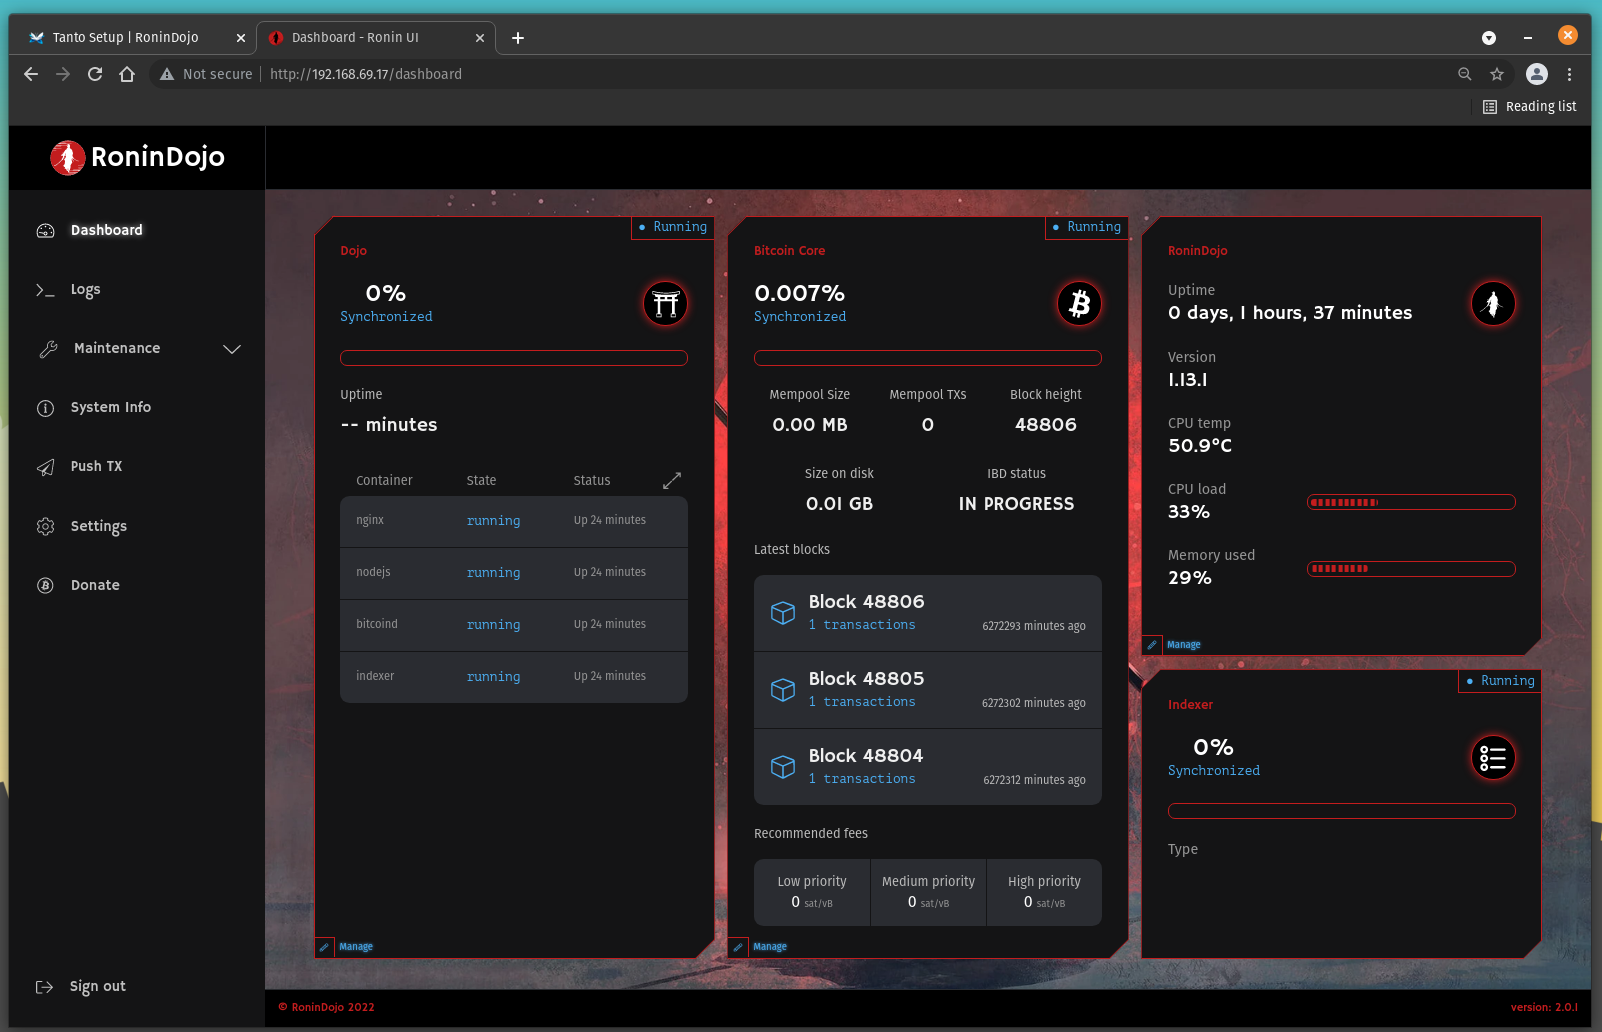
Some other vitals you can monitor are uptime, version, temperature, CPU load, and memory usage. Let this process run for a couple of days. Tanto will log you out automatically after some idle time but the processes continue to run in the background.
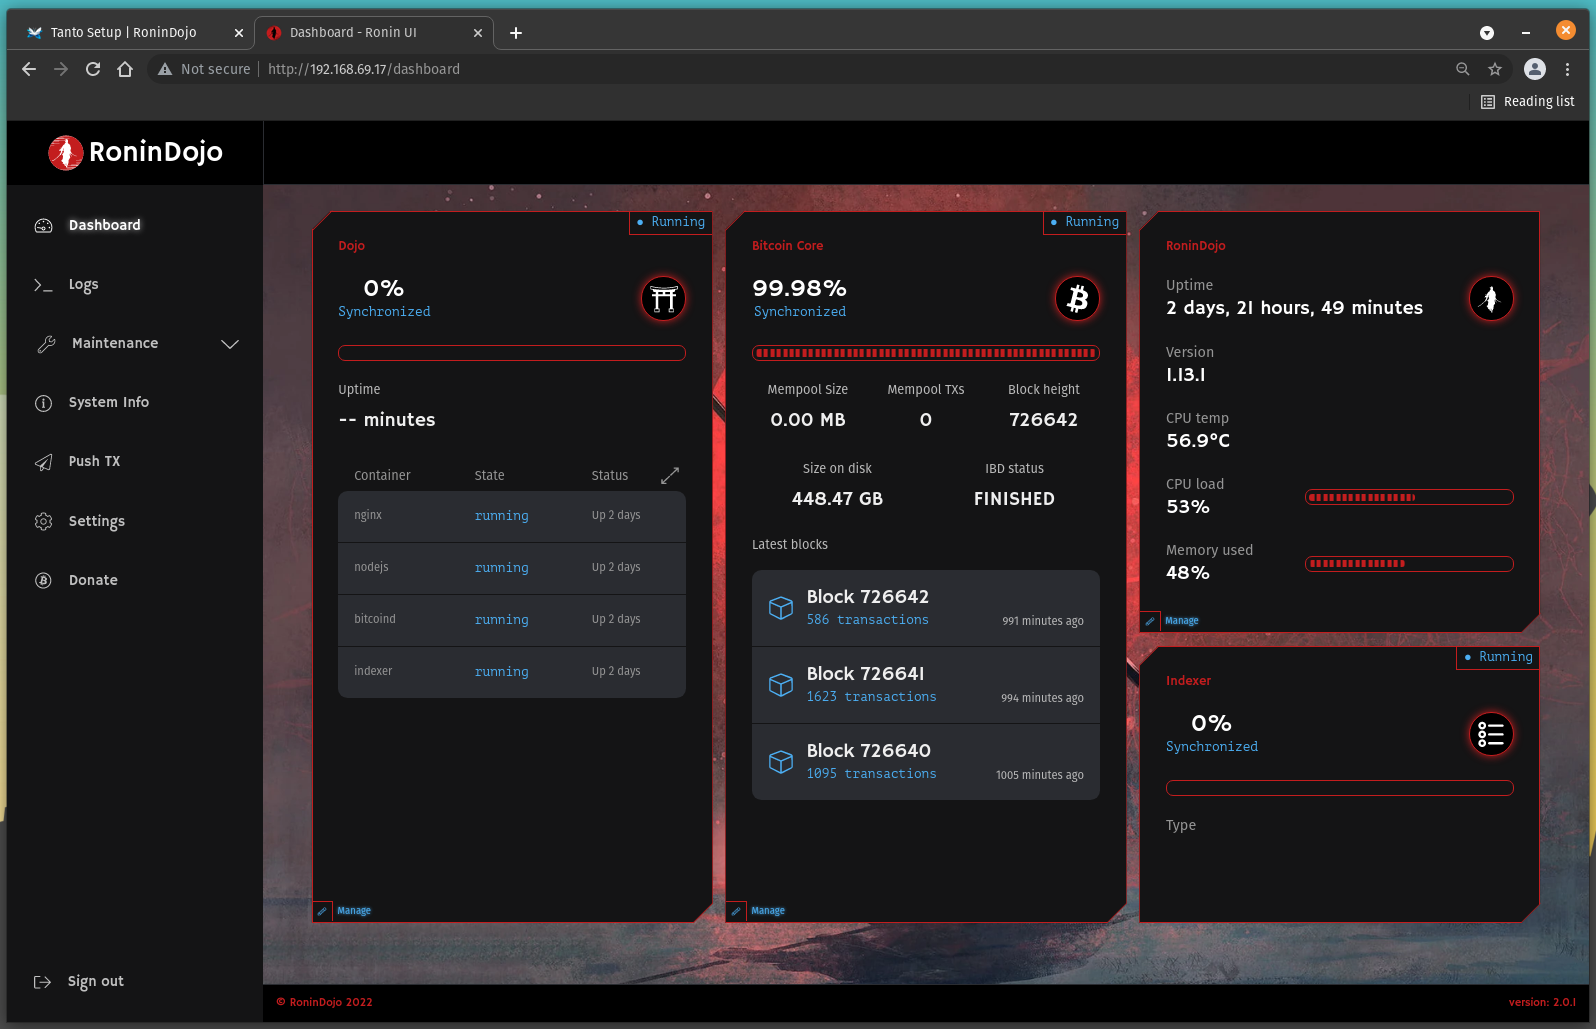
The IBD took a total of 2 days, 21 hours, 49 minutes in this demonstration.
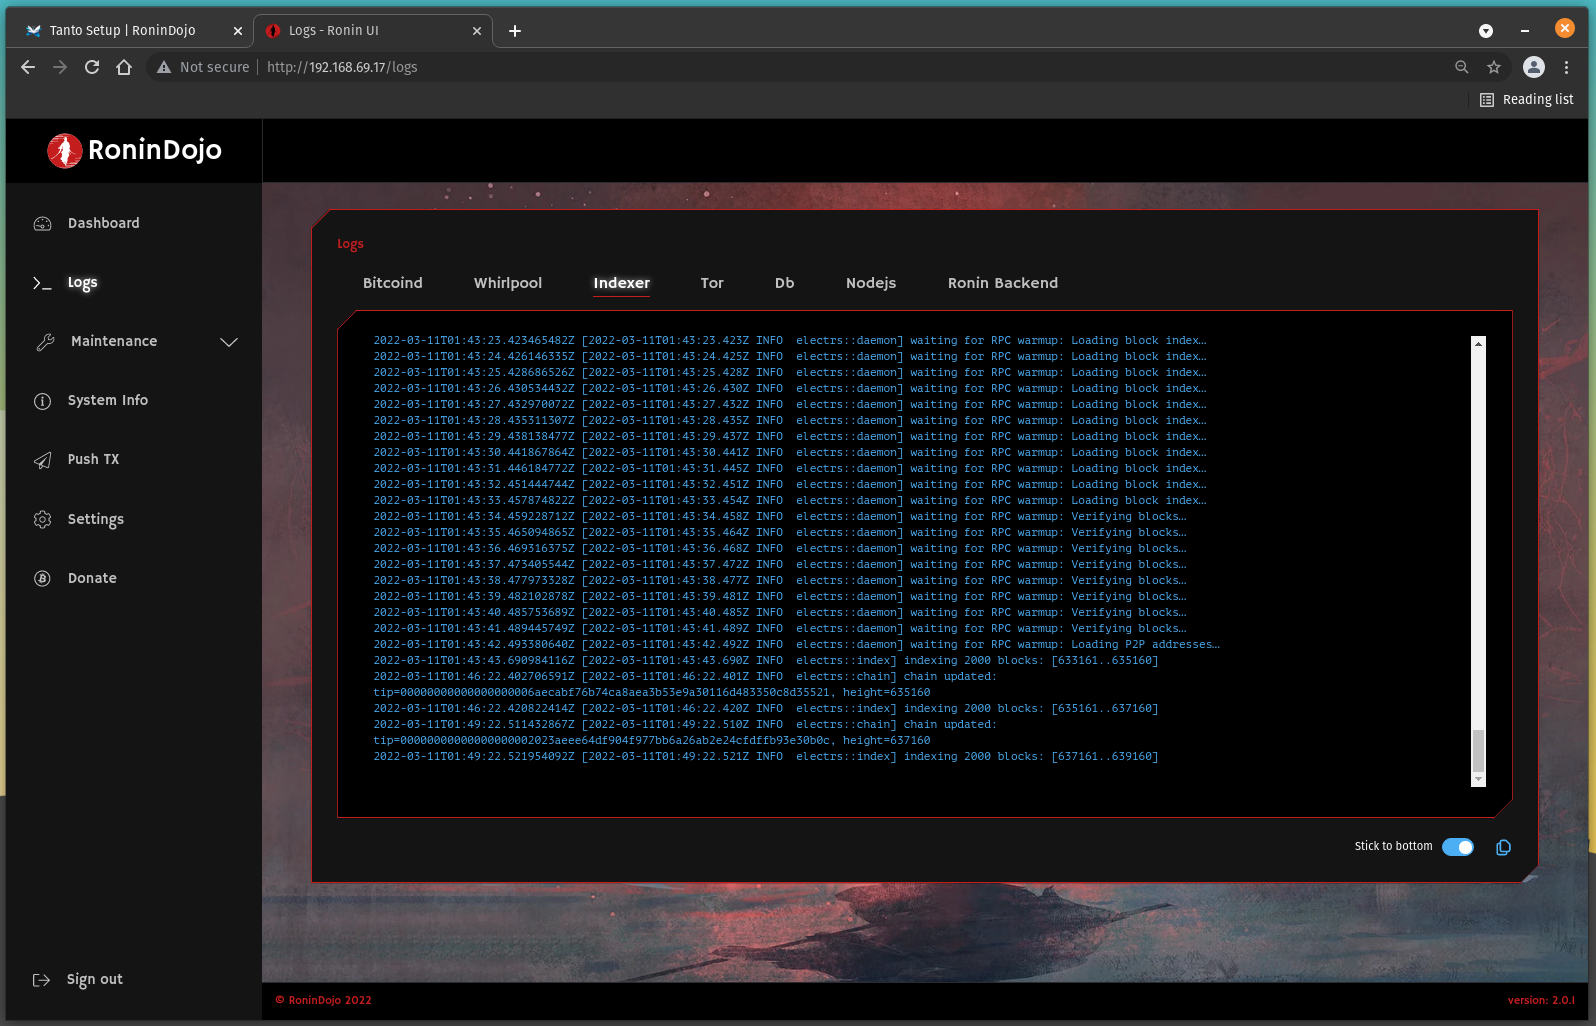
Now that the entire Bitcoin blockchain has been downloaded, it needs to be indexed so that it is searchable. The indexing process begins automatically once the IBD is finished, this process can take an additional day. You may notice that the Indexer status in the lower right-hand corner remains on 0%, don't panic! Simply navigate to the Logs option on the left-hand side menu and then the Indexer tab. You should see something like this screenshot below where the blocks are getting indexed in chunks of 2,000. Just let this process run to completion, again this can take another 24 hours.
Once the Indexer has caught up to the latest block height, you should see both Indexer and Dojo reporting 100% synchronized.
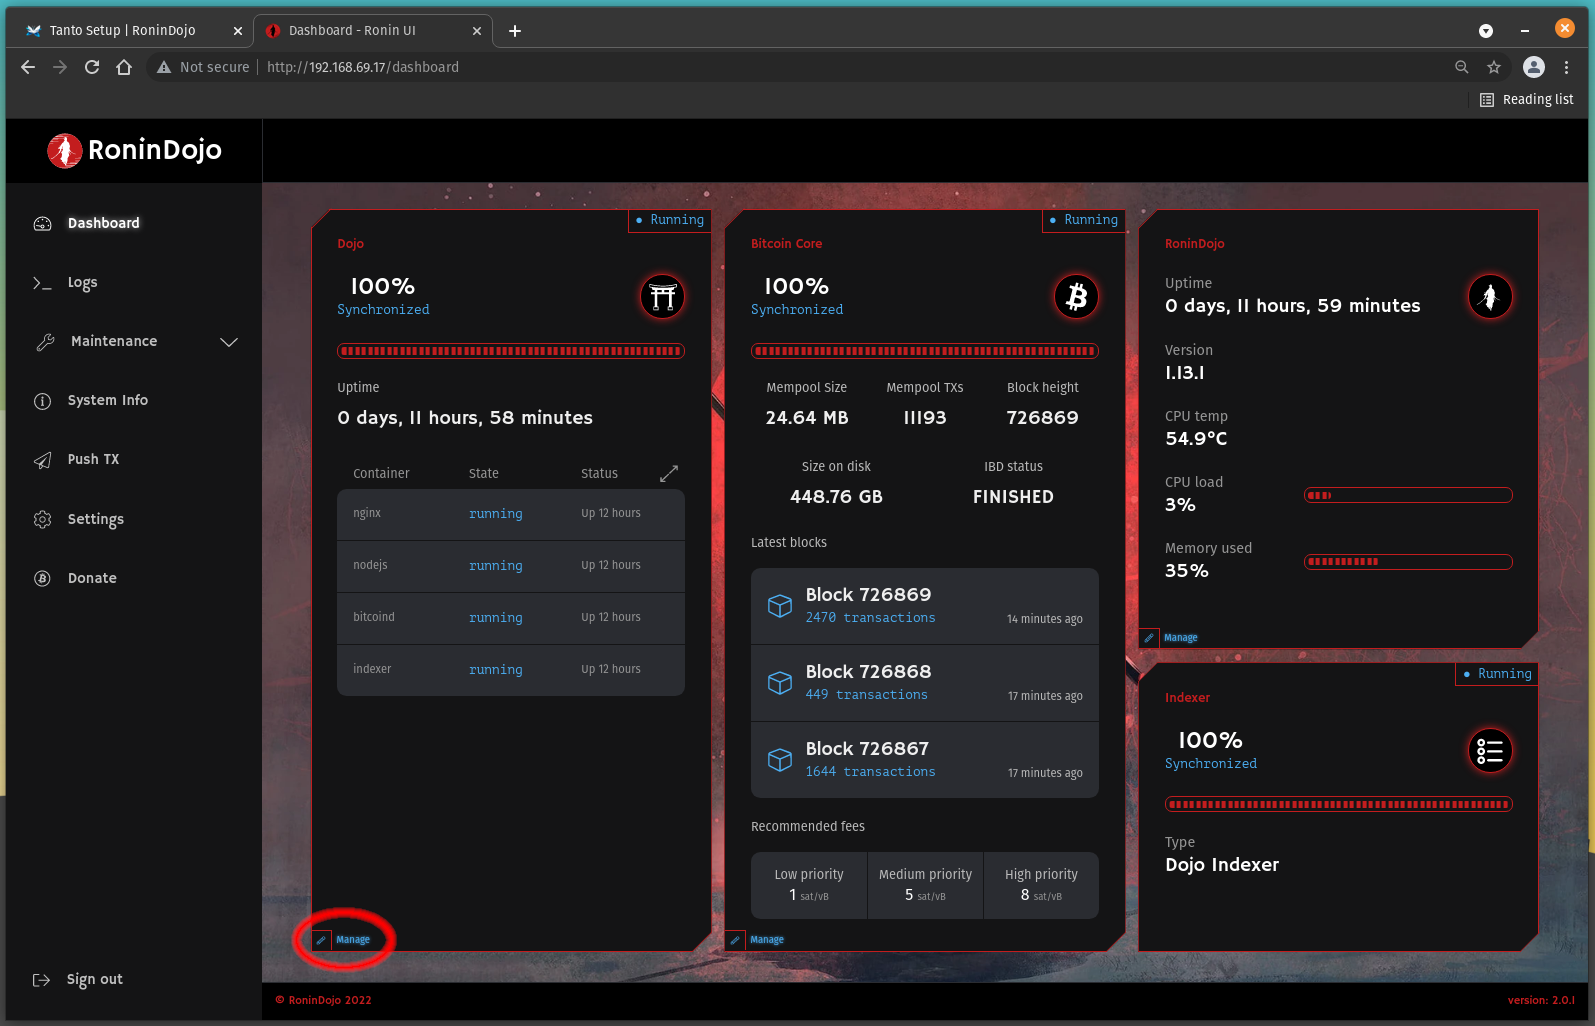
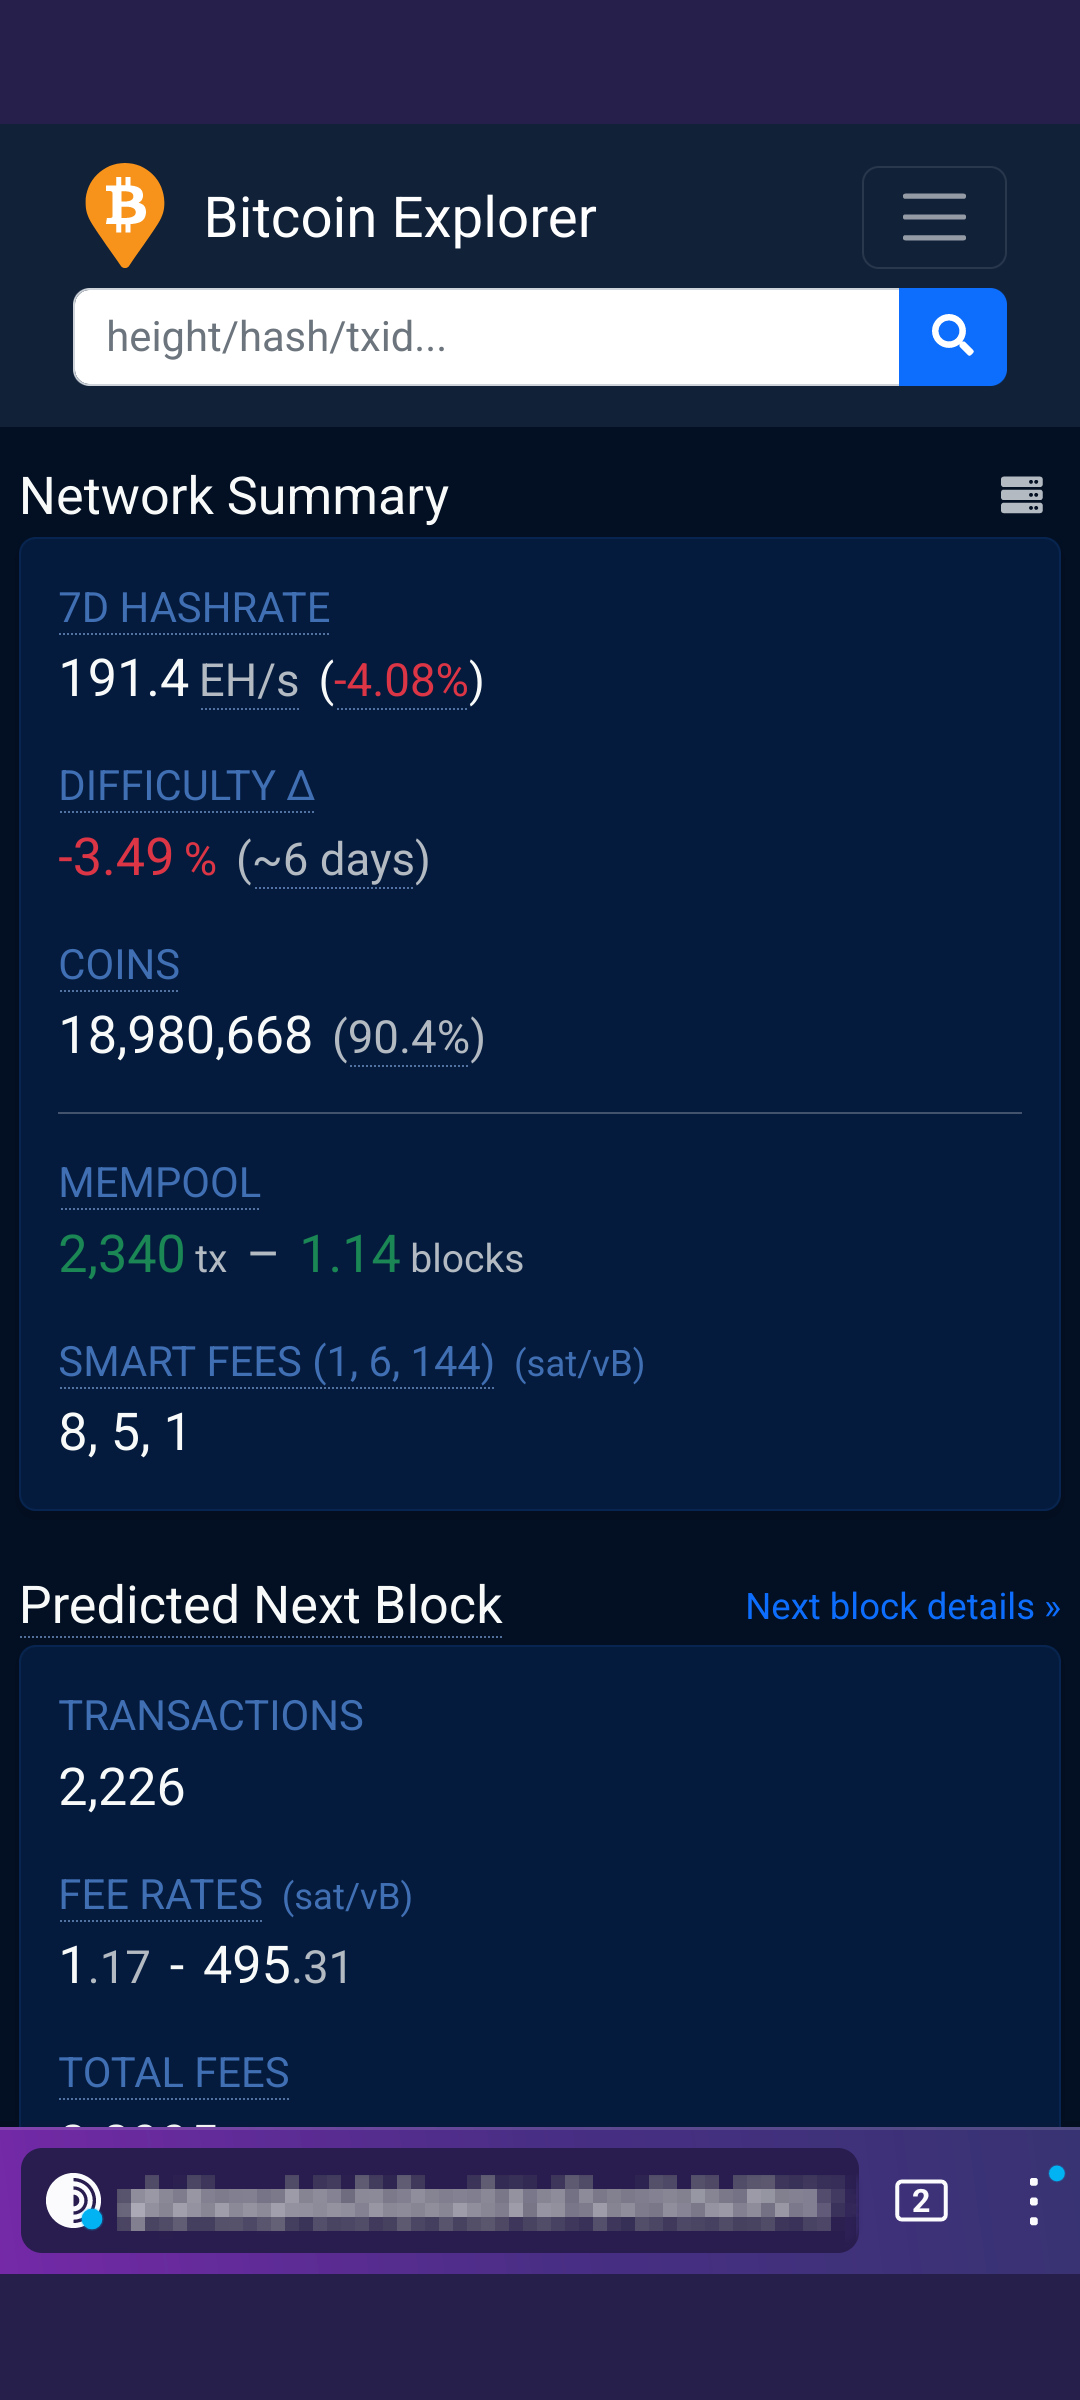
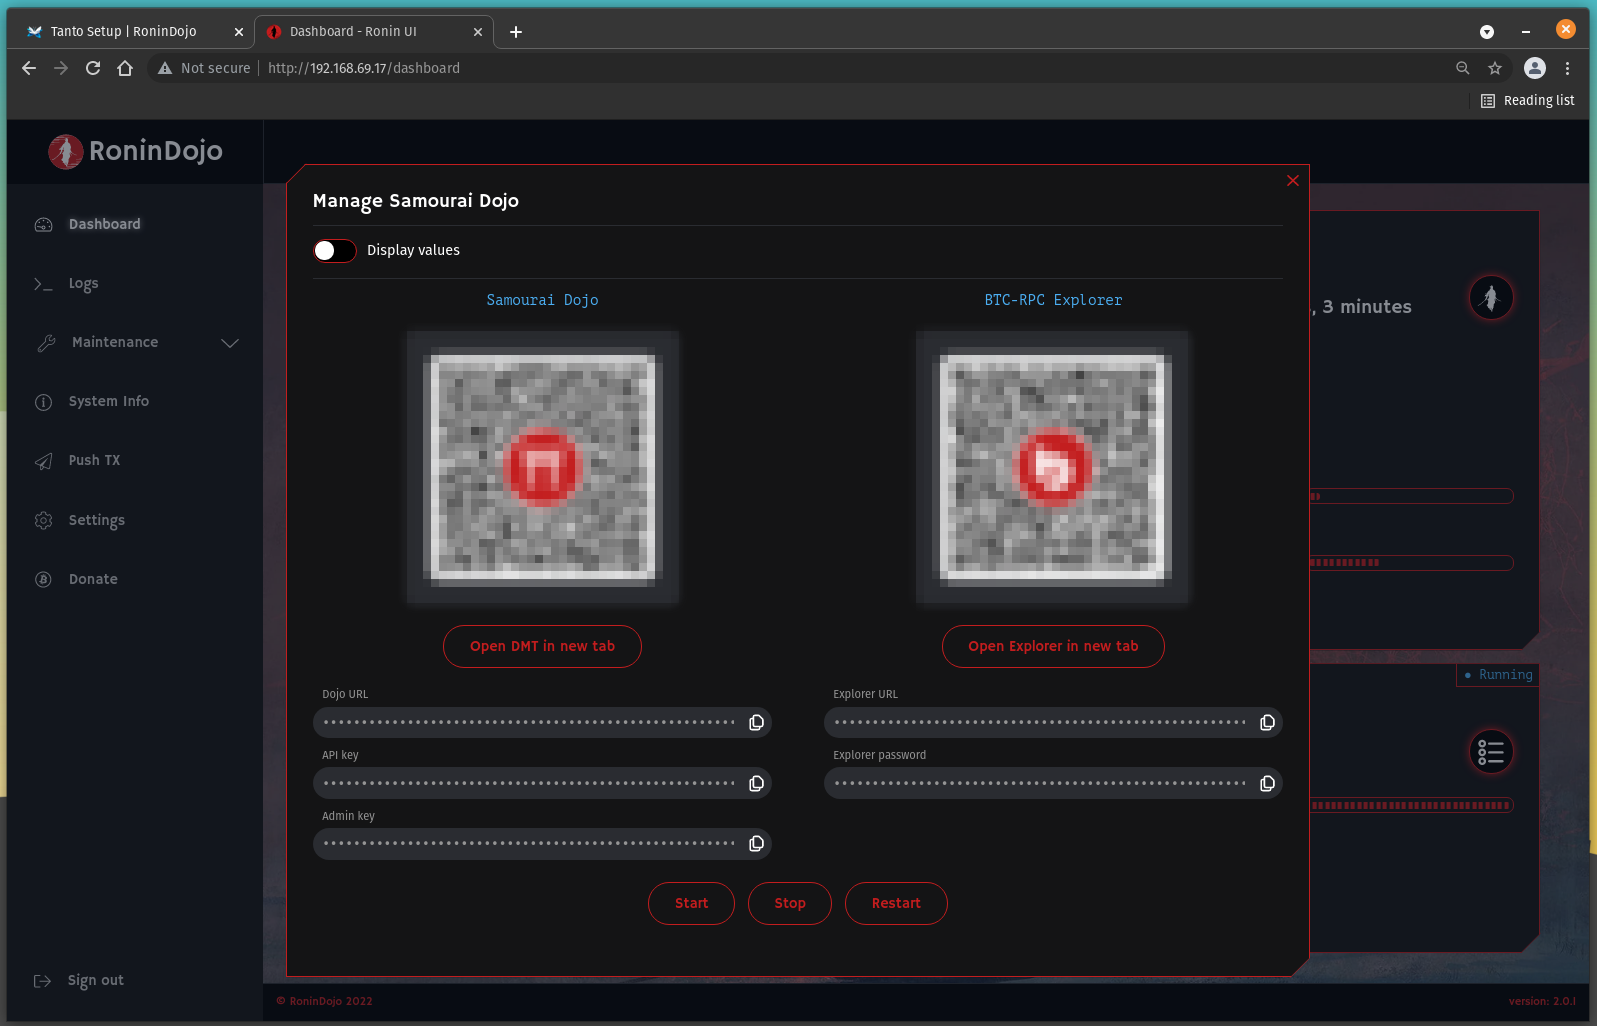
You can click on Manage in the lower left-hand corner of the Dojo window and this will bring up the QR code that you can use to connect your Samourai Wallet. Setting up Samourai Wallet will be covered in the next section. Make sure to toggle Display values to make the QR codes legible. The other QR code is for connecting your own BTC-RPC explorer. The Explorer provides a way to use your own Dojo to feed data to a full fledged Bitcoin blockchain explorer over Tor. Copy the .onion URL & password for the Explorer, paste into Tor Browser, leave the username blank, and bookmark page.
You can even log into your RoninDojoUI from your mobile phone with the Tor Browser. From the dashboard, click on Manage in the lower left-hand corner of the RoninDojo window. This will bring up a QR code that you can scan to follow the .onion link to your RoninDojo UI. Then enter your RoninDojo UI password and bookmark this page.
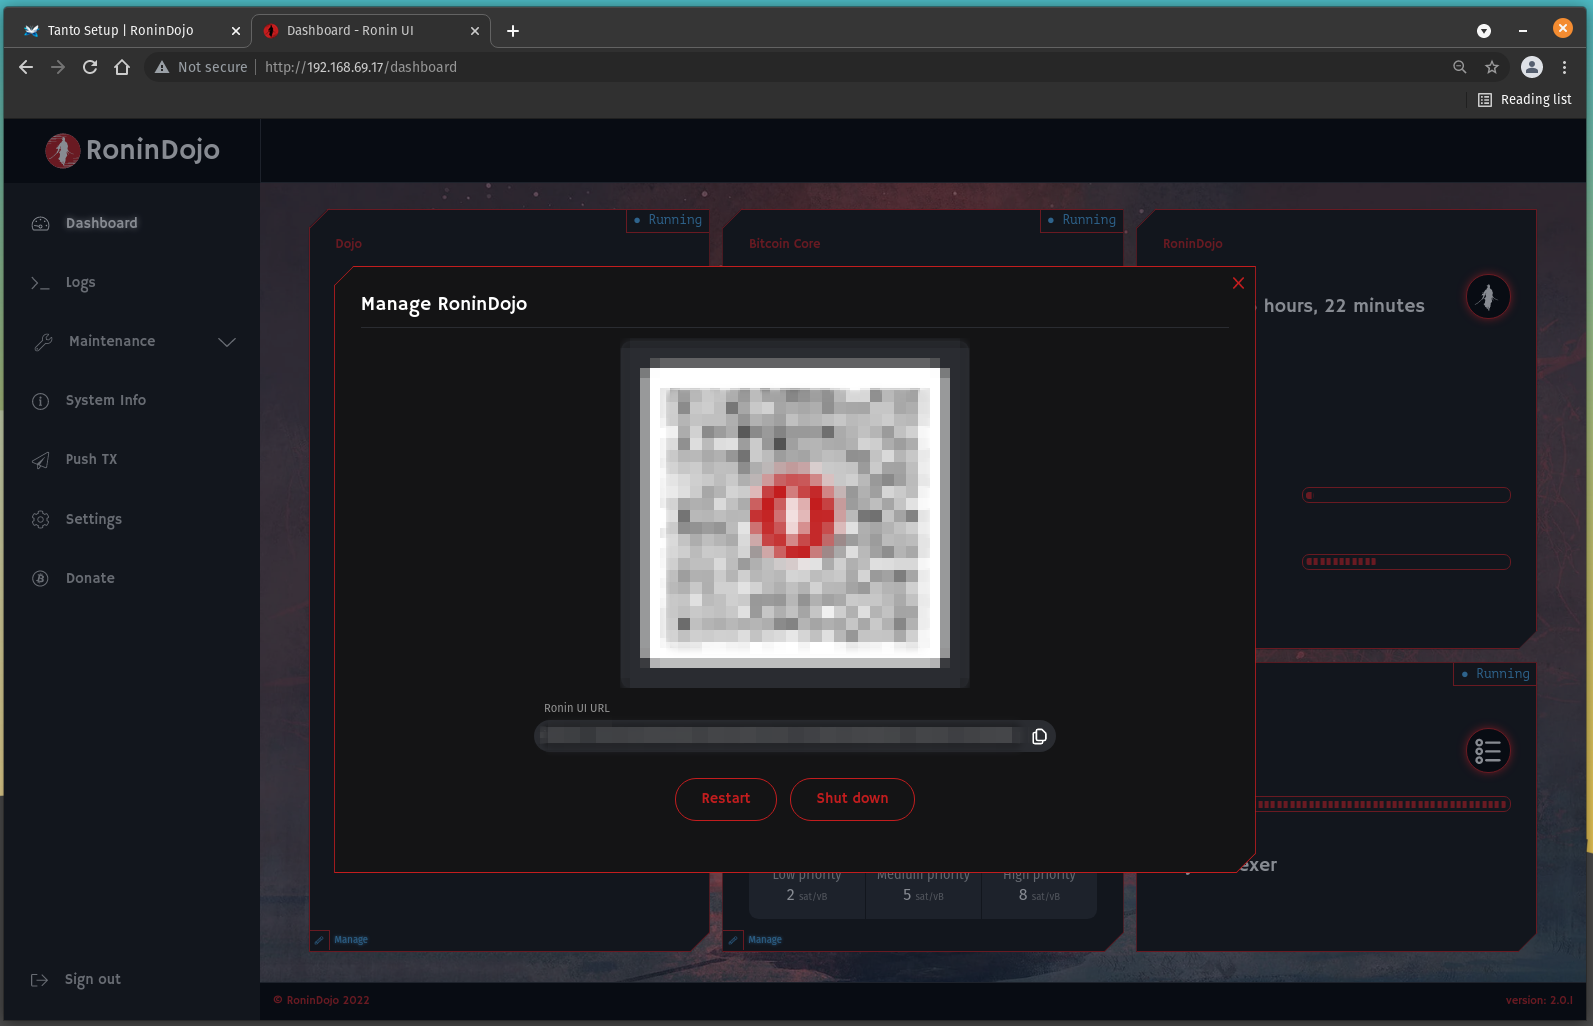
Once you are logged into your RoninDojo UI on mobile, then you can just copy/paste the .onion URL and password for the Explorer into your Tor browser as well, then leave the username blank, you can book mark this page as well and now you have a mobile block explorer that uses your own Dojo as a backend and communicates with it via Tor.