Software
This section demonstrates how to download the SeedSigner image and flash it to your MicroSD card. You will need to supply your own MicroSD card that has at least a 4GB capacity. Best practice is to test your hardware with the software image to make sure everything works prior to attempting assembly with the 3D printed enclosure.
Step 1: Download
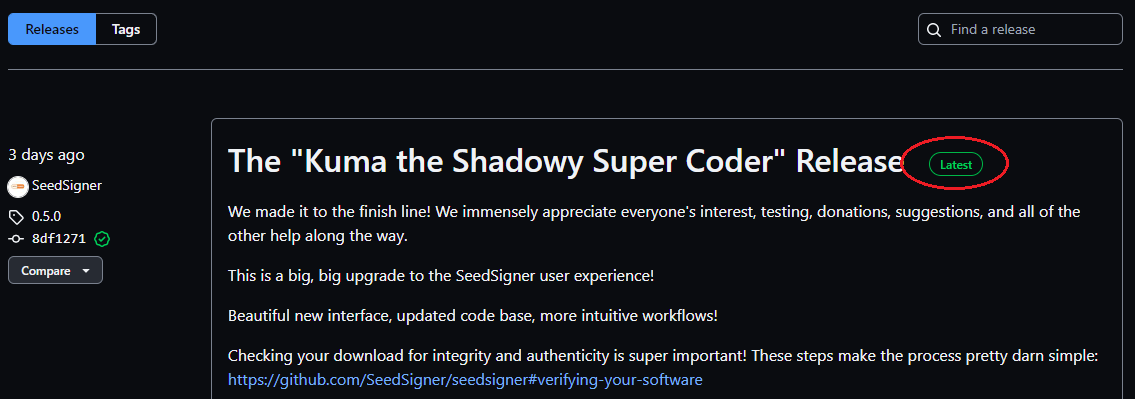
Navigate to the SeedSigner GitHub Repo and look for the latest release.
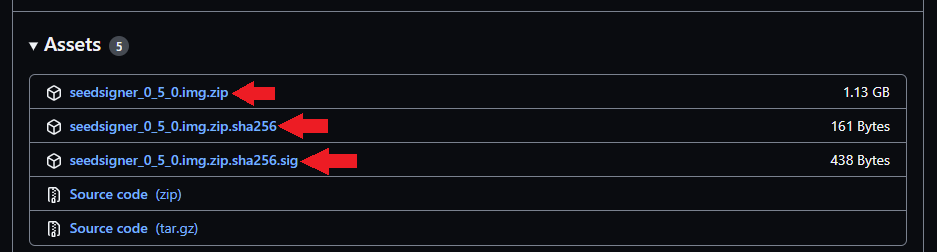
Scroll to the bottom of that release section and click on the link to download the .zip file. If you would like to verify your download, click on the links to download the .sha256 file and .sig file as well. Save these files in the same folder location.
Step 2A: Verify - Windows
This step is optional but recommended. This will ensure that you have downloaded the file that the SeedSigner developers intended on you receiving. This step will demonstrate how to verify on a Windows platform. Skip to Step 2B if you are using a Linux platform.
Or skip to Step 3 if you do not wish to verify your software download that will be handling your Bitcoin private keys.
The following instructions make an assumption that you already use Kleopatra from the gpg4win software bundle and have your own PGP key setup.
- First you will need the SeedSigner public key which you can find here.
- Copy the public key to your clipboard.
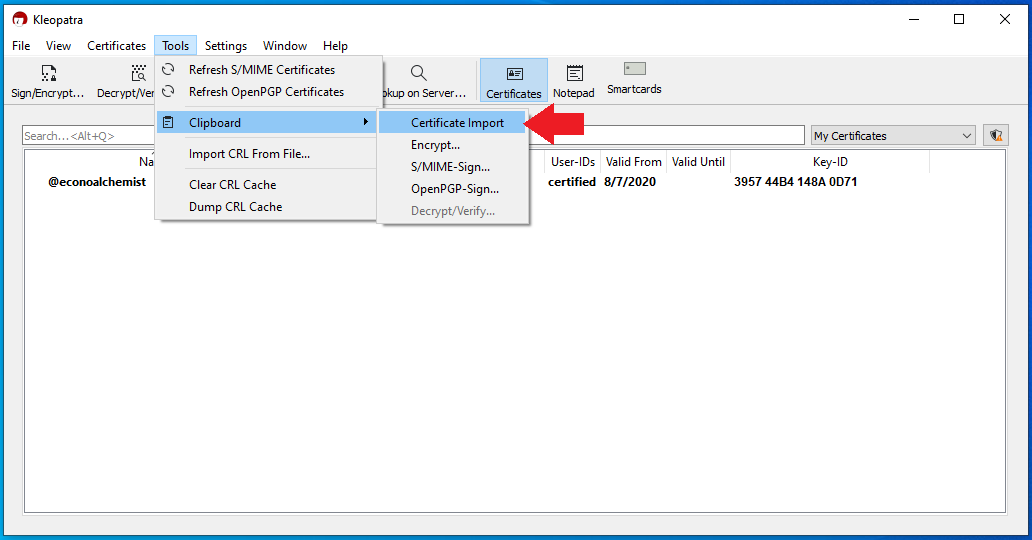
- Open Kleopatra, navigate to
Tools>Clipboard>Certificate Import.
- You should receive a dialog that informs you the certificate was imported successfully. Click on
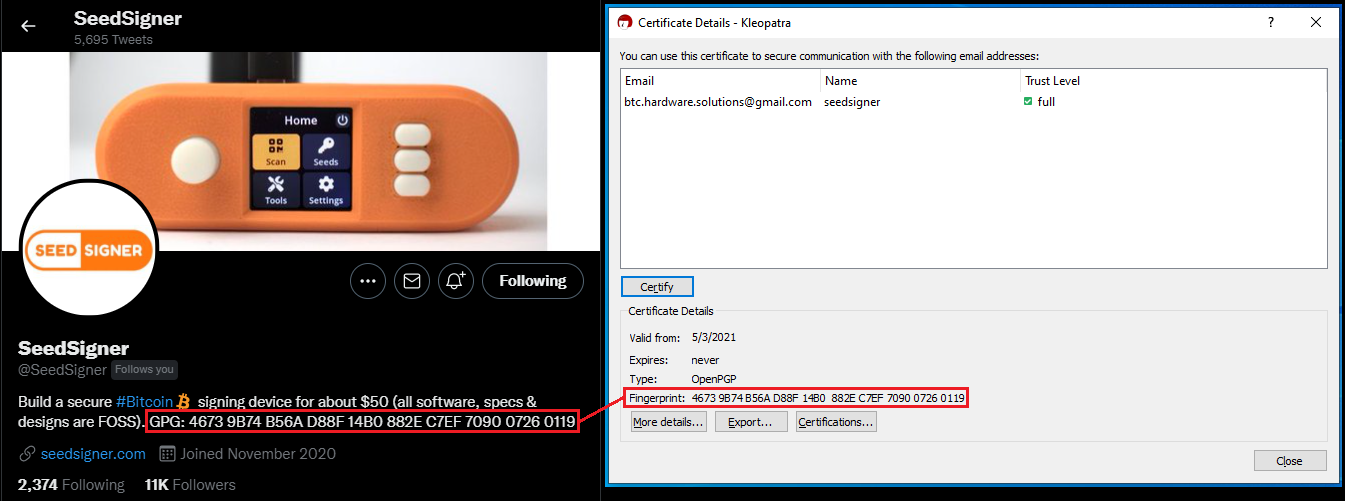
OK. - Now you can compare the fingerprint in Kleopatra to a known publicly displayed fingerprint such as SeedSigner's Twitter profile.
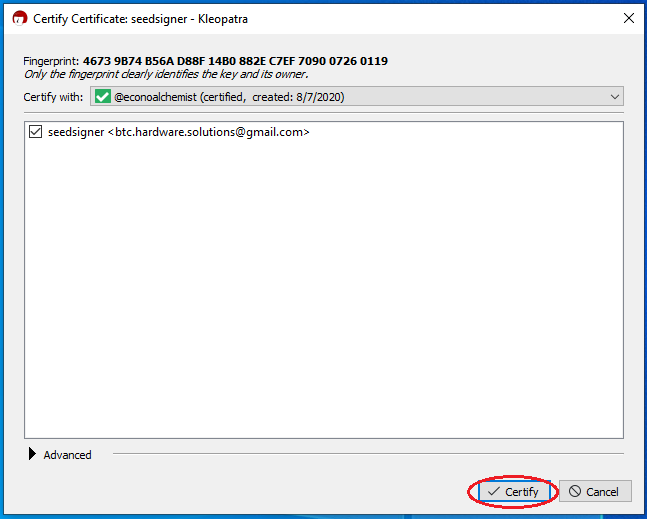
- Now you can right-click on the SeedSigner certificate in Kleopatra and select
Certify. - You will be prompted to enter your password.
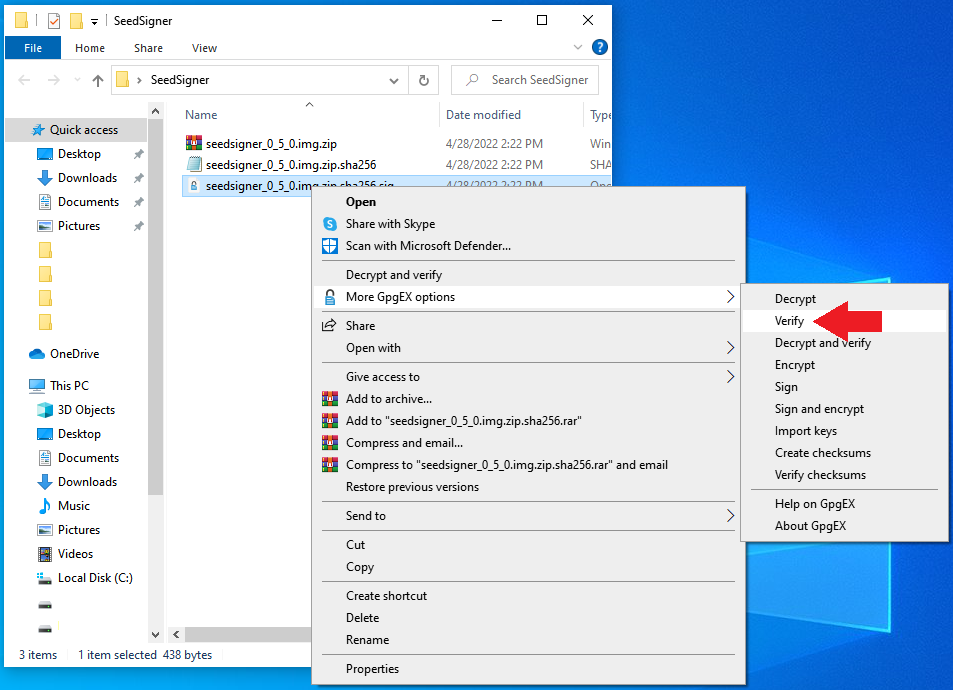
- Open the folder containing the
.zipfile,.sha256file, &.sigfile. - Right-click on the
.sigfile. - Select
More GpgEX options>Verify.
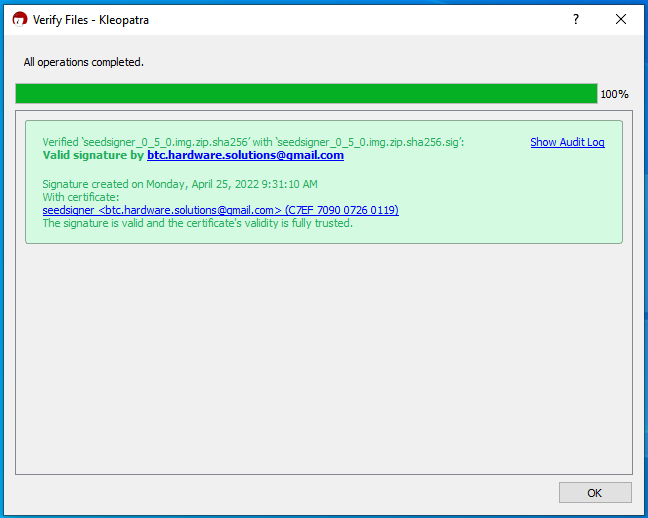
- Kleopatra will now use the signature file and the SeedSigner public key to verify the
.sha256file. - You should receive a dialog displaying the successful verification.
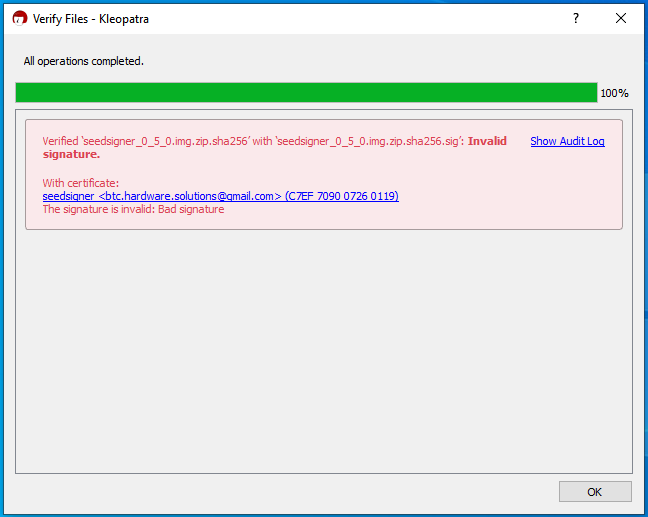
It is important to be able to distinguish between a valid and certified signature, a valid signature, and an invalid signature. Because the SeedSigner public key was certified by comparing the resulting fingerprint to a known publicly displayed fingerprint, the Kleopatra software prints a valid and certified dialog in green.
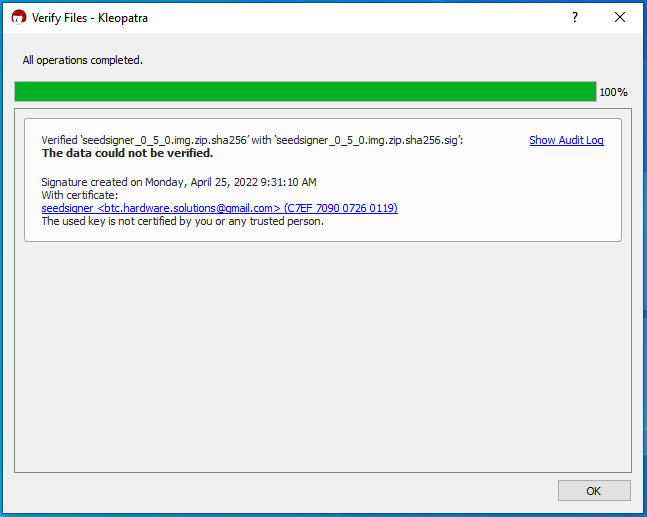
If you did not take the extra step to certify the SeedSigner public key, then Kleopatra can still determine that the signature is valid, but not certified. Meaning that the public key and accompanying signature are valid but that they could be from some other entity impersonating the developer. These dialogs will be printed in white. This is still a valid matching signature, it's just that unless you take that extra step to certify the fingerprint of the public key then do you really know it is a valid signature from SeedSigner and not an impersonator?
Or if there has been some manipulation in the file you downloaded and it is not authentically signed by the SeedSigner key, Kleopatra will print the dialog in red. This is an invalid signature and you should not proceed with decompressing the .zip file.
Now that you have verified the authenticity of the accompanying .sha256 file, you can rest assured that the sha256 hash value contained within it is in fact the hash value that you should be able to independently generate on the accompanying .zip file. To generate hash values on files, you can use a convenient freeware hex editor tool called HxD.
- In HxD, navigate to
File>Openand select the SeedSigner.zipfile - Navigate to
Analysis>Checksums>SHA256
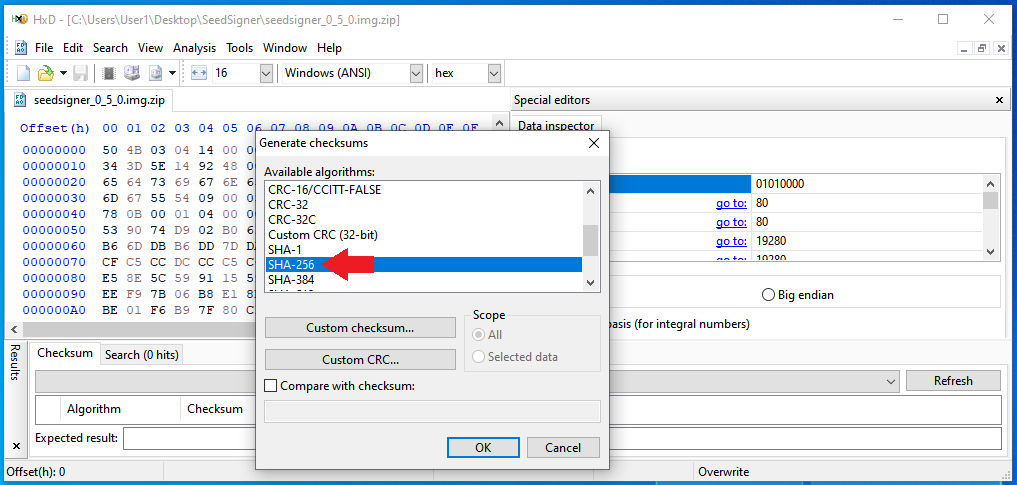
- Now you can open the SeedSigner
.sha256file with a text editor like Notepad. - Compare the hash values between HxD and the SeedSigner file.

After verifying the hash value, you know that the .zip file is authentic. If the hash values do not match, then do not decompress the .zip file. It is a good idea to close the .zip file from HxD at this point. You can skip ahead to Step 3 now.
Step 2B: Verify - Linux
Verifying signatures in Linux is a much more straight forward process. PGP tools come built in and can be executed from the command line terminal.
Before proceeding, ensure you have the .zip file, .sha256 file, and .sig file in your Downloads directory.
- Open your terminal
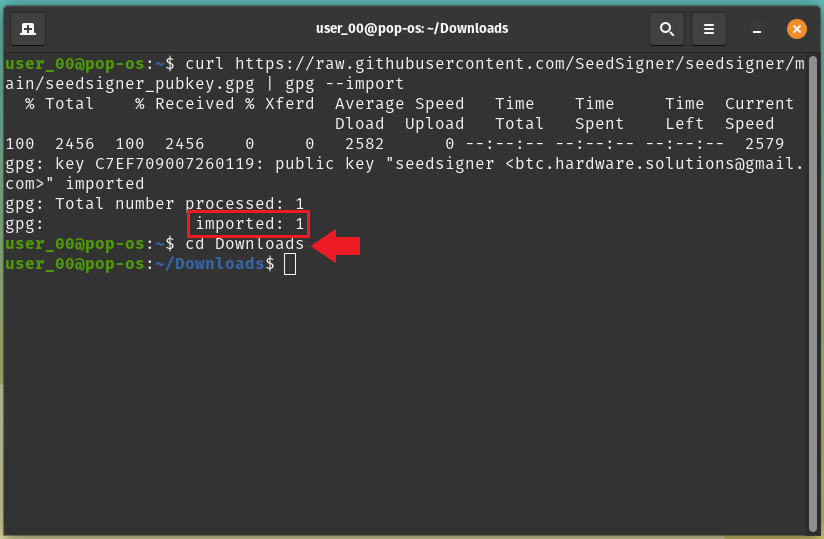
- Import the SeedSigner public key to your key-chain with:
curl https://raw.githubusercontent.com/SeedSigner/seedsigner/main/seedsigner_pubkey.gpg | gpg --import
- You should see the terminal print
imported: 1 - Then change your directory to your Downloads folder with
cd Downloads
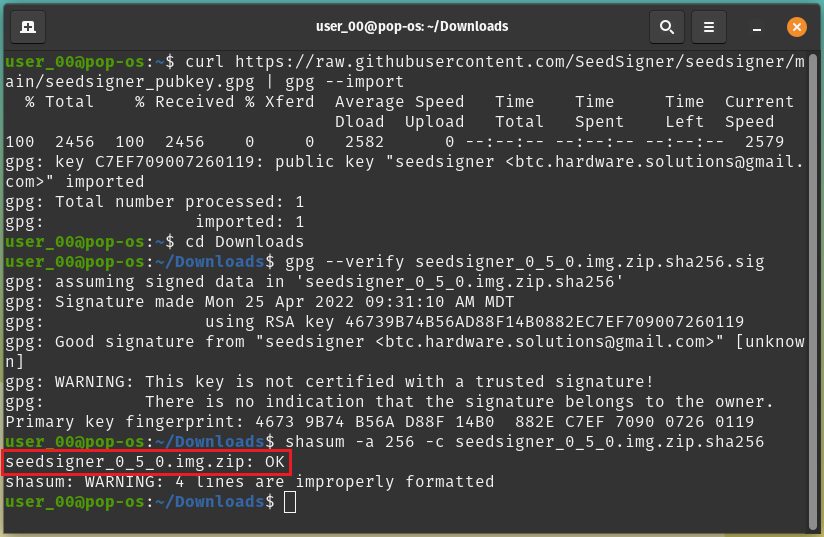
- Now verify the signature with
gpg --verify seedsigner_0_5_0.img.zip.sha256.sig. Be sure to use the version relative to the one you are verifying, this was version 0.5.0 and releases are made often so always use the latest one from SeedSigners releases page. - The terminal should print
Good signature from "seedsigner <btc.hardware.solutions@gmail.com>" - You will see the warning about the key not being certified, see the example in
Step 2Afor a detailed explanation. Long story short, this is fine.

- Now you can verify the hash value with
shasum -a 256 -c seedsigner_0_5_0.img.zip.sha256. Again, making sure to use the version appropriate for you. - The terminal should print
seedsigner_0_5_0.img.zip: OK. - You can ignore the warning about improperly formatted lines if you get it.
That's it, you're done verifying the .zip file you downloaded. You can now move on to flashing the image to the MicroSD card in the next step.
Step 3: Flash
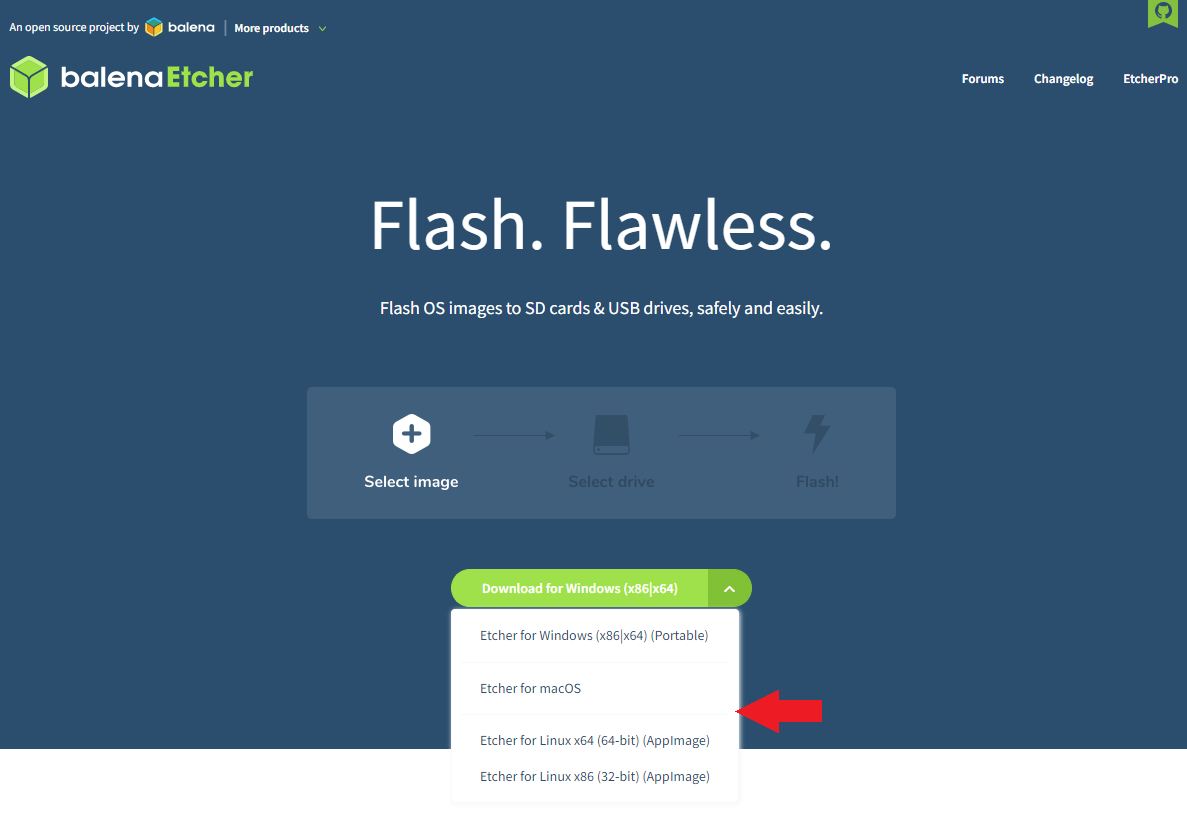
Using a program like Balena Etcher makes flashing the SeedSigner image easy. Navigate to the Balena Etcher website where you can download the application appropriate for your operating system. Follow your system prompts to install. Make sure you have a MicroSD card at least 4GB in size formatted and connected to your computer.
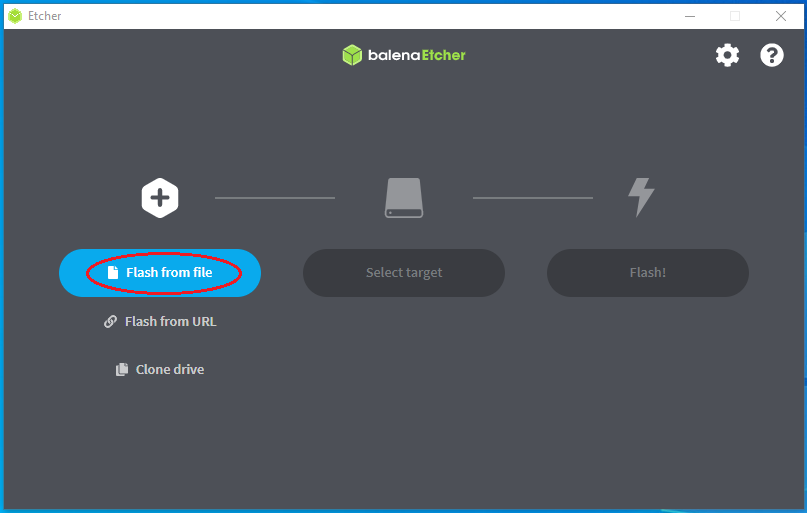
Once you have Balena Etcher installed and opened, select Flash from file.
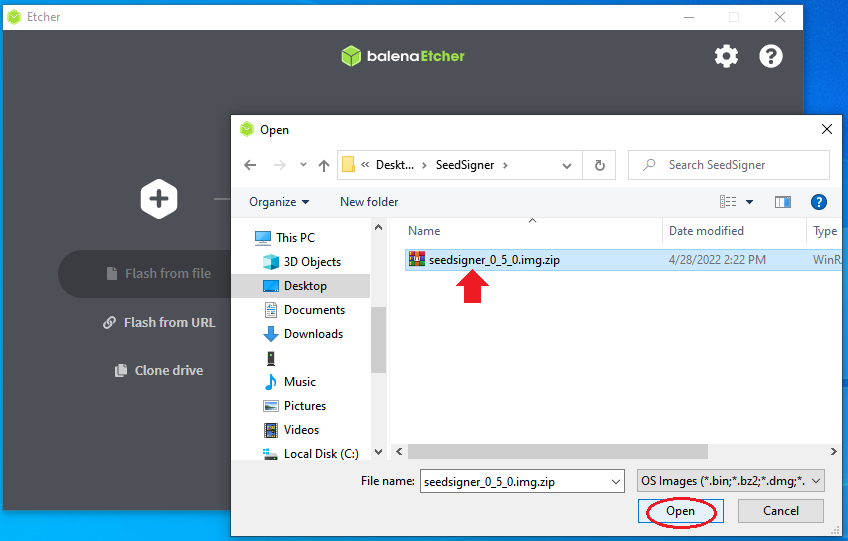
Select the .zip file from the file explorer. The .zip file can remain in it's compressed state, Balena Etcher will decompress it.
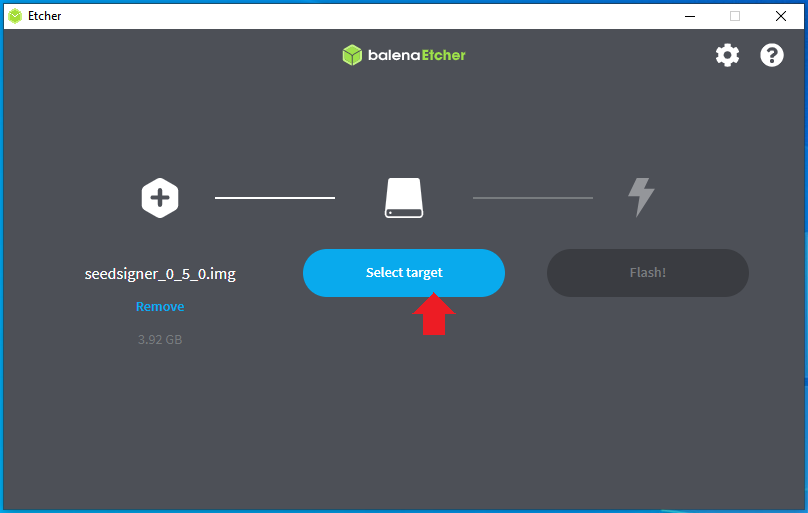
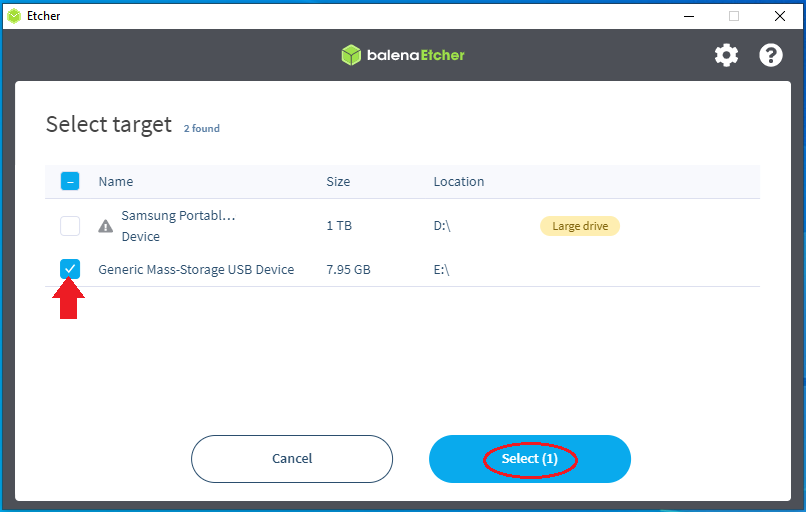
Select the target drive that you want to flash the image file to. You want to choose your MicroSD card here.
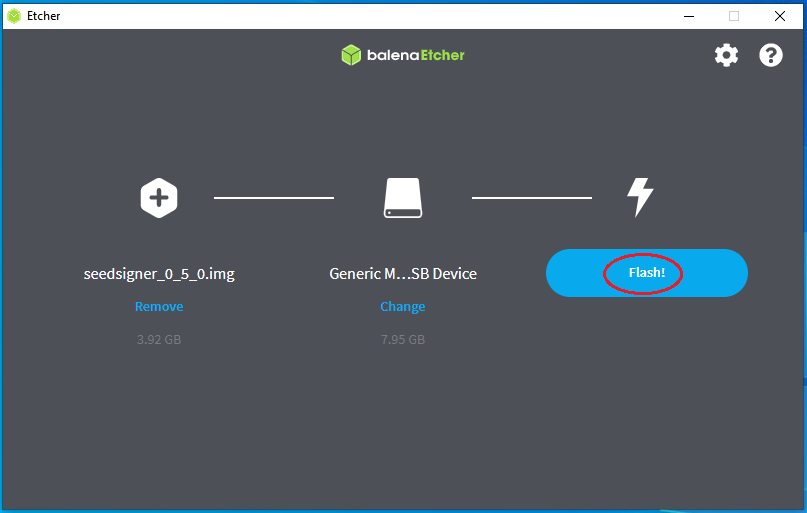
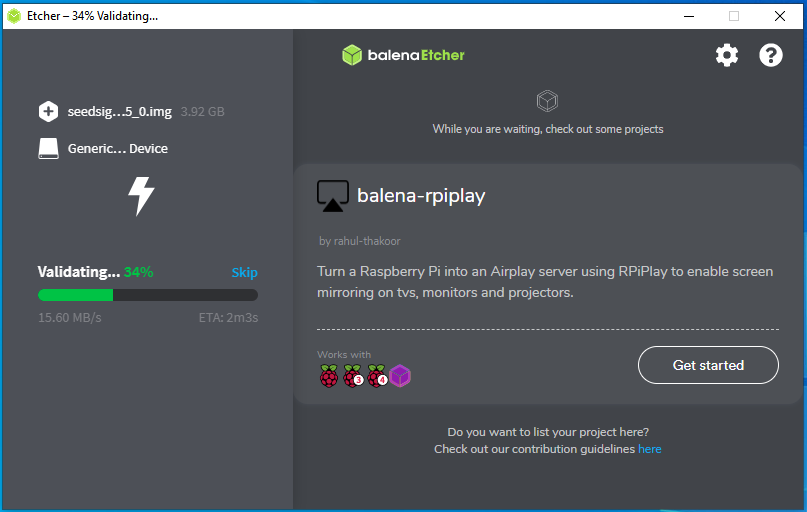
Click on the Flash! button and the flashing process should start automatically. The progress bar will move over to the left-hand side of the application and some promotional dialogs will be displayed on the right-hand side of the application. You do not need to interact with the promotional dialogs, just let the flashing process run.
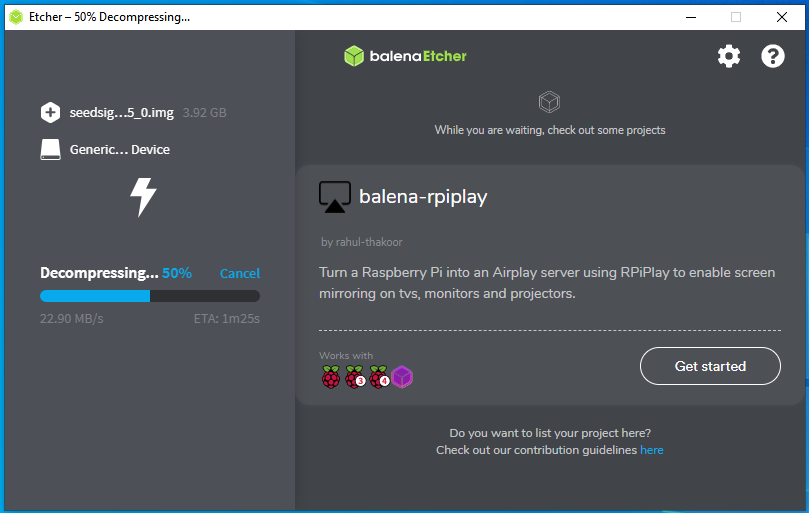
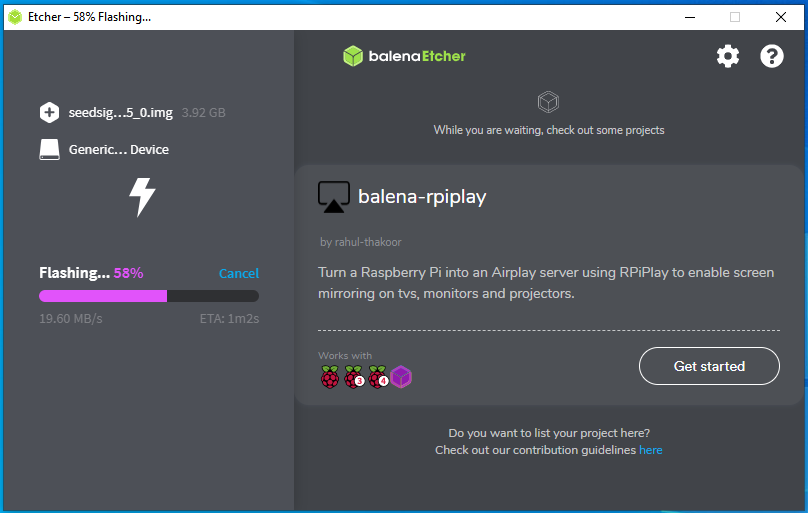
There are 3 stages of the flashing process: Decompression, Flashing, & Validation. Just let the software run through all the steps and do not disconnect the MicroSD card during this process. If you get any operating system prompts saying the drive needs to be formatted, just ignore them.
Once finished, you should receive a message that lets you know the flash was completed successfully. If it was not completed successfully, try again and if the problem persists, then consider using a different MicroSD card.
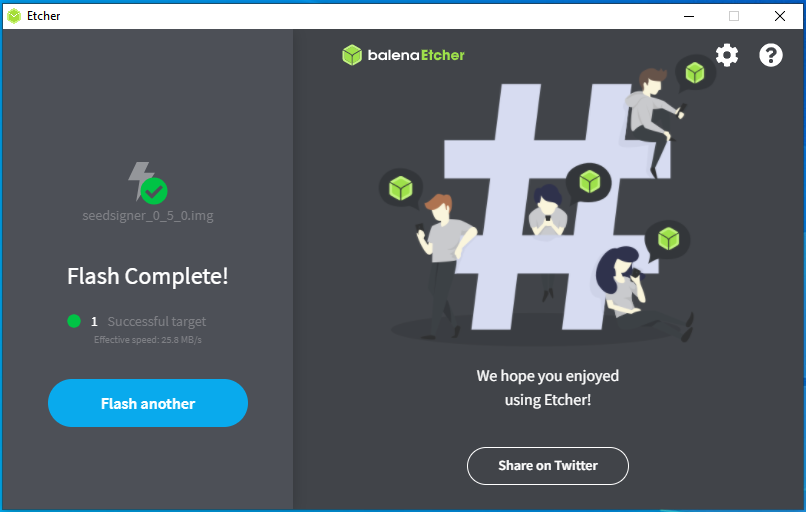
You can close the Balena Etcher application. Safely eject the MicroSD card from your computer if your system has not done so already. Now you are ready to mock up your hardware and test it prior to final assembly.