MultiSig
Multisig is short hand for "multiple signatures", this popular configuration is how you can secure your bitcoin in such a way that signatures from multiple wallets are required in order for the bitcoin to be spent, in the case of hardware wallets this means you need multiple devices to sign the transaction. One approach to multisig is to use hardware wallets from different manufacturers in order to mitigate unforeseen vulnerabilities or attack vectors that may be present in one manufacturer but not another. Depending on how the multisig quorum is configured, 2-of-3 signatures may be required to spend the bitcoin, or this number can be extended to even more robust security models like 7-of-9.
In this demonstration, a 2-of-3 multisig configuration will be presented using 1 software wallet in Sparrow Wallet, 1 COLDCARD hardware wallet, and 1 Passport hardware wallet. This means that 1-of-3 signatures will be from a hot wallet. If you want to ensure your multisig setup has all air-gapped keys, then use a third hardware wallet instead. This guide will at least give you the basic understanding you need to customize your configuration to fit your needs. To learn more about getting started with COLDCARD, check out this guide.
Sparrow Wallet
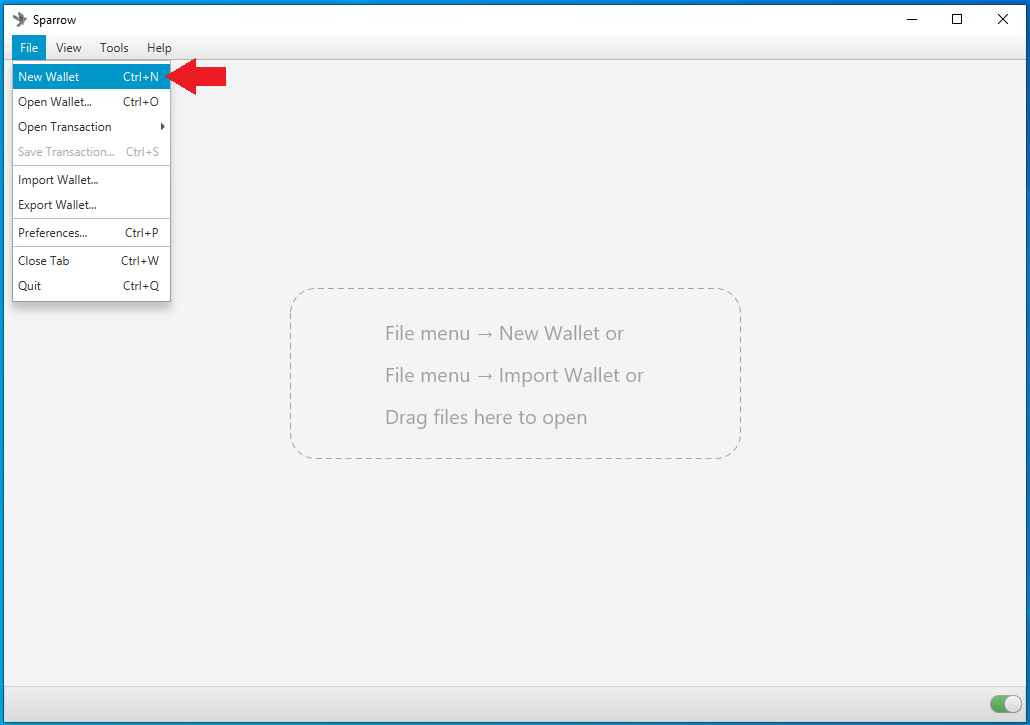
Starting with Sparrow Wallet, navigate to File > New Wallet.
Then Sparrow Wallet will ask you to name your new wallet, this can be anything you want. In this example "MultiSig Demo" was used.

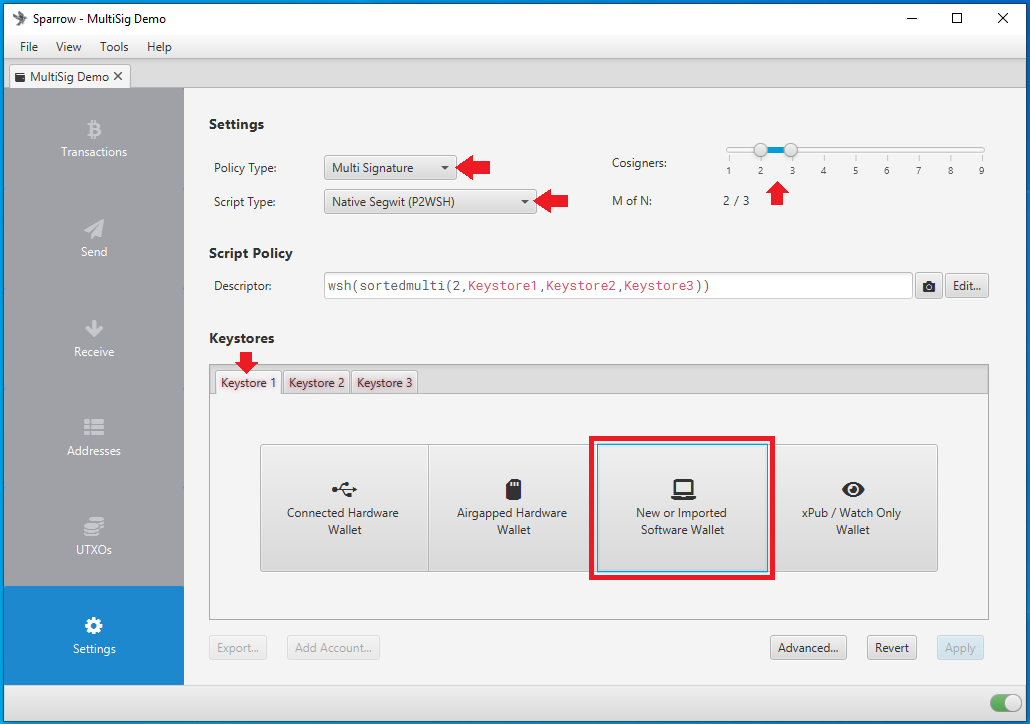
On the next screen select Multi Signature from the Policy Type drop-down menu.
Choose the script type you want; P2SH for legacy addresses that start with "1", P2SH-P2WSH for nested-segwit addresses that start with "3", or P2WSH for native-segwit addresses that start with "bc1q". In this example, P2WSH native-segwit addresses will be used.
Choose how many cosigners are required, in this example 2-of-3 will be used which means that any two signatures from the Passport, the COLDCARD, or Sparrow Wallet combined will suffice for spending the bitcoin locked up in this quorum.
Then under the Keystores section, you will see three tabs (more if your quorum is larger). For the first keystore, Keystore 1, select New or Imported Software Wallet. This will create a brand new wallet in Sparrow Wallet to be set up as the first cosigning wallet.
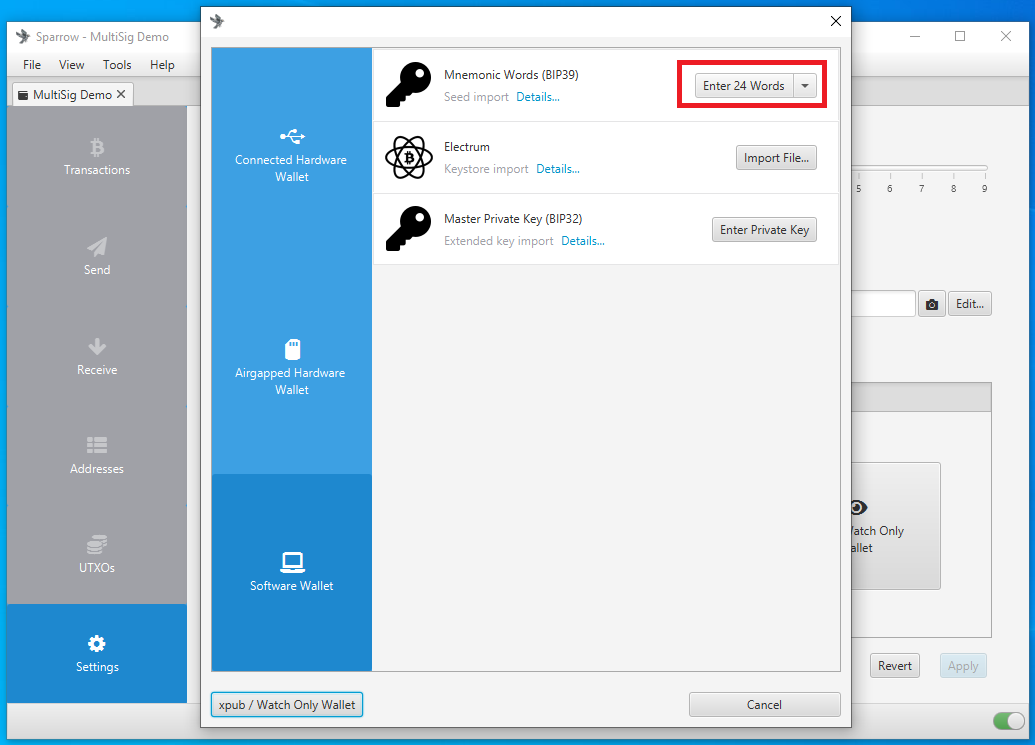
A pop up window will appear, click on the Enter 24 words button next to the Mnemonic Words (BIP39) option.
On the next screen, click on Generate New to have Sparrow Wallet randomly generate 24 seed words.
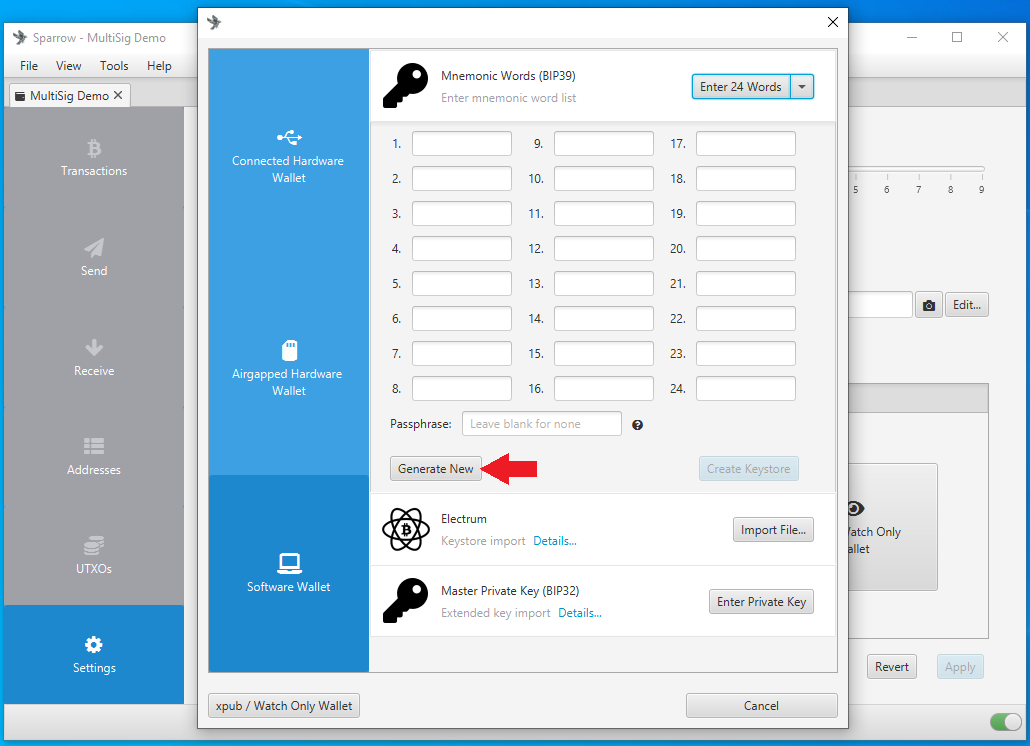
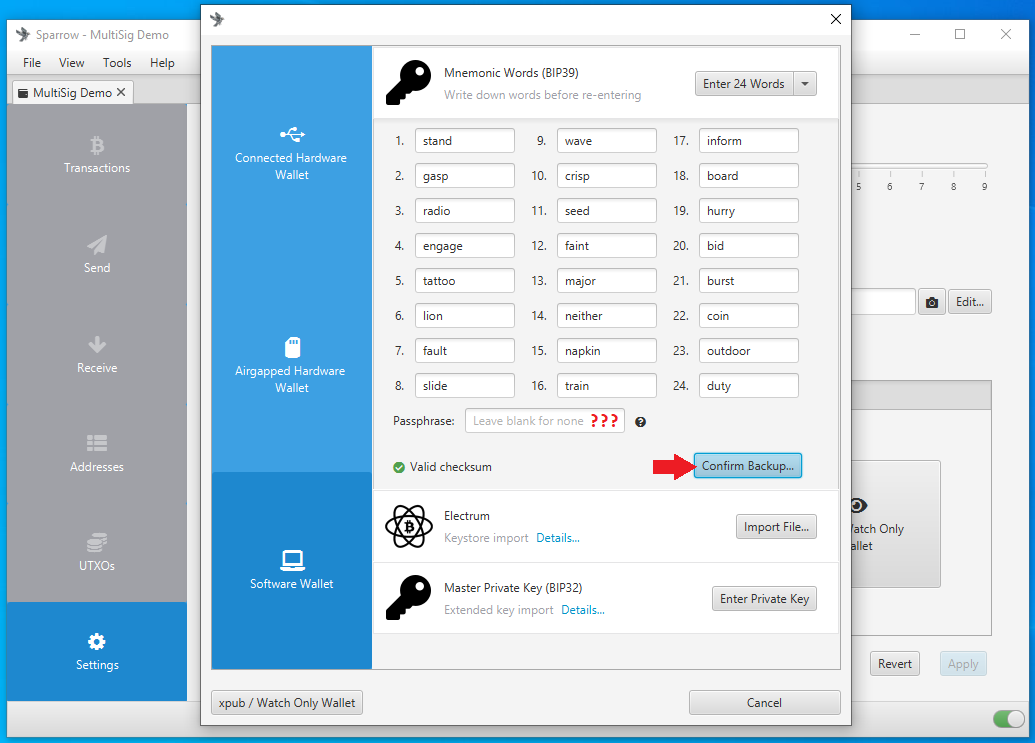
Sparrow Wallet will generate 24-words making your new seed phrase. Do not share these words with anyone, they will have access to 1-of-3 signing keys. Do not take a screenshot of these words, do not store them in a digital format, do not take a picture of them with your phone, you will compromise the security of your multisig setup. Write these words down on paper at the very least and consider stamping them into metal for a backup that can withstand extreme environmental hazards.
Also, you have the option here of adding a passphrase if you want. As explained earlier in this guide, a passphrase can be thought of as a "25th word" that only you know.
Once you have written down your words and optional passphrase and double checked your work, click on the Confirm Backup... button to verify you have written this information down correctly. Sparrow Wallet will ask you if you have written the words down, click on the Re-enter Words... button to continue to the test.
Once you have re-entered all 24-words in order, click on the Create KeyStore button.

On the next screen, click on the Import Keystore button.
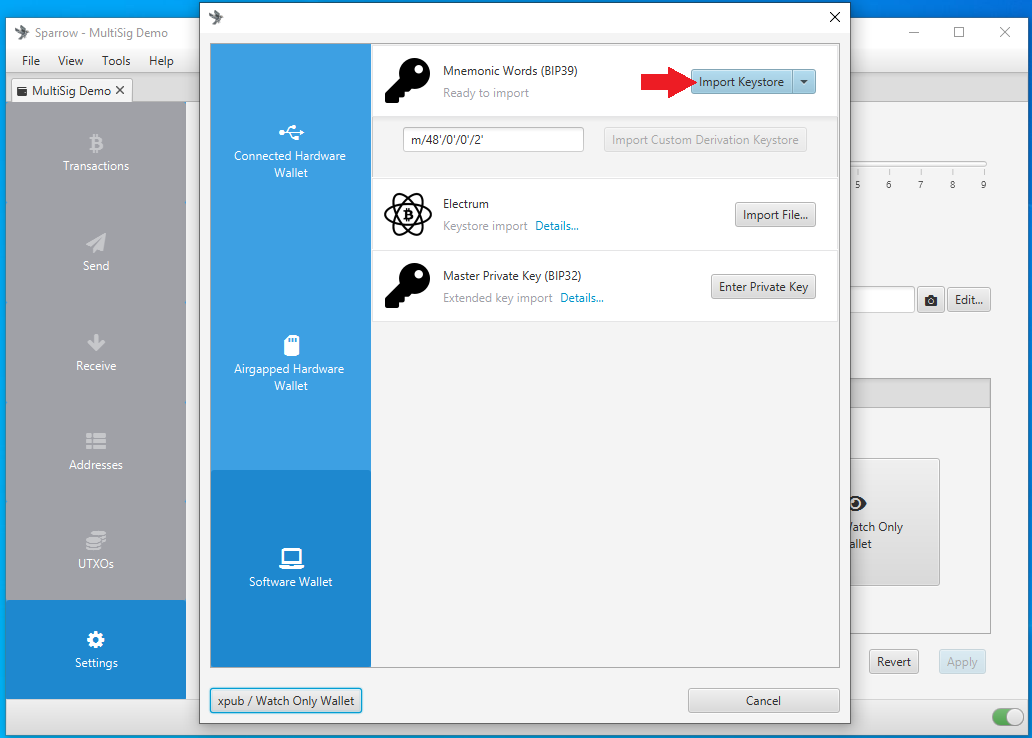
You will be taken back to the settings page for your multisig configuration. The first Keystore is finished and you will notice that it has been populated with the details from your newly setup wallet.

COLDCARD
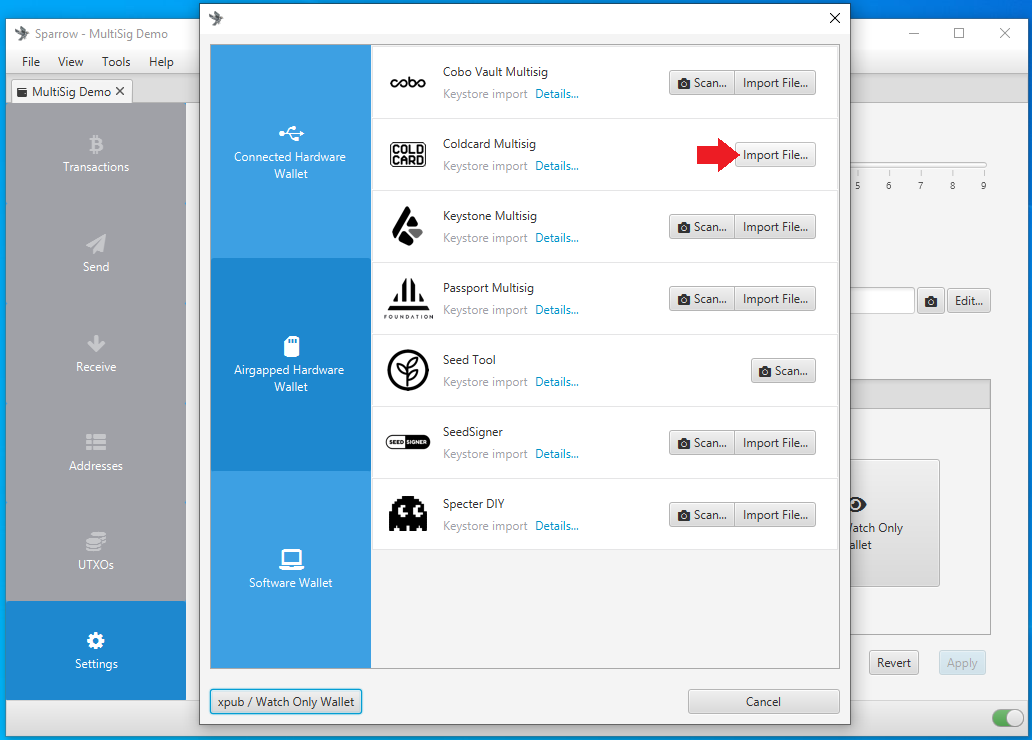
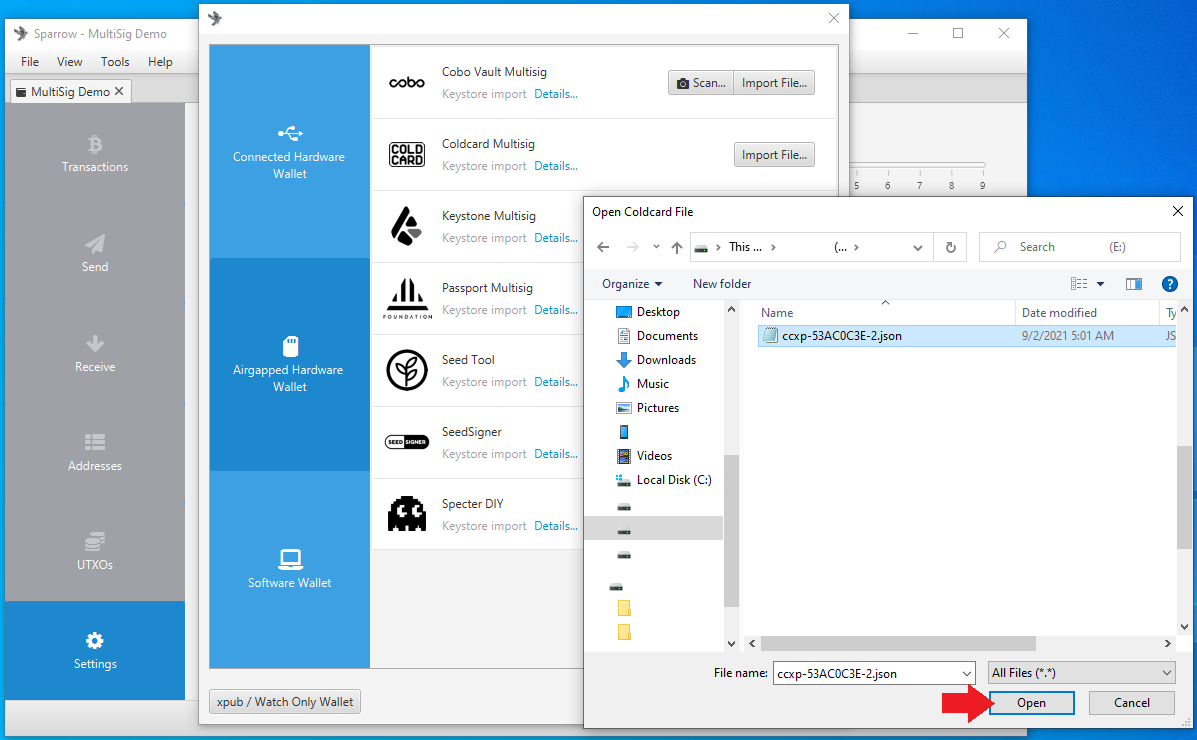
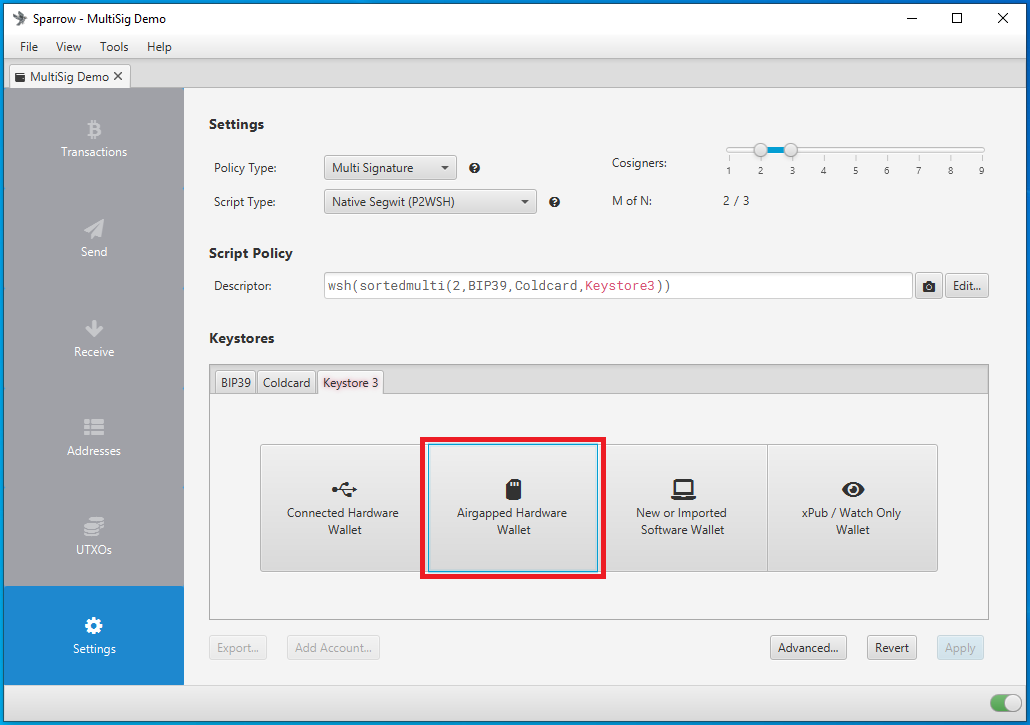
Click on the Keystore 2 tab, then select Airgapped Hardware Wallet.

In the next window that pop ups, press the Import File... button in the Coldcard Multisig row. This will open the file explorer where you can navigate to the file written by your COLDCARD.
If you have not done so already, you need to export the .json file with the xpub information from the COLDCARD. These next steps will only show a very high-level explainer on how to export this information but for a full detailed guide read this article.
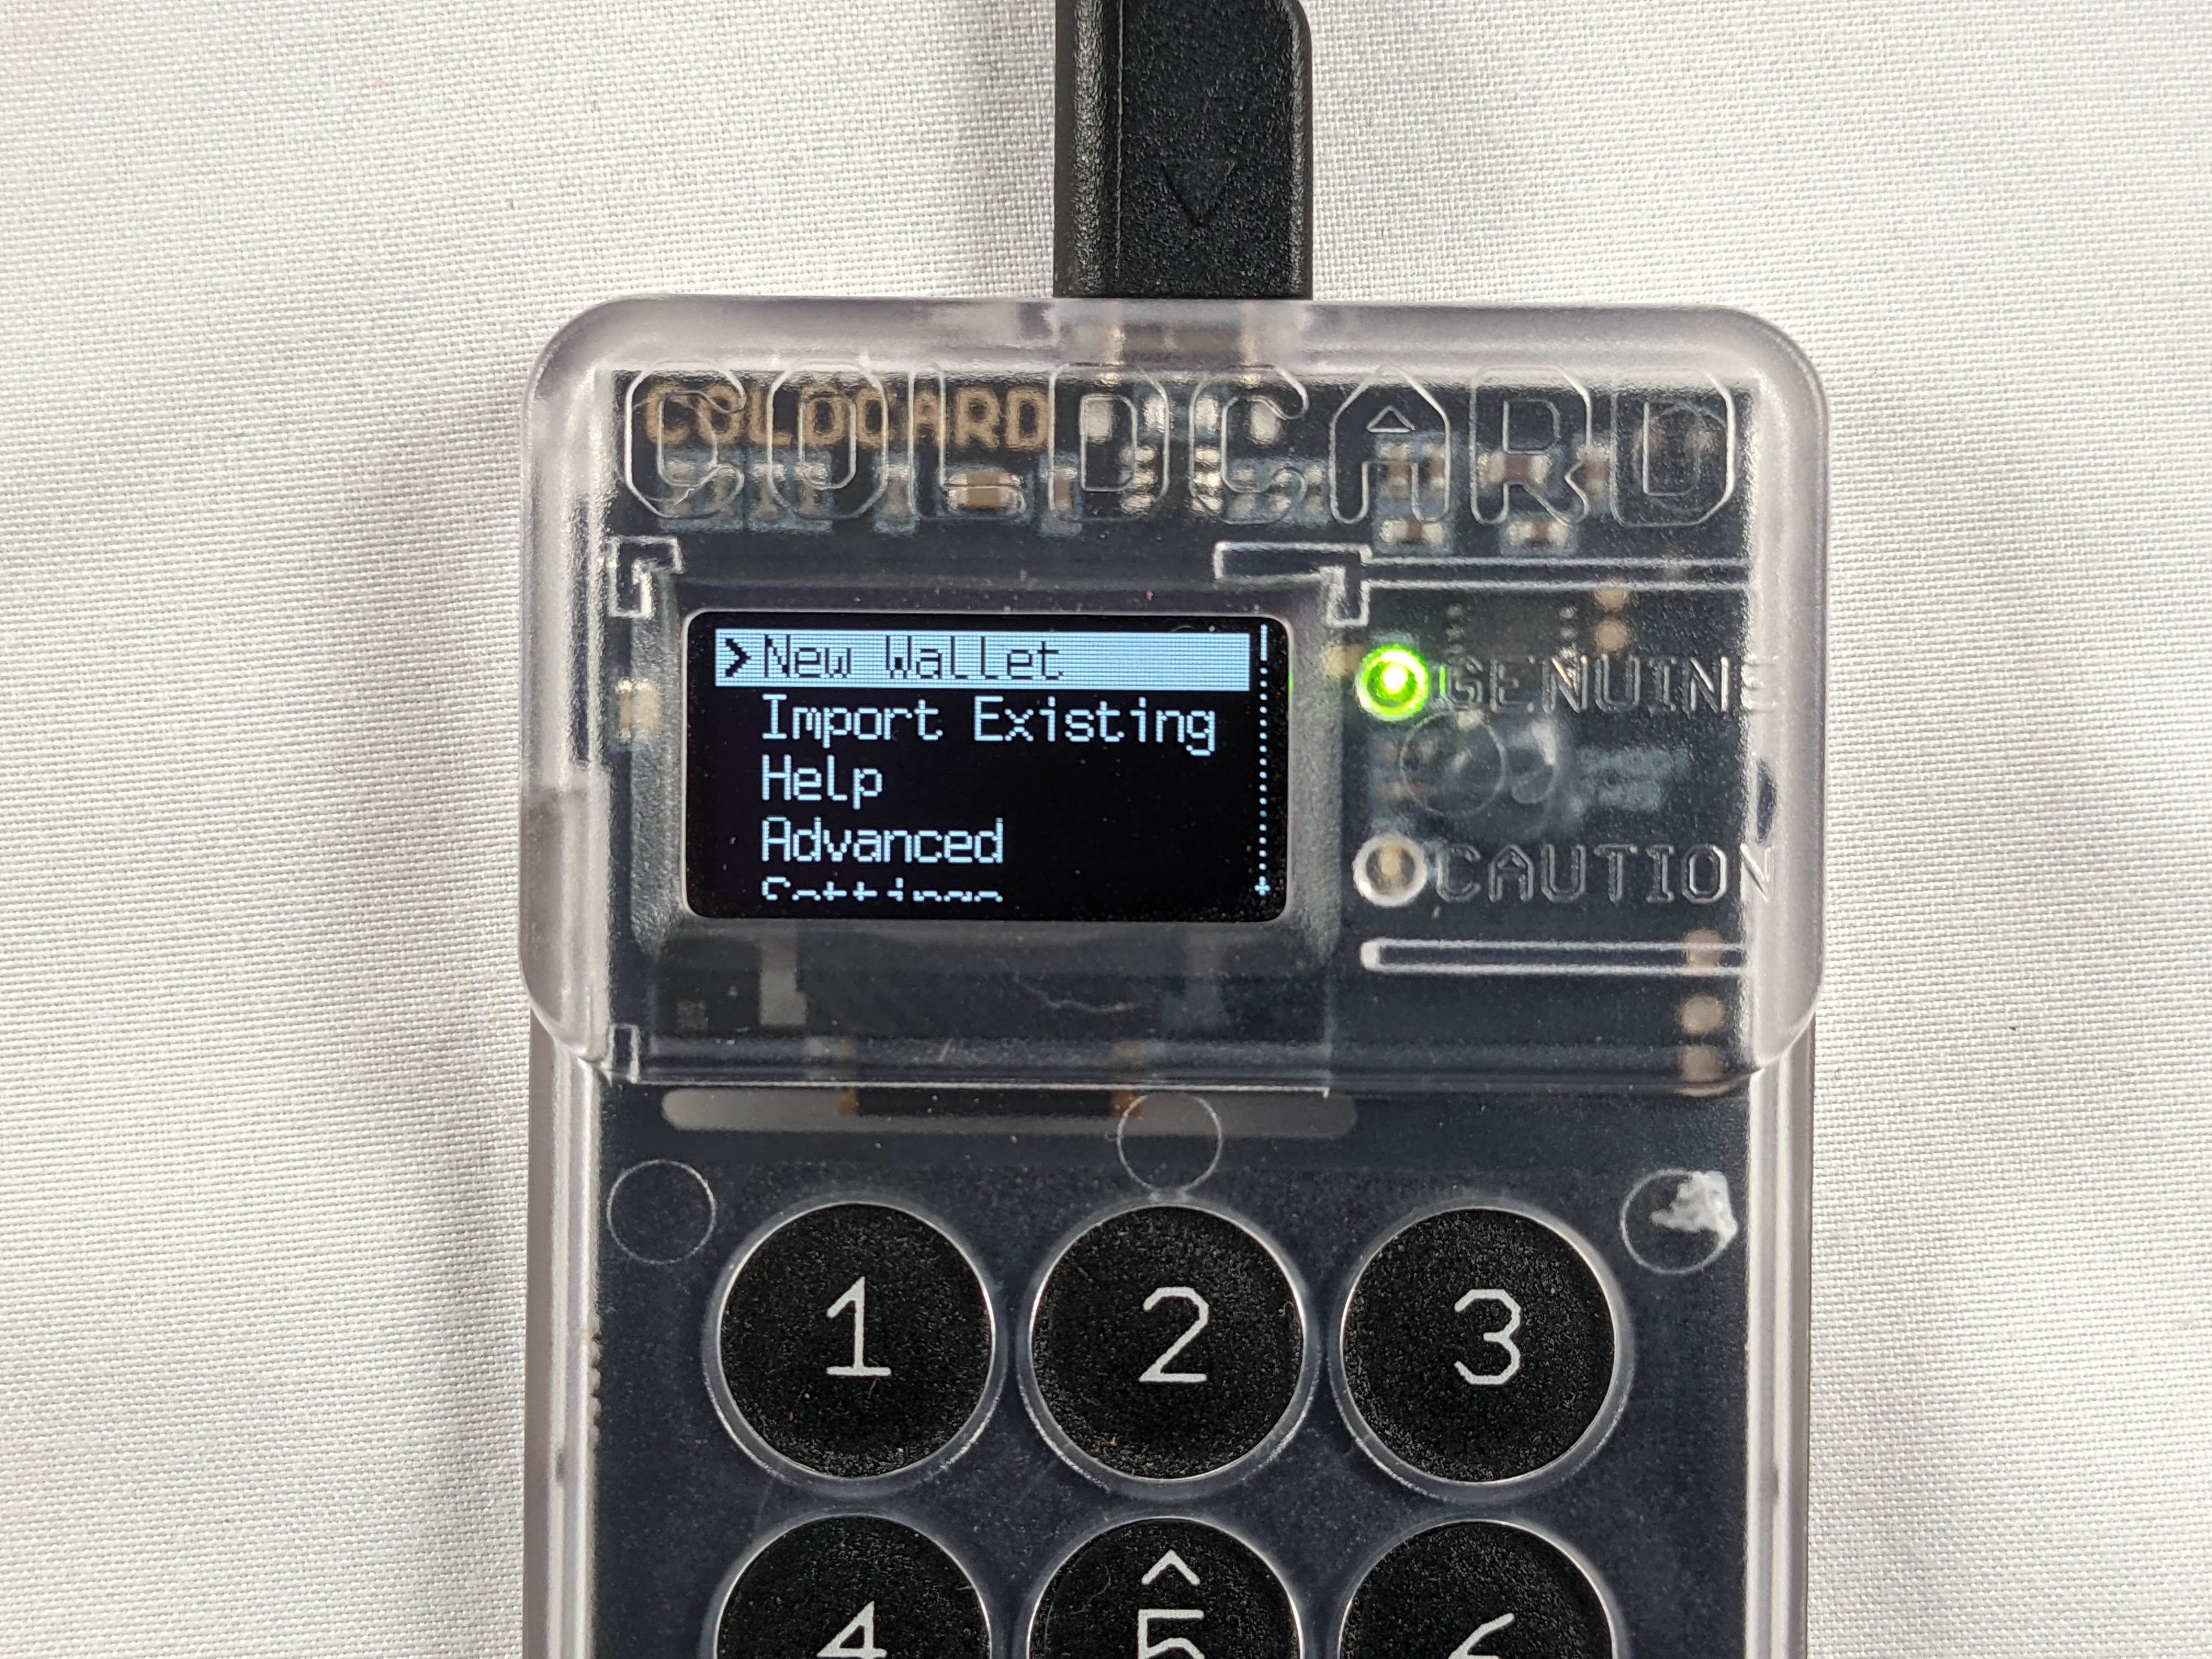
After setting up your COLDCARD for the first time and securing your PIN and anti-phishing words, as well as upgrading the firmware; one of the first things you will do is generate a new wallet by navigating to New Wallet from the main menu, if you have not set up a wallet on this COLDCARD already.
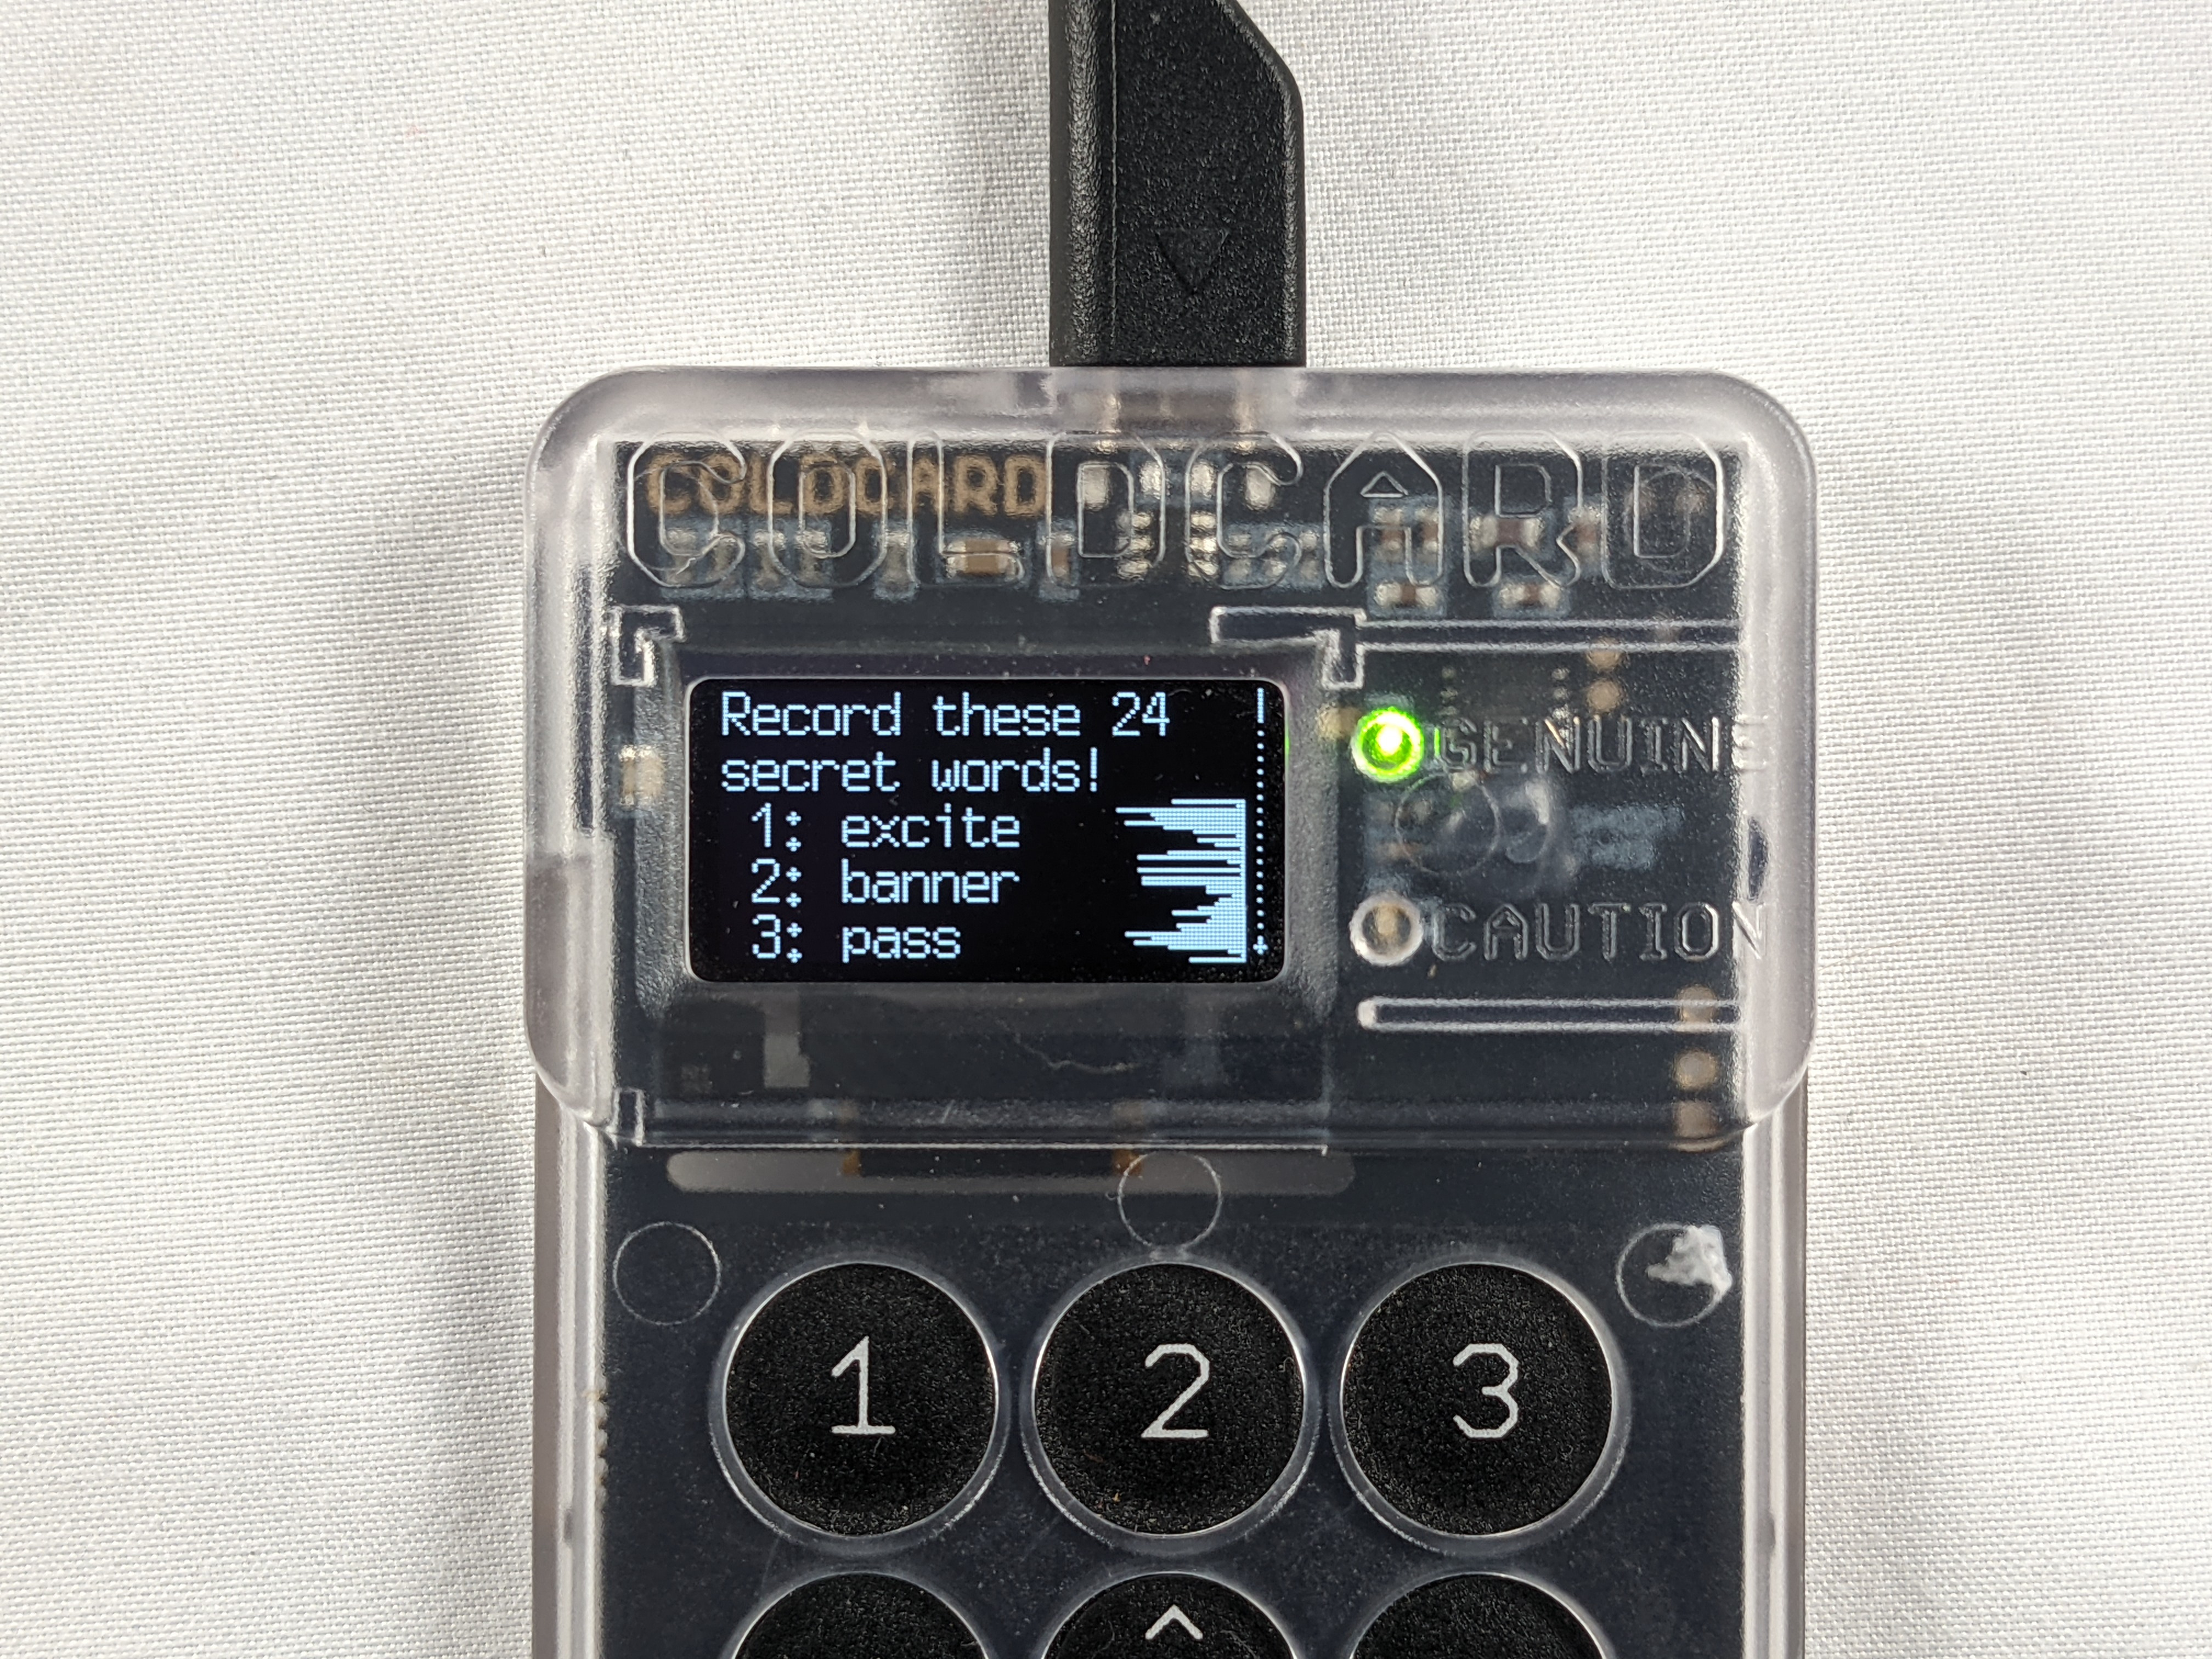
Then the COLDCARD will randomly generate and display 24 seed words, again do not share these words with anyone, they will have access to 1-of-3 signing keys. Do not take a screenshot of these words, do not store them in a digital format, do not take a picture of them with your phone, you will compromise the security of your multisig setup. Write these words down on paper at the very least and consider stamping them into metal for a backup that can withstand extreme environmental hazards.
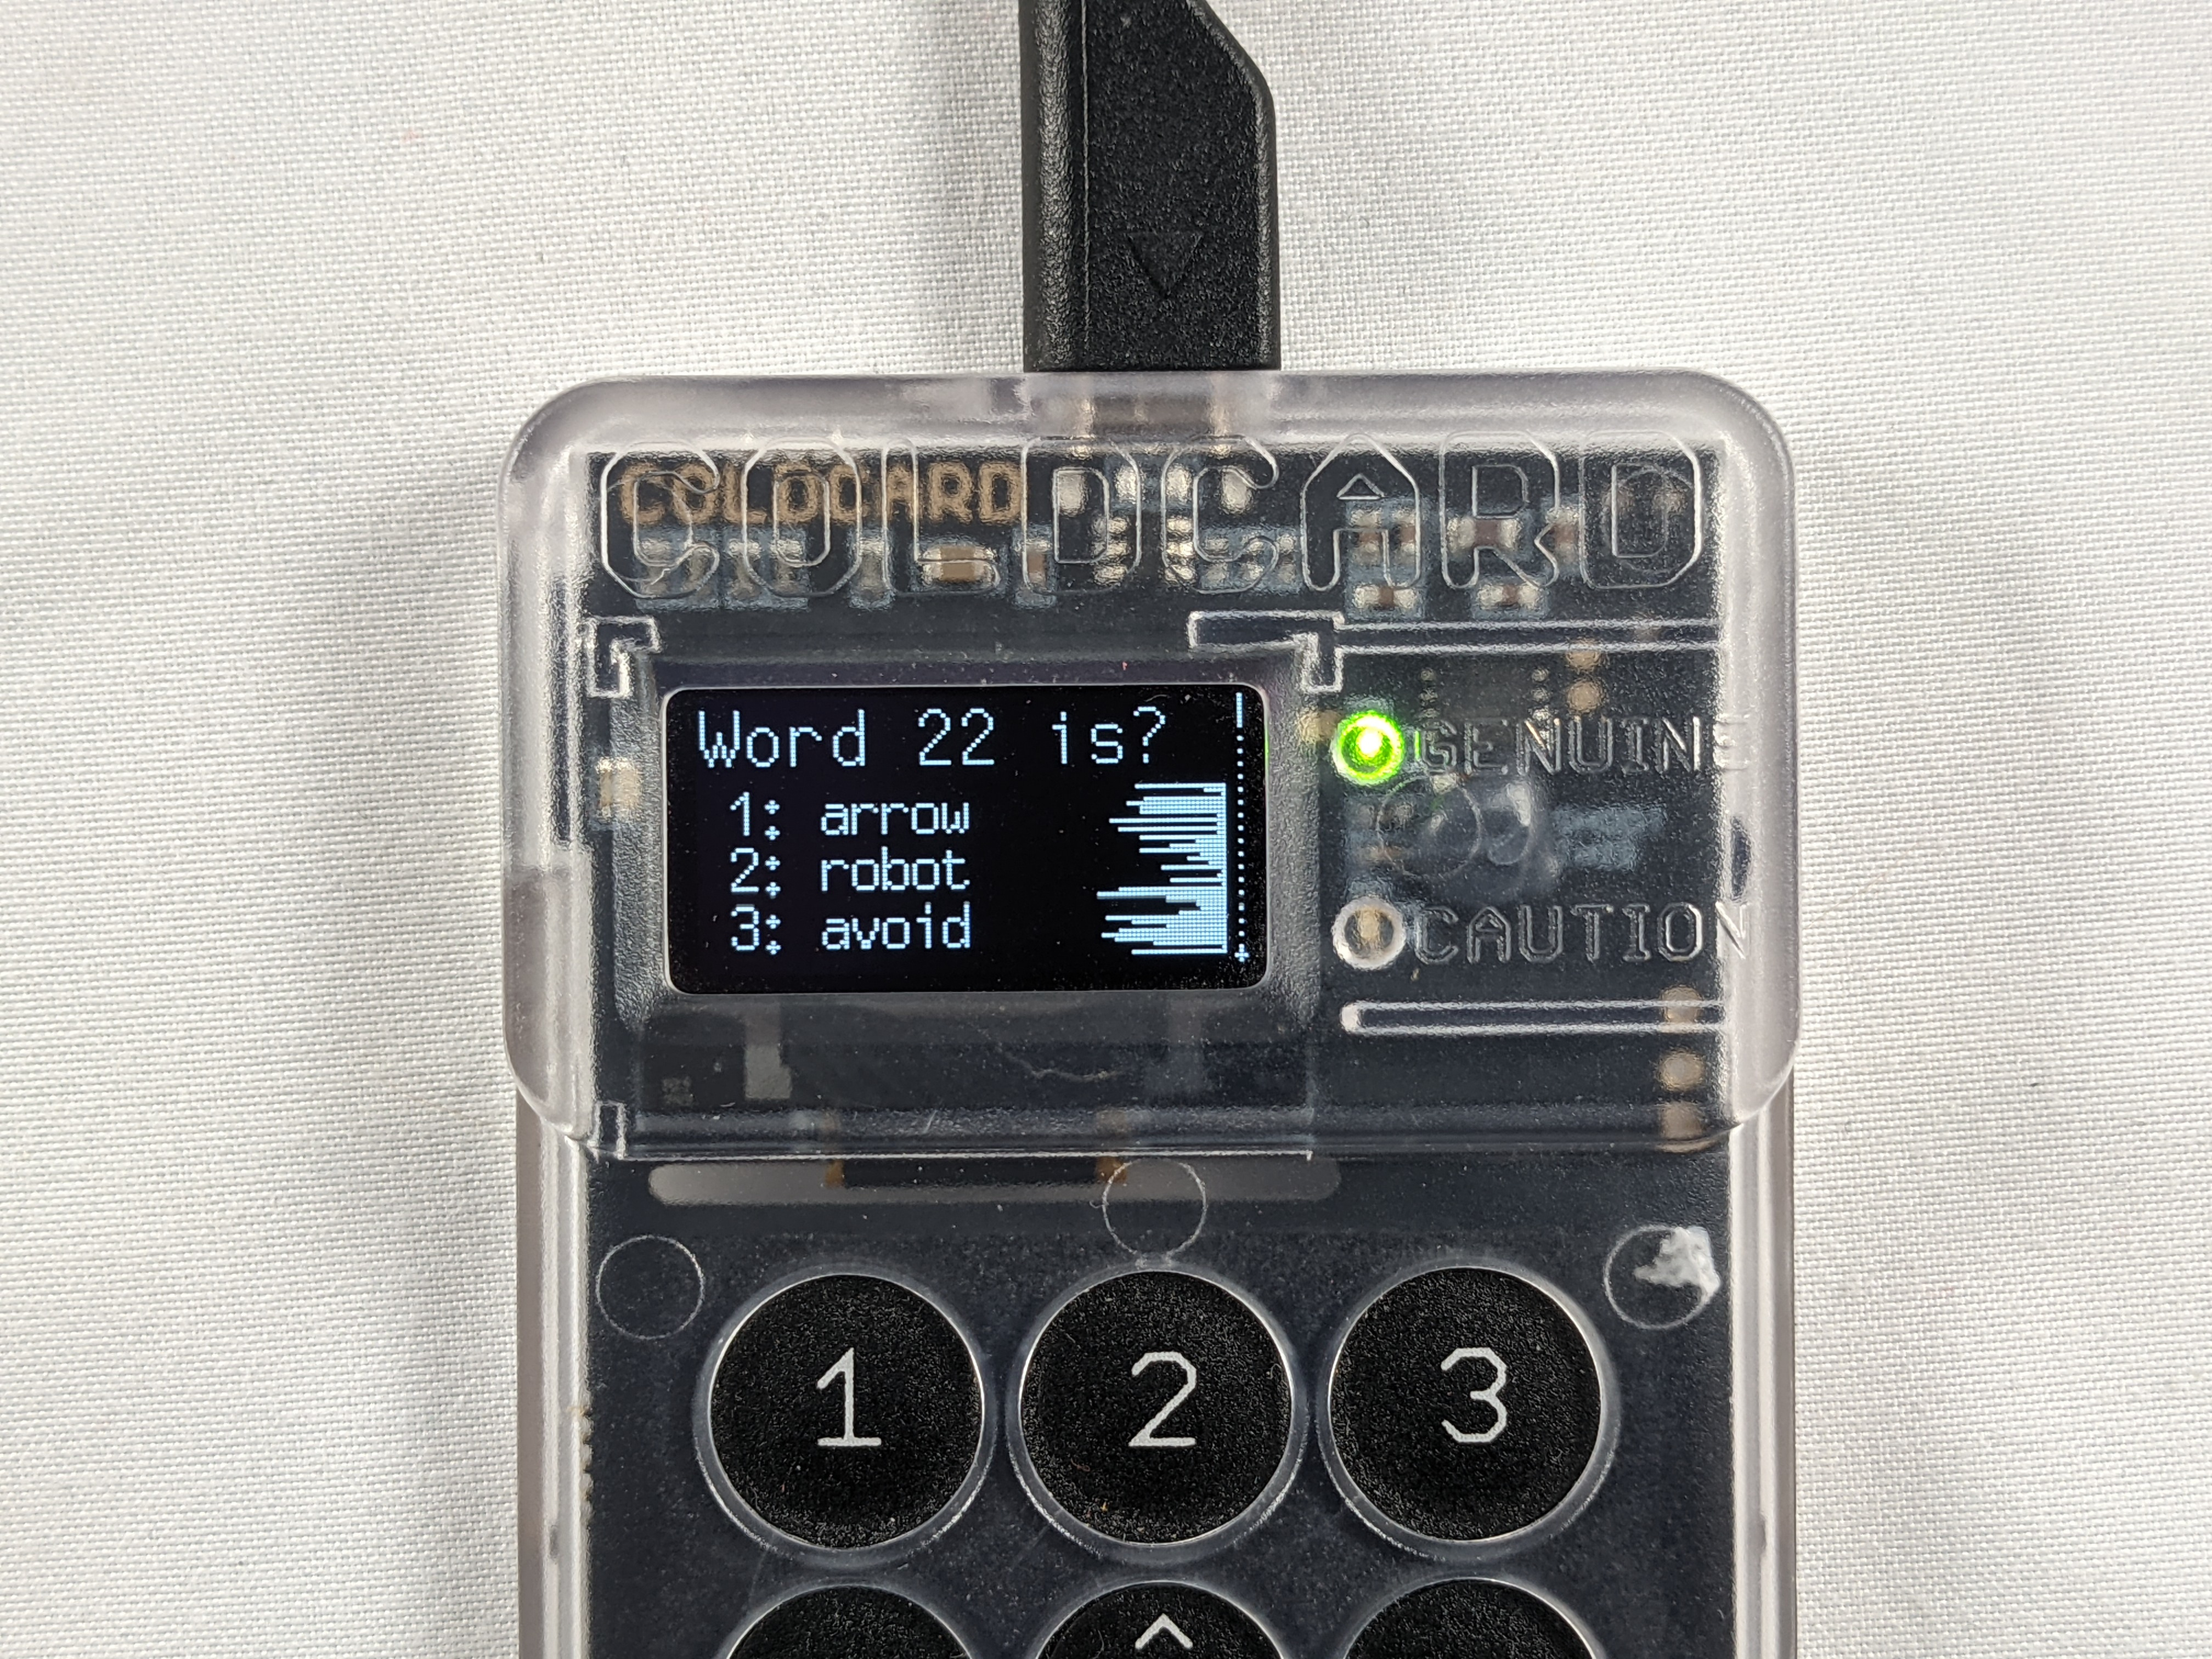
The COLDCARD will then test you on all the words.
At this point, if you want to enter a passphrase on the COLDCARD, you can do so at this time. Refer to this article for details on the passphrase. To summarize, the COLDCARD has no way of knowing if your passphrase is correct, so ensure that you double check your work by testing your backup information so you know you have everything you need to restore your wallet.
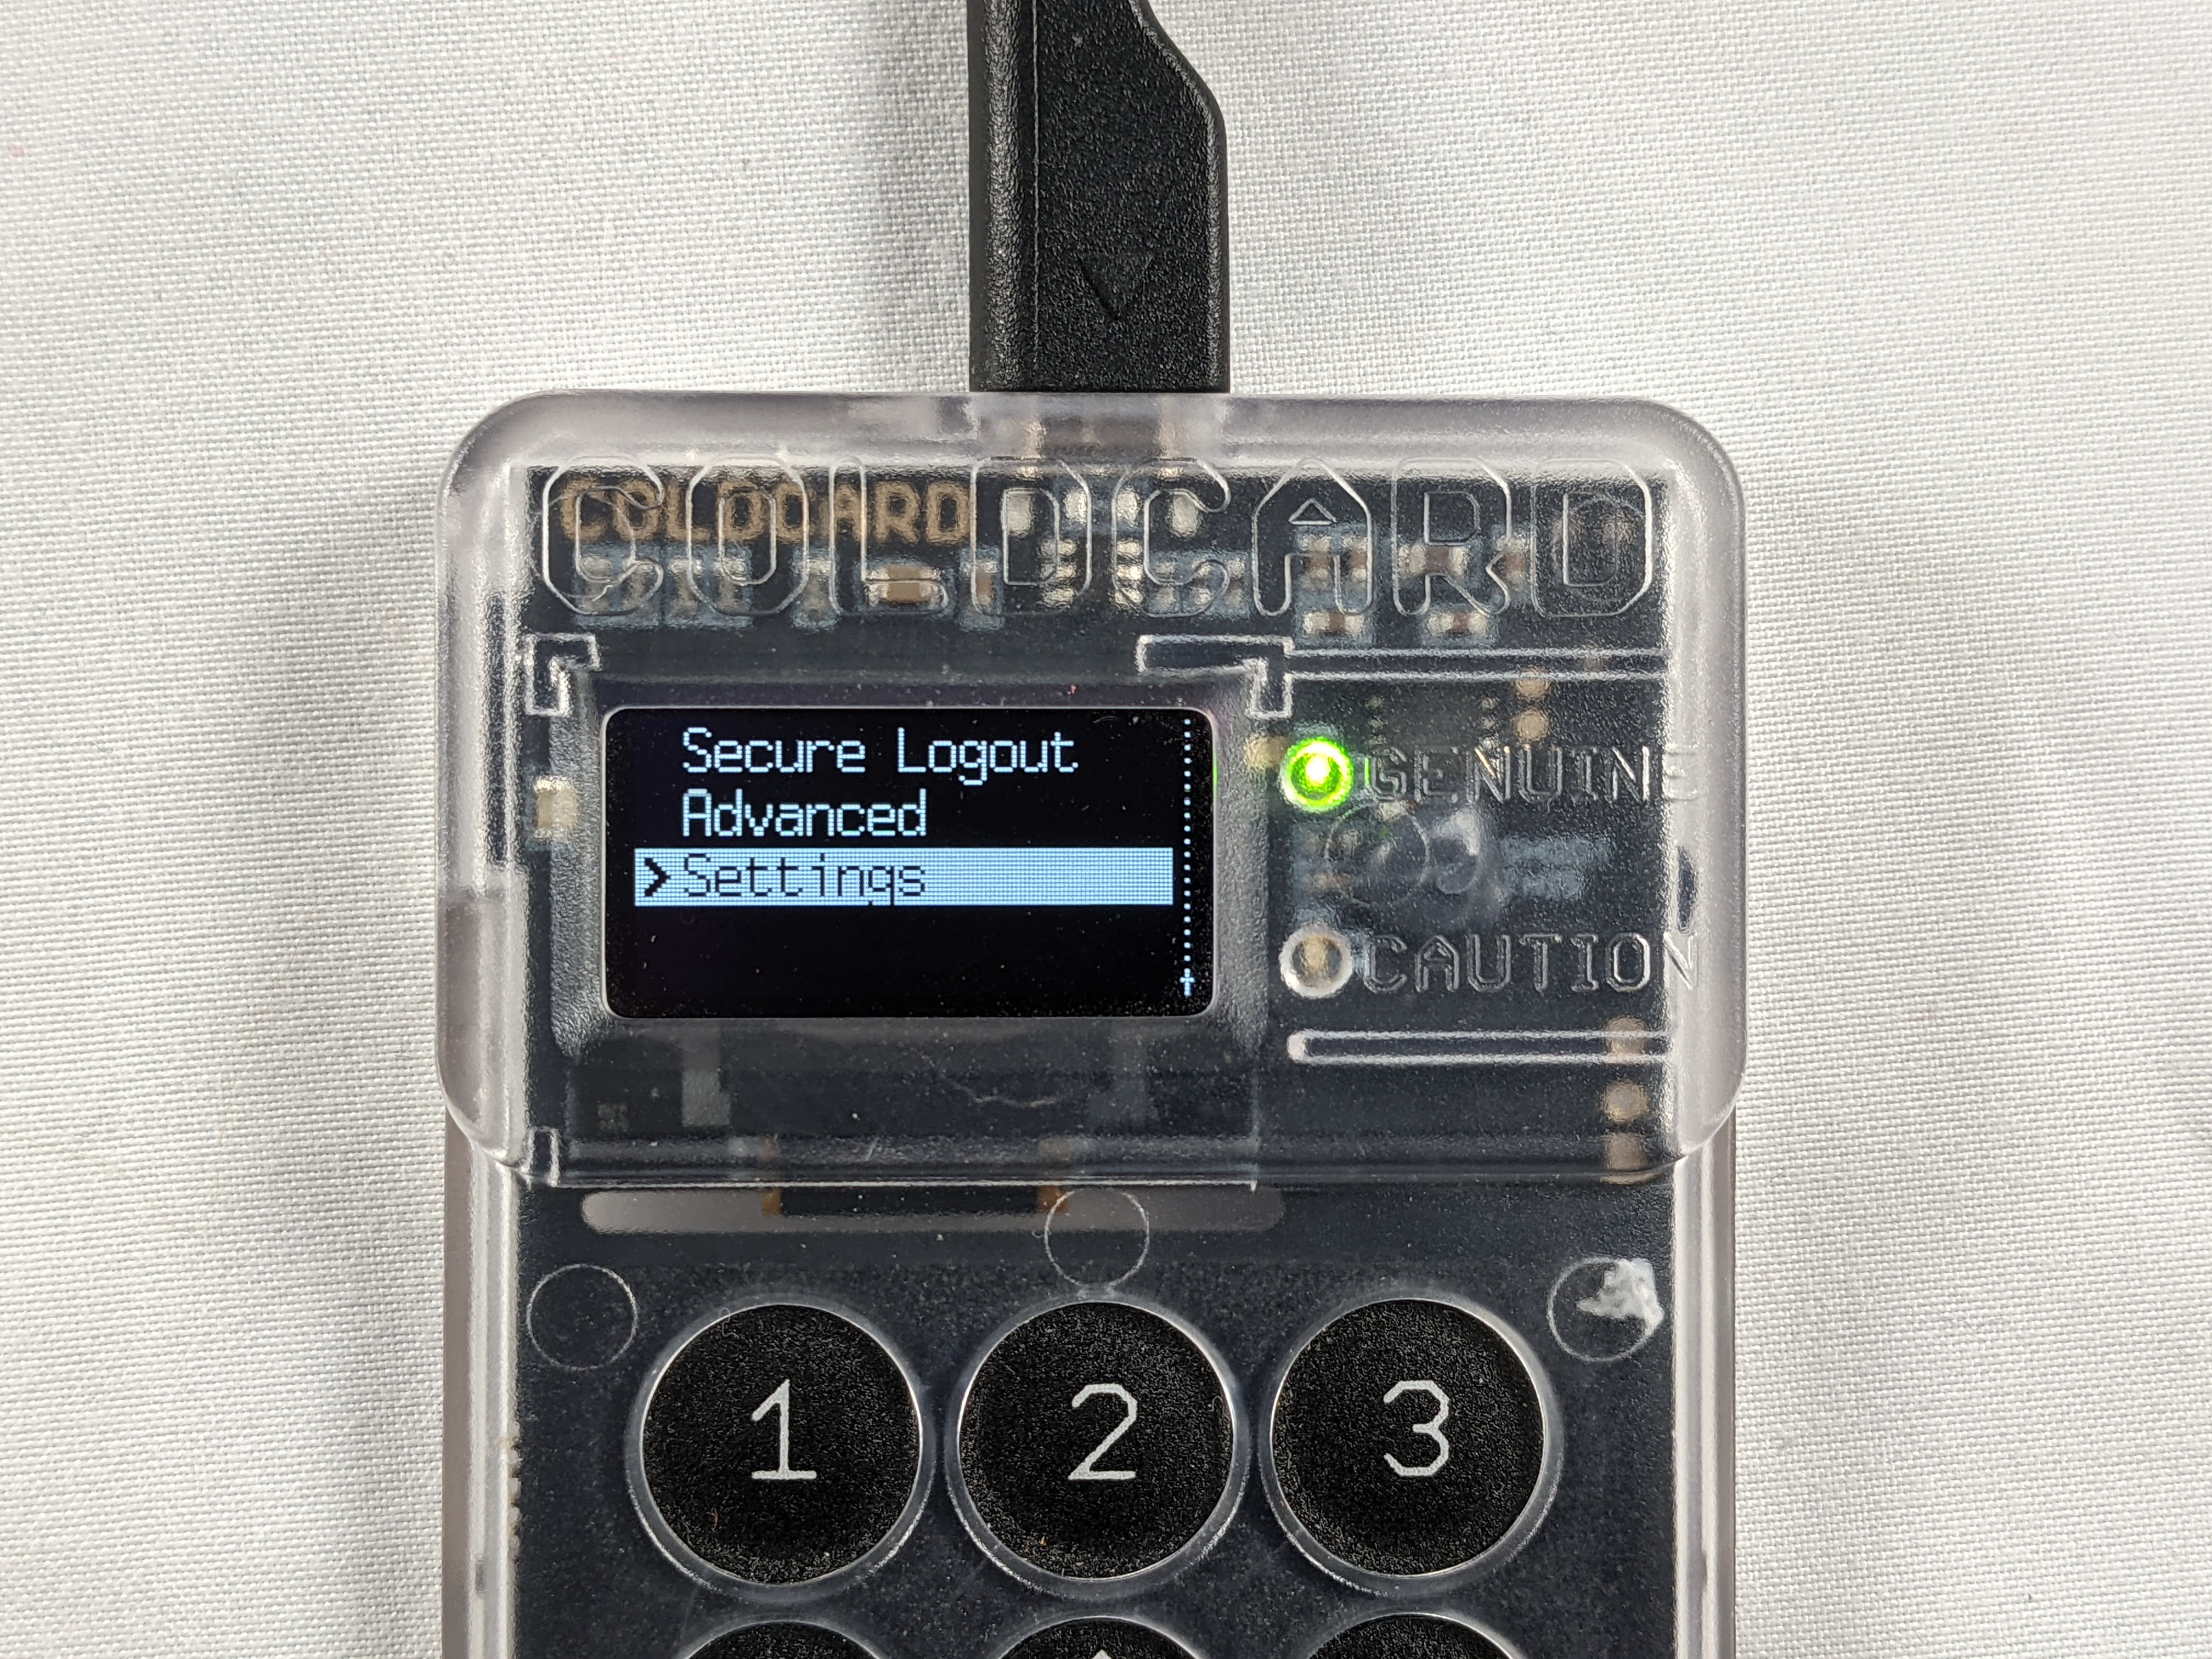
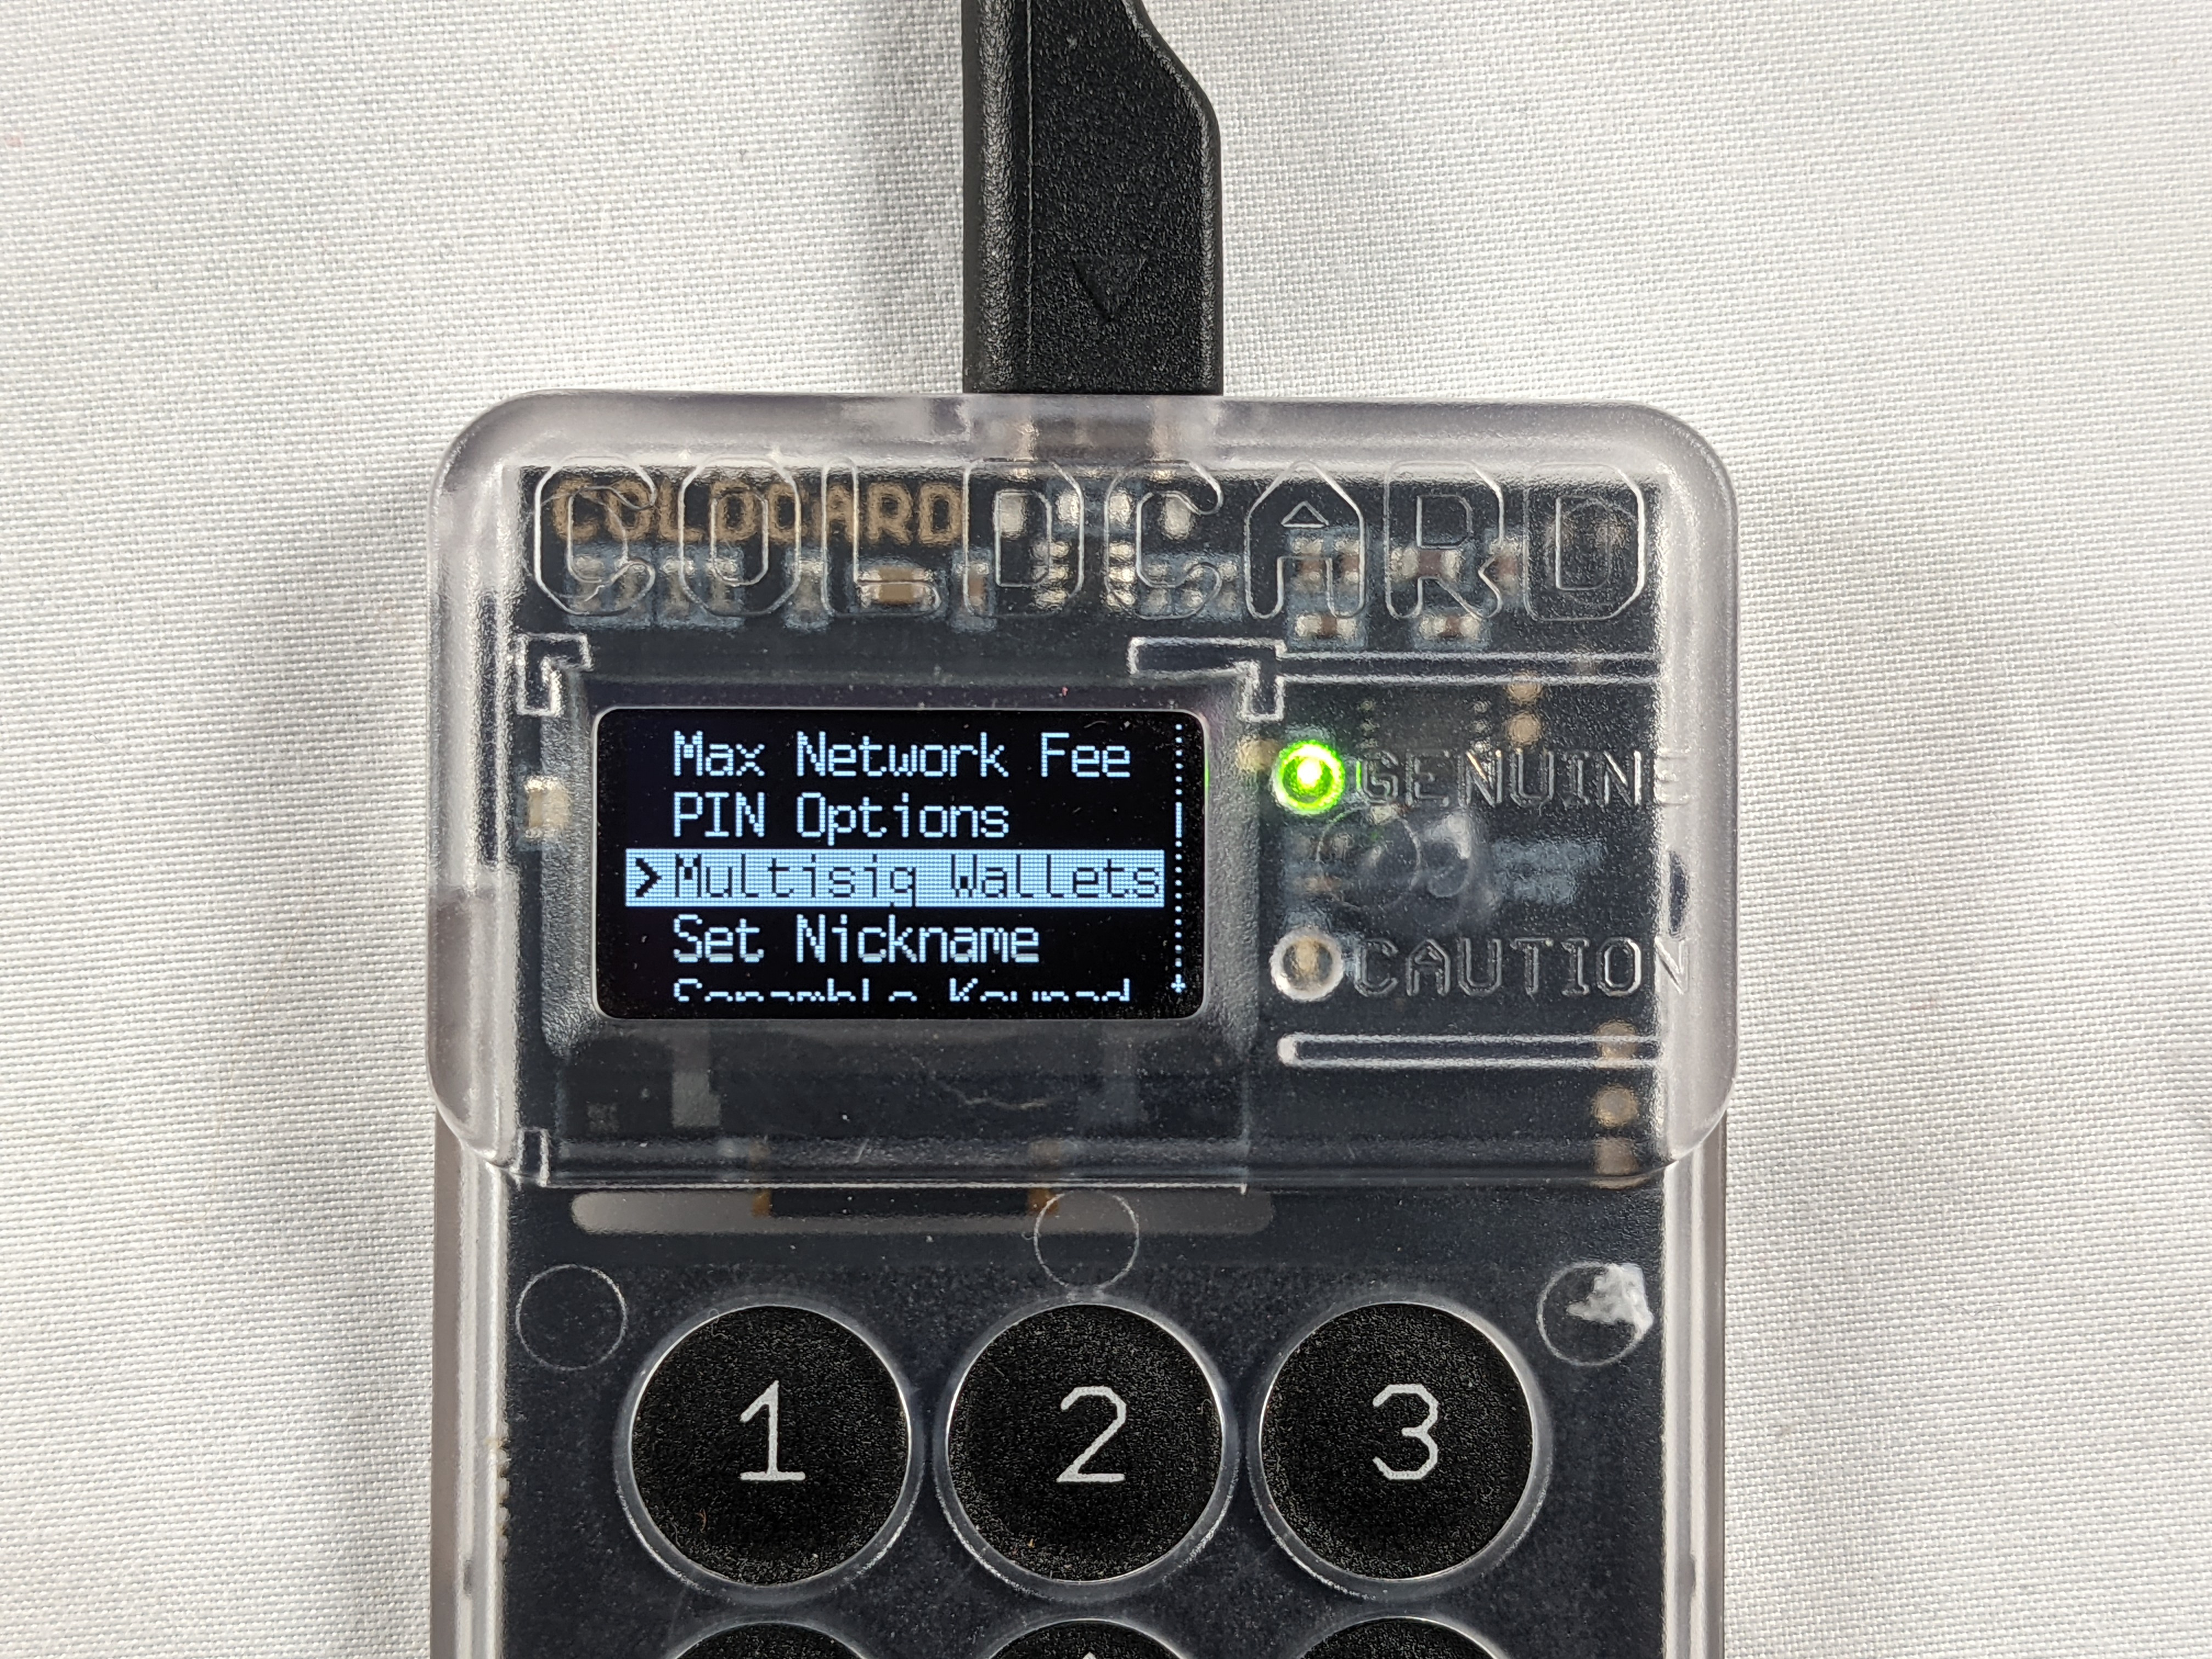
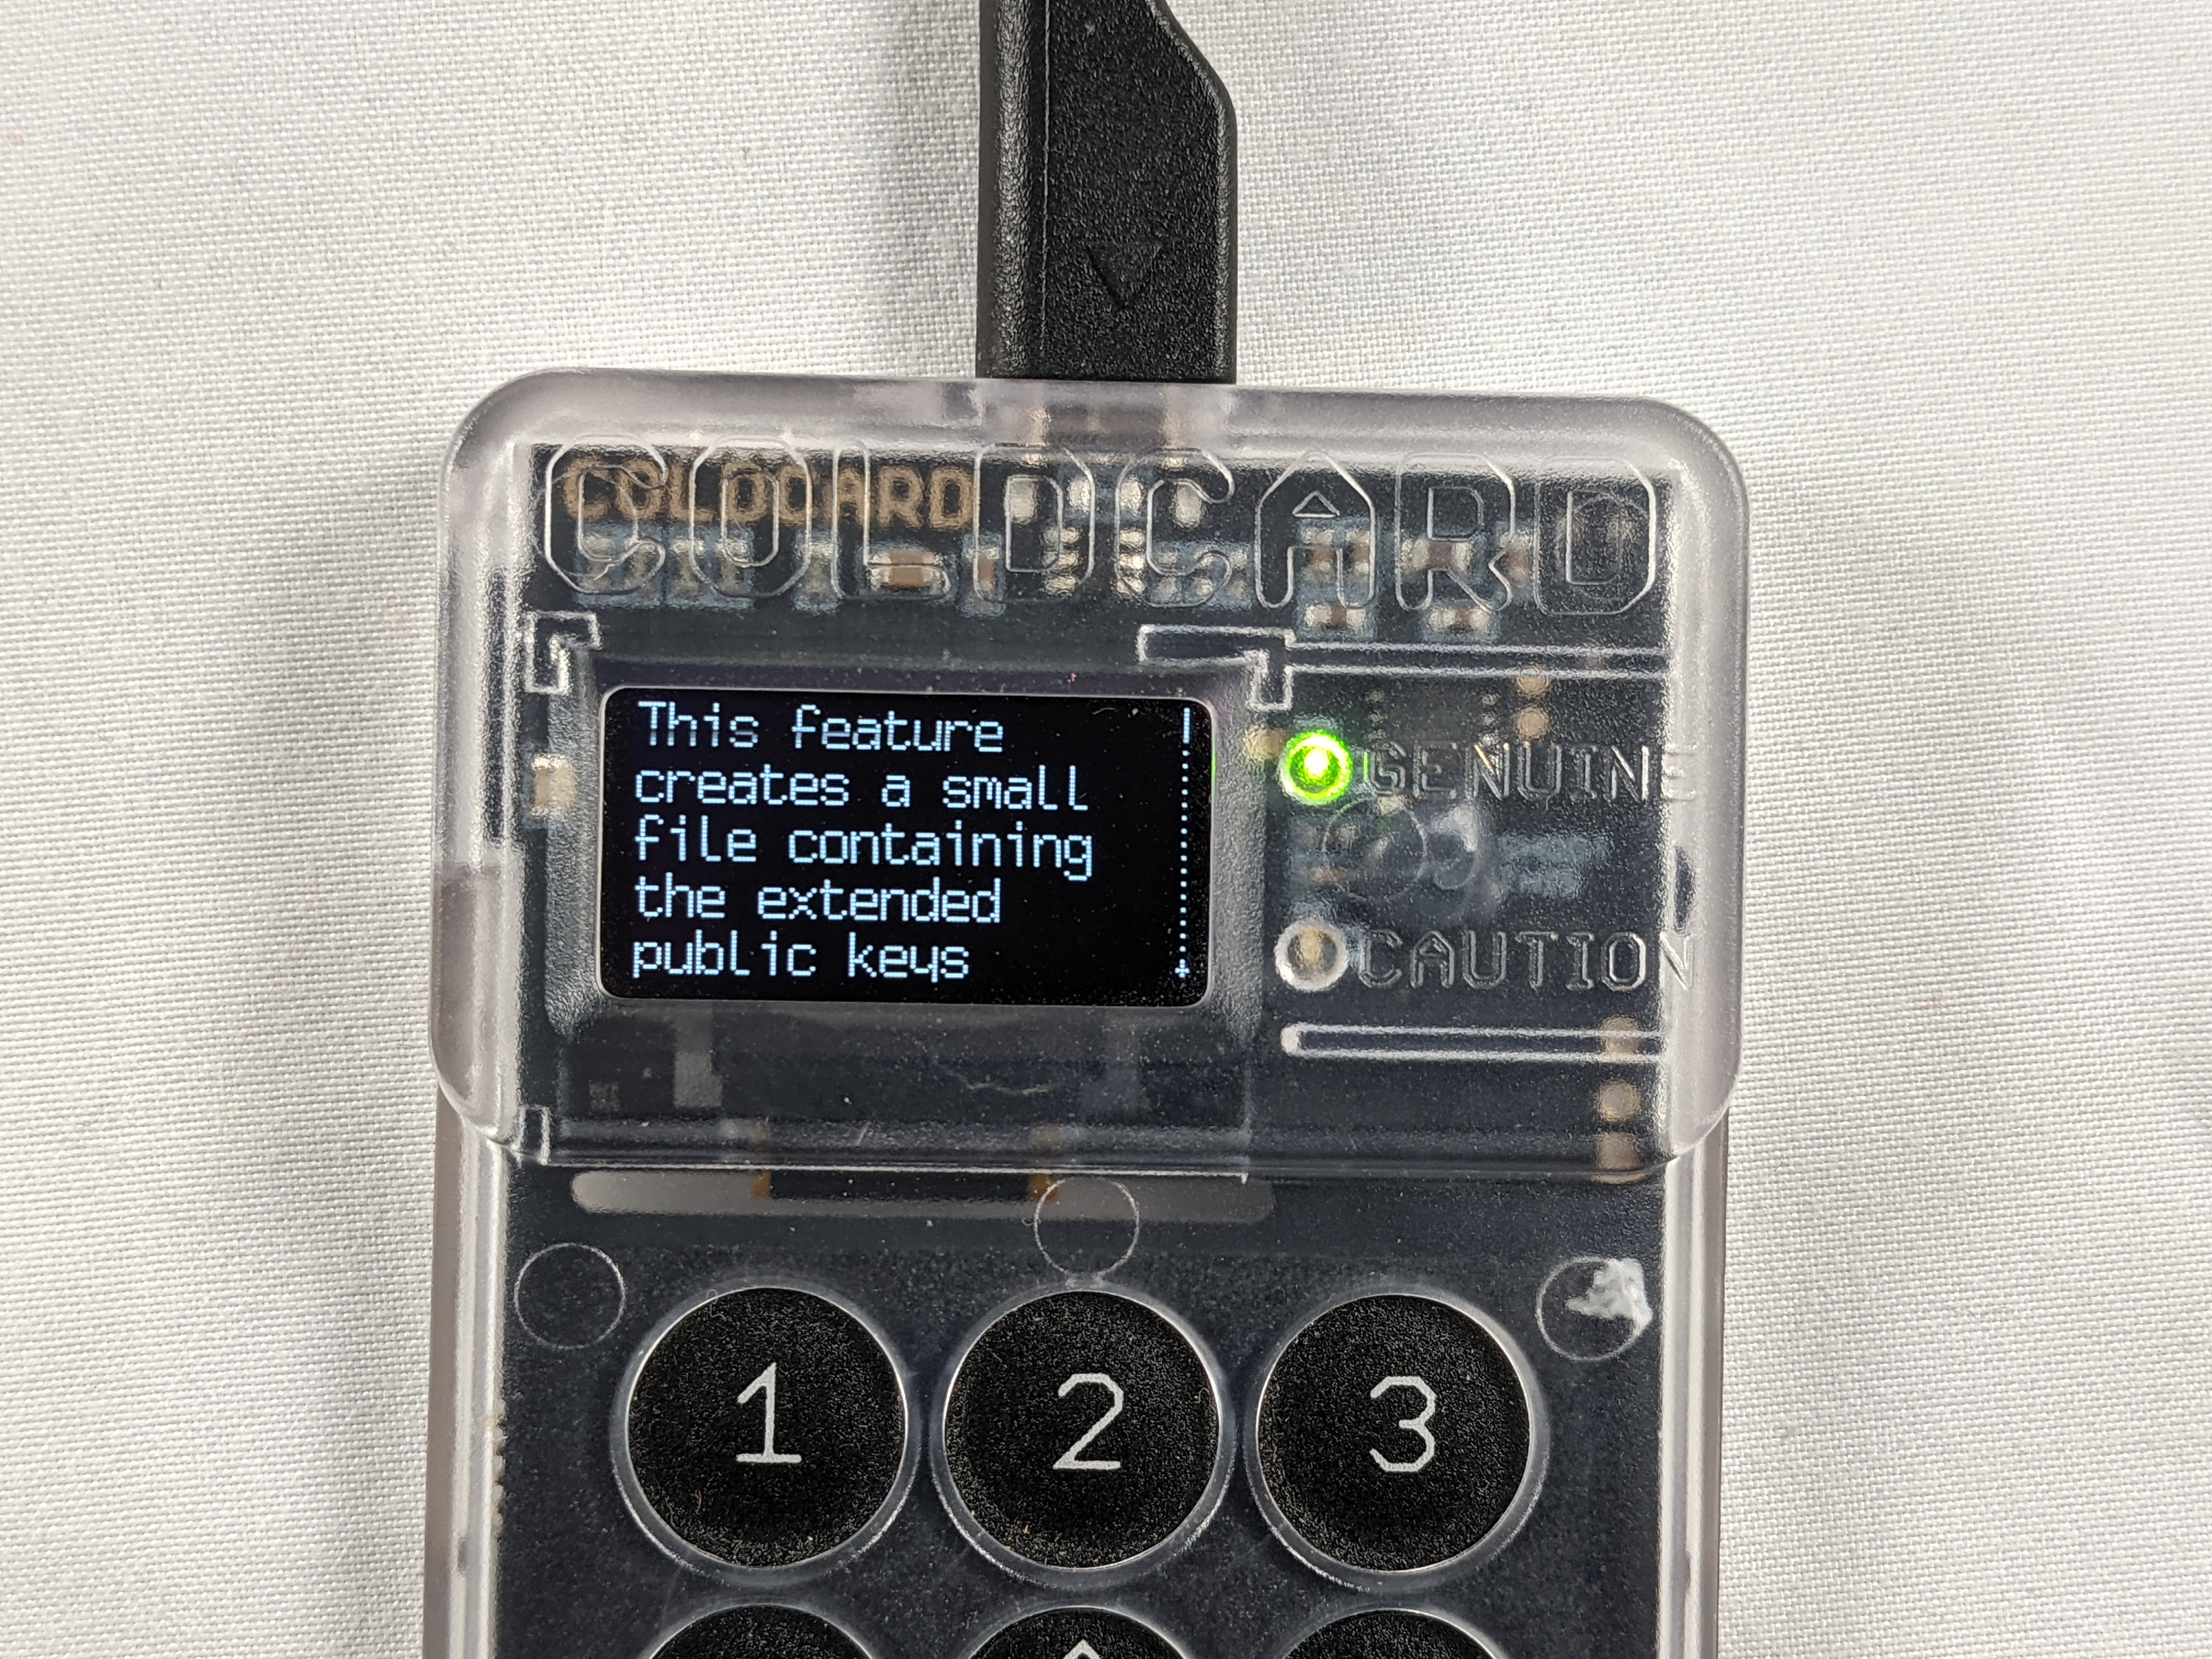
Once you have decided whether you want a passphrase or not, then navigate to Settings from the main menu and then Multisig Wallets then Export XPUB. At this point, you can insert a microSD card into the COLDCARD.

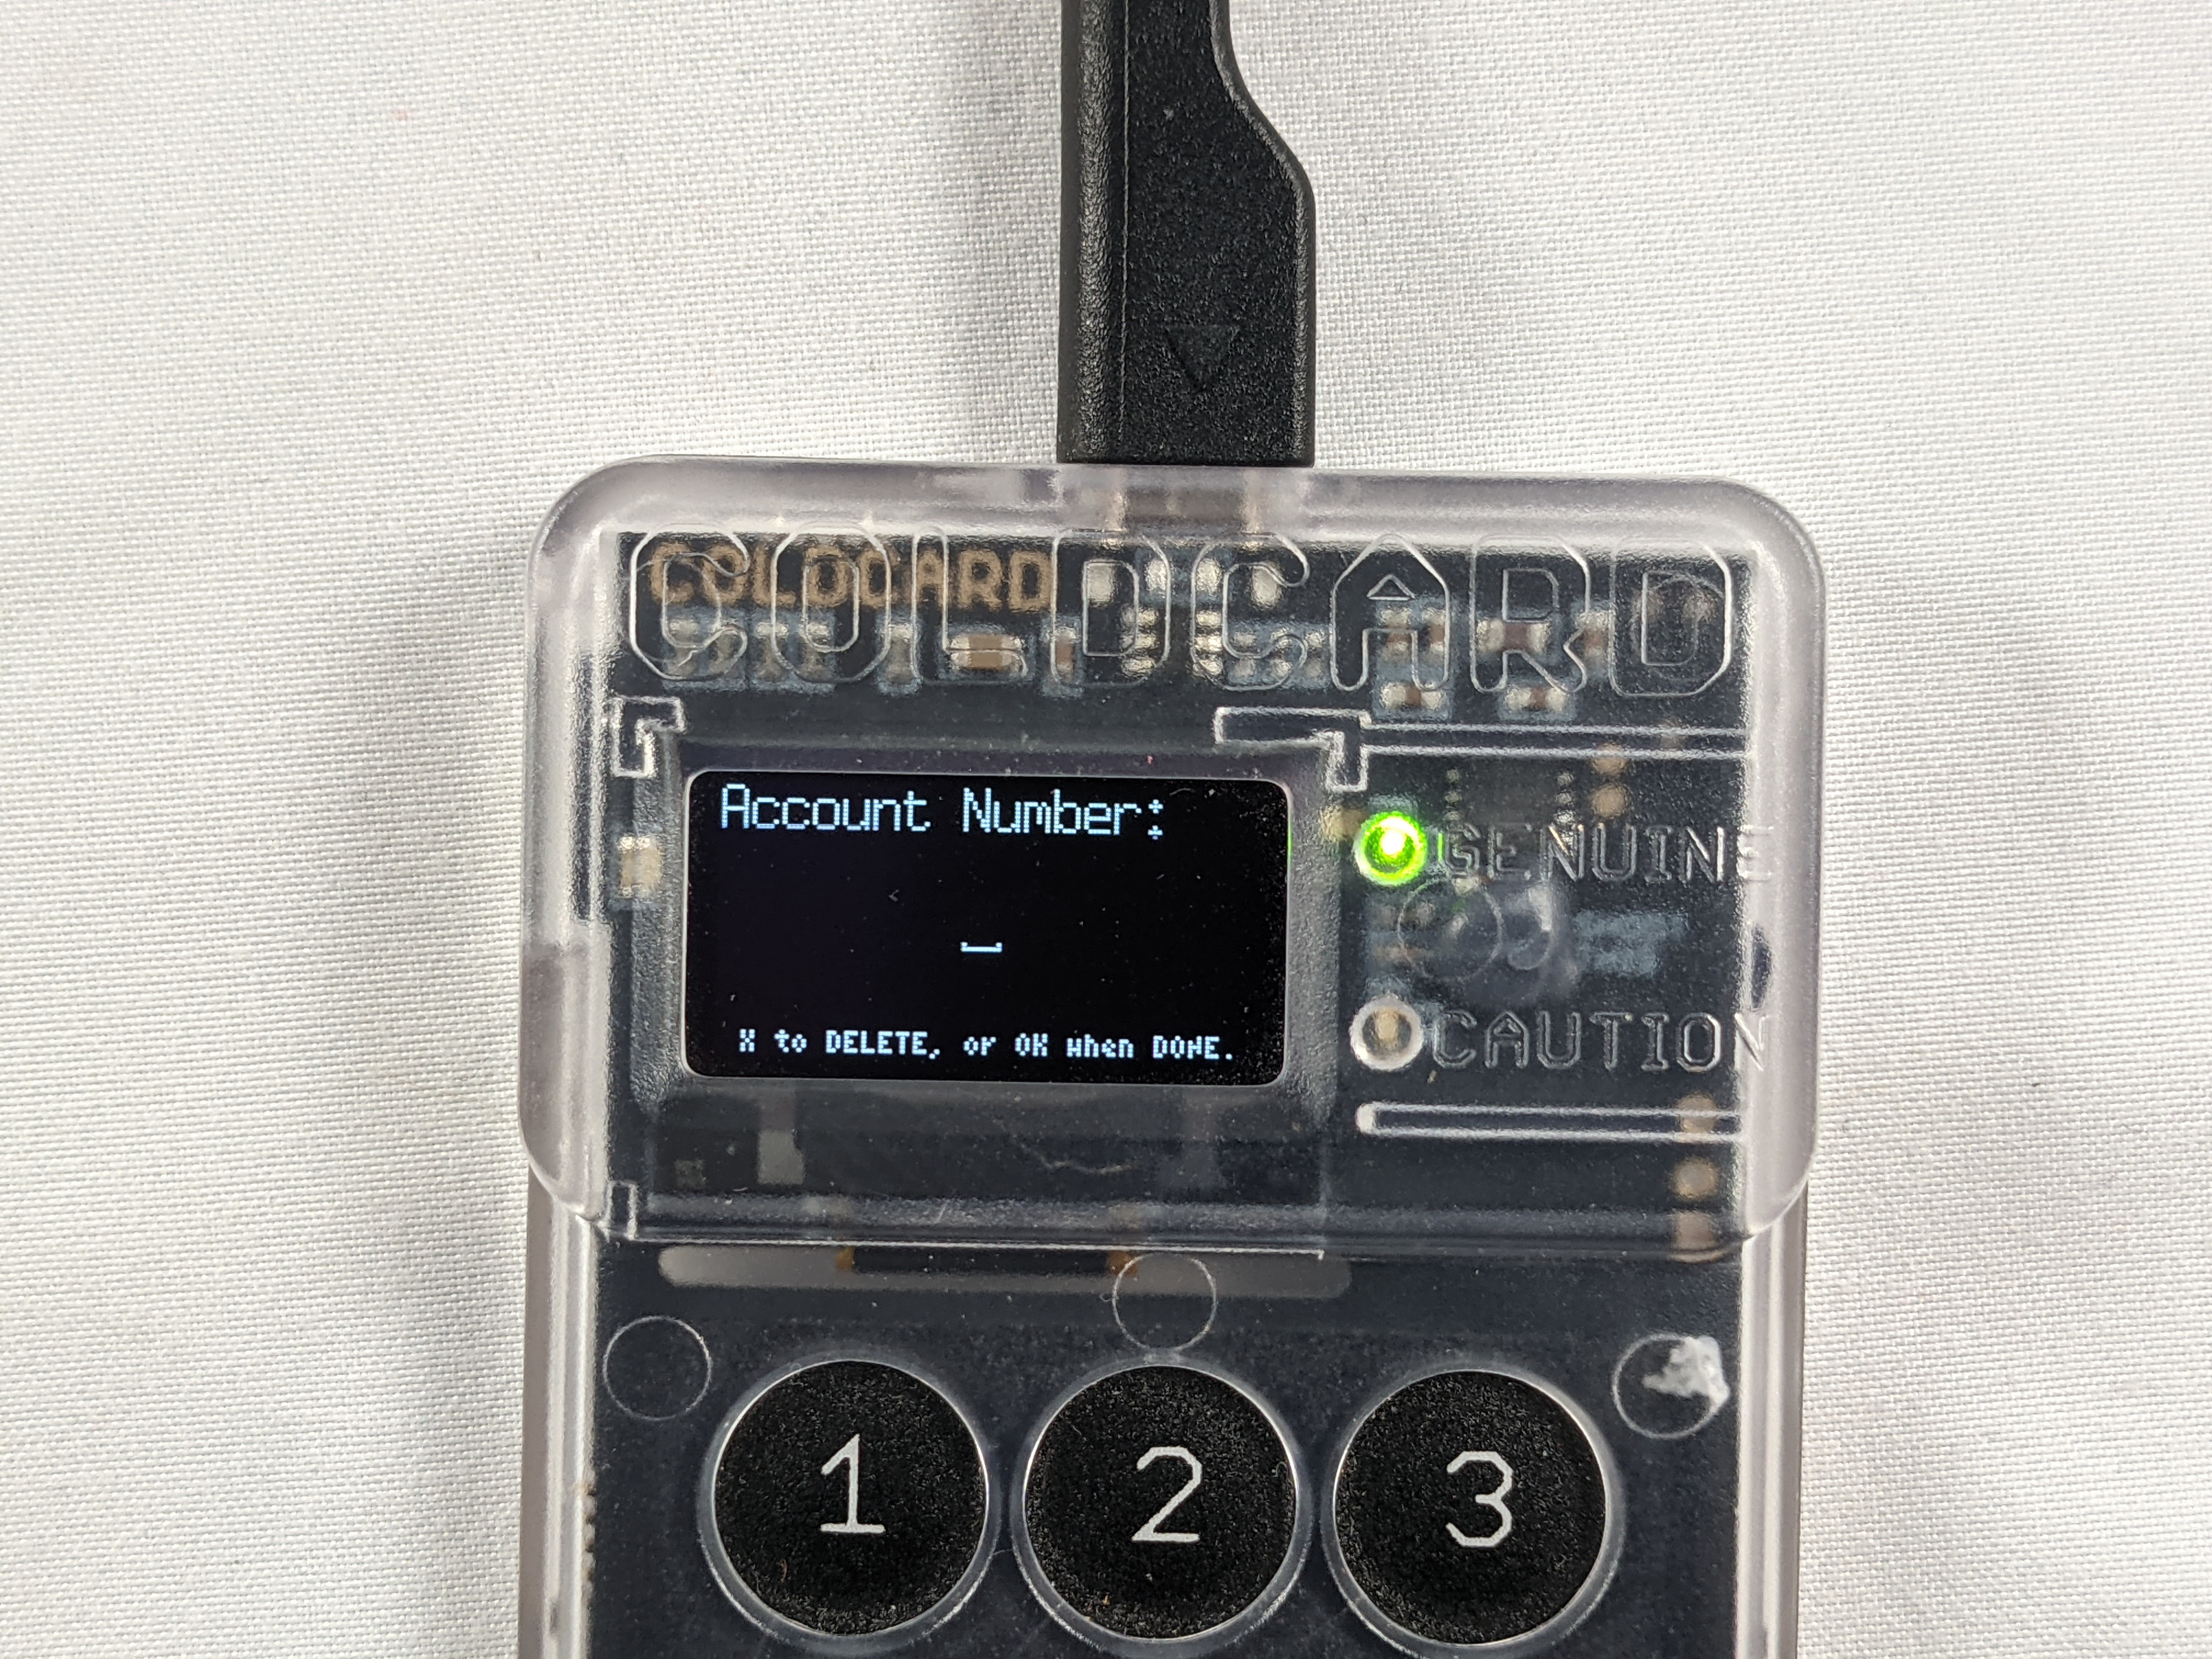
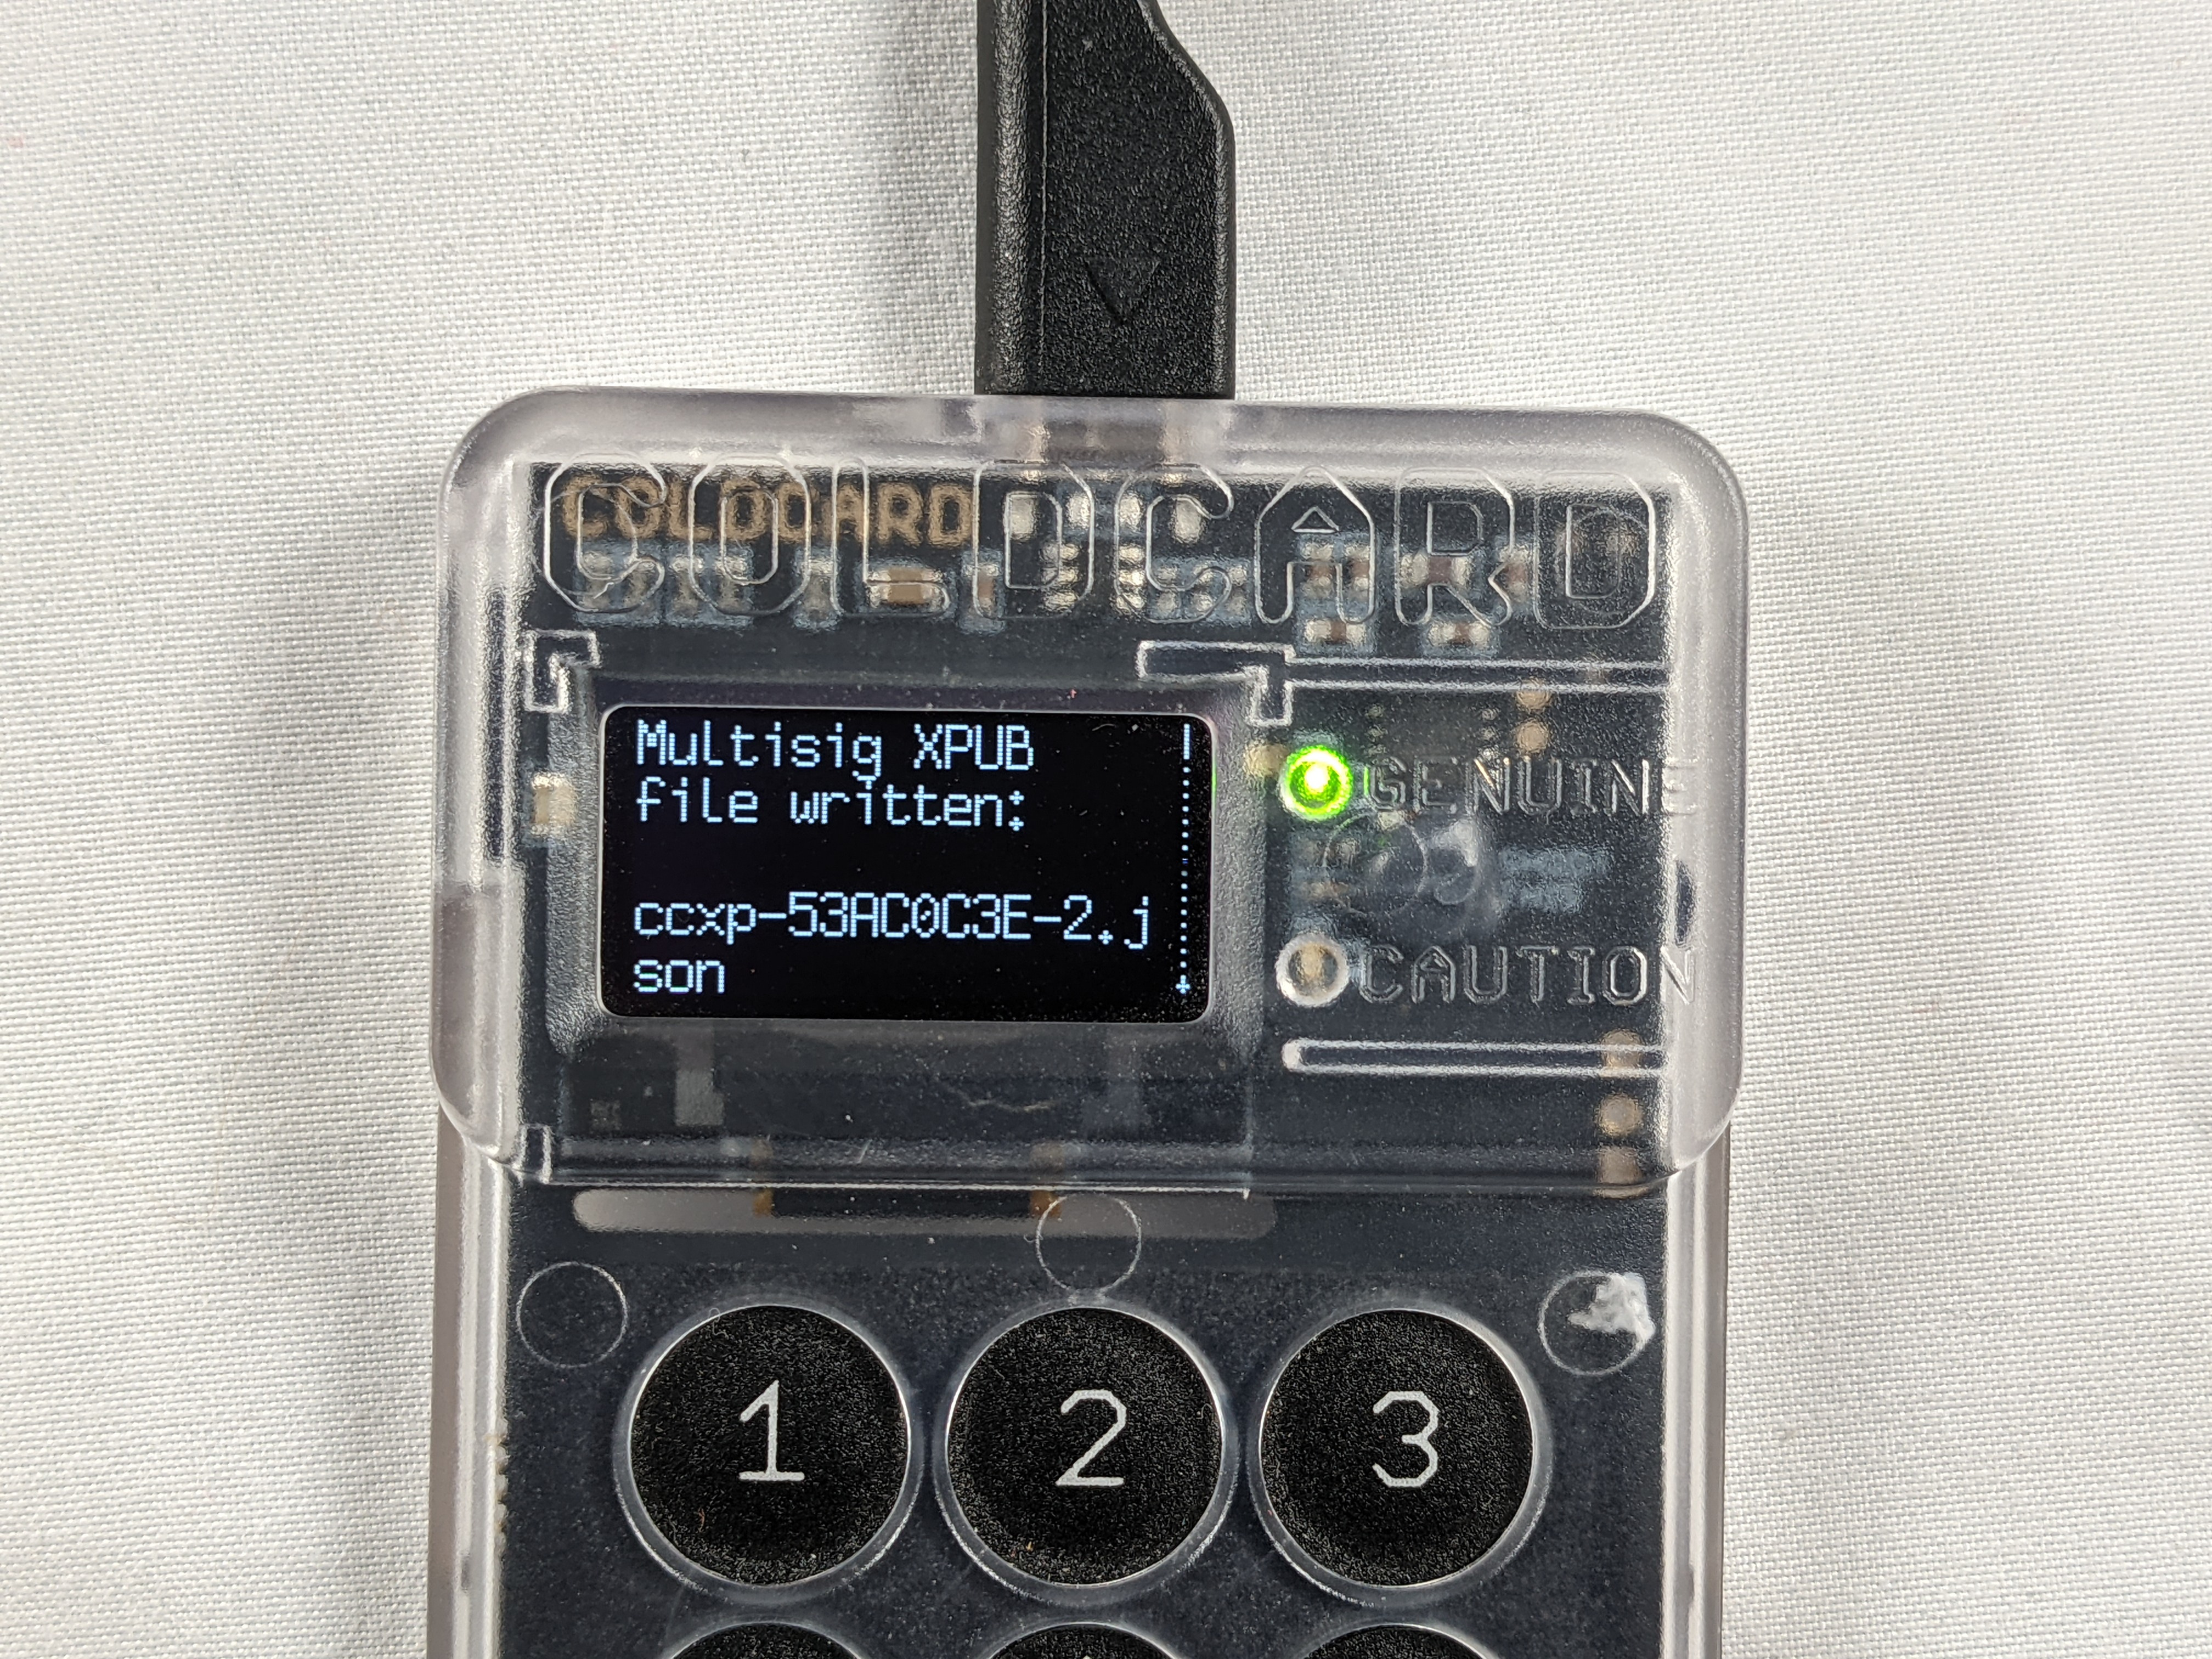
The COLDCARD will then display a message explaining the contents of the .json file. After, pressing OK on the COLDCARD at the end of that message, the COLDCARD will ask you for an account number, you can just leave it blank for the default 0. Then the COLDCARD will let you know when the file it finished being written to the microSD card and what the name of the file is.
Remove the microSD card from the COLDCARD and insert the microSD card into your computer or use an USB adaptor and then insert that into your desktop computer running Sparrow Wallet. Back in Sparrow Wallet, navigate to the microSD card and select the coldcard-export.json file.
Sparrow Wallet will use the .json file to populate the necessary information in Keystore 2. Now you can navigate to the Keystore 3 tab.

Passport
From the Keystore 3 tab, select Airgapped Hardware Wallet.
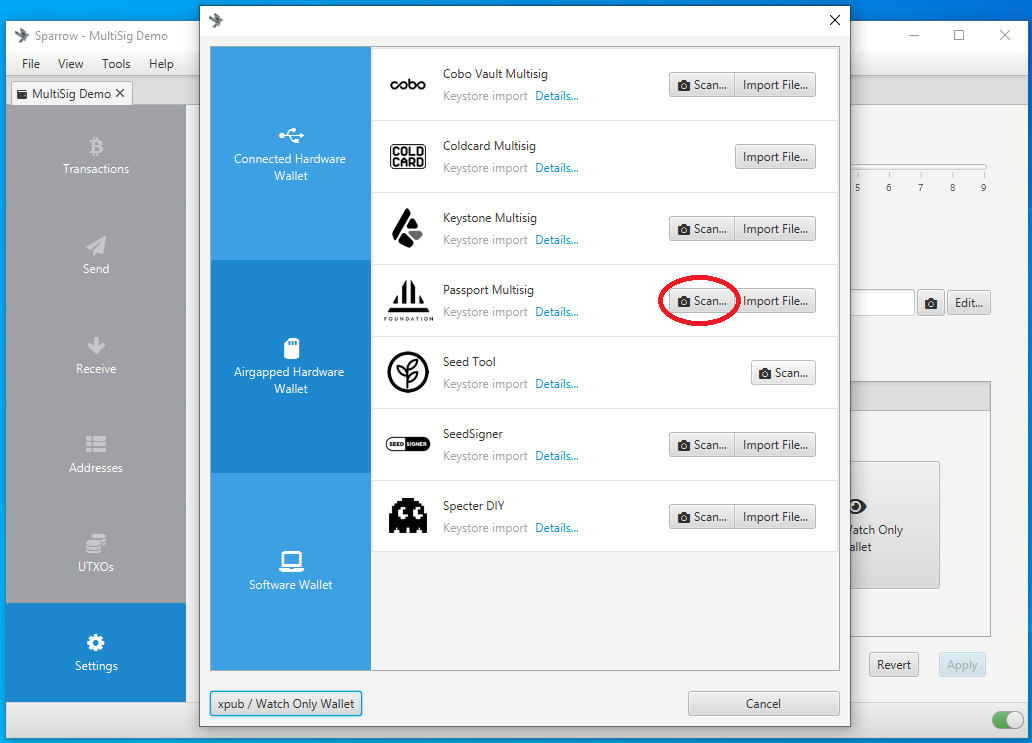
From the pop up window, press the Scan... button on the Passport Multisig row.
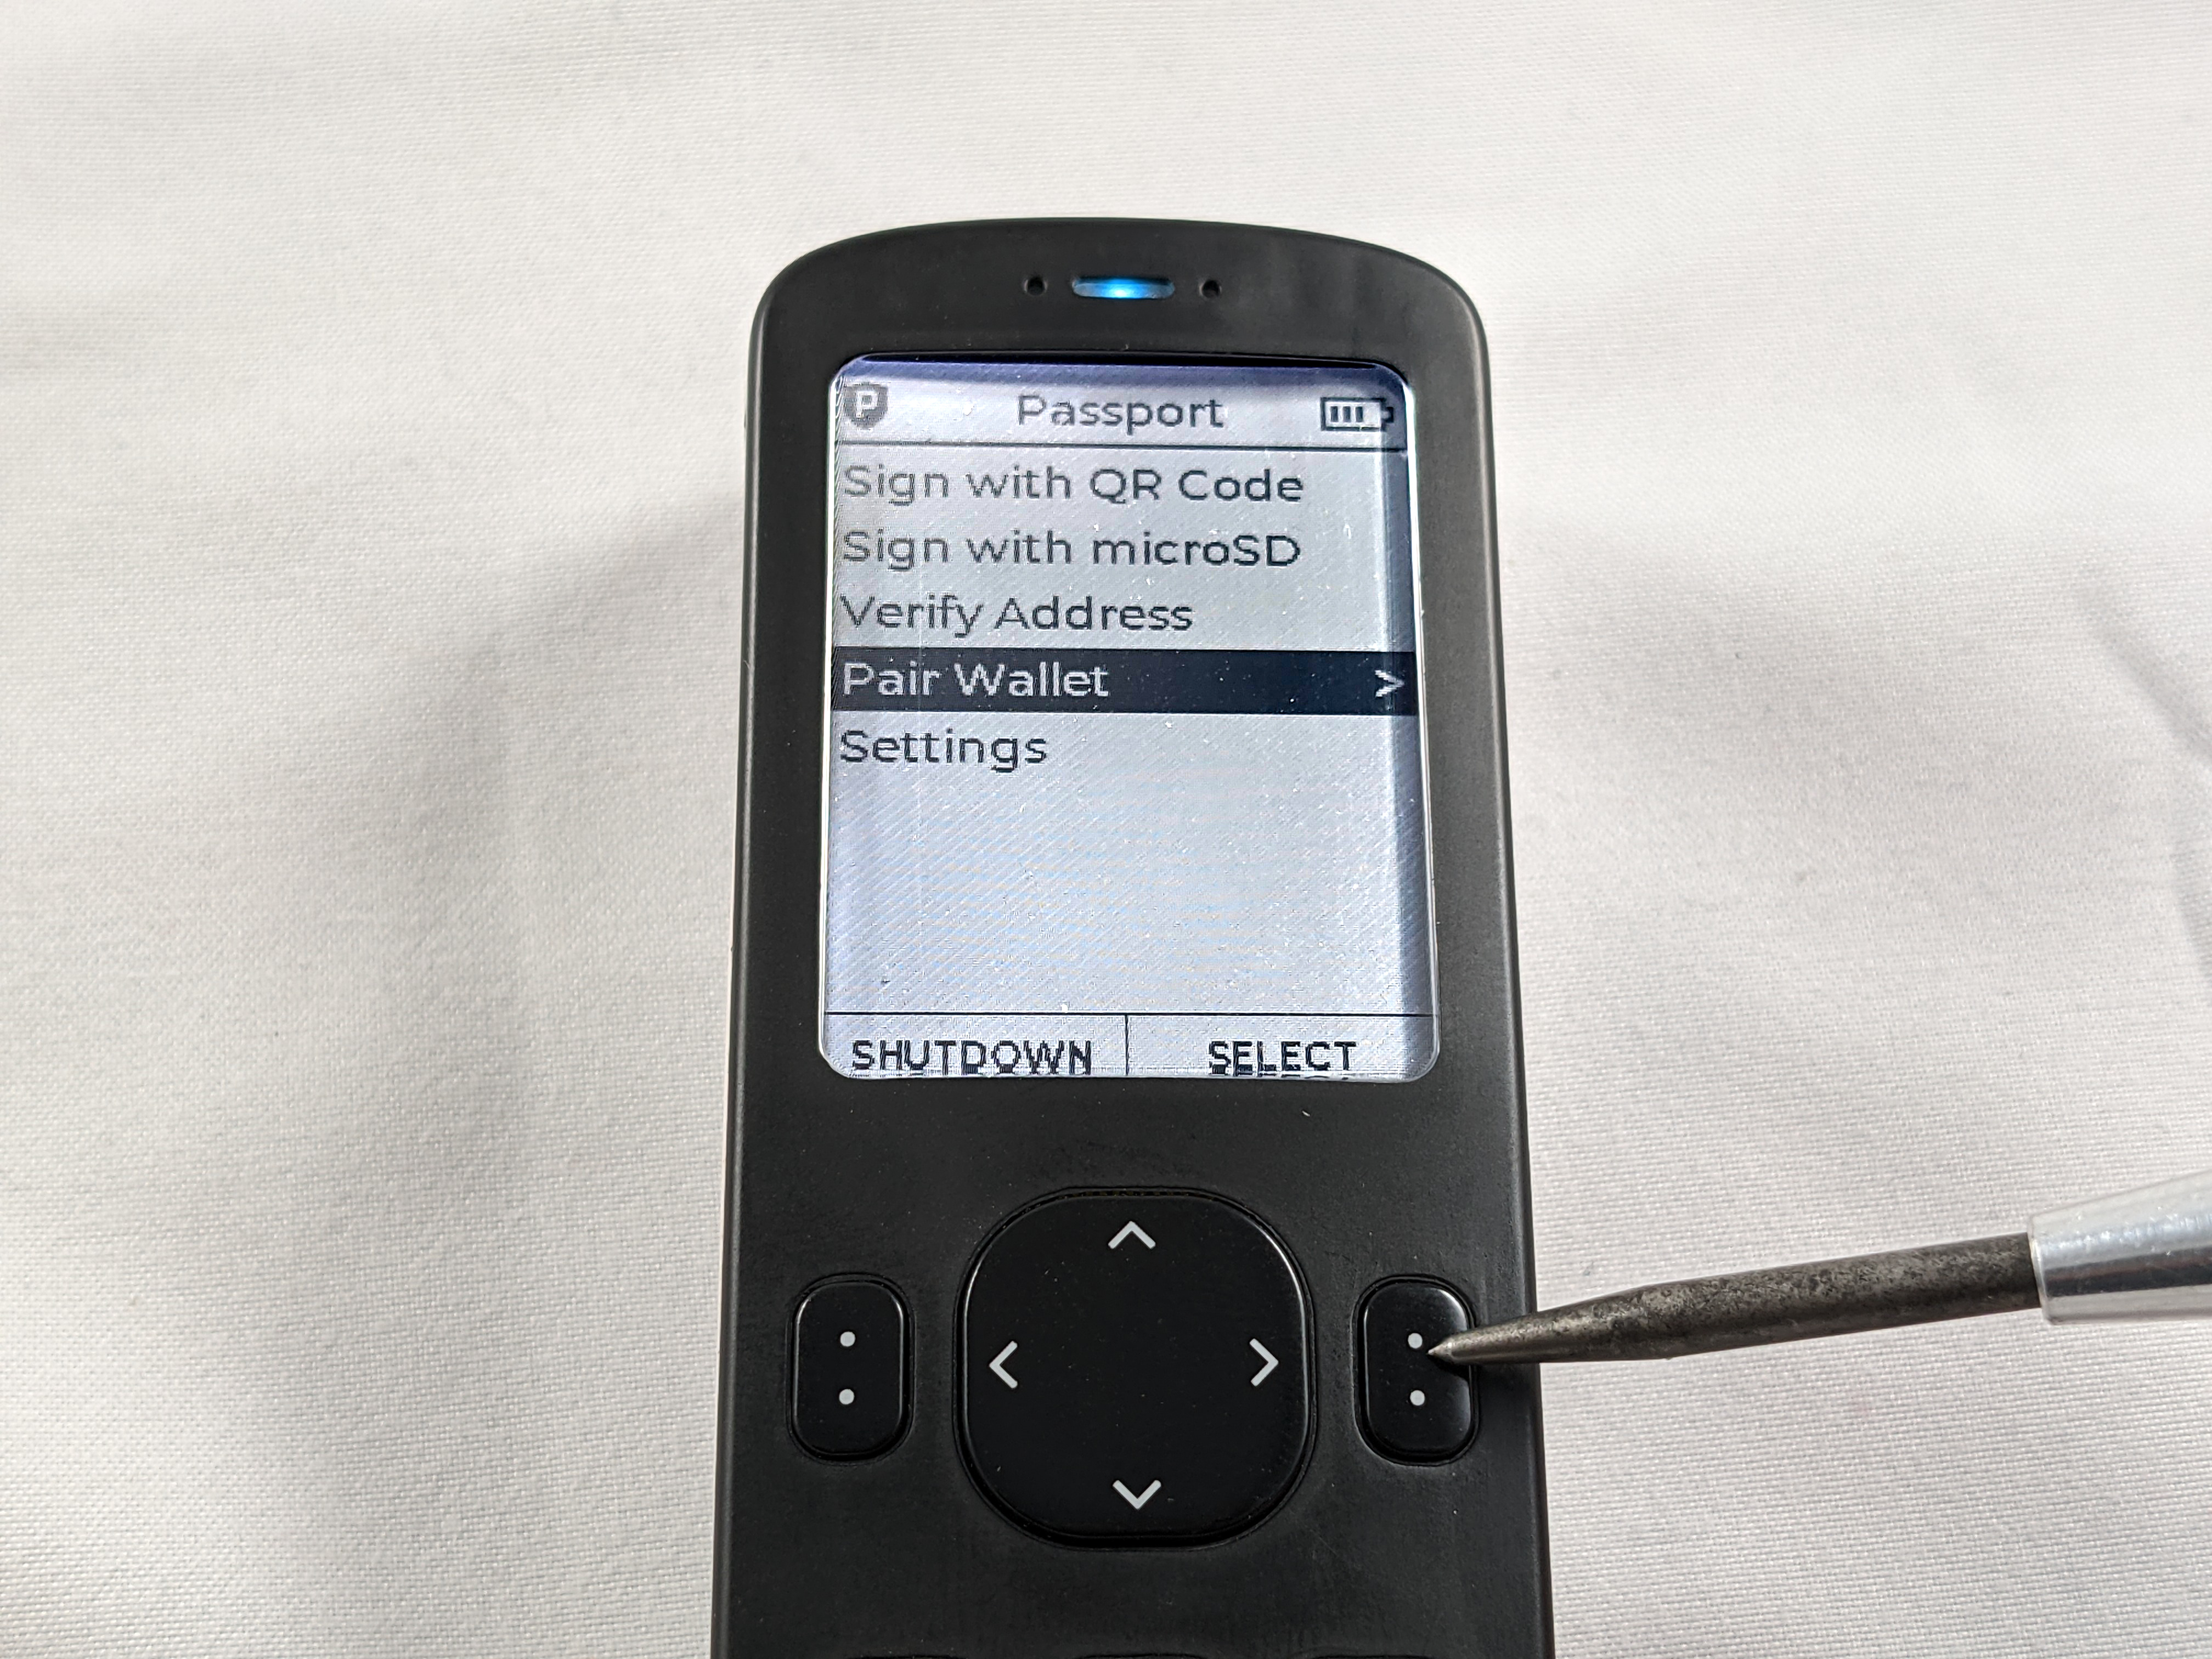
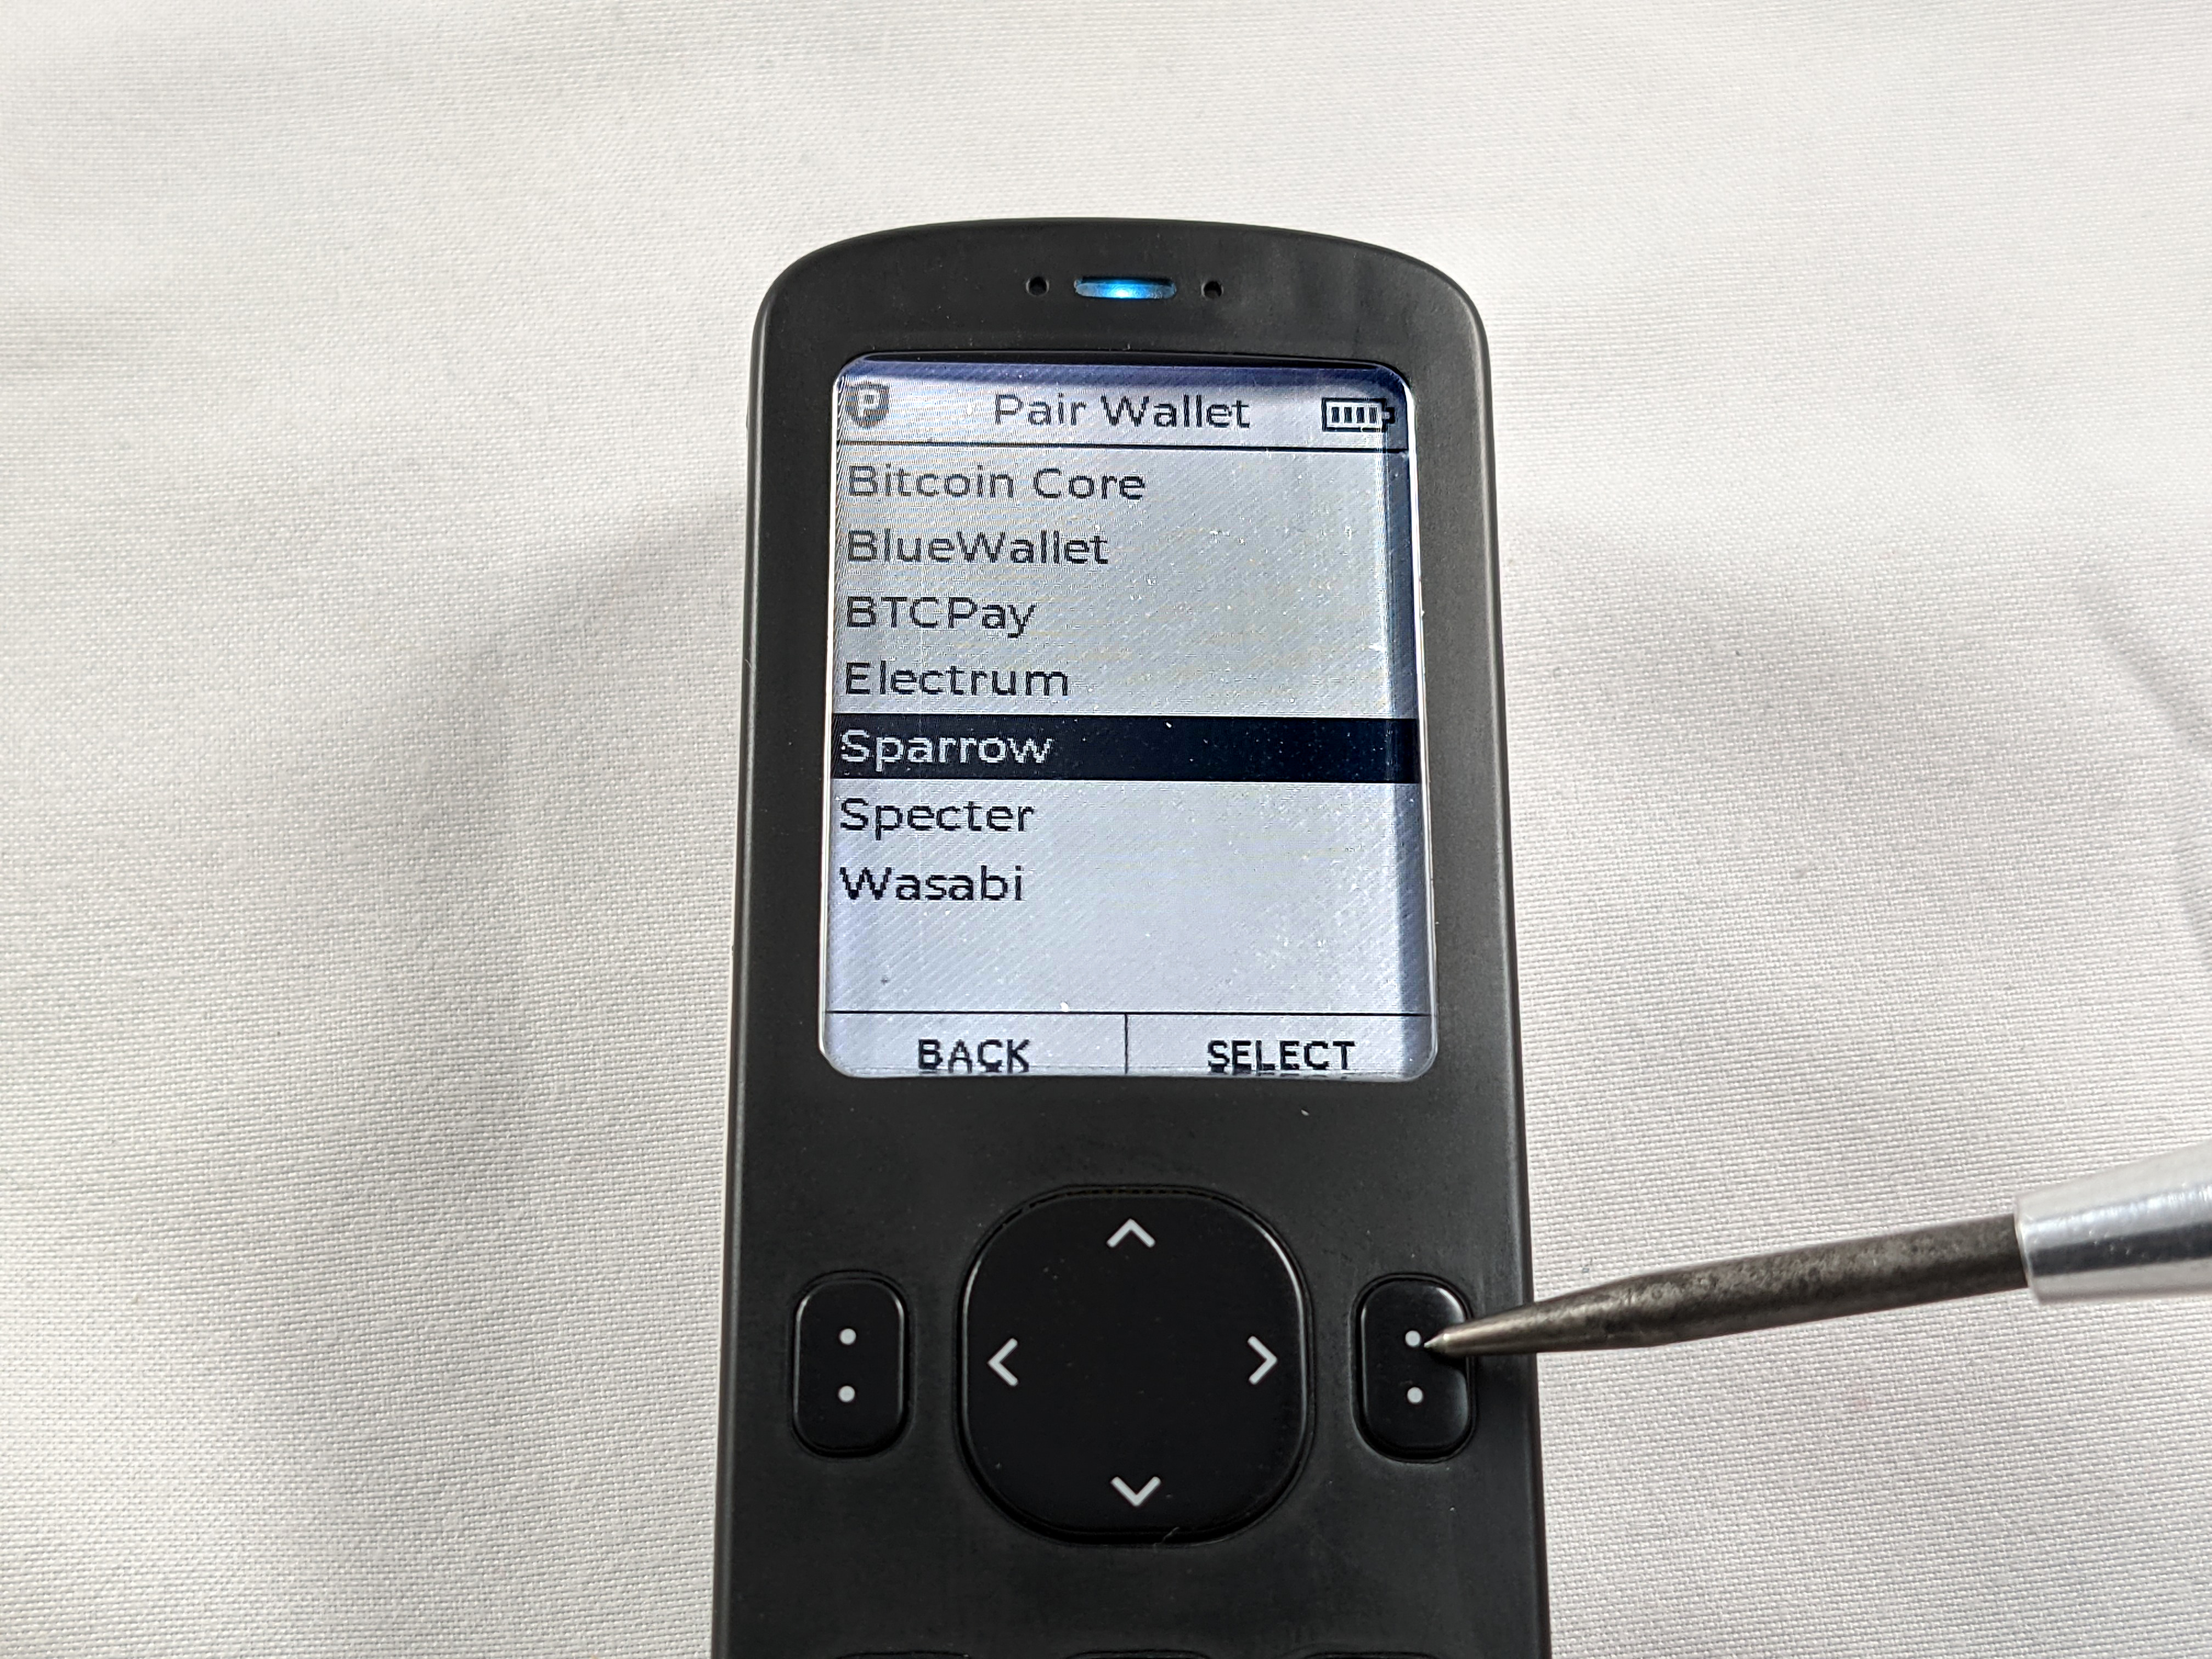
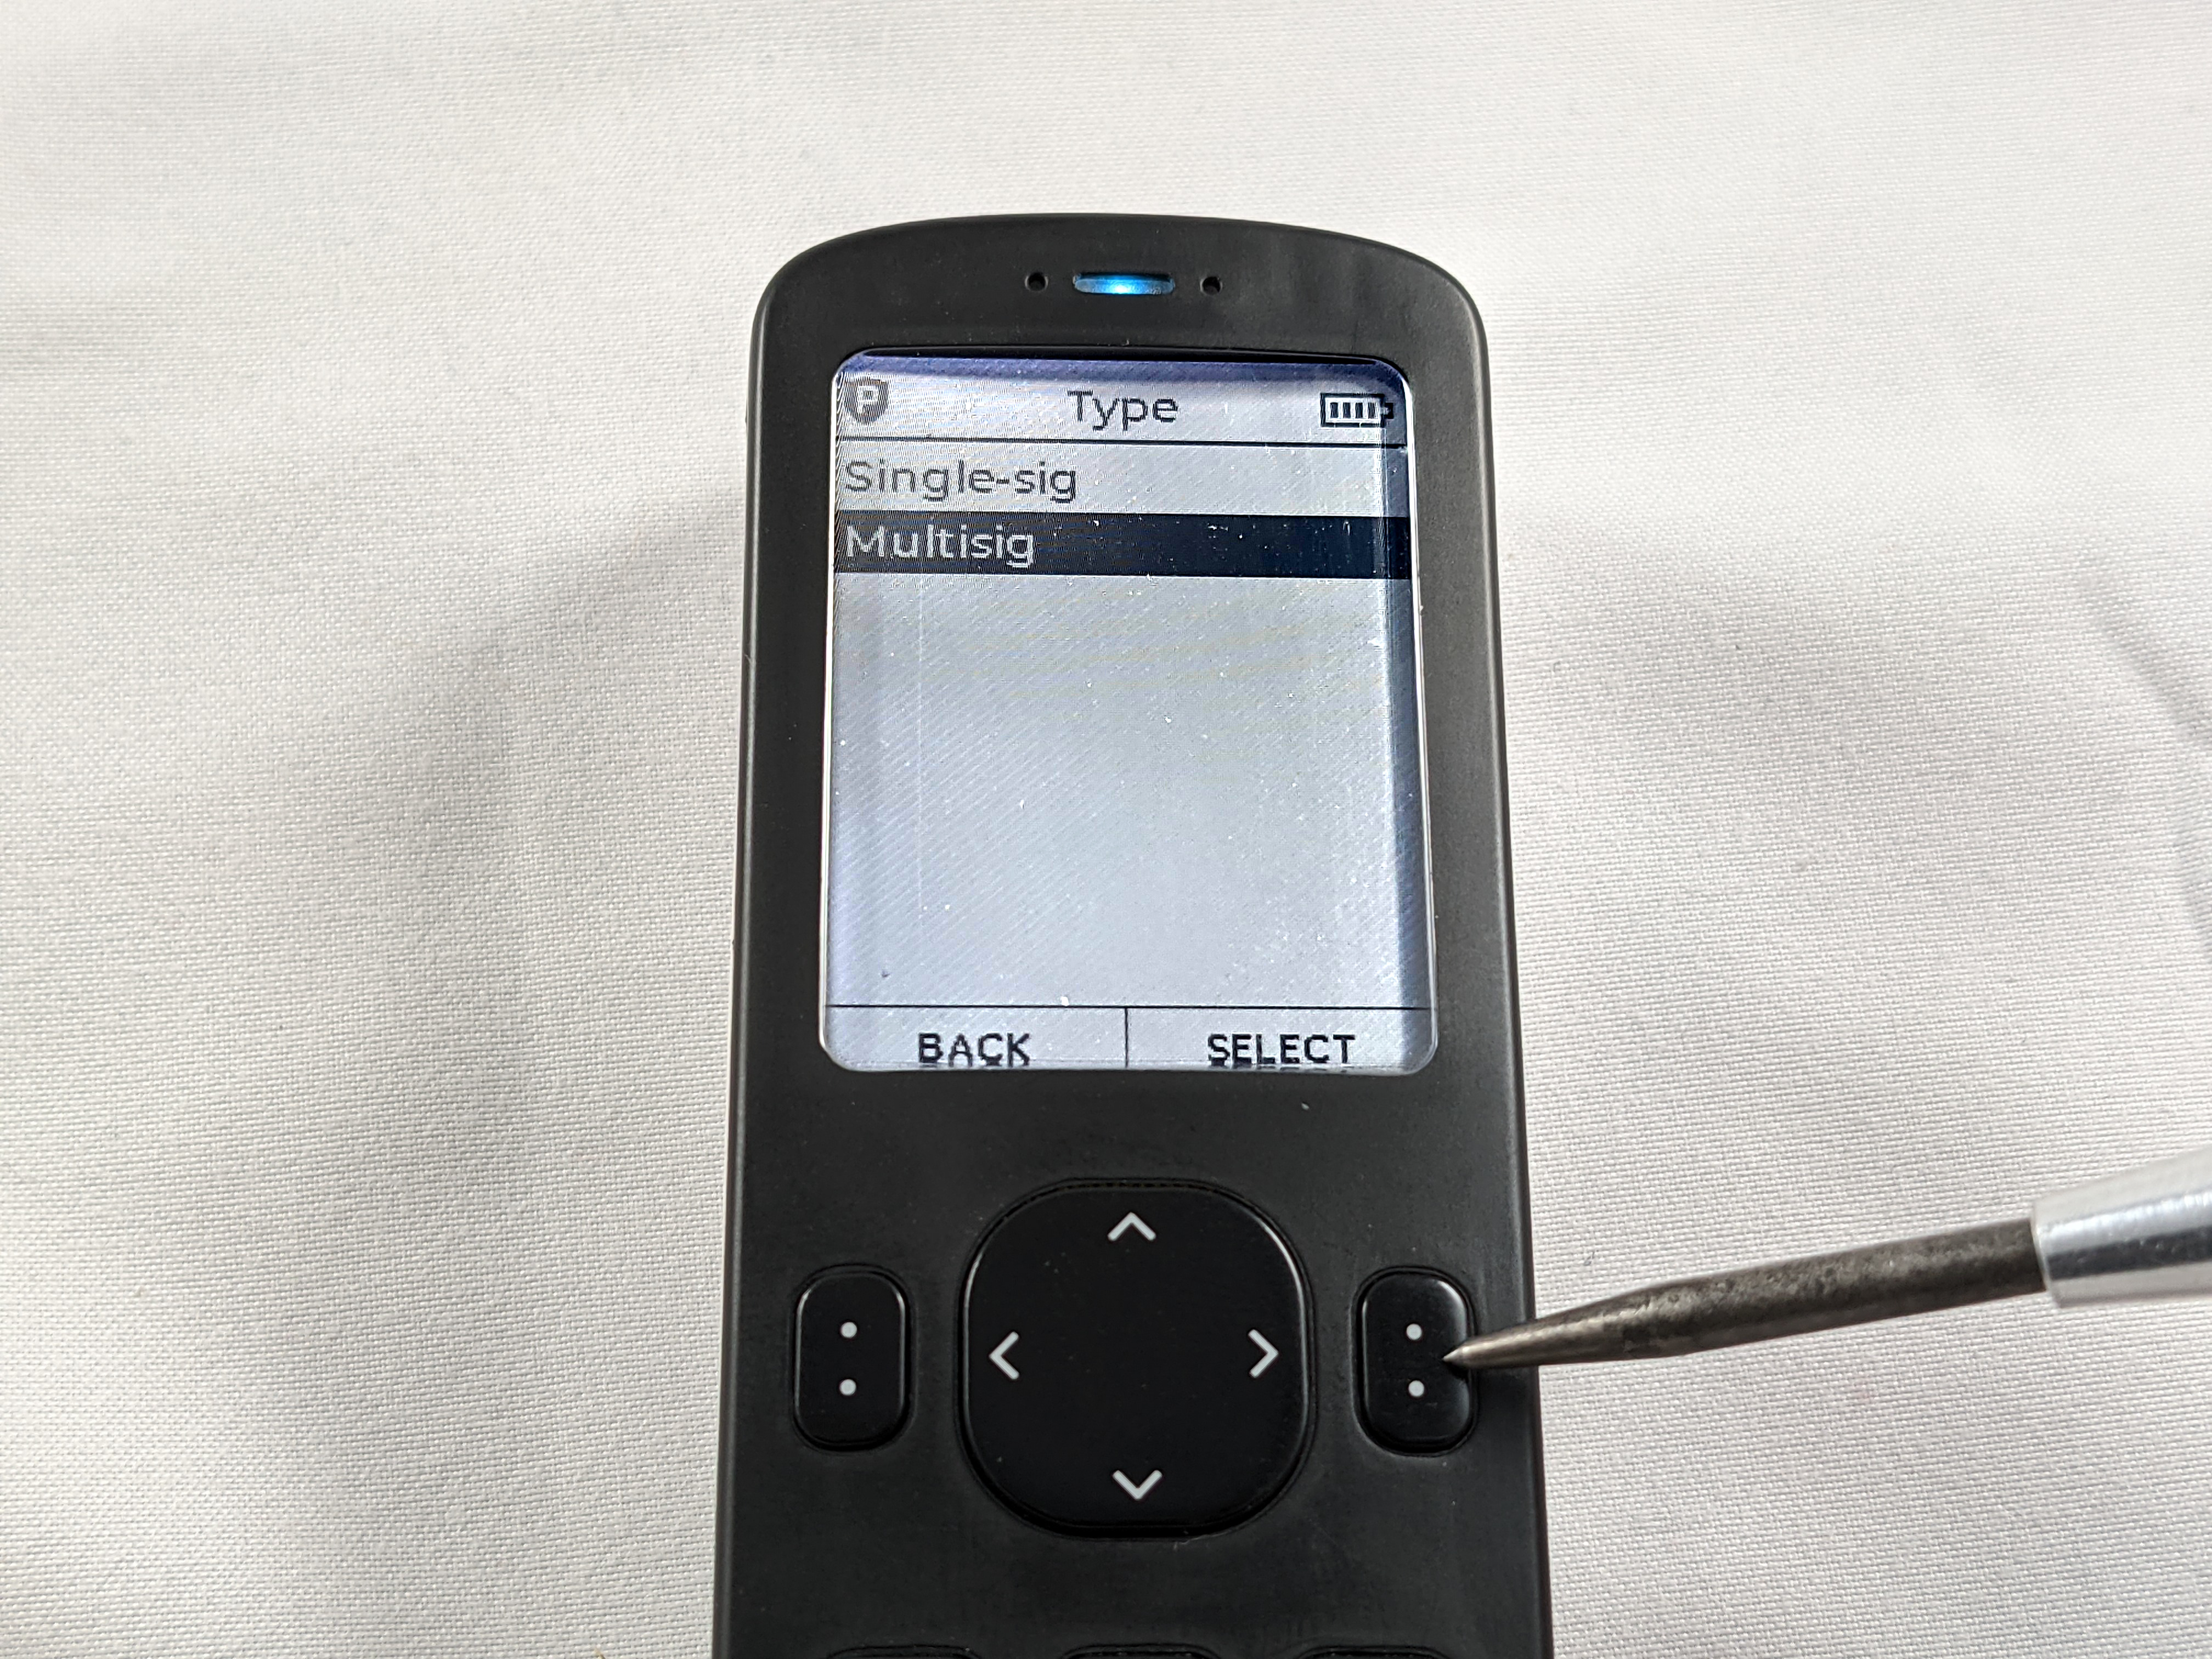
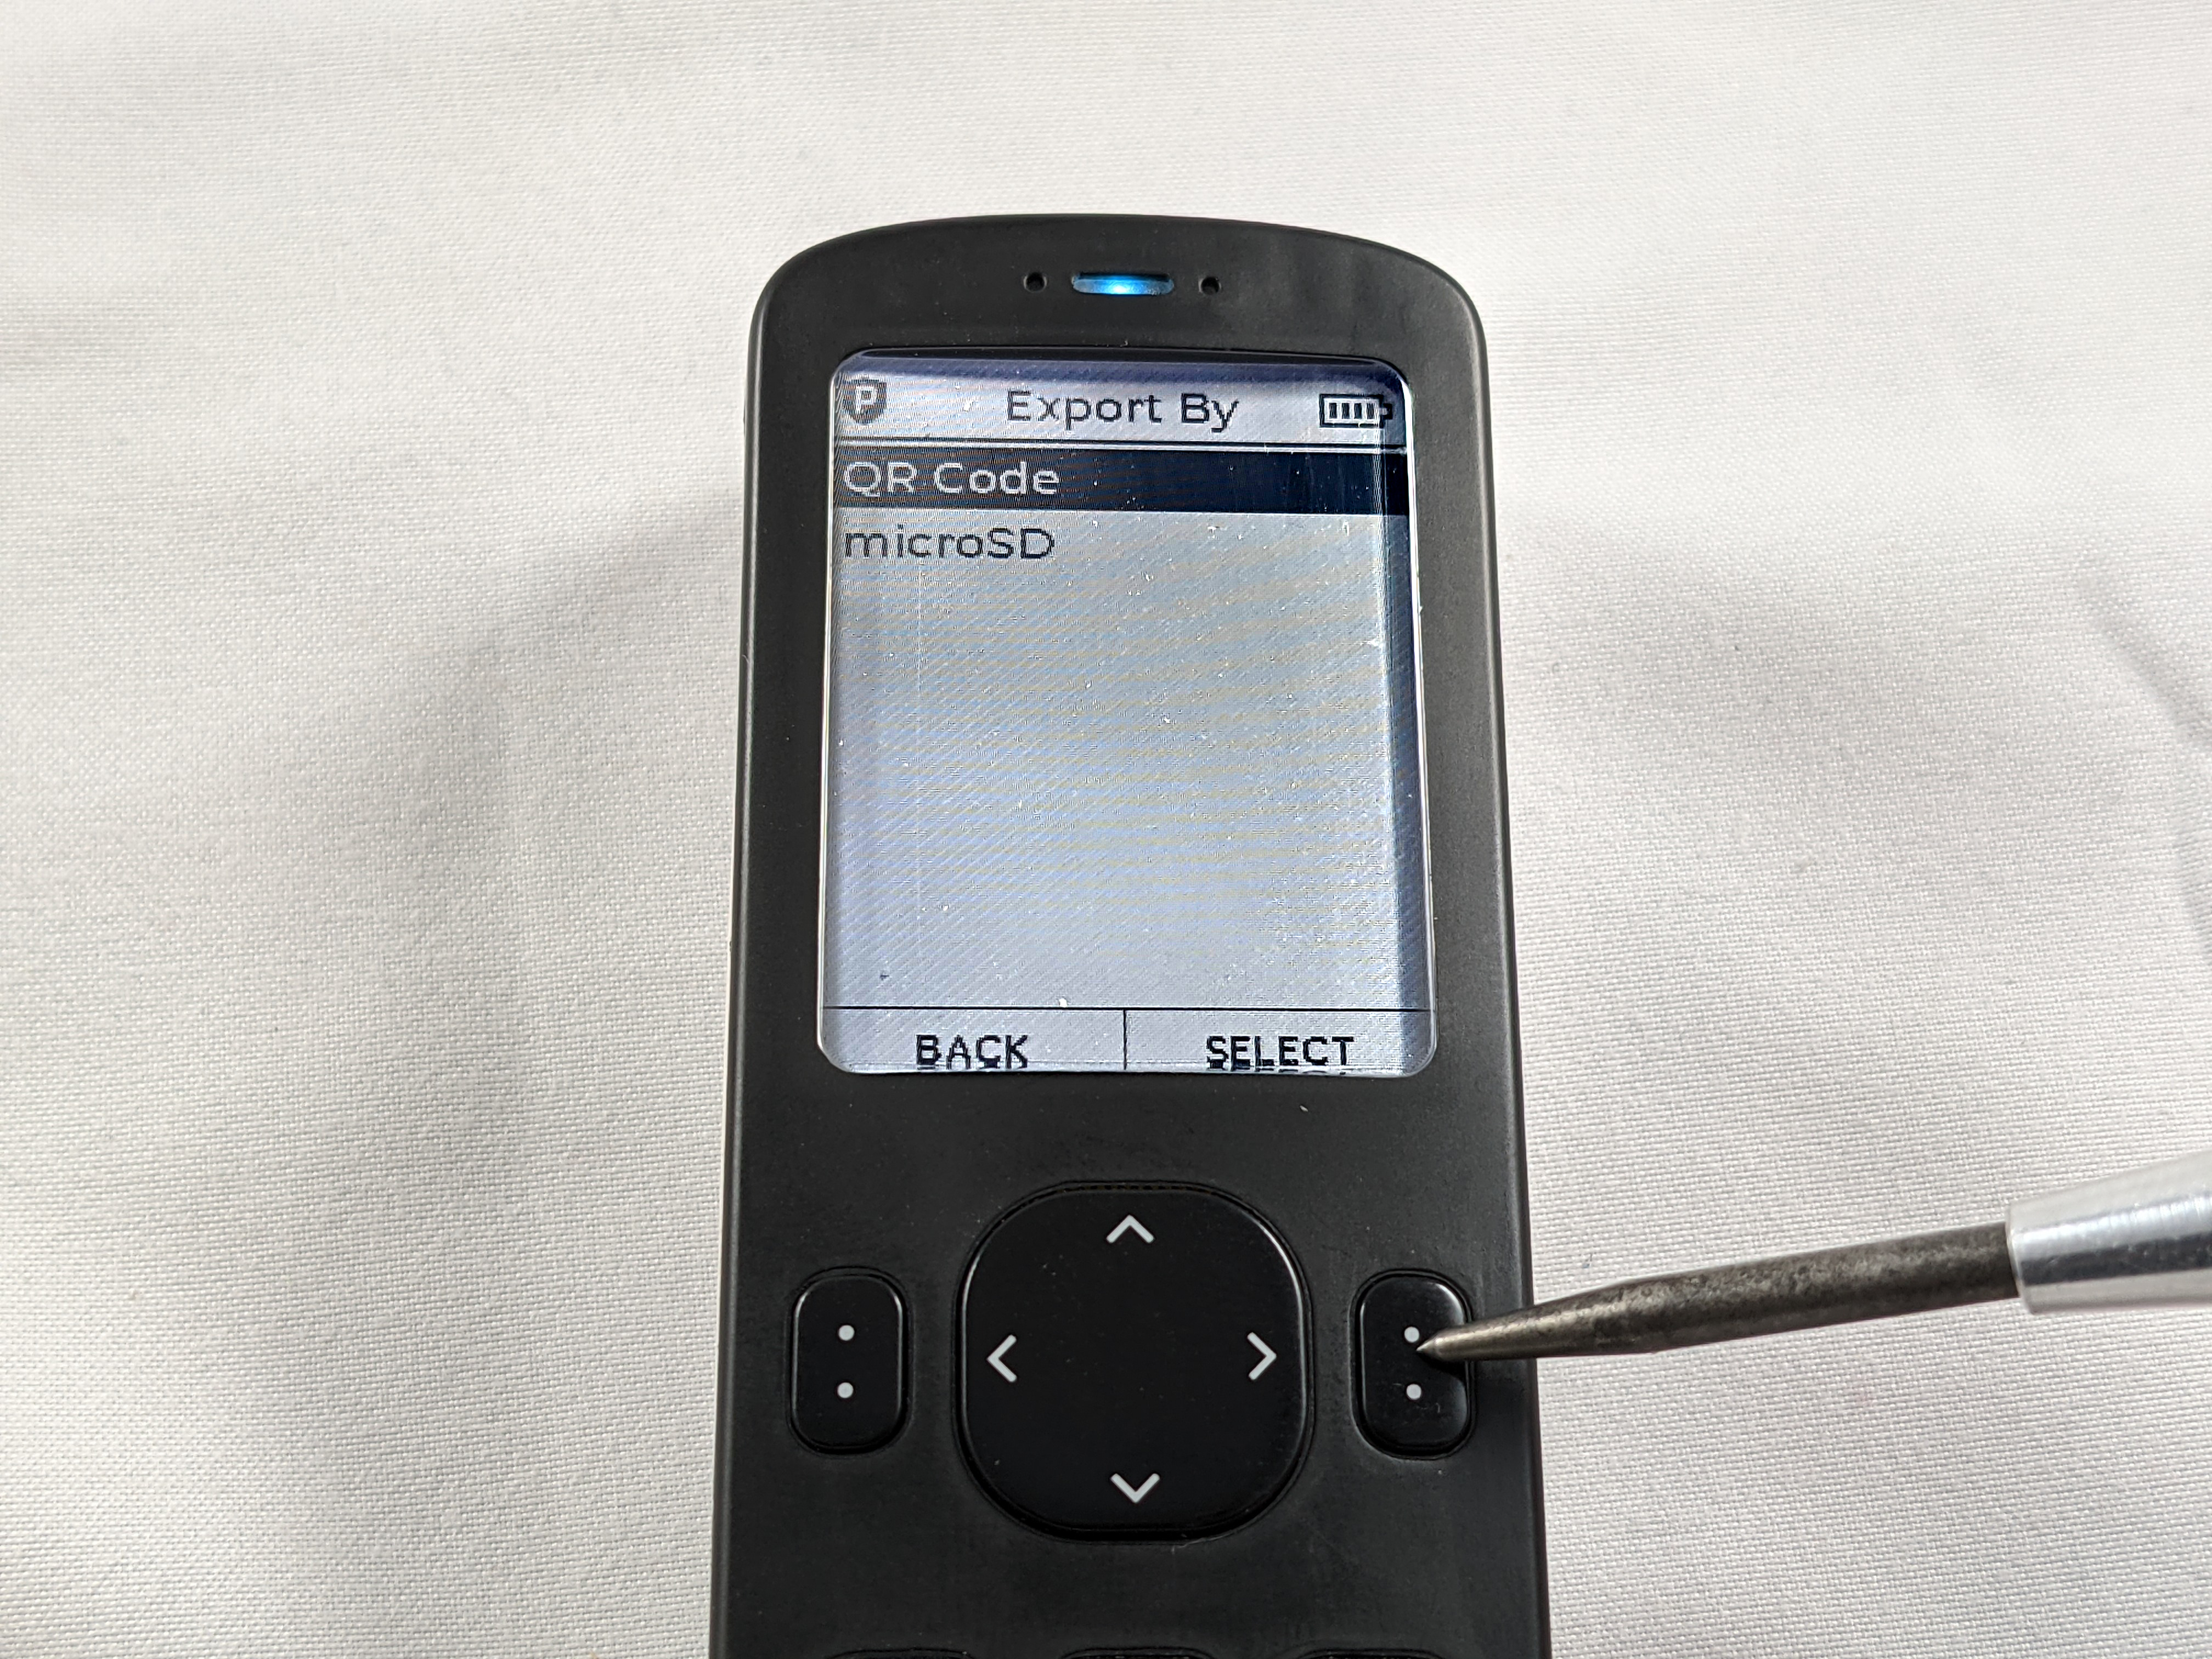
Then Sparrow will launch the webcam and wait for you to hold up the Passport with the animated QR codes. Login to the Passport and apply the passphrase if necessary. Then from the main menu scroll down to Pair Wallet > Sparrow > Multisig > QR Code.
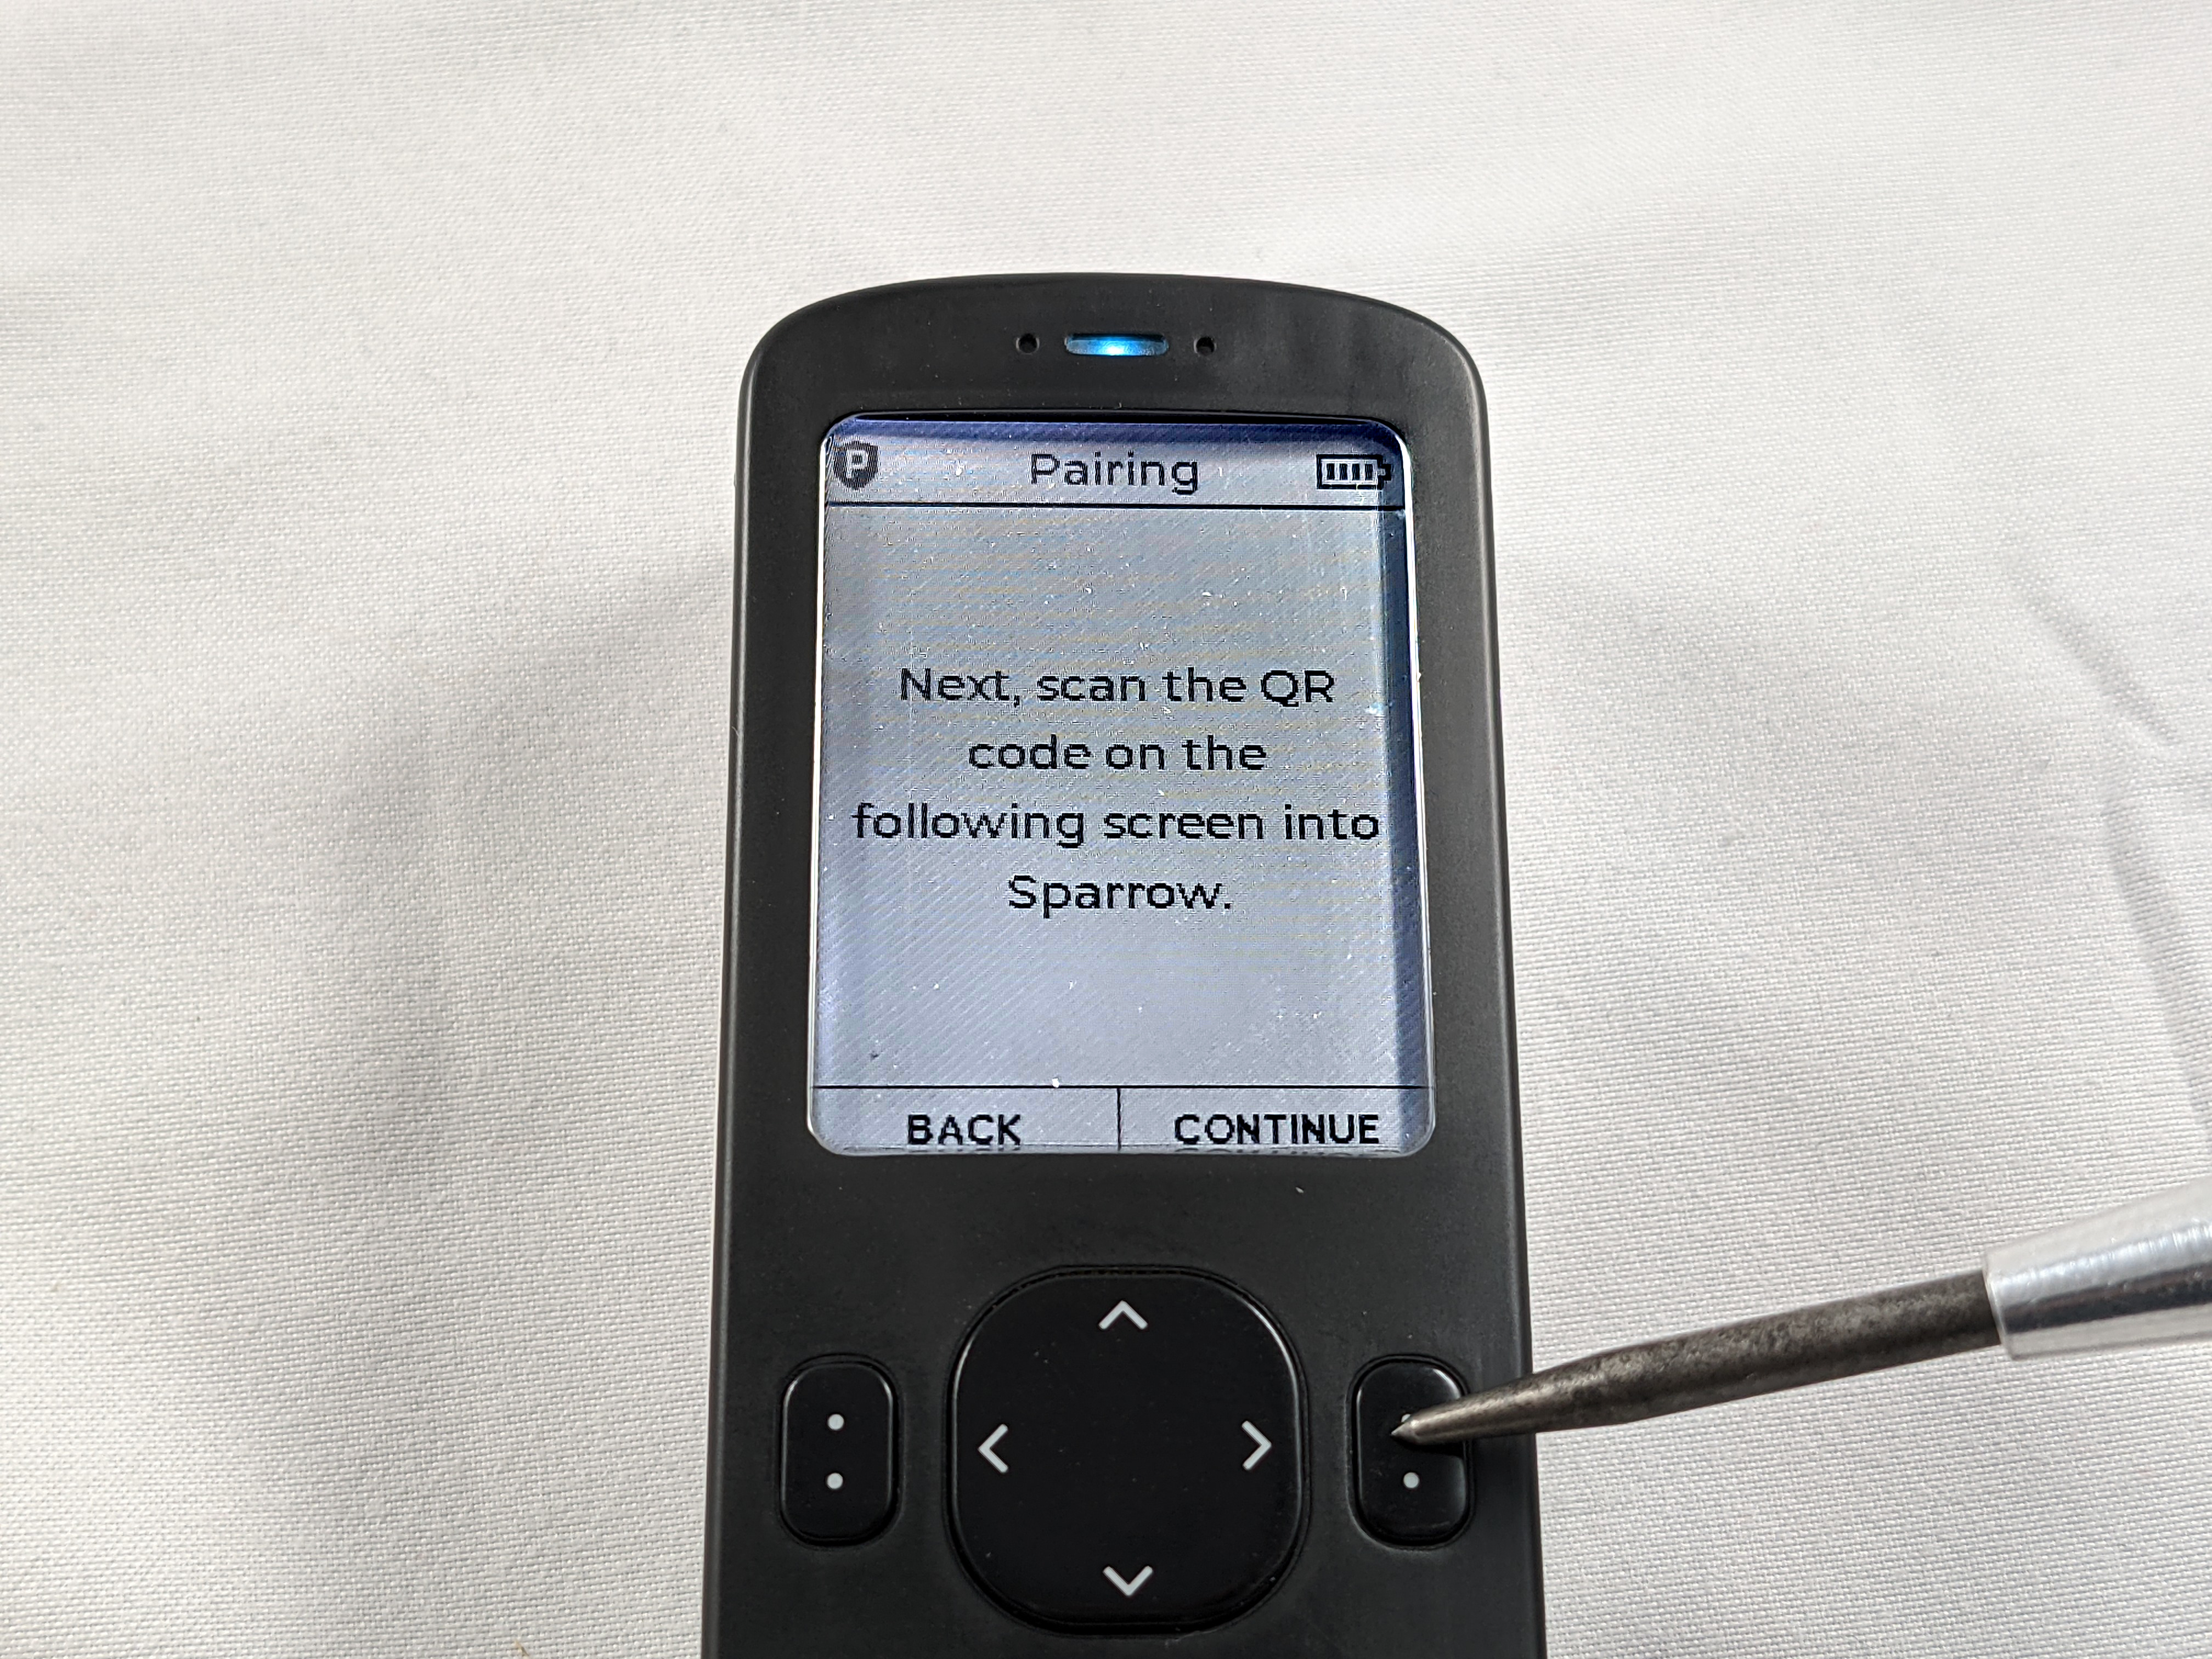
The Passport will display a message saying to scan the following QR codes into Sparrow. Now hold the Passport up to your webcam and let Sparrow scan in the details from the animated QR codes.

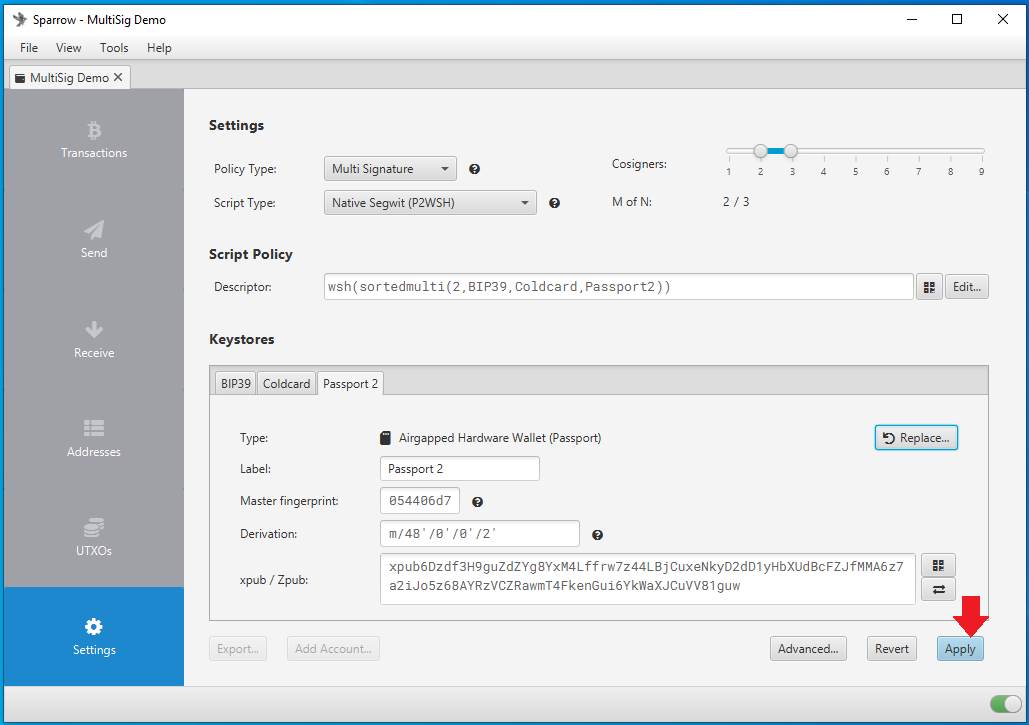
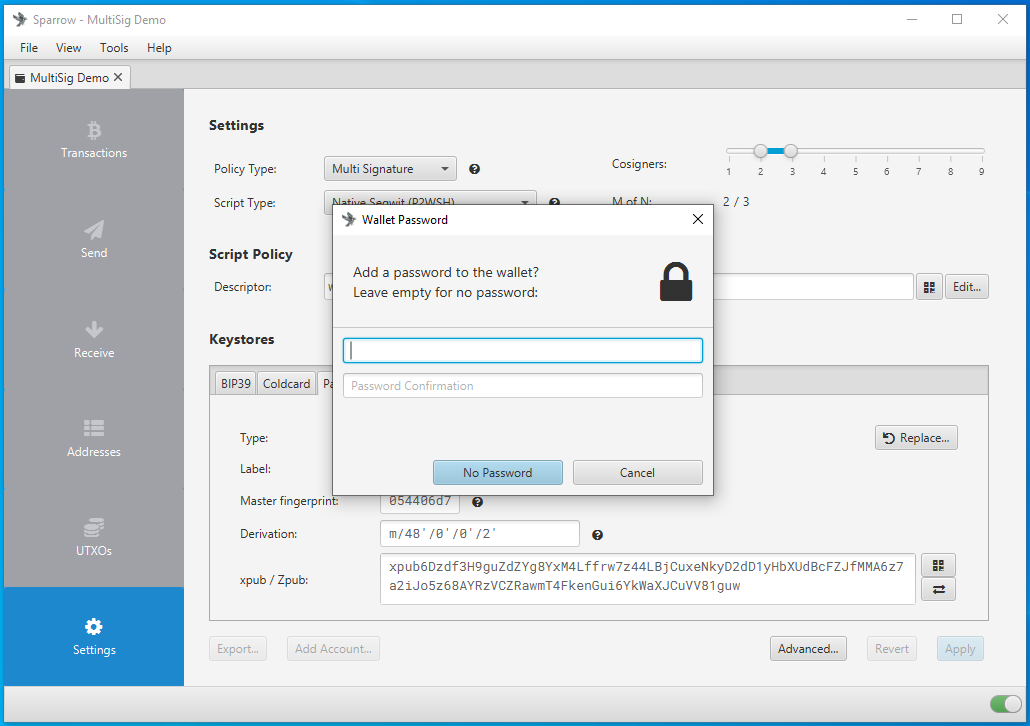
Sparrow will use the QR code information to automatically populate the necessary information for Keystore 3. Then you can click on Apply. Then Sparrow will ask you if you would like to add a password, this is an optional password that encrypts the wallet data file on your computer to prevent anyone from gaining access to this information by gaining access to your computer.
Transacting
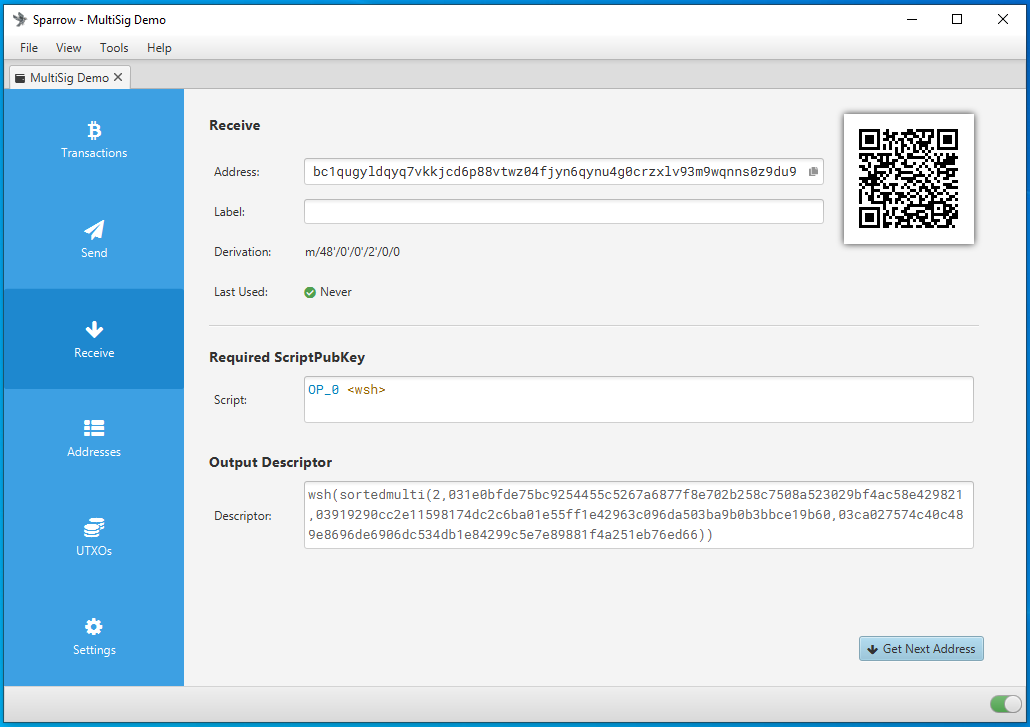
Now you can navigate through your new multisig wallet, for example, from the Receive tab you can display a deposit address that you can scan with your mobile Bitcoin wallet or copy/paste the address as necessary to deposit some bitcoin to your new multisig wallet.
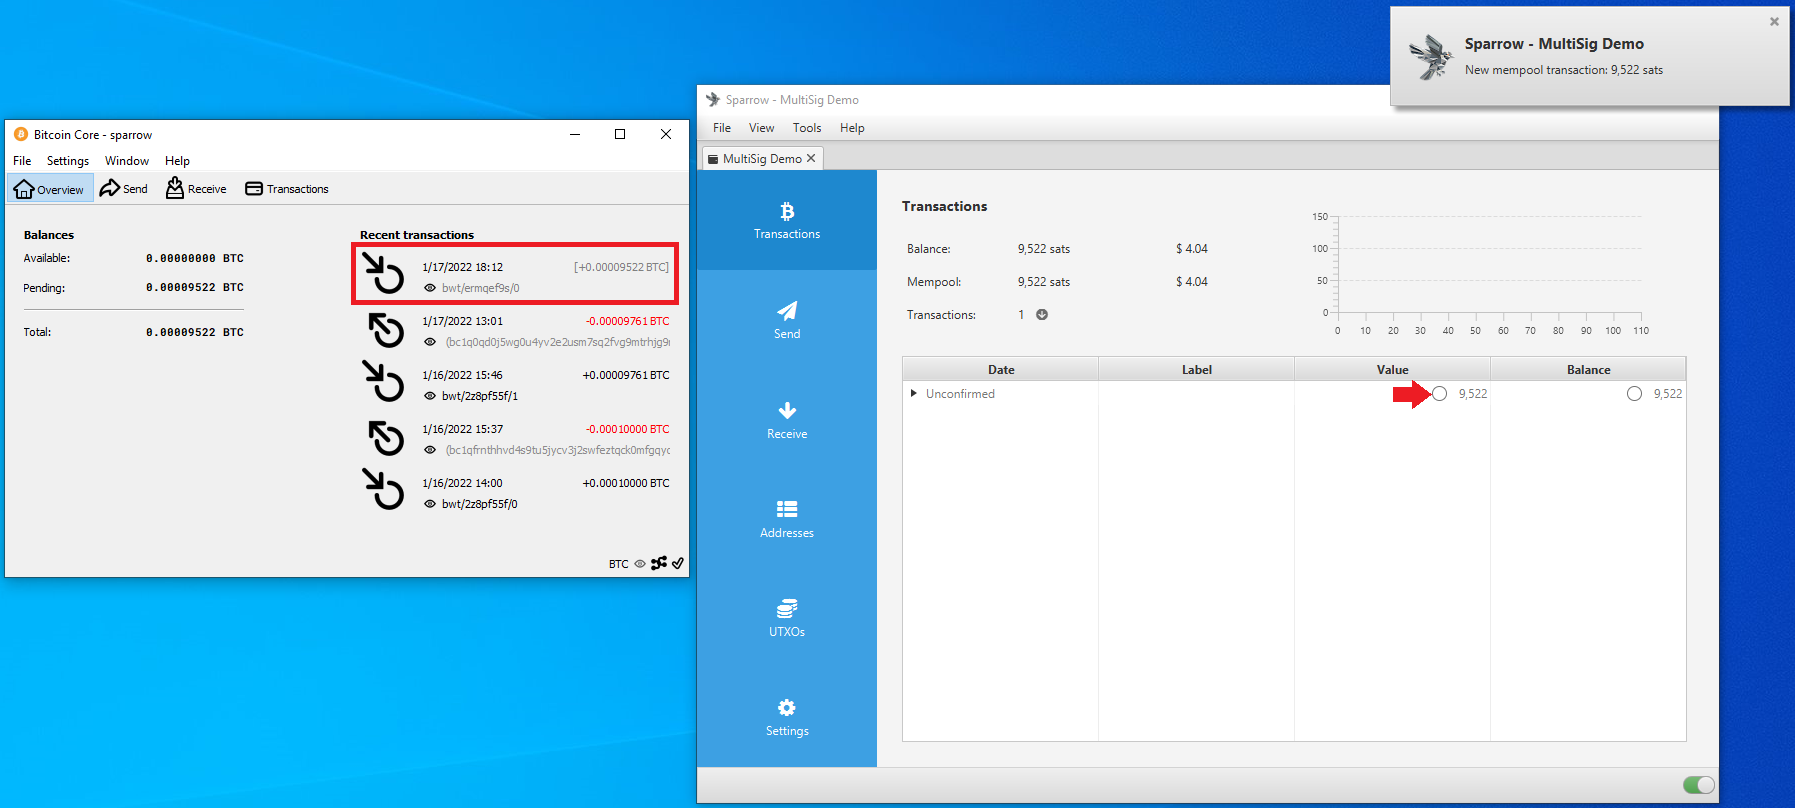
Once you send some bitcoin, the transaction will appear in BitcoinCore and Sparrow Wallet, you can copy/paste the txid into your favorite block explorer and watch the mempool progress. Once your bitcoin is deposited in your multisig wallet, you will need to provide at least 2-of-3 signatures from the 3 wallets to spend this bitcoin.
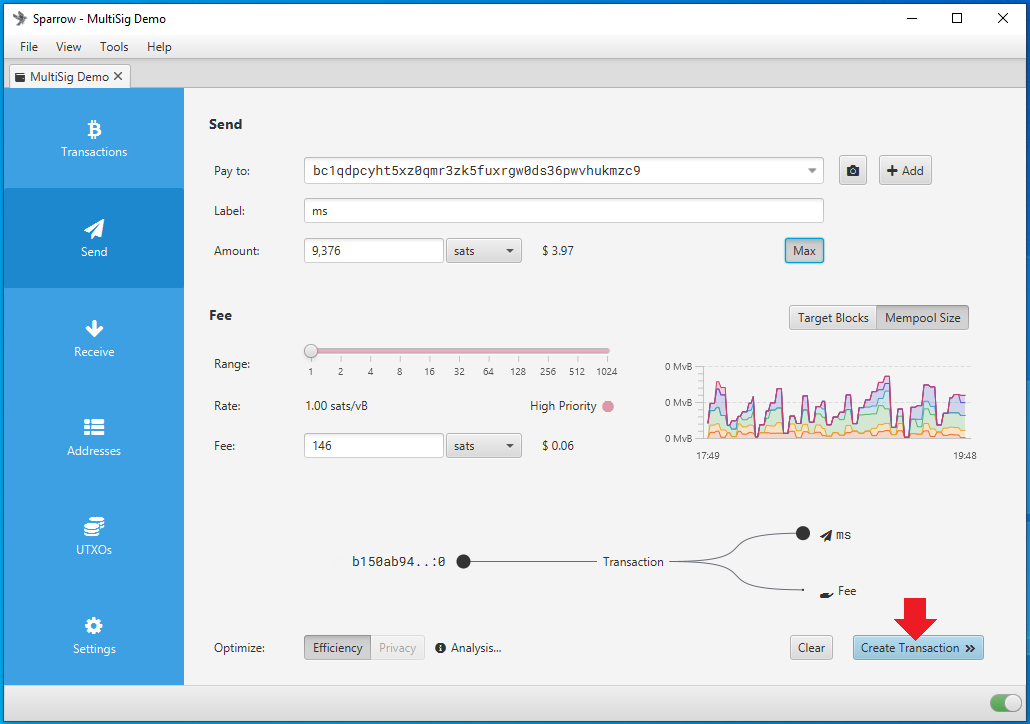
Once you are ready to spend from your multisig wallet, setup the transaction the same way you do for a single signature transaction by navigating to the Send tab on the left-hand side of the Sparrow Wallet interface. There, you can input the Bitcoin address to spend to, add a label, enter the amount, set the miners fee and then click on Create Transaction.
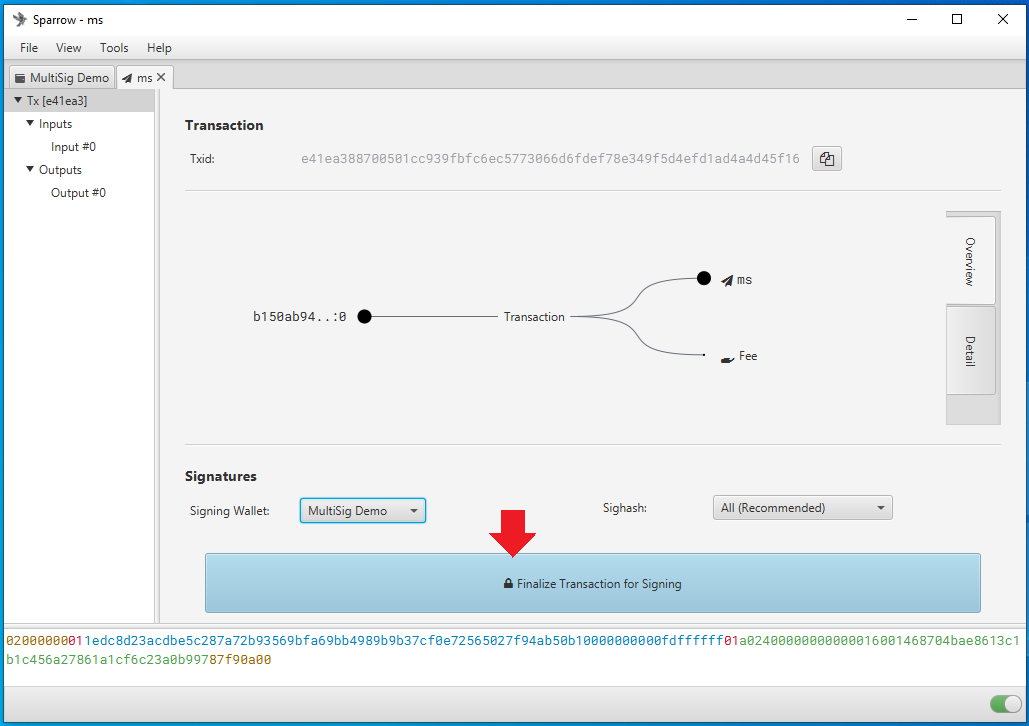
Then on the next screen click on Finalize Transaction for Signing.
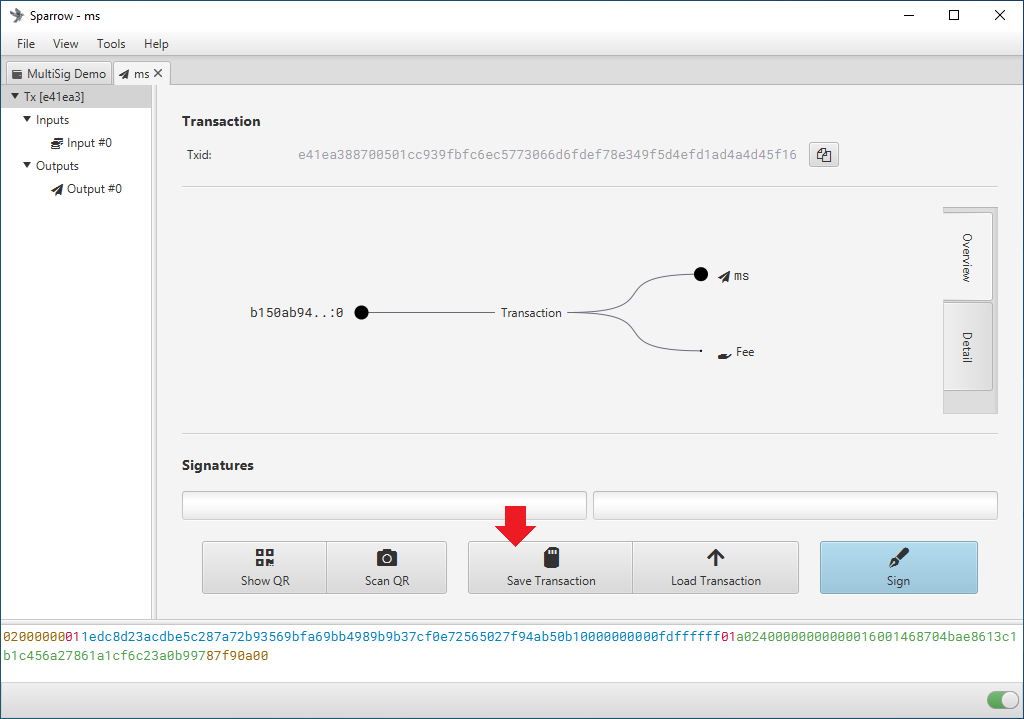
At this point, you have a couple options, this transaction needs 2-of-3 signatures in order to be valid. One of the signatures can be provided by Sparrow Wallet since it is one of the cosigners. To sign with Sparrow Wallet, simply click on the Sign button in the lower left-hand corner and then one signature will be added. However, it would be beneficial for the purposes of this guide to demonstrate both hardware wallets signing. Starting with the COLDCARD, click on the Save Transaction button.
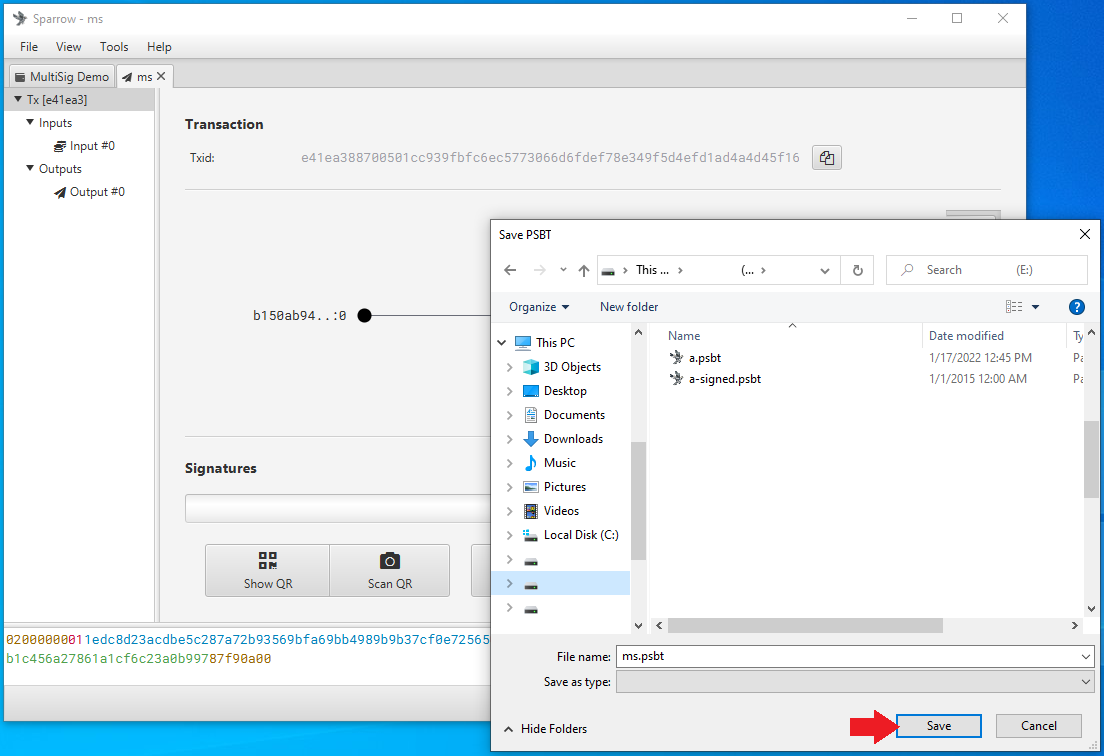
This will launch the file explorer, navigate to the microSD card and save the transaction there.
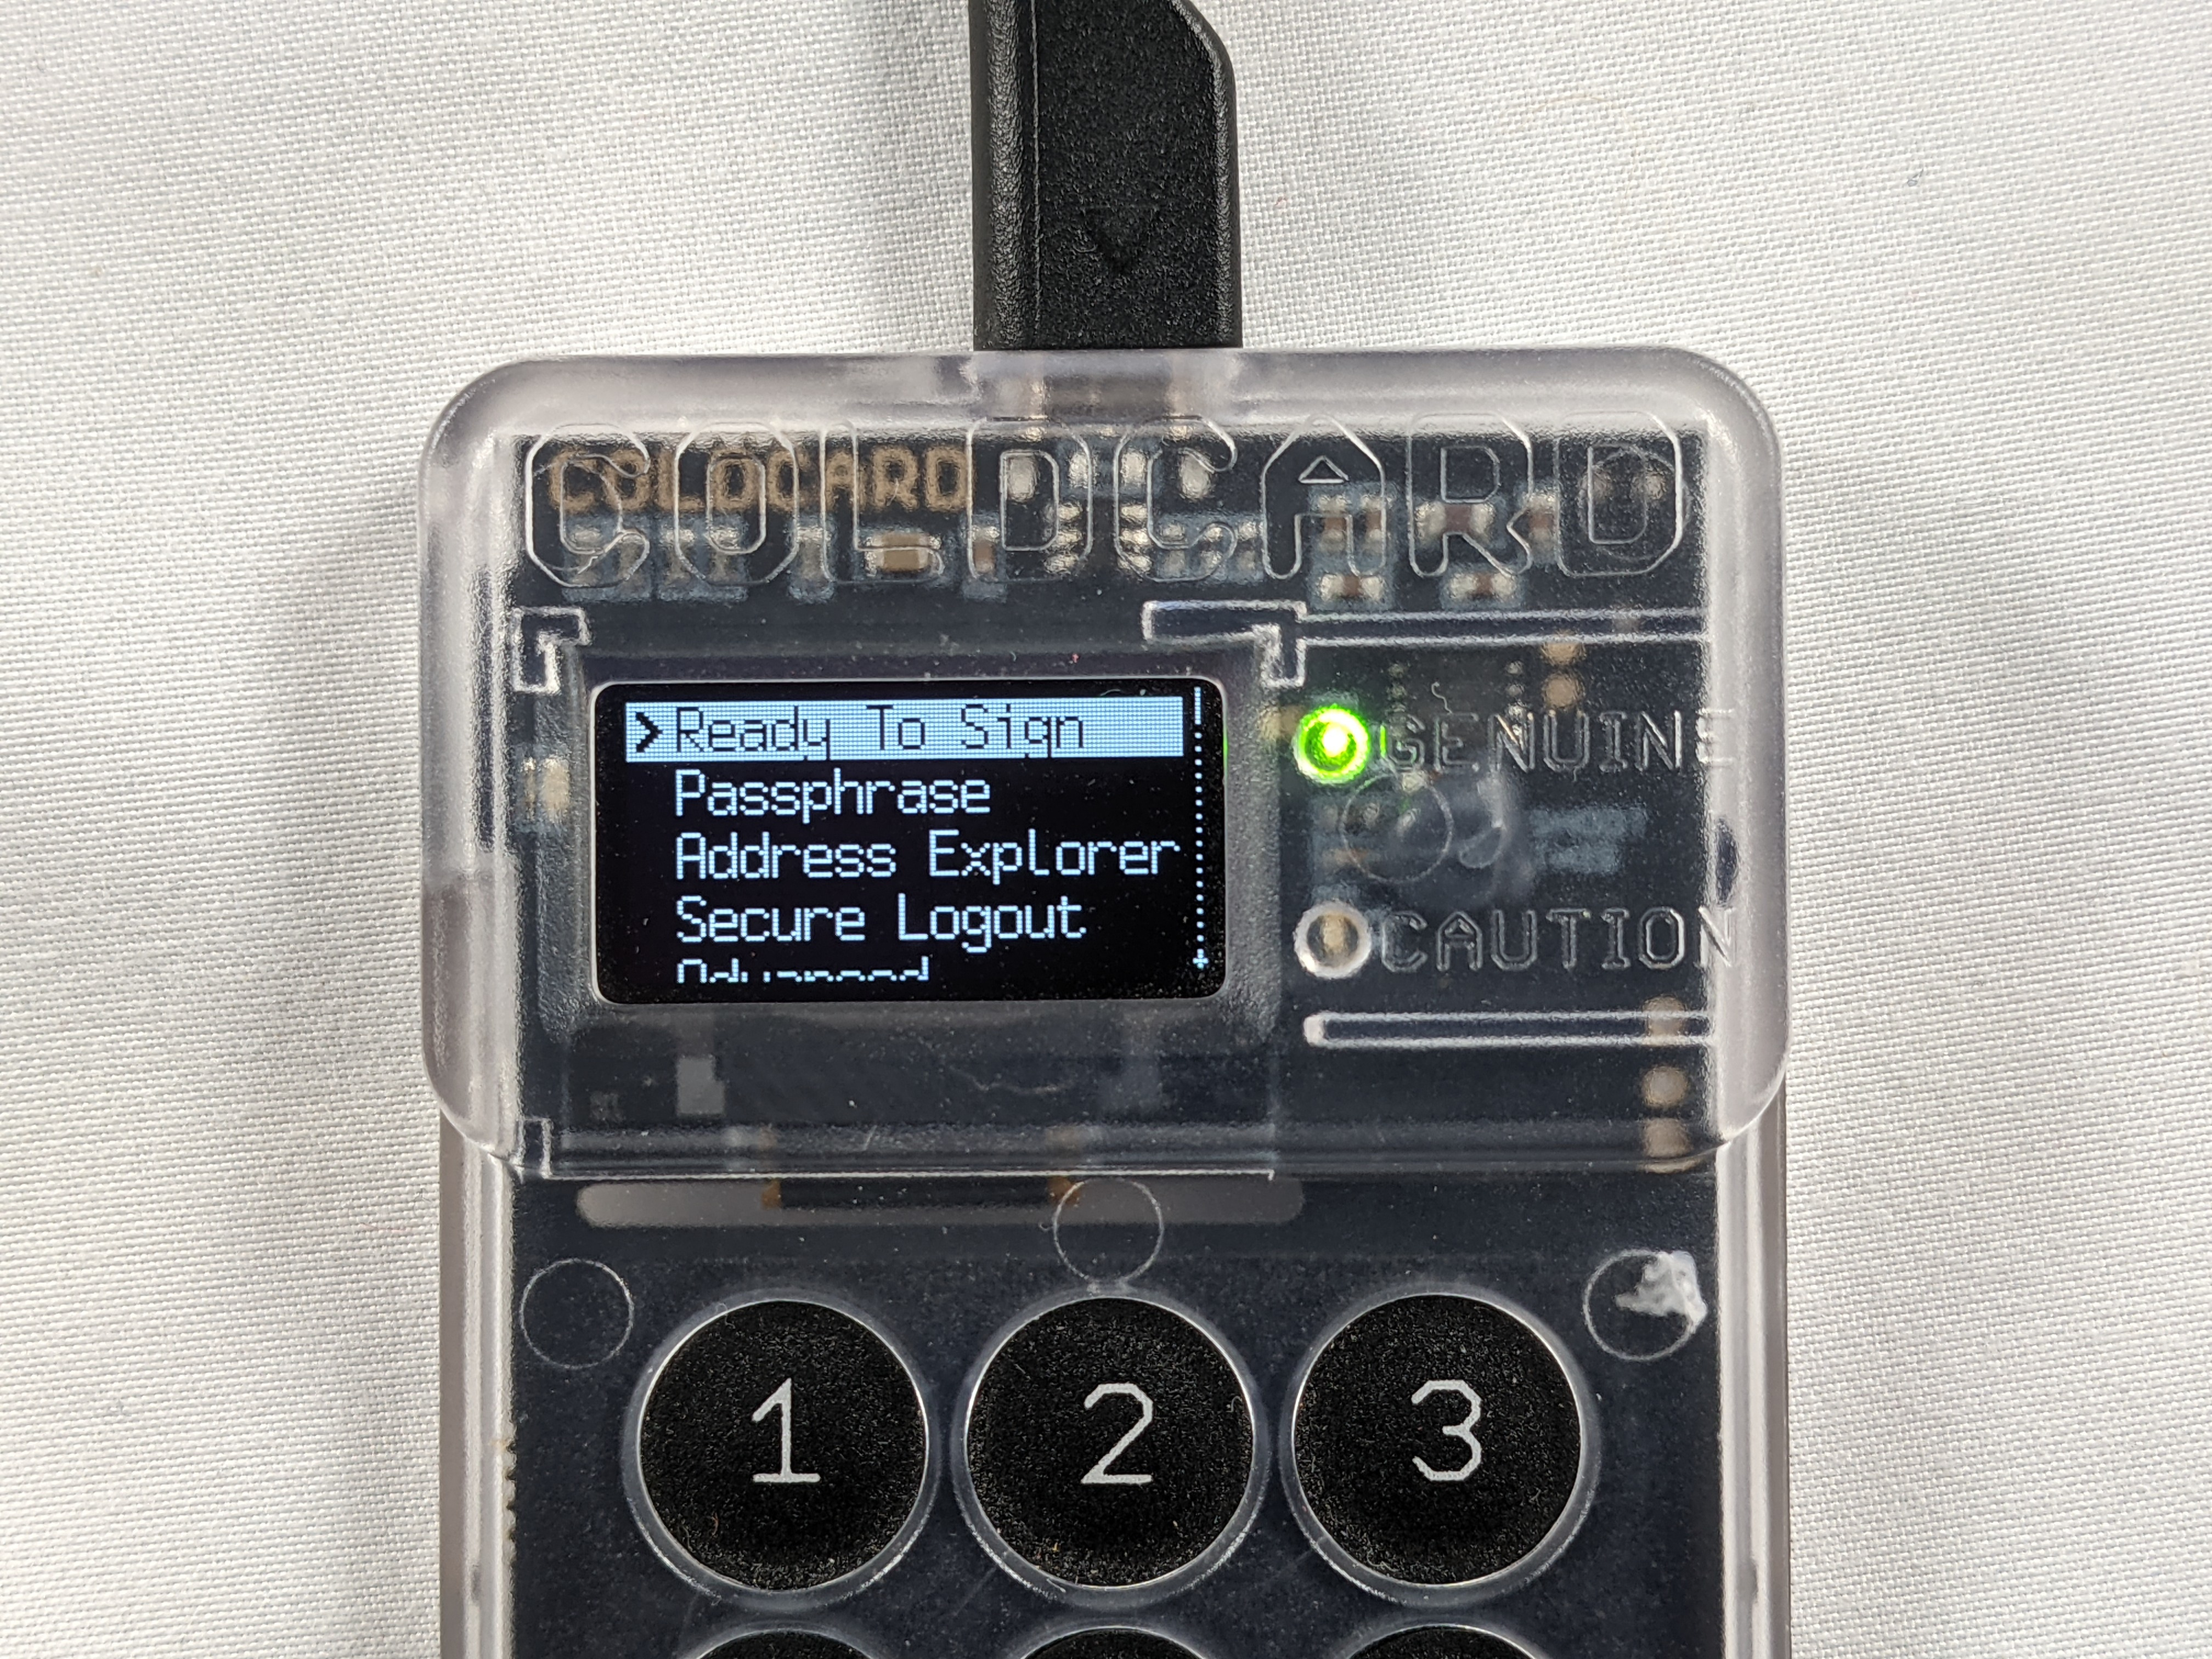
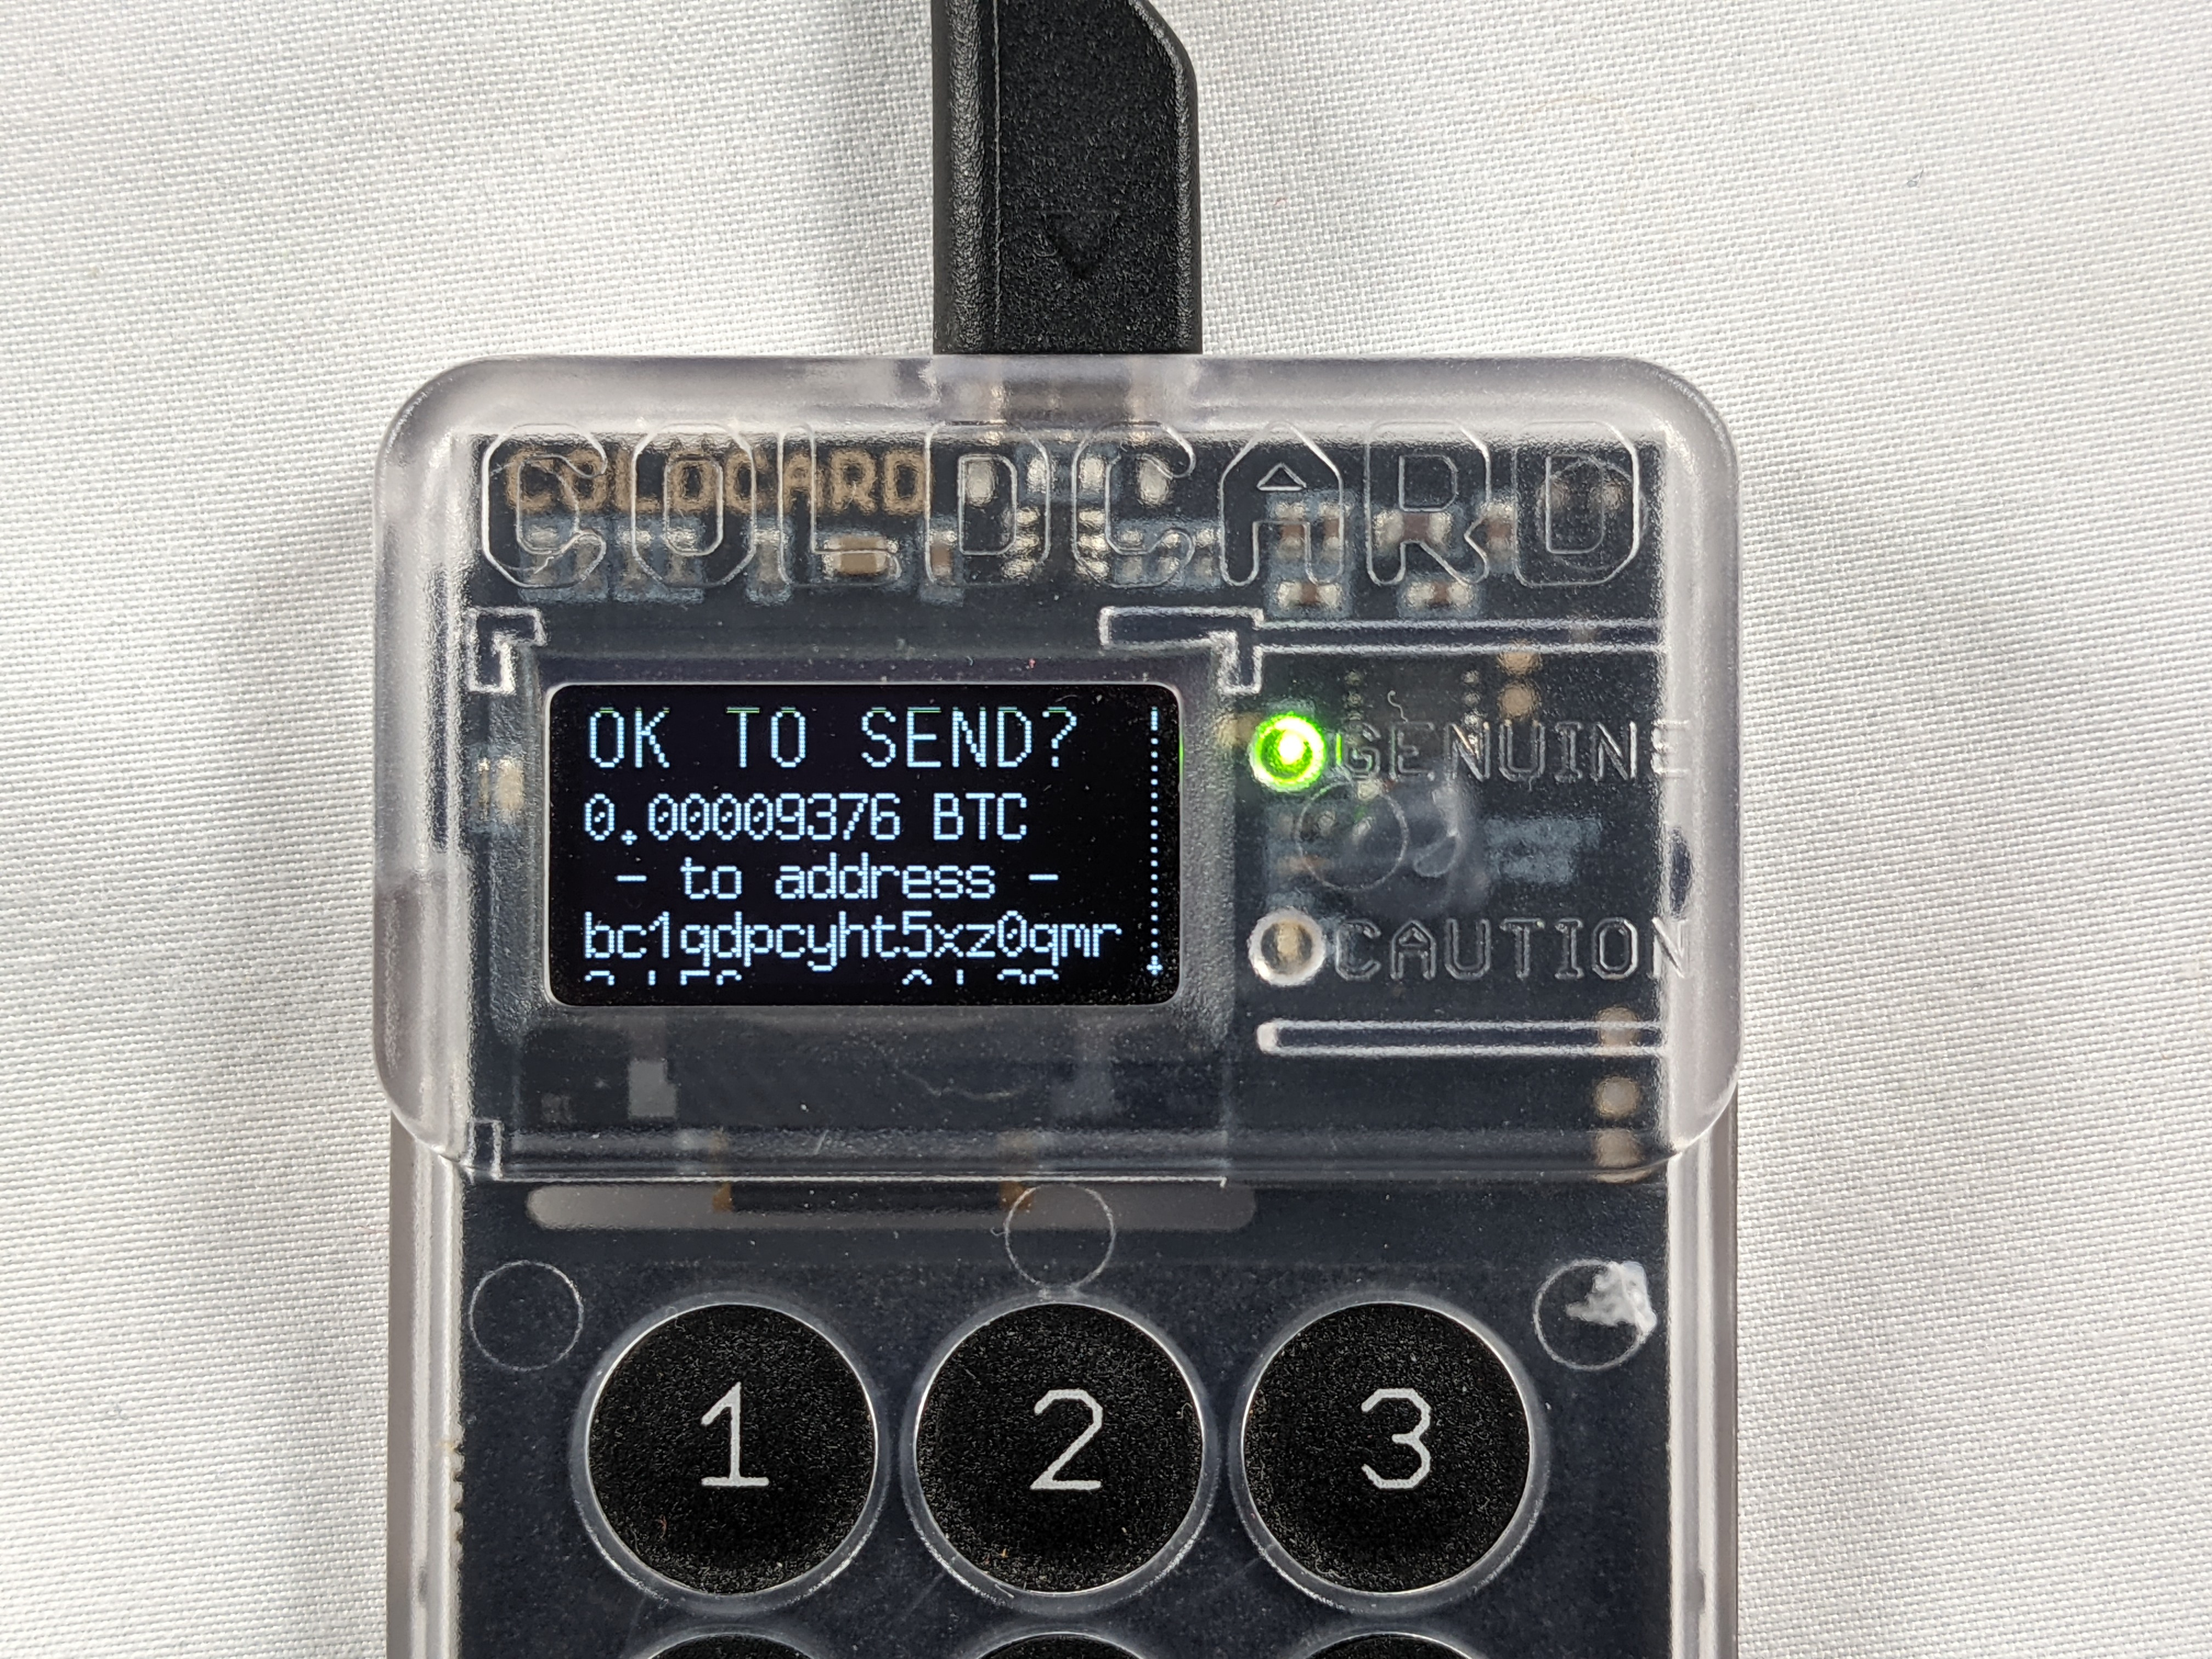
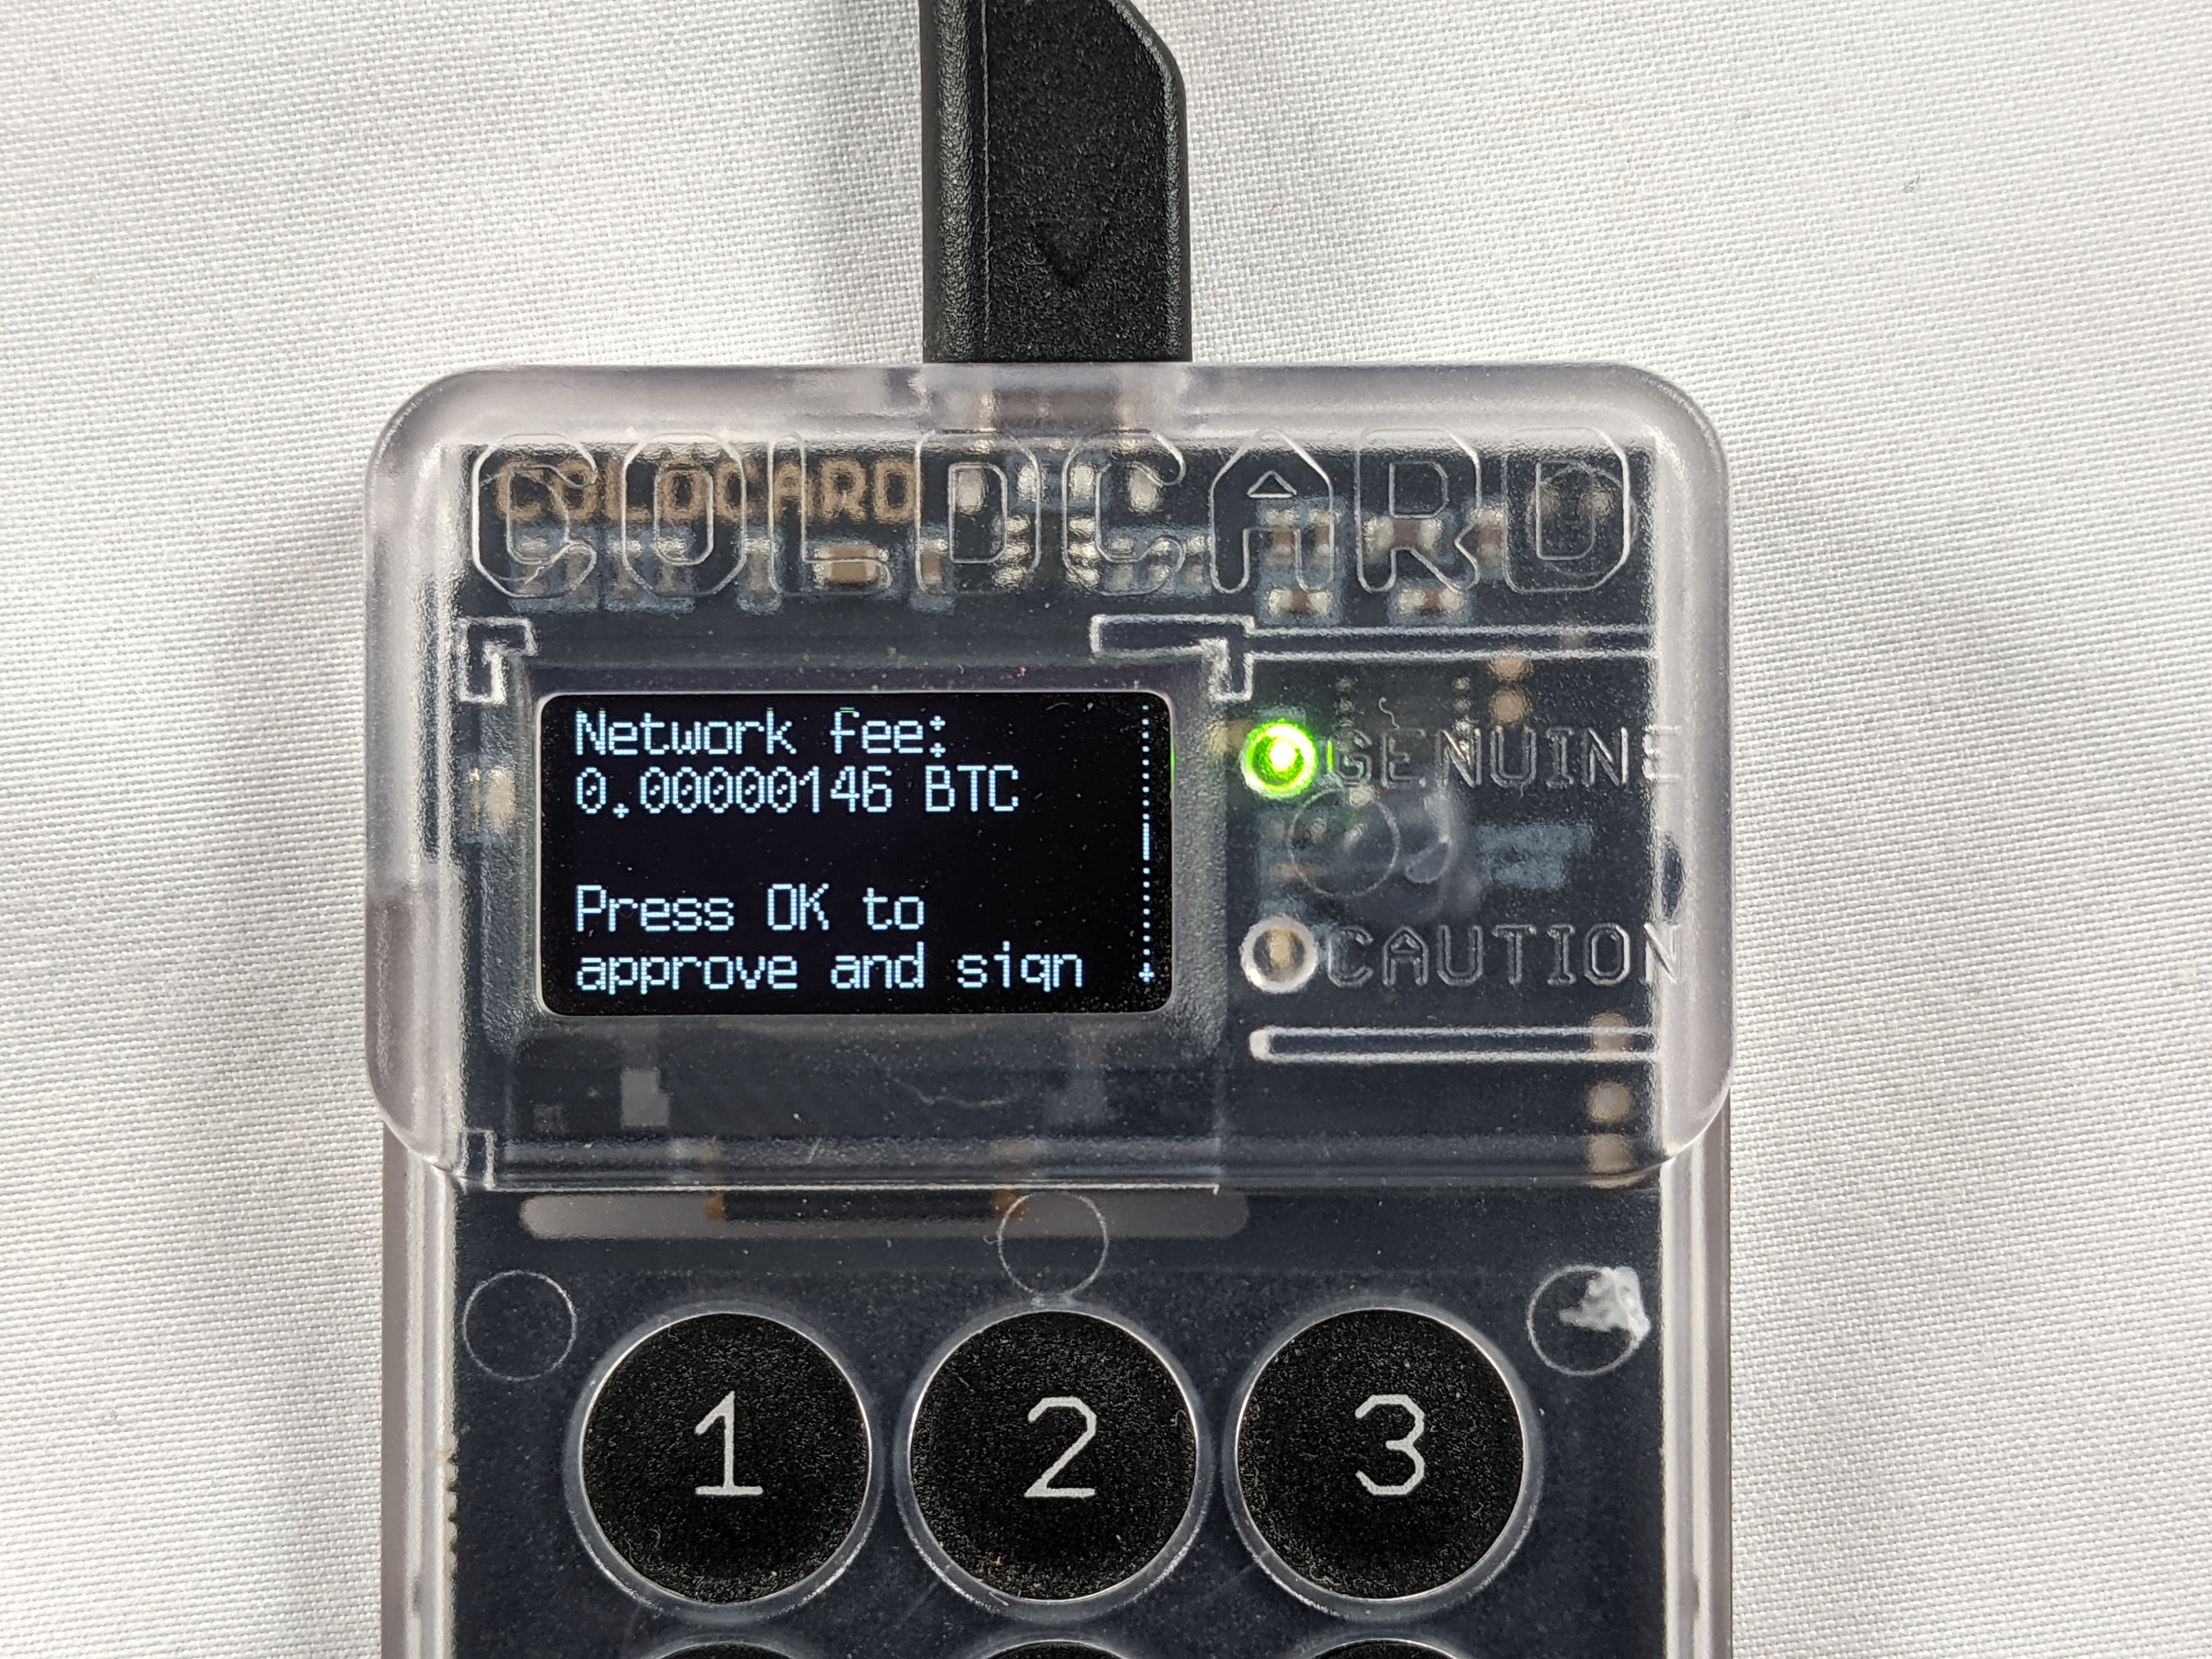
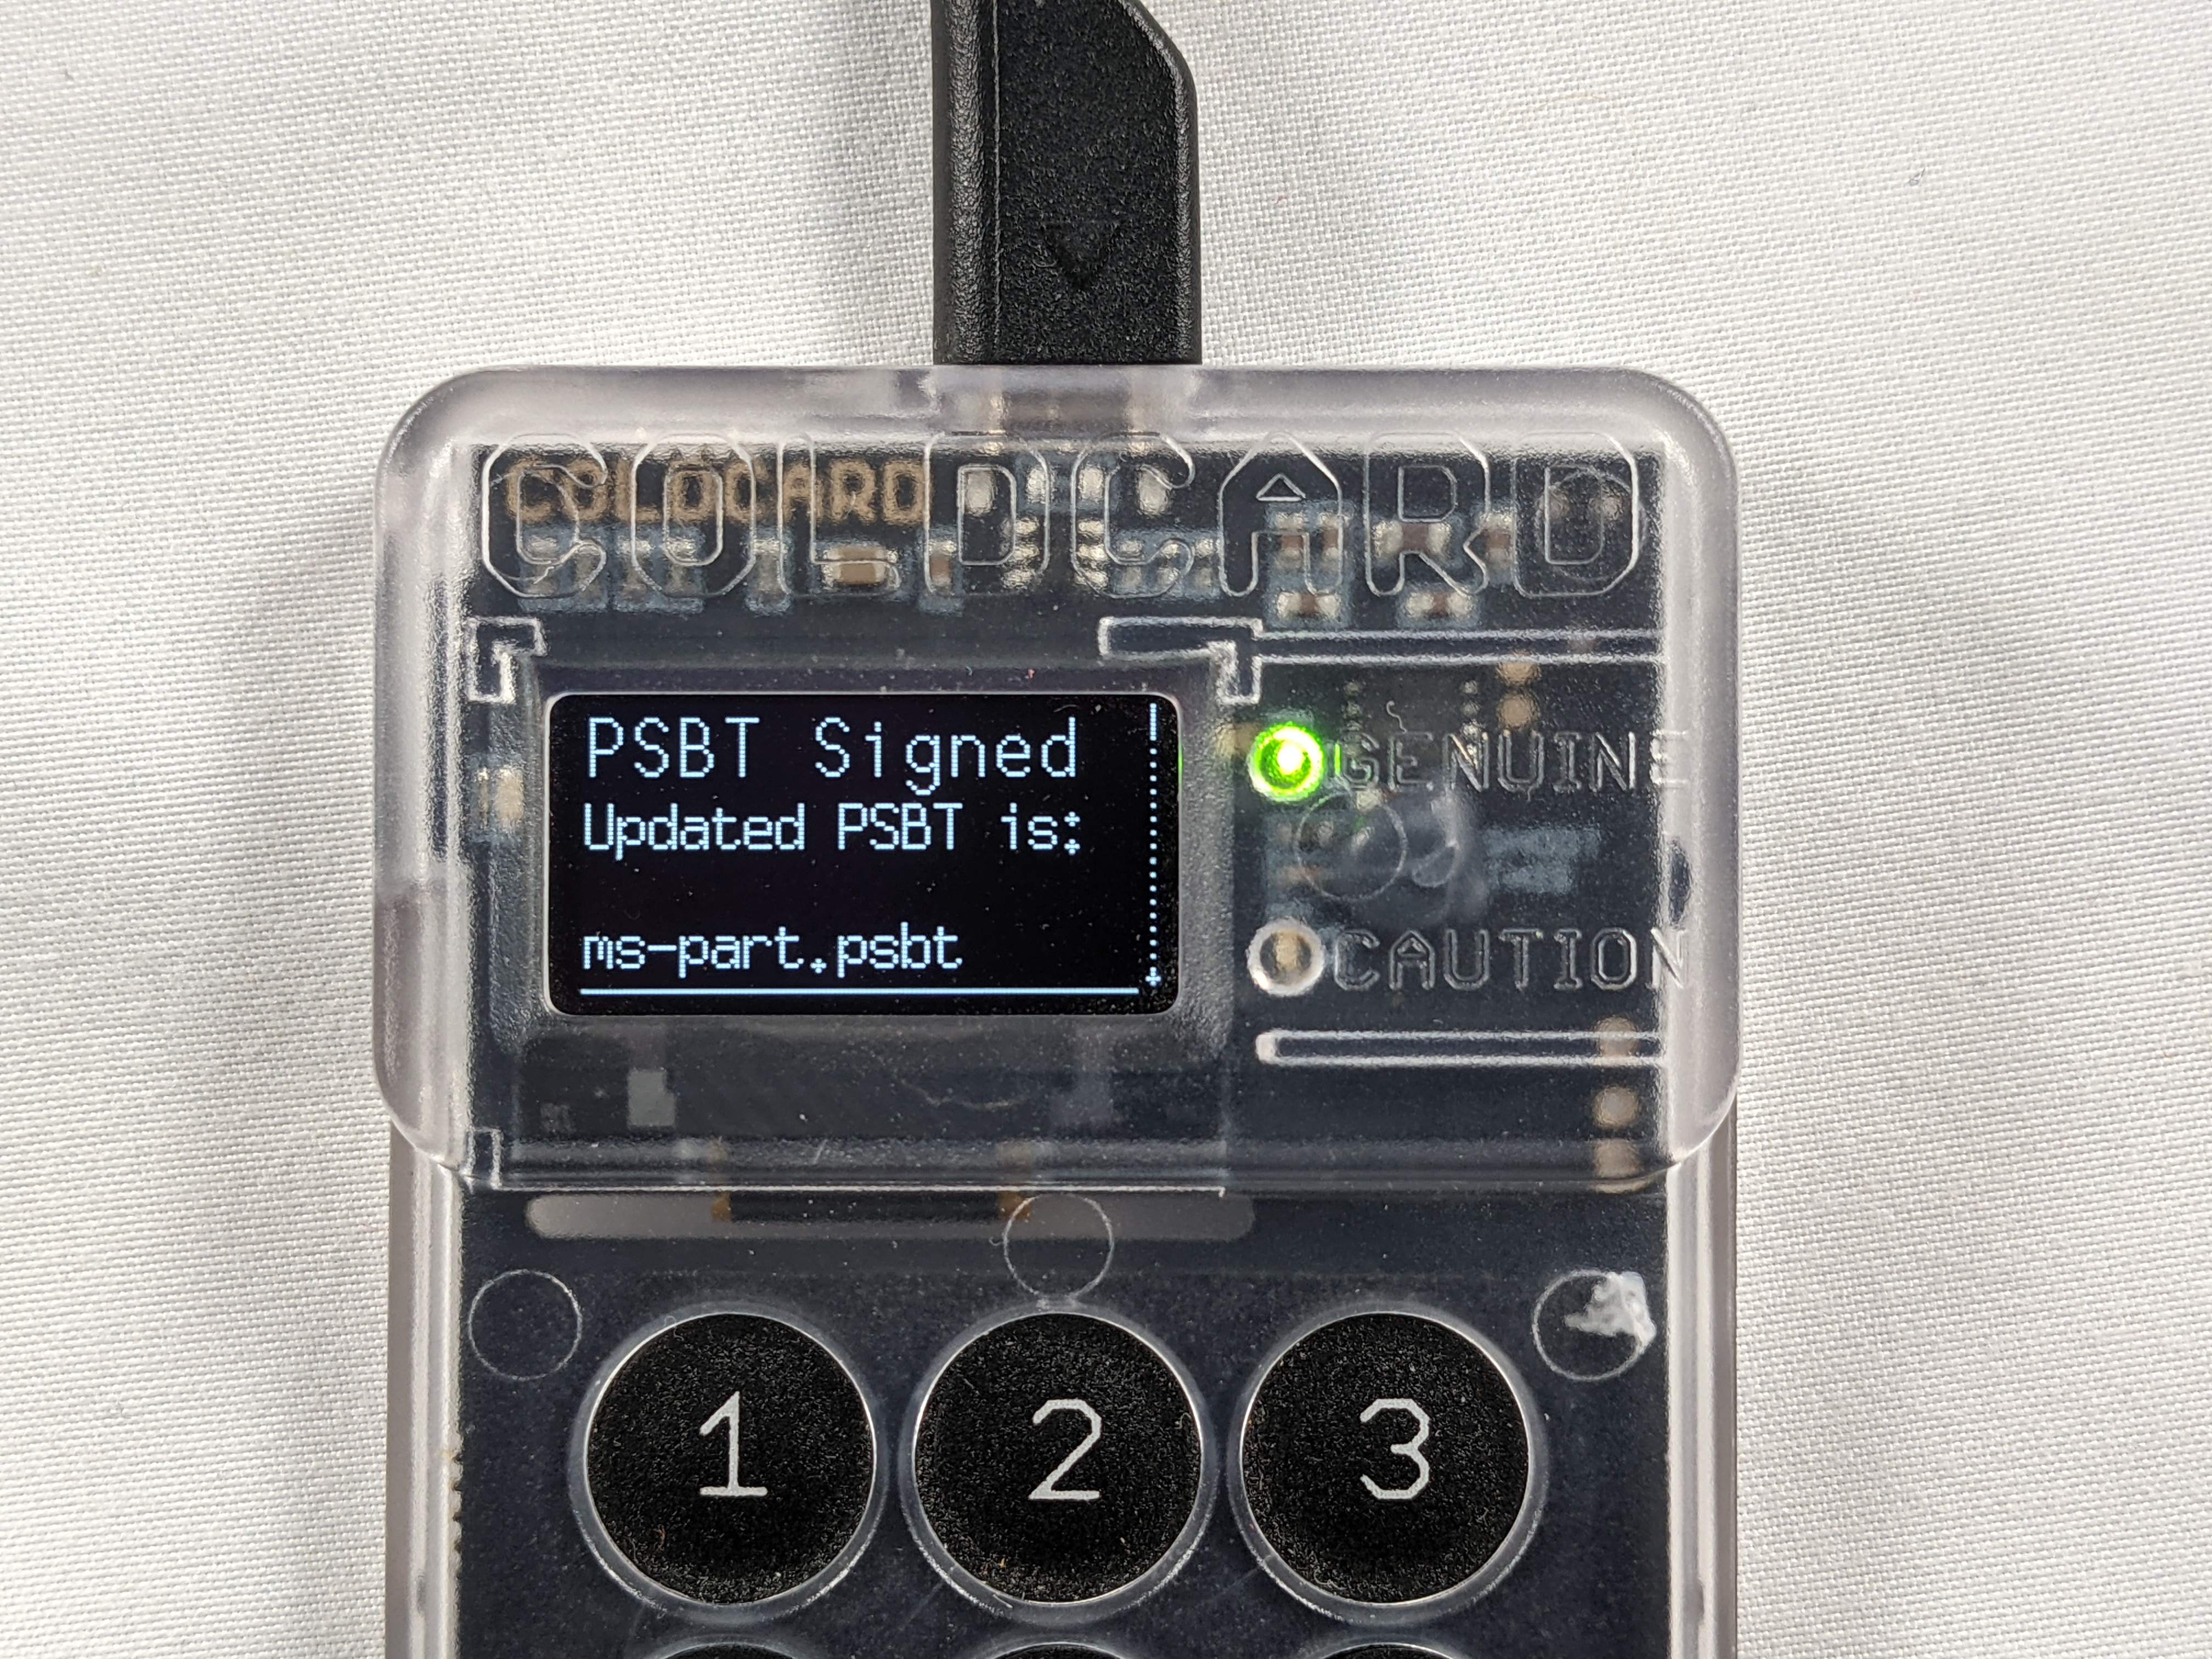
Take that microSD card and insert into the COLDCARD, then power it on and login and apply a passphrase, if necessary. From the main menu, select Ready To Sign then the COLDCARD will read the multisig transaction from the microSD card and ask if you want to create a new multisig wallet, press OK. The COLDCARD will then display the amount to be spent, the address being sent to, and the network fee. If everything looks good then press OK. Last, the COLDCARD will let you know when the transaction has been signed and what the name of the new file is.

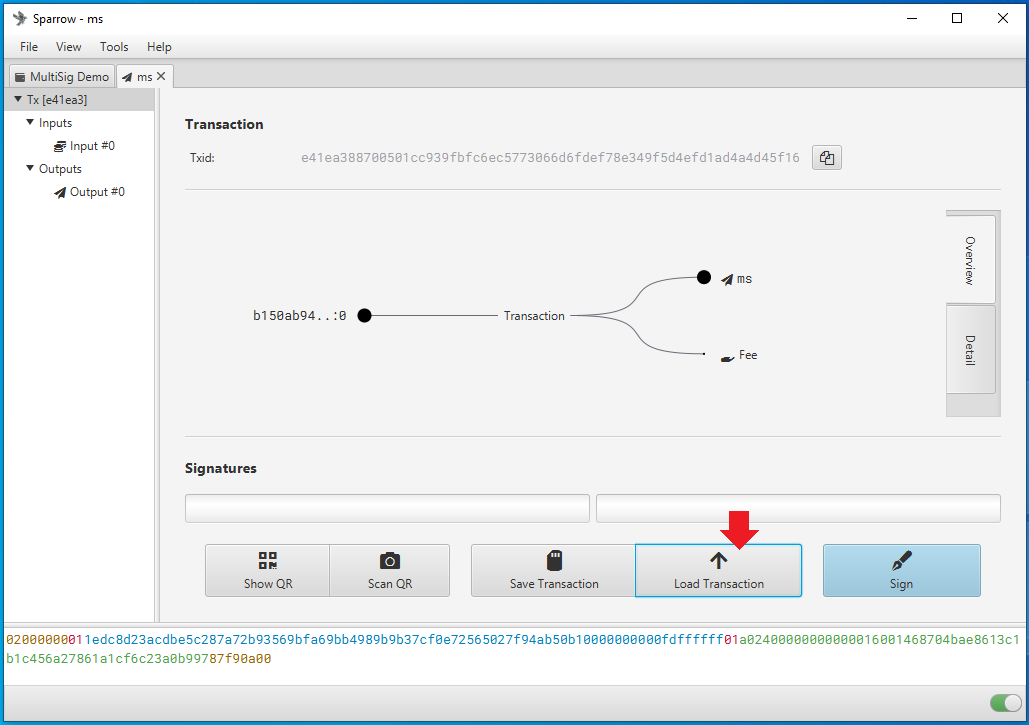
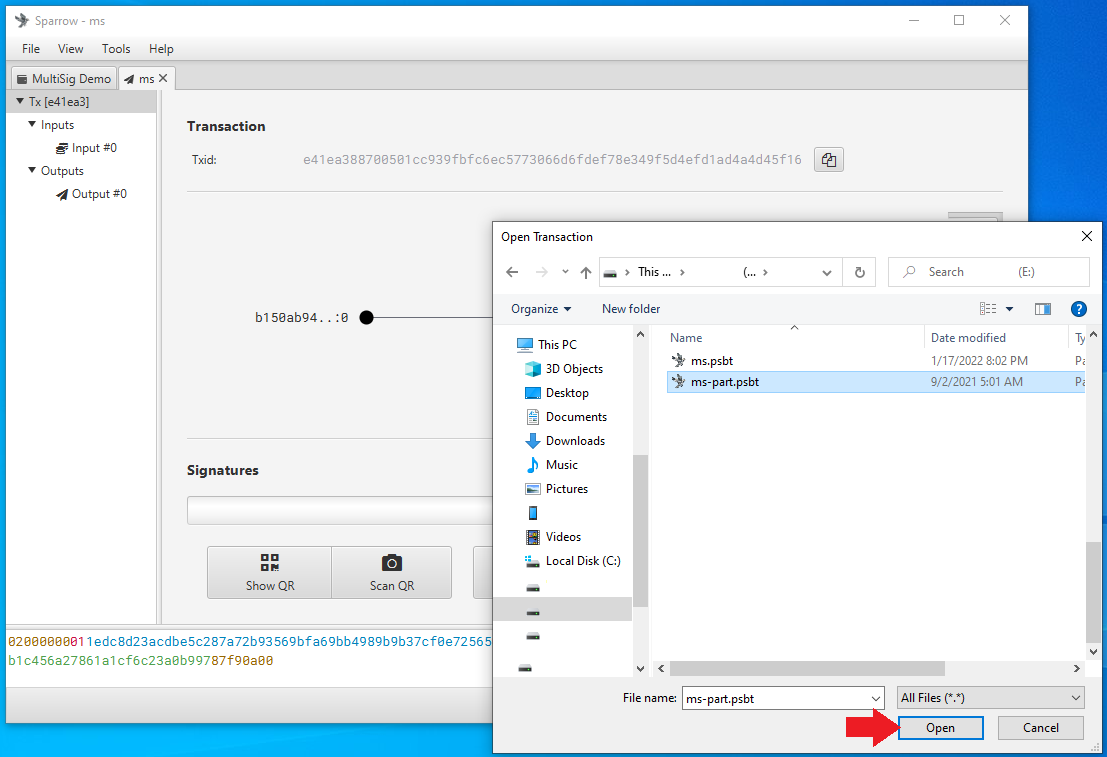
You can now power down the COLDCARD and eject the microSD card. Insert the microSD card into your USB adaptor and insert that into the computer running Sparrow Wallet. Then, back in Sparrow Wallet, from the transaction screen click on Load Transaction. Then a file explorer will open, navigate to the microSD card and select the partially signed transaction.
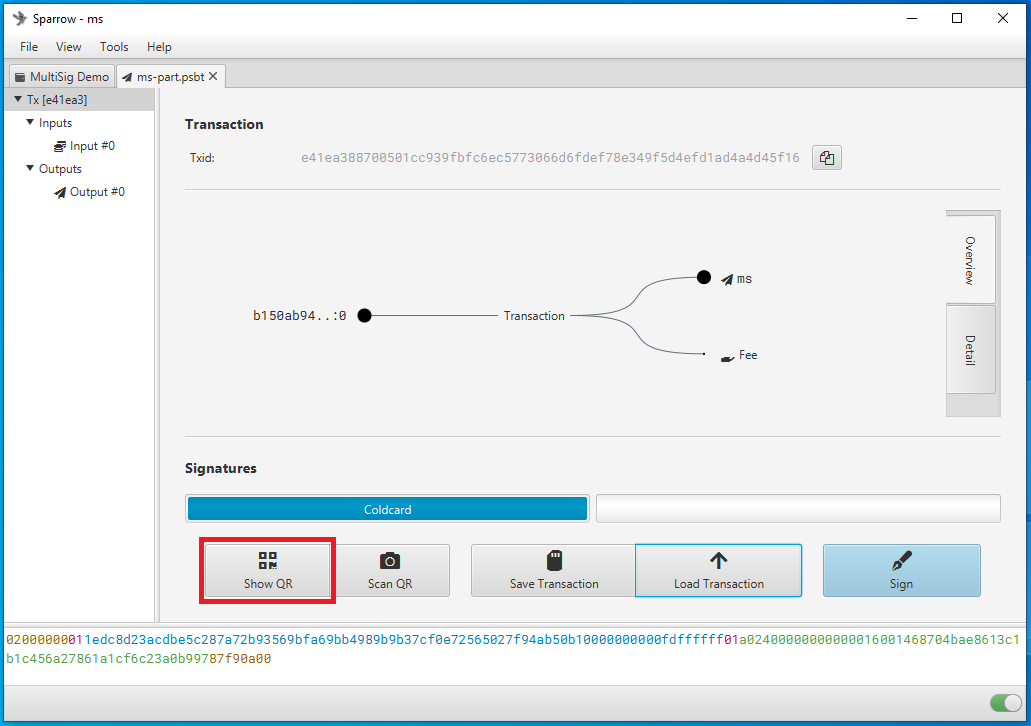
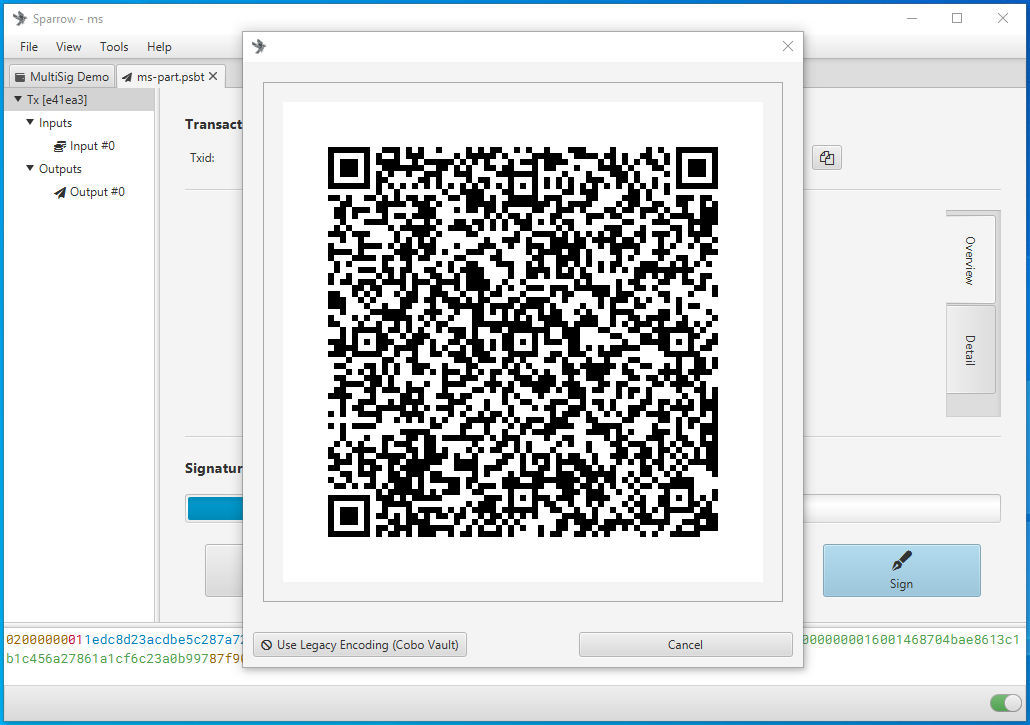
You'll see one of the two required signatures populate in Sparrow Wallet. Now you can sign with the Passport by pressing the Show QR button in Sparrow Wallet. An animated series of QR codes will be displayed in a pop up window.
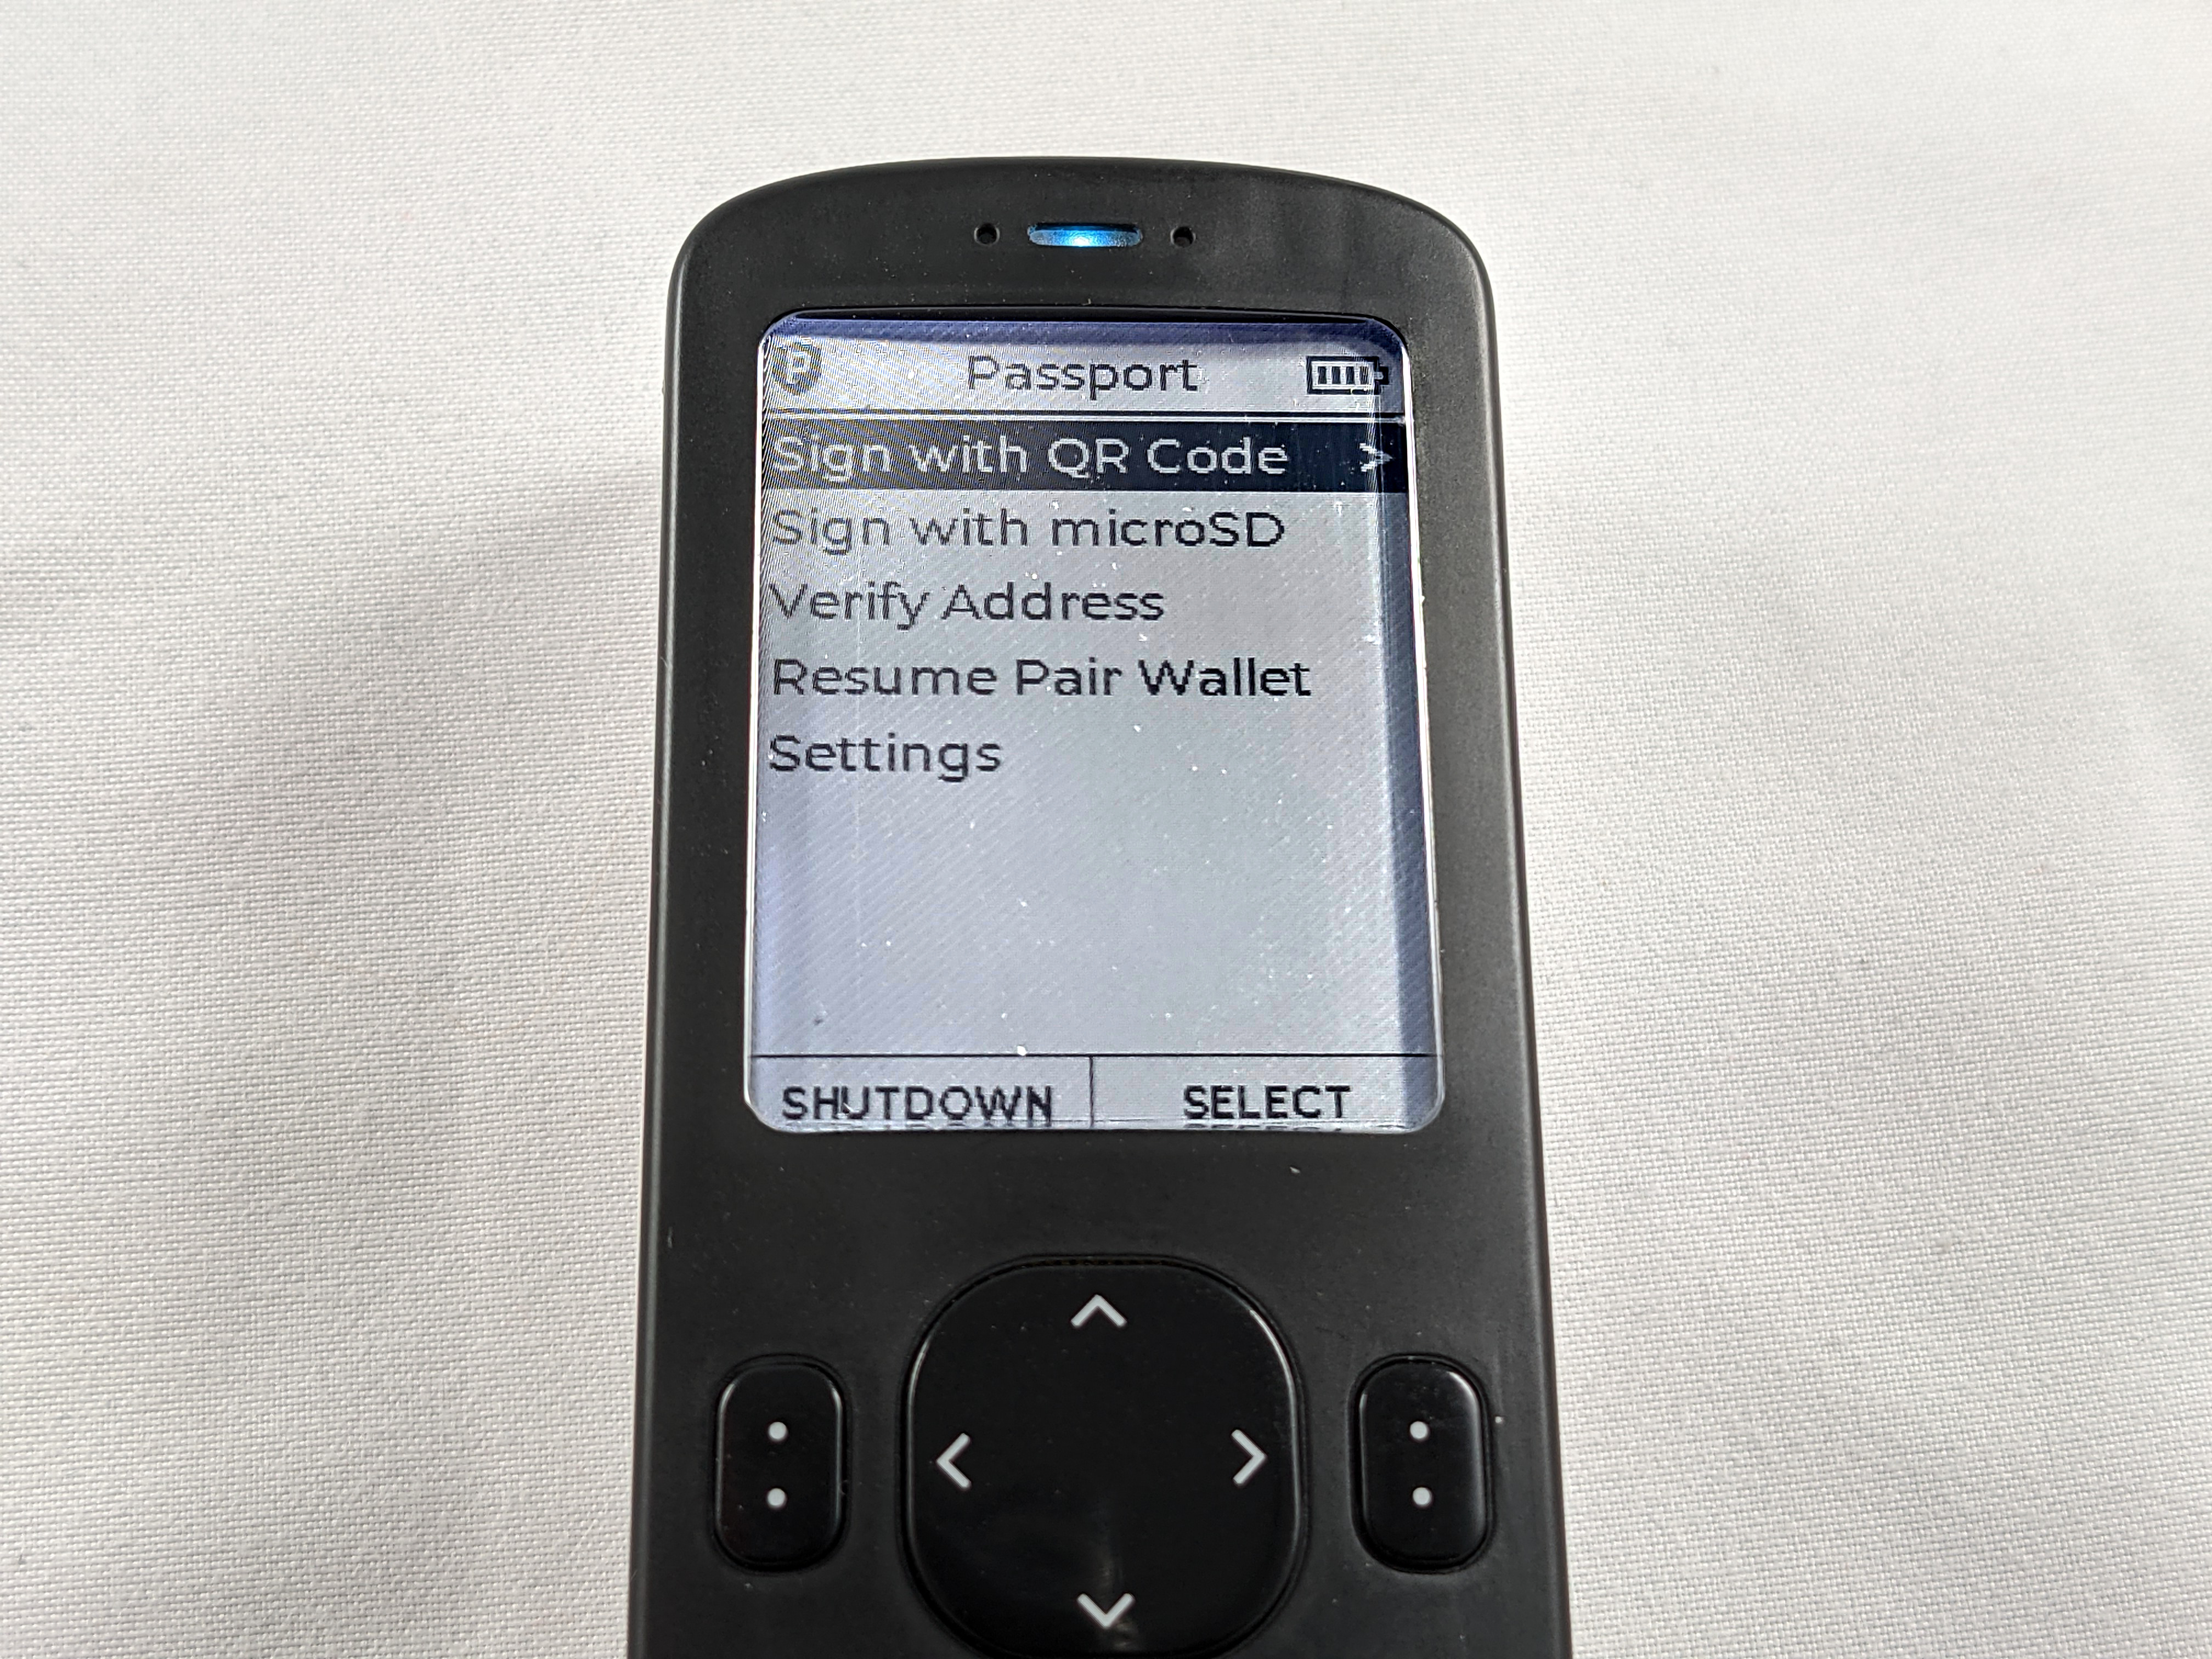
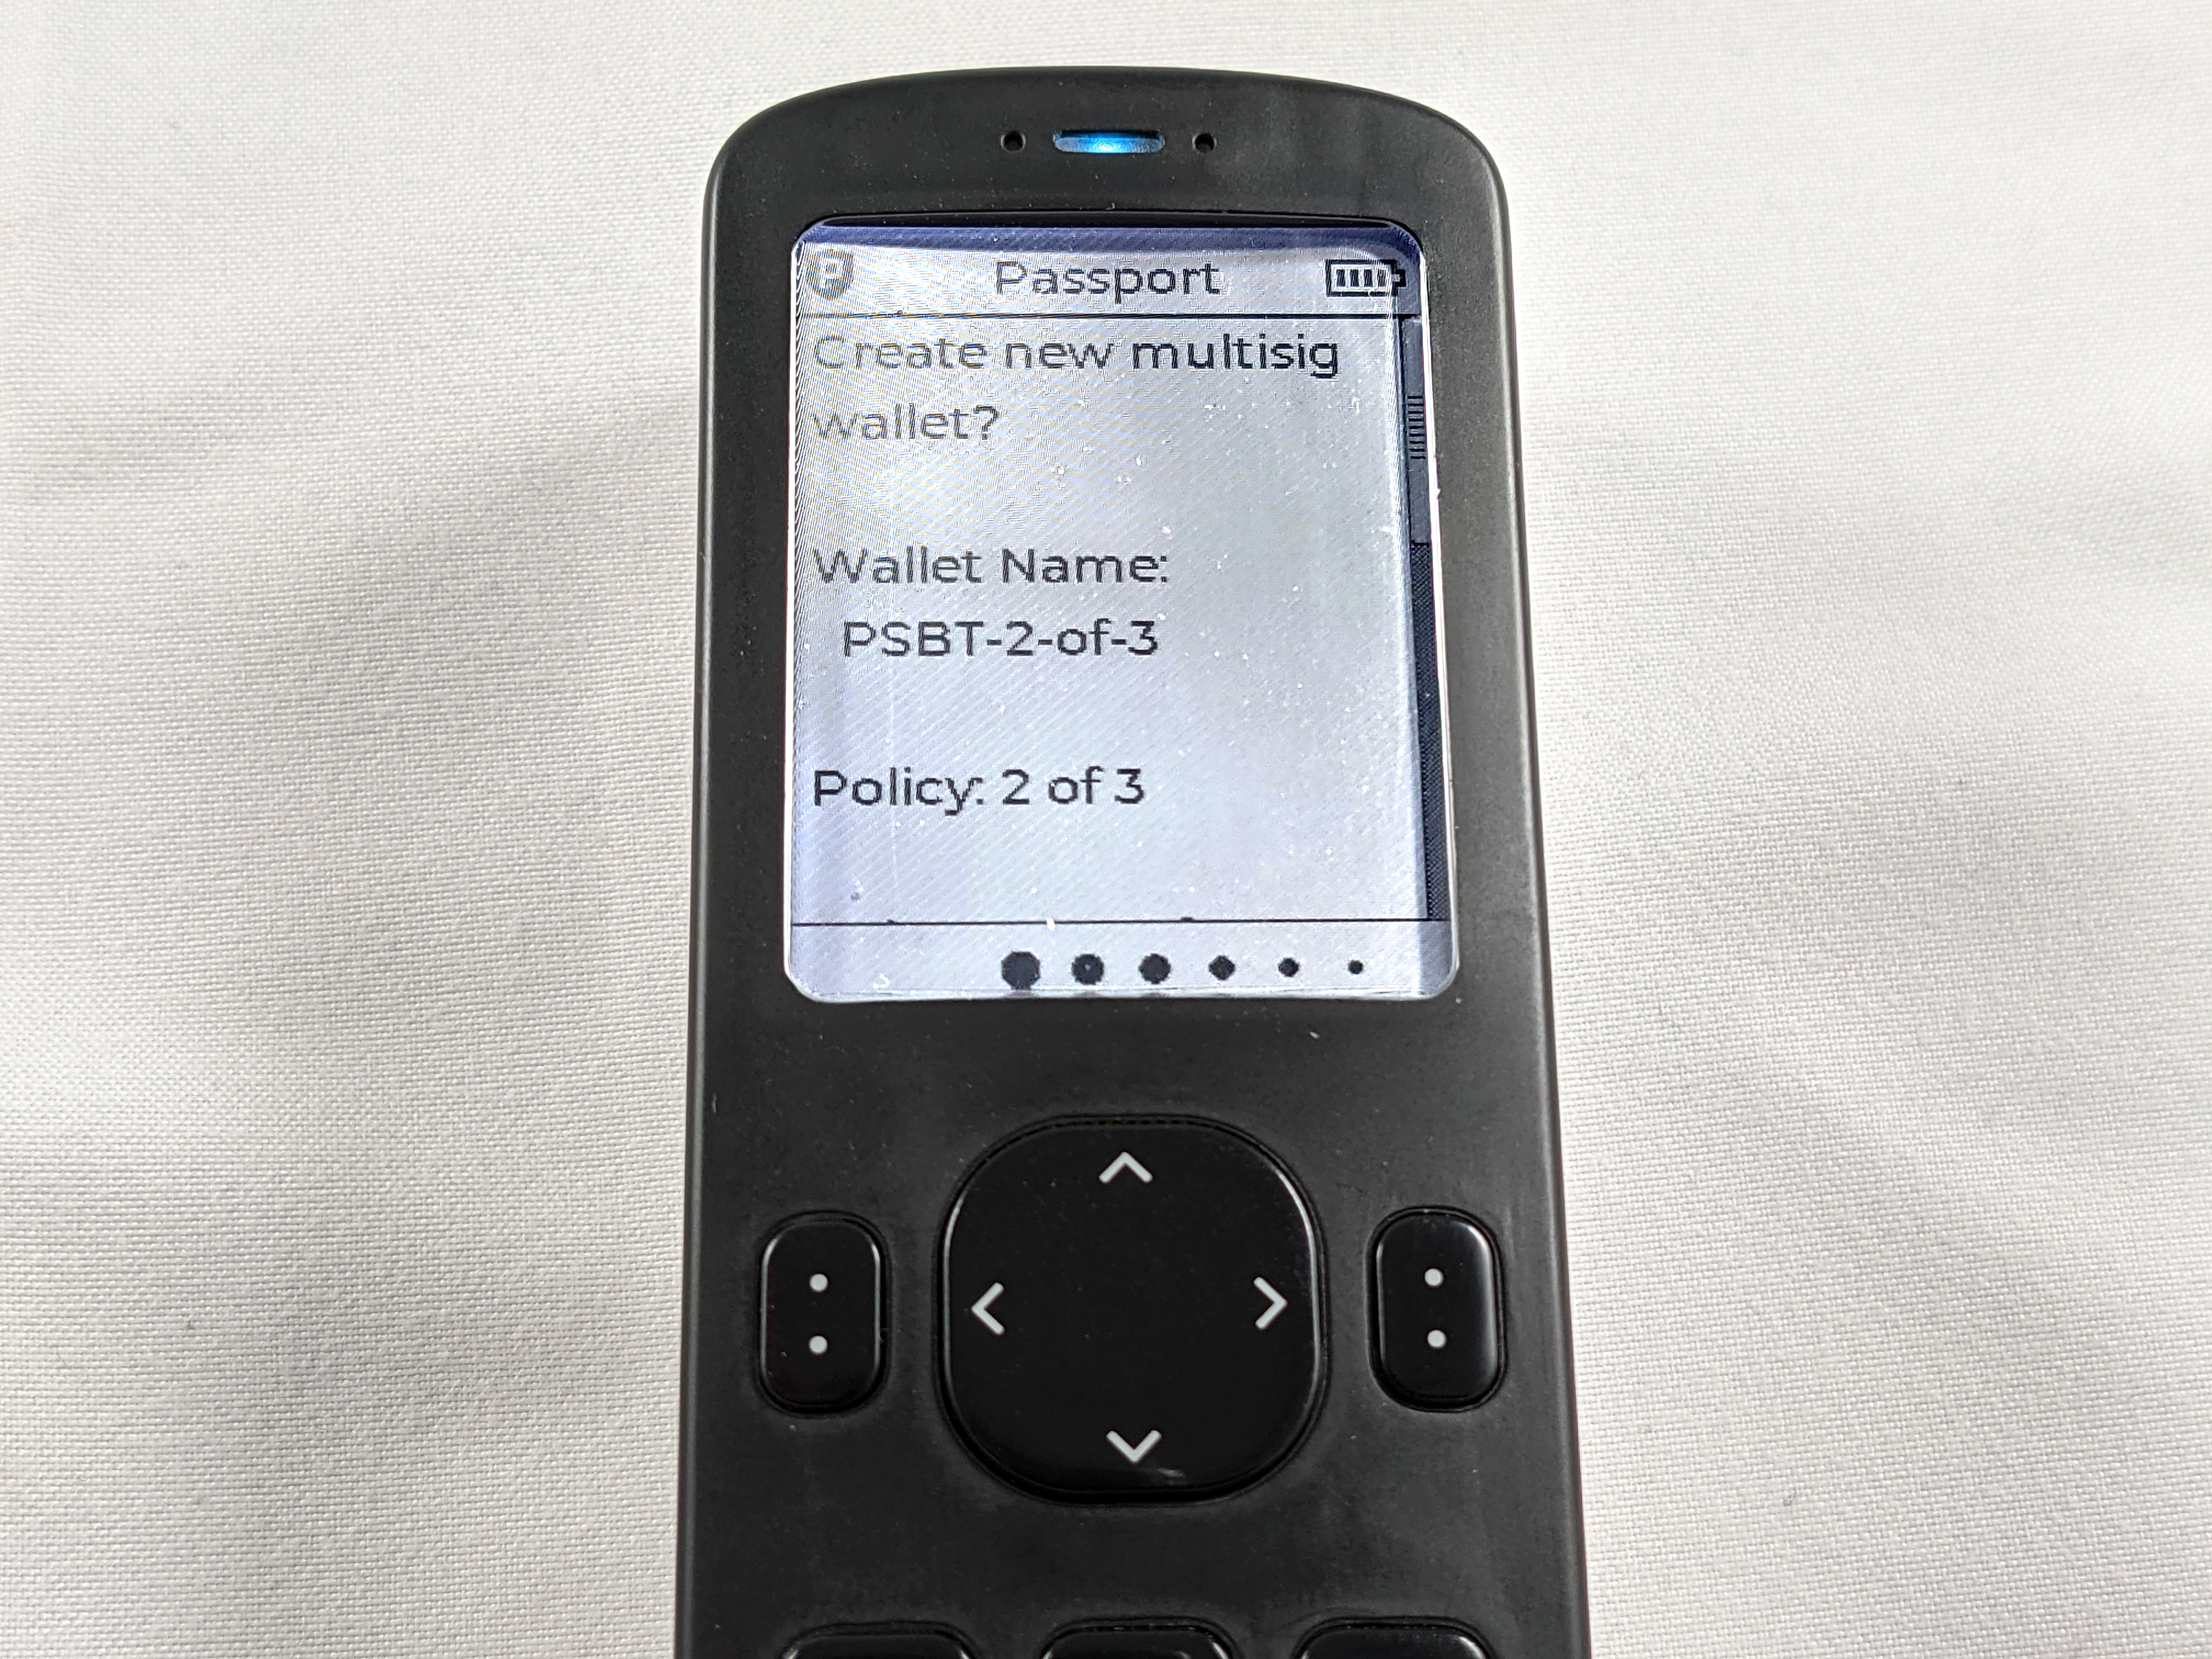
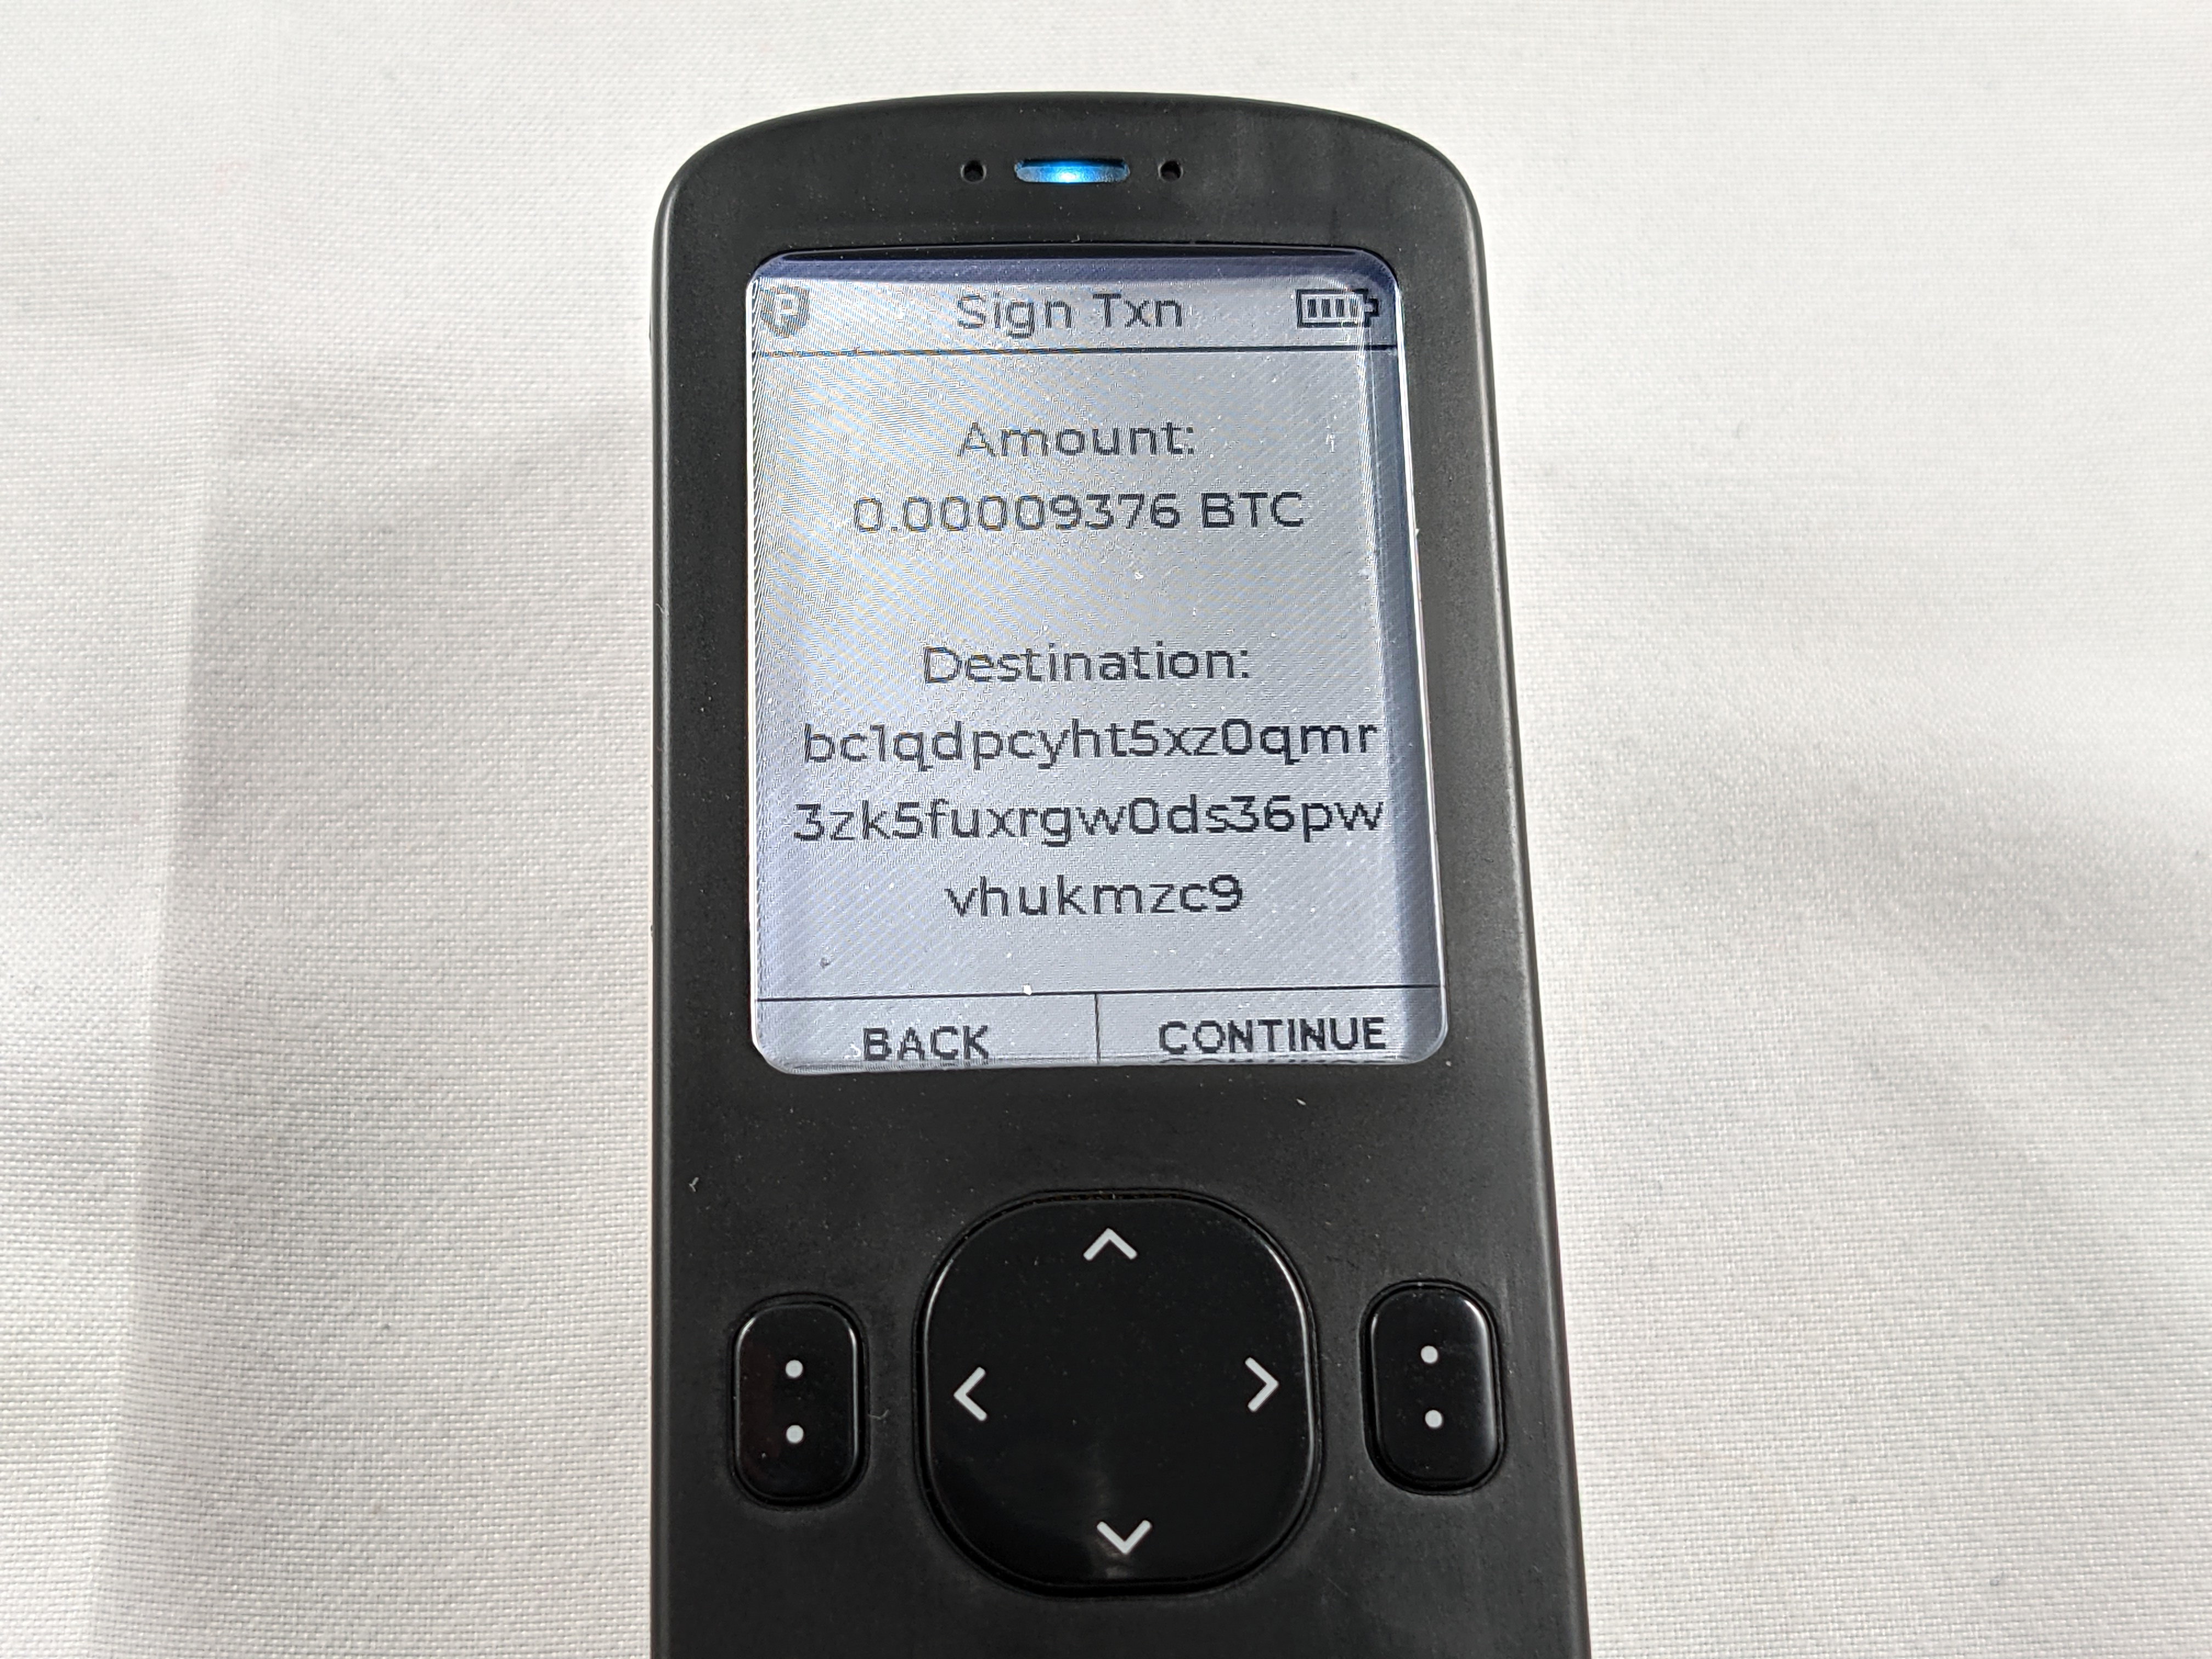
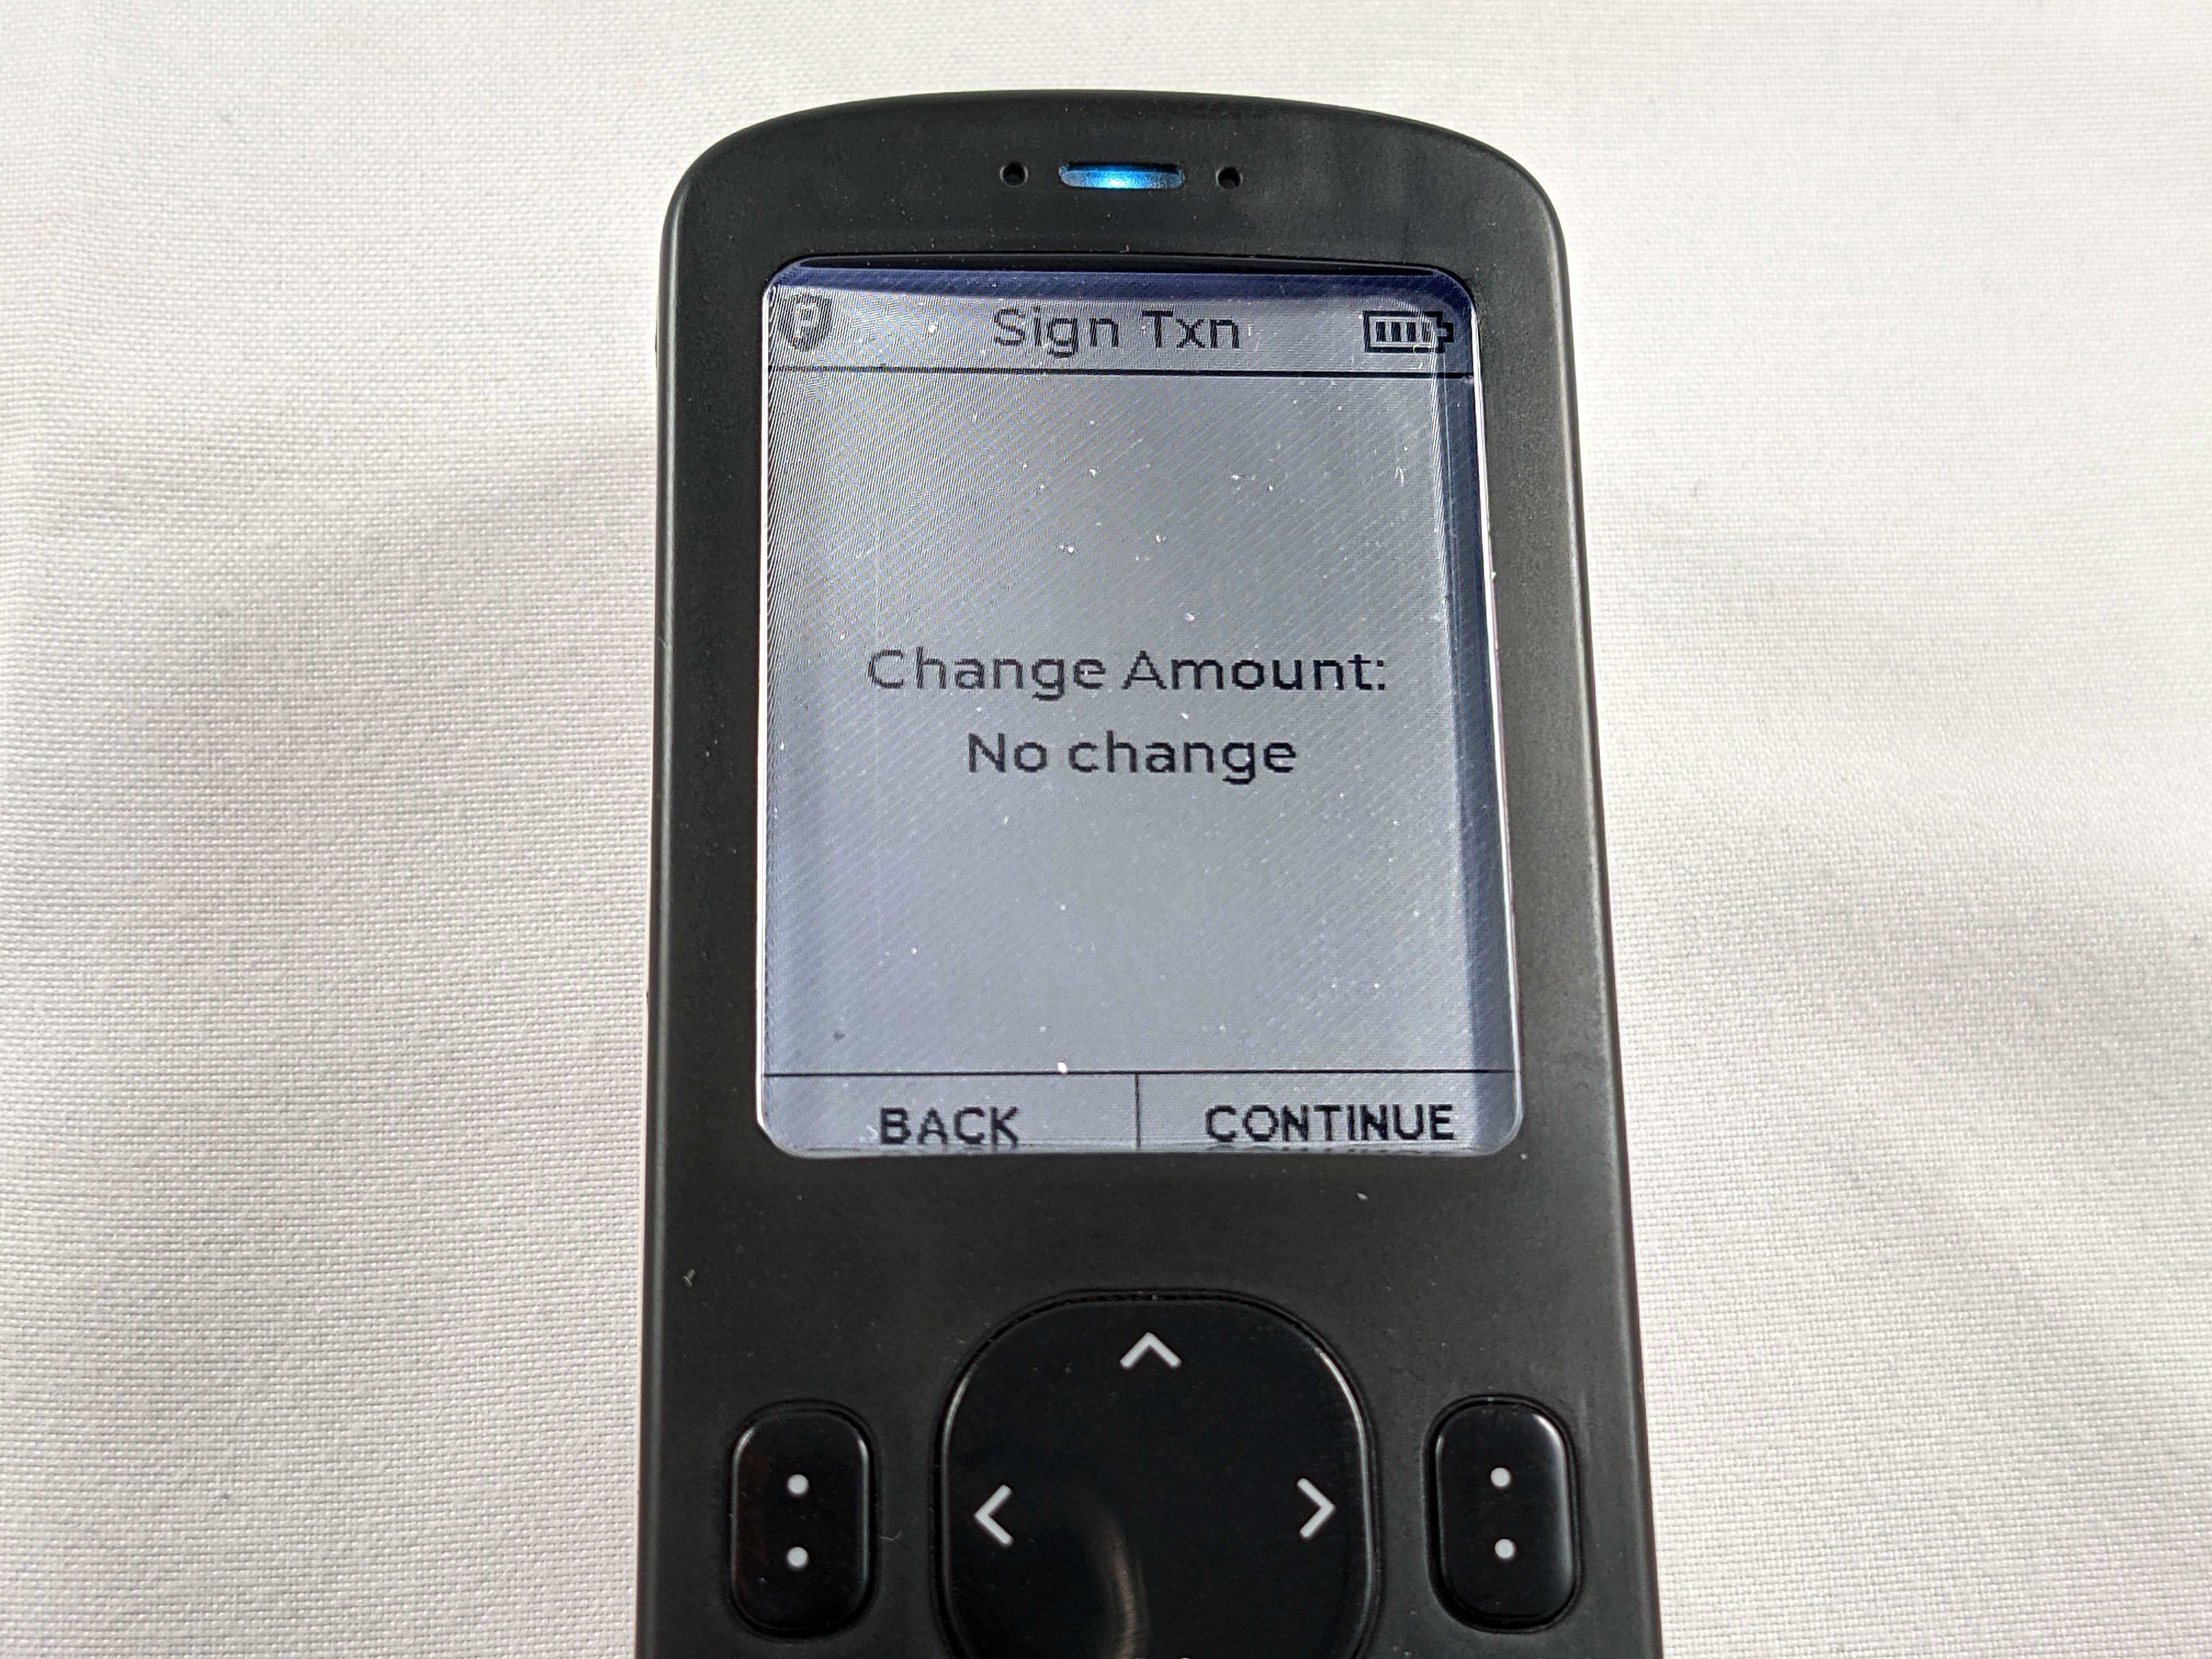
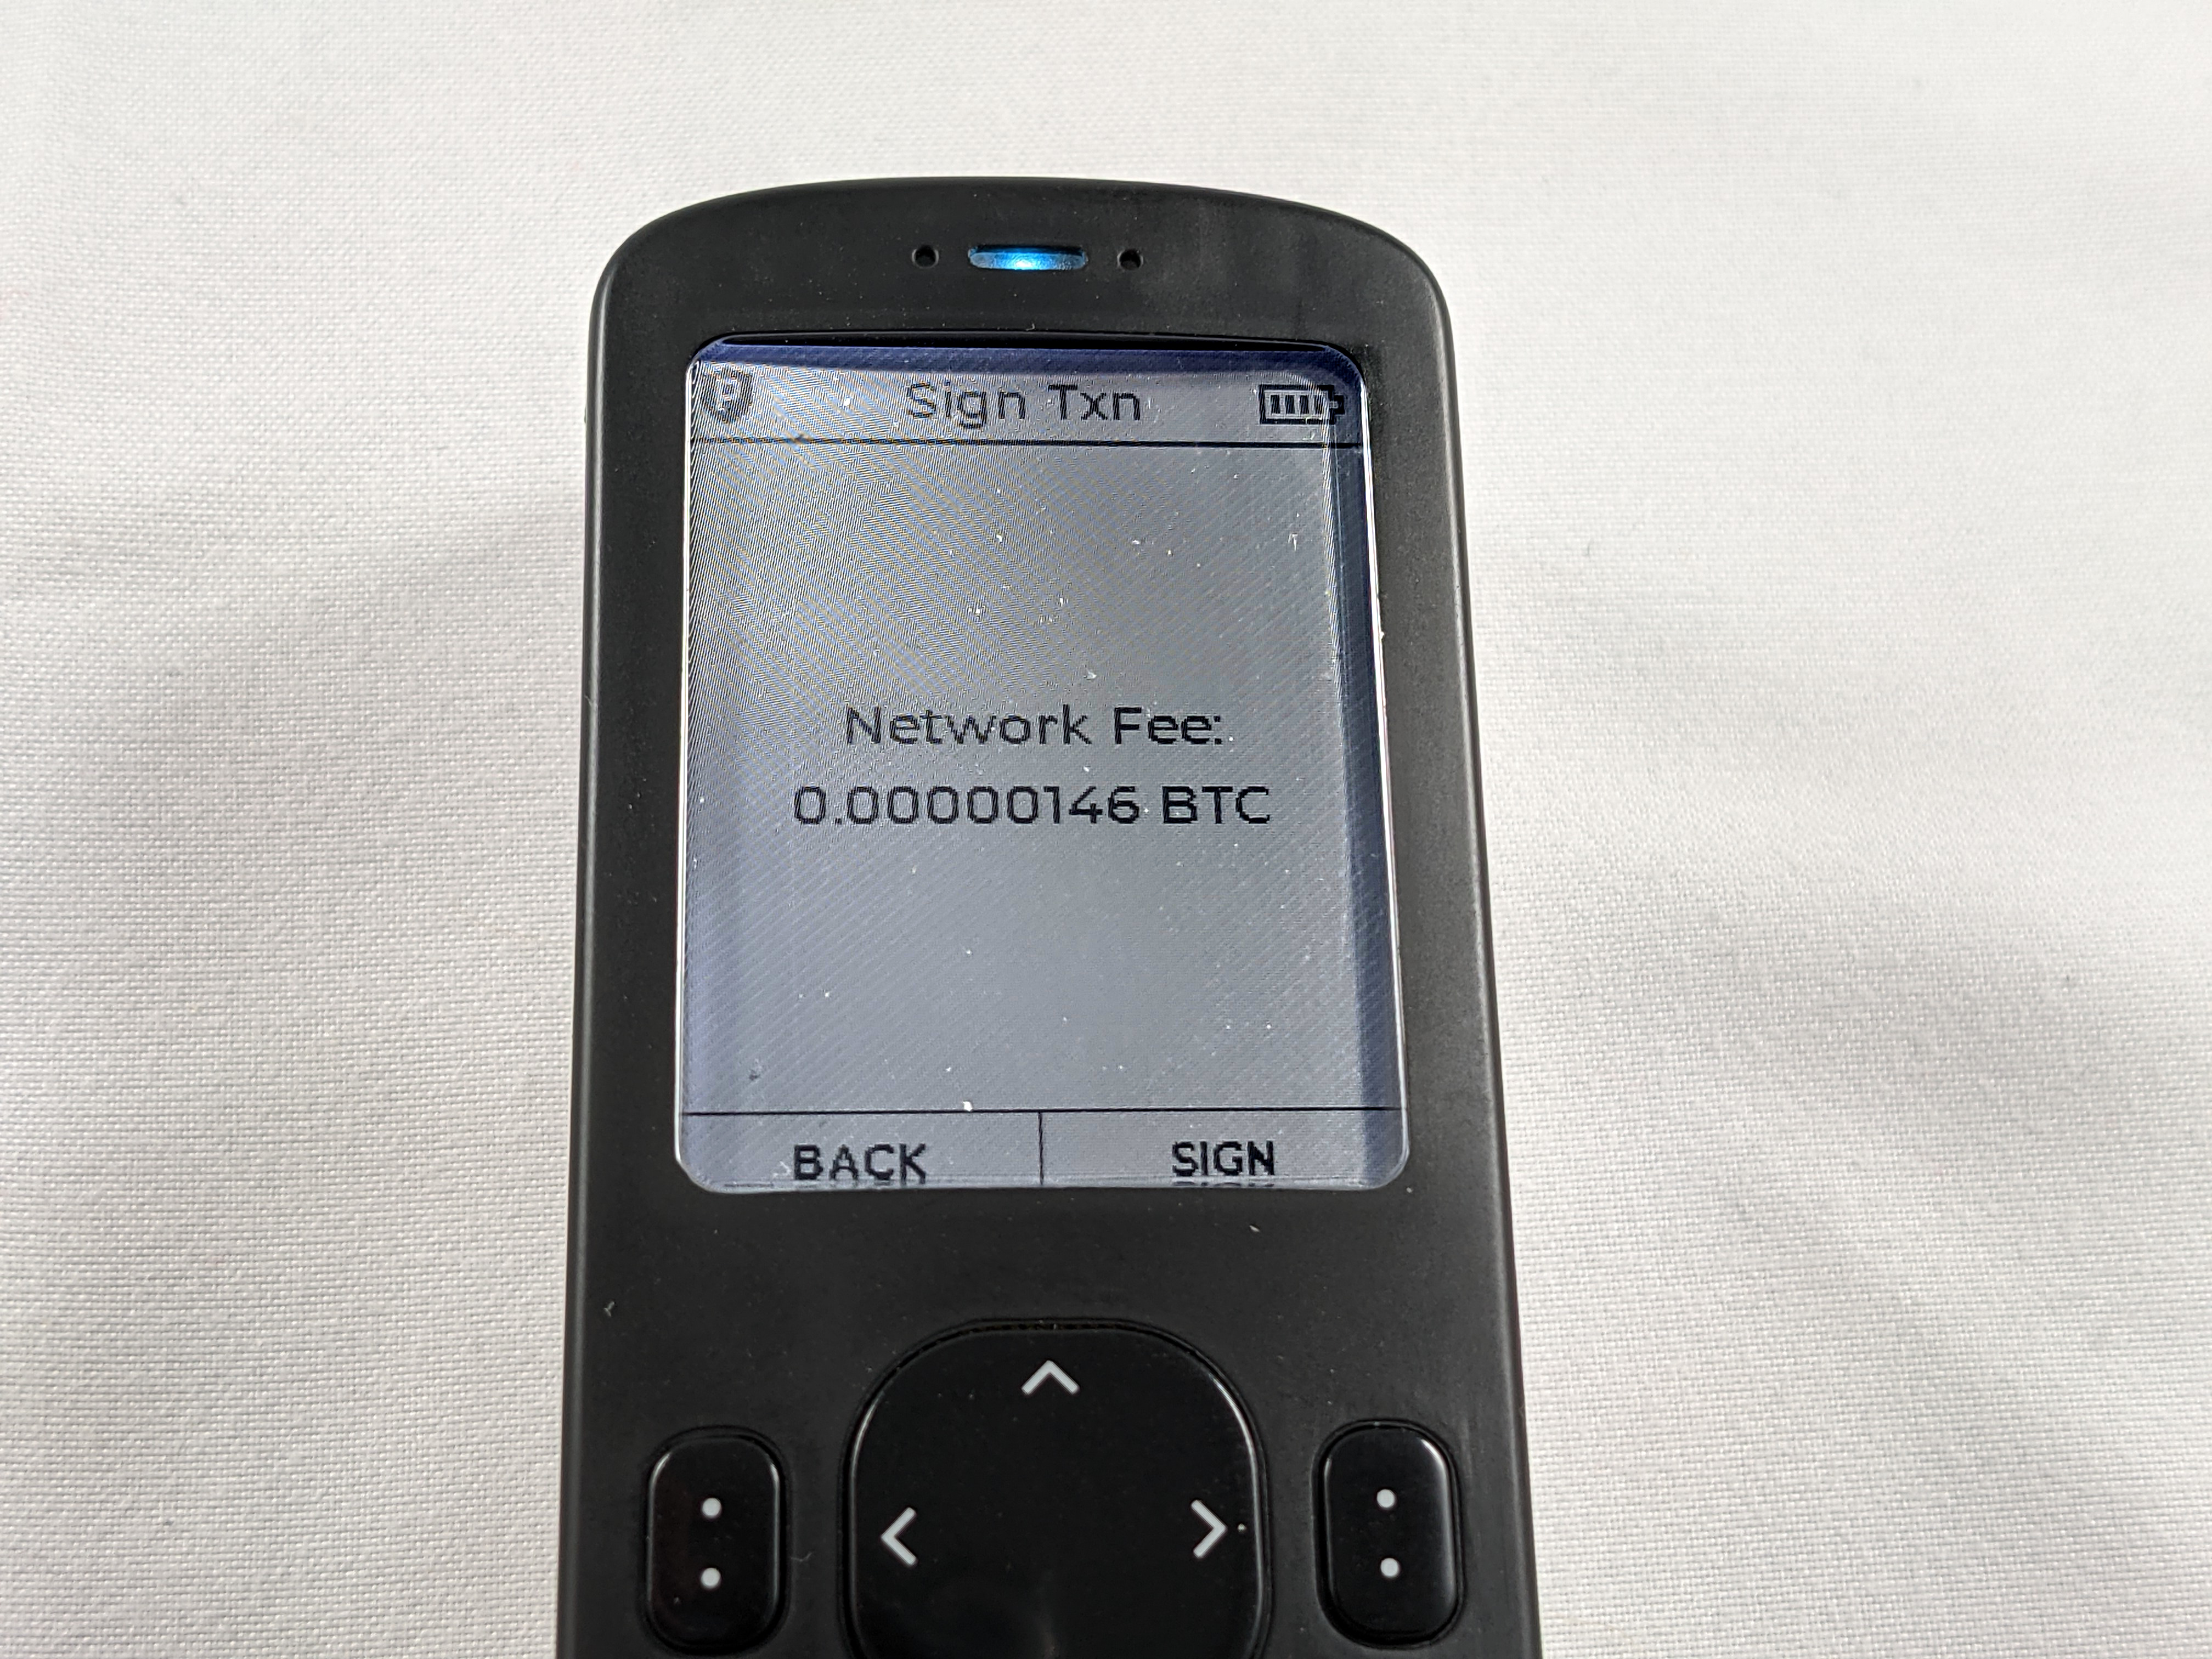
At this point, power on the Passport, login, and apply the passphrase if necessary. From the main menu, select Sign with QR Code. Then The Passport will ask you if you want to create a new multisig wallet, scroll to the bottom of that message and select to continue. The amount to be spent and the destination address will be displayed, if there will be any change then that will also be displayed, and the network fee will be displayed. If all the details look correct, press SIGN.
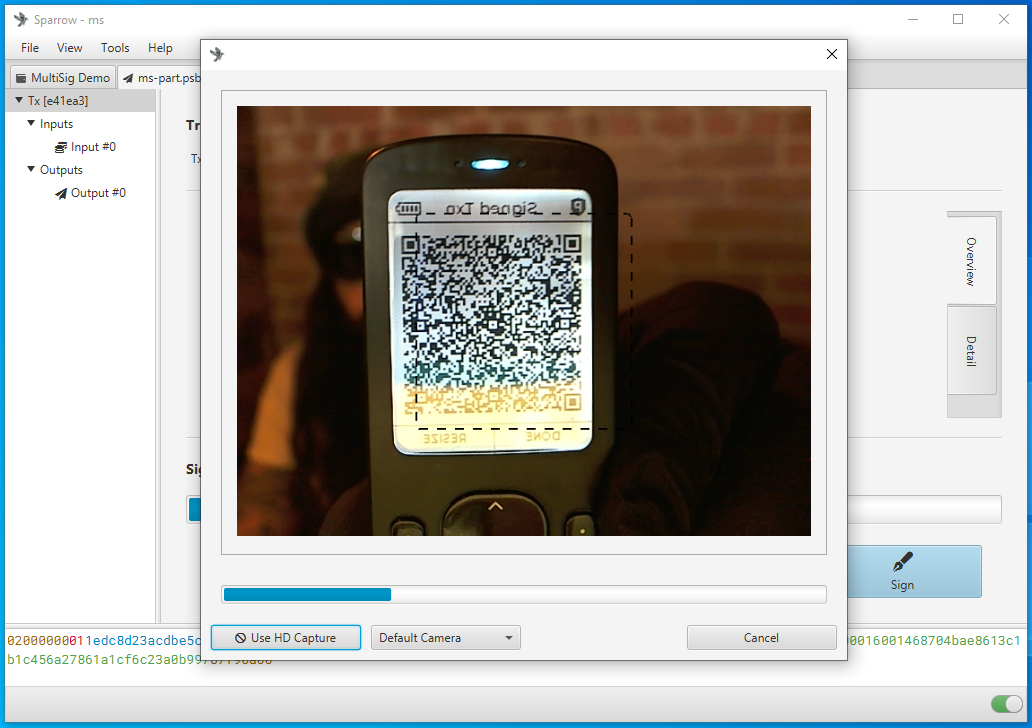
Then the Passport will let you know it is going to start flashing a series of QR codes in the next step, press CONTINUE then go back to Sparrow Wallet and click on Scan QR. The webcam will launch and then you can hold the Passport up to the camera so that Sparrow Wallet can scan the animated QR codes.
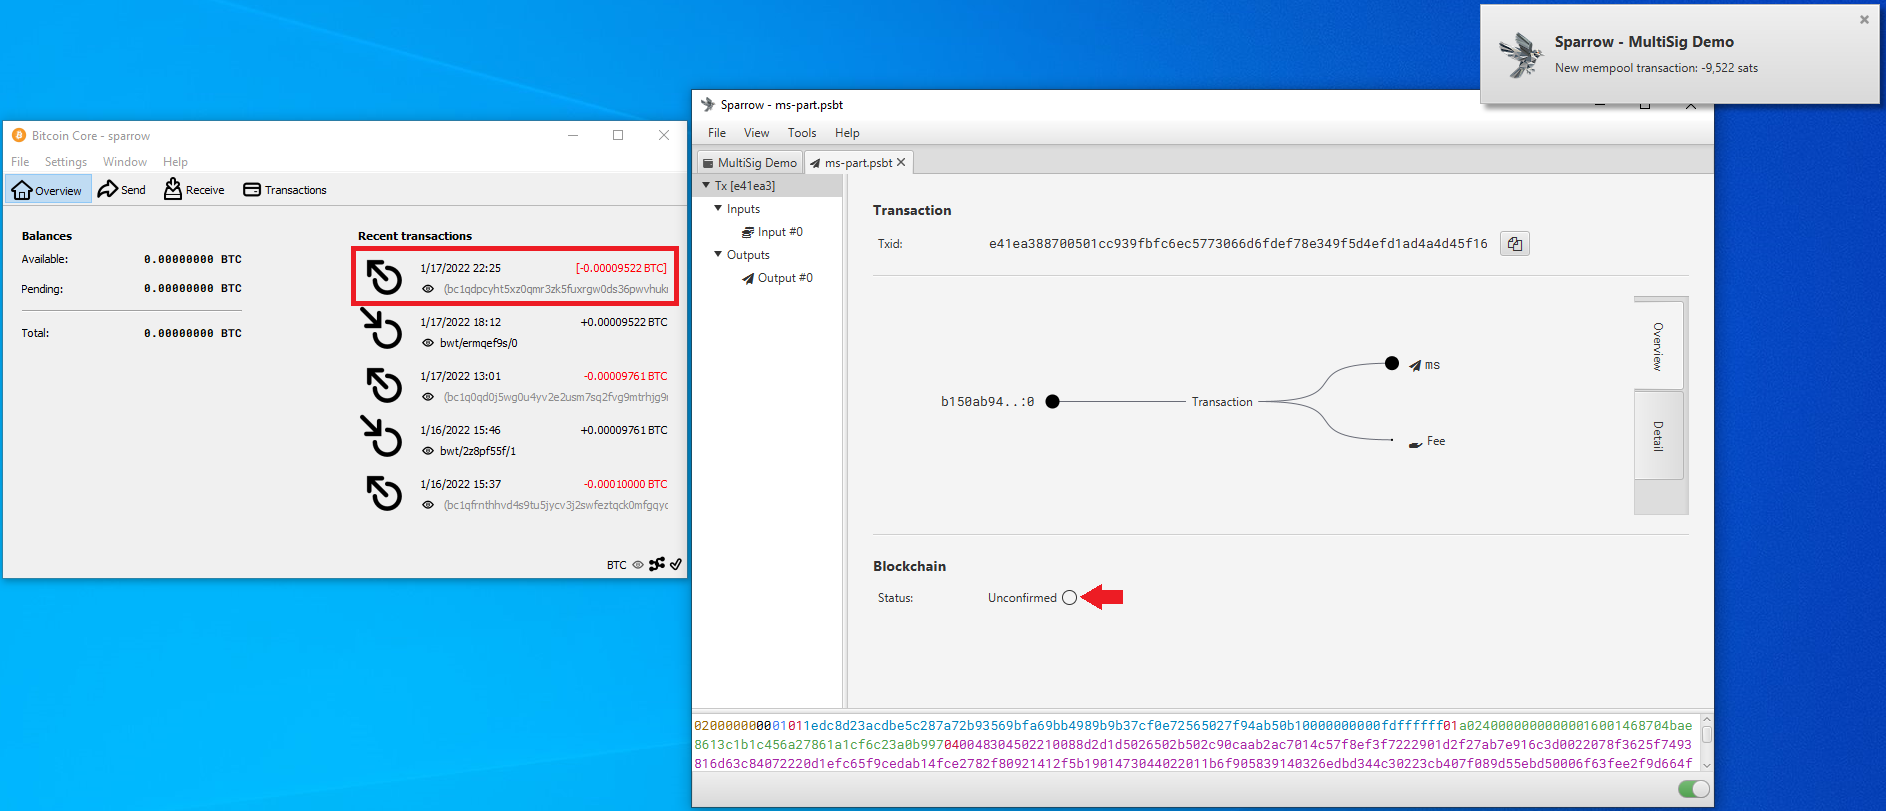
That makes 2-of-3 signatures and the transaction is now ready to be broadcast to the Bitcoin network. Simply click on the Broadcast Transaction button.

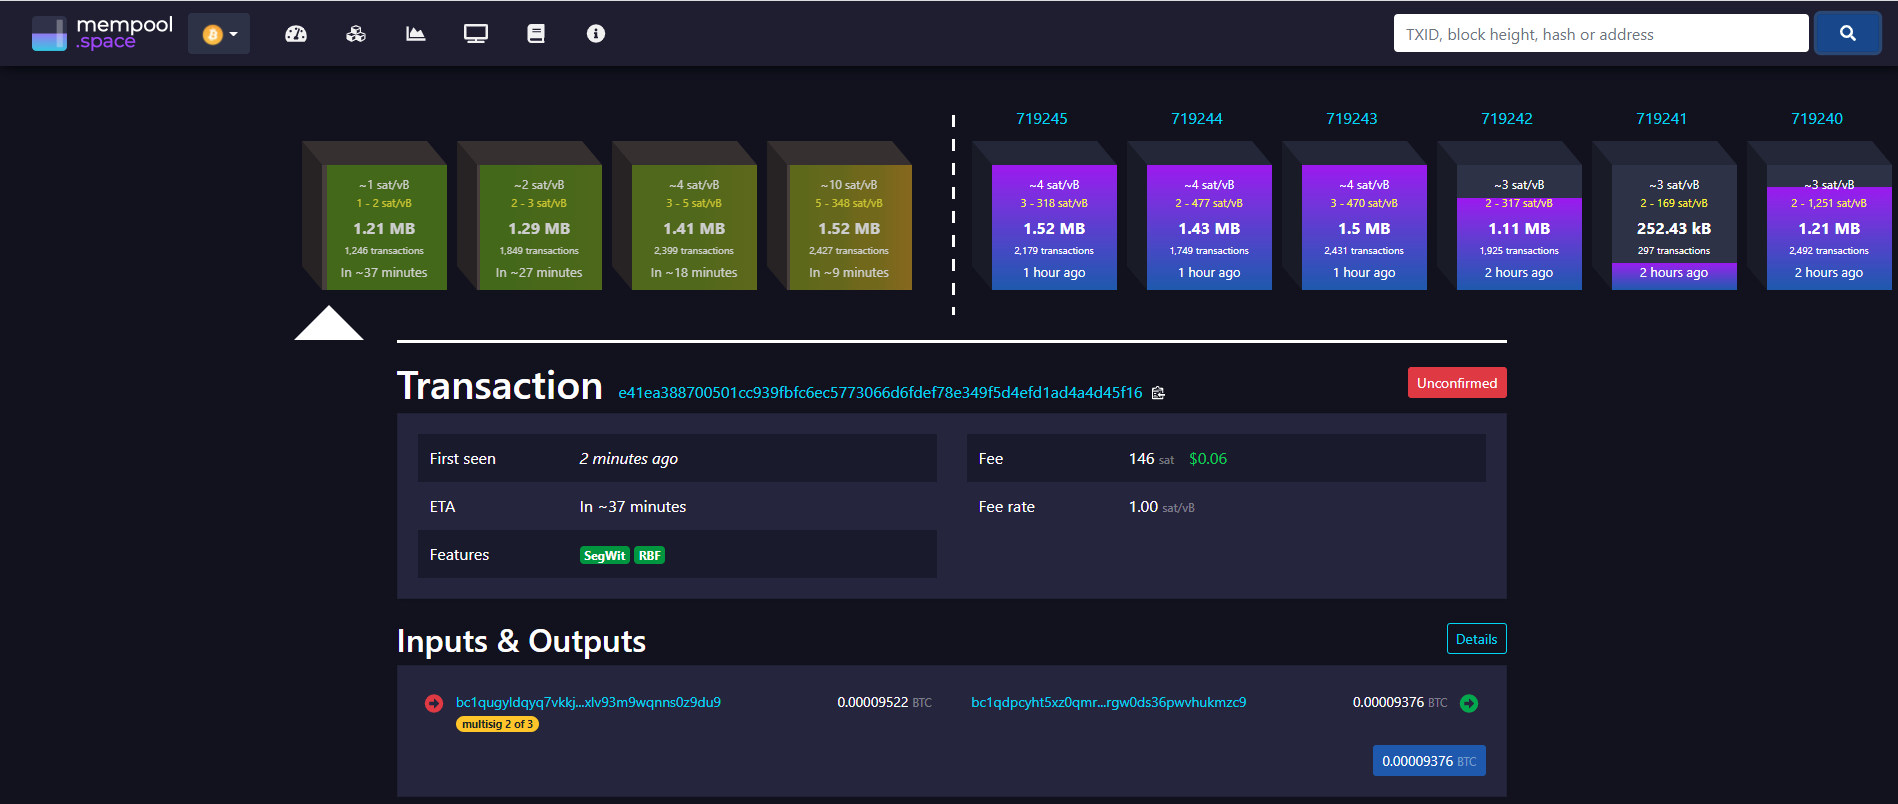
Once the transaction is broadcast, you will see it in BitcoinCore and you will get the Sparrow Wallet notification. Then you can copy/paste the txid into your favorite block explorer and wait for your first confirmation.
Now that you see how multisig works, it is important to backup the appropriate information and test those backups before depositing any bitcoin to your new multisig wallet. Be sure to have the seed words written down in order, then think about stamping them in metal. Have your passphrase written down and consider stamping that in metal. Have your XPUBs written down as well and consider stamping those in metal. There are a number of creative solutions you can employ to conceal backup information in different geographic locations. For example, say you have a 2-of-3 multisig, each wallet has a 24-word seed phrase, we'll call it "S" in this example. Each wallet also has a passphrase, we'll call it "P". And each wallet has an XPUB, we'll call that "X". You could in theory then store your backup information like:
| Location | Seed Phrase | Passphrase | XPUB |
|---|---|---|---|
| L1 | S1 | P2 & P3 | X3 |
| L2 | S2 | P3 & P1 | X1 |
| L3 | S3 | P1 & P2 | X2 |
That way if anyone else finds any of the backup packs, they will not have enough information to spend any Bitcoin. But if you are able to recover any two of the three backup packs, then you will have enough information to restore your multisig wallet and sign a transaction.